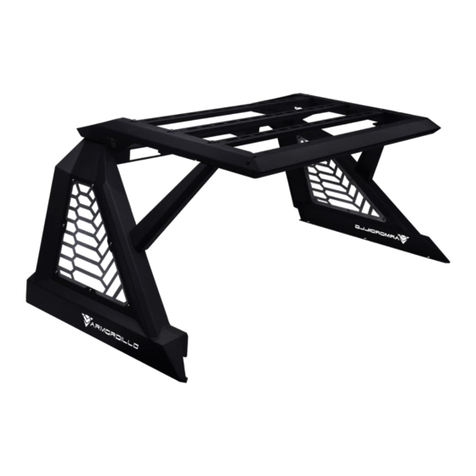
ARMORDILLO RS Running Boards User manual

RS Running Boards
2009-2018 Doge Ram 1500 - Crew Cab
2010-2018 Ram 2500/3500 - Crew Cab
2018-2022 Ram 1500 Classic - Crew Cab
(Excl. Chassis Cab Diesel models)
Page 1 of 6 4/30/20 (AL)
ARMORDILLO Products are designed as decorative accessories and should not be reliedupon as protection for the vehicle or passengers.
Buyers assume all risk and liabilitywhatsoever resulting frominstallation and use of products. We assumes no liabilityfor injury, loss,
incidental or consequential damages in the event of an accident.
ARMORDILLO guarantees the original purchaser a LIMITED 3-YEAR WARRANTY from data of purchase against manufactured defects in
materials, workmanship and finish under normal use. This excludes damage resulting from road hazards, debris, product misuse, improper
installation, impairments from accidents, neglect, shipping or product modification.This warrantyapplies onlyto new products and is
limited to the repair or replacement products. Warrantydoes not included cost of removal, installation, labor, freight, inconvenience, or
consequential damage. Original purchaser must return defective merchandise to the original place of purchase and must provide the proof
of purchase.
WARNING: When working on ,under or around vehicle exercise caution. If working without a lift check vehicle owners manual for correct
jacking points. Always wear safetyglasses and ensure a safeworking area. Serious injuryor death could occur if safety measures are not
followed.
ARMORDILLORECOMMENDS PROFESSIONAL INSTALLATION ON ALLTHEIR PRODUCTSSTOP - Verify part andapplication is correct
before proceeding. If missing part or damage itemplease contact customer service directlyvia message system on the site you bought the
item from.
Call us at (909)895-4522 Monday-Friday 9am-6pm PST
Email us At SUPPORT@ARMORDILLOUSA.COM

RS Running Boards
2009-2018 Doge Ram 1500 - Crew Cab
2010-2018 Ram 2500/3500 - Crew Cab
2018-2022 Ram 1500 Classic - Crew Cab
(Excl. Chassis Cab Diesel models)
Page 2 of 6 4/30/20 (AL)
PARTS LIST:
1
Driver/Left Running Board
18
8-1.25mm x 30mm Hex Bolts
1
Passenger/Right Running Board
24
8mm x 24mm OD x 2mm Flat Washers
3
Driver/Left Center/Rear Mounting Brackets
12
8mm Lock Washers
3
Passenger/Right Center/Rear Mounting Brackets
6
8mm Hex Nuts
3
Driver/Left Support Brackets
6
8mm Nylon Lock Nuts
3
Passenger/Right Support Brackets
6
8mm Plastic Retainers
12
10-1.5mm x 35mm Hex Bolts
12
6-1.0mm x 25mm Hex Bolts
24
10mm x 27mm OD x 3mm Flat Washers
24
6mm x 2mm OD x 2mm Flat Washers
12
10mm Nylon Lock Nuts
12
6mm Nylon Lock Nuts
6
8-1.25mm x 30mm Bolt Plates
PROCEDURE:
1. REMOVE CONTENTS FROM BOX. VERIFY ALL PARTS ARE PRESENT. READ INSTRUCTIONS
CAREFULLY BEFORE STARTING INSTALLATION. DRILLING MAY BE REQUIRED.
2. Starting at the Driver/Left front side of the vehicle, remove the sealing tape covering the factory holes in
the side of the inner panel, (Figure 1).
3. Determine the correct procedure to attach the Driver/Left Front Bracket for your model/year:
Models without factory threaded inserts in body panel, (see Figure 1):
a. Select (1) 8mm Bolt-Nut Plate, (Figure 2). Partially thread an 8mm Hex Bolt into the threaded nut
on the Bolt-Nut Plate, (Figure 3). Thread the Hex Bolt in until it is flush with the welded nut. Use the
Passenger side
Center/Rear Brackets
Driver side
Center/Rear Brackets
Passenger side Front Bracket
(Same as Driver Center/Rear Brackets)
Driver side Front Bracket
(Same as Passenger
Center/Rear Brackets)
Passenger side Center/Rear
Support Brackets
Driver side Center/Rear
Support Brackets
Passenger side Front
Support Bracket
(Same as Driver
Center/Rear Support
Brackets)
Driver side Front
Support Bracket
(Same as Passenger
Center/Rear Support
Brackets)
Front
Driver/Left Running Board

RS Running Boards
2009-2018 Doge Ram 1500 - Crew Cab
2010-2018 Ram 2500/3500 - Crew Cab
2018-2022 Ram 1500 Classic - Crew Cab
(Excl. Chassis Cab Diesel models)
Page 3 of 6 4/30/20 (AL)
Hex Bolt as a handle and insert the Bolt-Nut Plate into the oval hole, (Figure 4). Feed the threaded
bolt on the Bolt-Nut Plate through one of the hex shaped factory holes.
b. Thread (1) 8mm Plastic Retainer onto the threaded end and down tight against the body panel,
(Figure 5). NOTE: The Plastic Retainer is designed to keep the Bolt-Nut Plate from falling into the
body panel and to aid in Bracket installation.
4. Select (1) Passenger/Right Support Bracket, for use on the Driver/Left Front mounting location, (Figure
6). Attach the Bracket to the threaded end of the Bolt Plate with (1) 8mm Flat Washer, (1) 8mm Lock
Washer and (1) 8mm Hex Nut, (Figure 6).
c. Remove the 8mm Hex Bolt from the nut on the Bolt Plate from Step 3a. Rotate the Bolt on the Bolt-
Nut Plate until the threaded nut lines up with the remaining hole in the Bracket and hex hole in the
body panel, (Figure 5). Attach the Bracket to the threaded nut with (1) 8mm x 30mm Hex Bolt, (1)
8mm Lock Washer and (1) 8mm Flat Washer, (Figure 6). Do not tighten hardware at this time.
Models with factory threaded inserts, (see Figure 7):
a. Select (1) Passenger/Right Support Bracket, for use on the Driver/Left Front mounting location.
Attach the Bracket to the threaded inserts with (2) 8mm x 30mm Hex Bolts, (2) 8mm Lock Washers
and (2) 8mm Flat Washers, (Figure 8). Leave hardware loose.
5. Select (1) Passenger/Right Support Bracket, (for use on the Driver/Left Front mounting location). Attach
the Support Bracket to the Mounting Bracket with (1) 8mm Hex Bolt, (2) 8mm Flat Washers and (1)
8mm Nylon Lock Nut, (Figure 9). Do not tighten hardware at this time.
6. Next, attach the Support Bracket to the back of the pinch weld with (2) 6mm Button Head Bolts, (4)
6mm Flat Washers and (2) 6mm Nylon Lock Nuts, (Figure 10). Do not tighten hardware at this time.
IMPORTANT: Most 2009-12 models are not equipped with factory holes and will require drilling through
the pinch weld to attach the Bracket. Do not drill through pinch weld at this time, (see Step 10).
7. Move to the center mounting location, (Figure 11). Repeat Steps 2—6 to attach (1) Driver/Left
Mounting Bracket and (1) Driver/Left Support Bracket to the center location.
8. Move to the rear mounting location, (Figure 12). Repeat Steps 2—6 to attach (1) Driver/Left Mounting
Bracket and (1) Driver/Left Support Bracket to the rear location
9. Carefully unwrap and select the Driver/Left Running Board. Attach the Running Board mounting tabs to
the front face of the Mounting Brackets with (6) 10mm Hex Bolts, (12) 10mm Flat Washers and (6)
10mm Nylon Lock Nuts, (Figure 13). Do not tighten hardware at this time.
10. Properly level and adjust the Running Boards and fully tighten all hardware.
2009-12 models requiring drilling to attach Brackets to pinch weld:
a. Level the Running Board to the vehicle. Make sure all (3) Brackets are tight against the bottom of
the body panel and tighten all mounting hardware.
b. Mark the location of the slots onto the pinch weld.
c. Temporarily remove the Running Board and the (3) Mounting Brackets. Drill (2) 1/4” holes through
the pinch weld for each Bracket. IMPORTANT: Do not drill too close to the bottom edge of the pinch
weld. Drill the holes in the center of the marked slots.
d. Repeat Step 4 to attach the Brackets to the drilled holes in the pinch weld. Check for level then fully
tighten all hardware.
11. Repeat Steps 2—10 to attach the Passenger/Right Running Board.
12. Do periodic inspections to the installation to make sure that all hardware is secure and tight.
To protect your investment, wax this product after installing. Regular waxing is recommended to add a protective layer
over the finish. Do not use any type of polish or waxthat may contain abrasives that could damage the finish. Mild soap
may be used to clean the Running Boards.

RS Running Boards
2009-2018 Doge Ram 1500 - Crew Cab
2010-2018 Ram 2500/3500 - Crew Cab
2018-2022 Ram 1500 Classic - Crew Cab
(Excl. Chassis Cab Diesel models)
Page 4 of 6 4/30/20 (AL)
Driver/Left Side Installation Pictured
(Fig 2) 8mm Bolt-Nut Plate, NOTE:
8mm Bolt-Nut Plate is not required
on models with threaded inserts
(Fig 3) Thread (1) 8mm Hex Bolt
into the nut on the plate. Stop when
bolt reaches end of nut as pictured
(Fig 4) Use the loose Hex Bolt as a handle. Insert
the Bolt Plate into the oval hole and feed the
threaded end out either factory hex shaped hole.
IMPORTANT: Do not let go of the hex bolt until after
Plastic Retainer has been threaded onto bolt (Fig 5)
(Fig 5) Thread Plastic Retainer onto Bolt
Plate to hold Bole Plate in position.
Plastic Retainer
Front
(Fig 1) 2009-mid 2015 Driver/Left front
mounting location (No factory holes
in pinch weld 2009-2012 models)

RS Running Boards
2009-2018 Doge Ram 1500 - Crew Cab
2010-2018 Ram 2500/3500 - Crew Cab
2018-2022 Ram 1500 Classic - Crew Cab
(Excl. Chassis Cab Diesel models)
Page 5 of 6 4/30/20 (AL)
Driver/Left Side Installation Pictured
8mm Hex Bolt
(2) 8mm Flat Washers
8mm Nylon Lock Nut
Front
(Fig 8) Driver/Left front models with factory
installed threaded inserts. Bolt Plate not required
Front
(2) 8mm Hex Bolts
(2) 8mm Lock Washers
(2) 8mm Flat Washers
(Fig 7) Driver/Left front mid 2015-on (example of
models with factory installed threaded inserts)
Front
(Fig 9) Attach (1) Passenger/Right Support
Bracket to the Mounting Bracket
8mm Flat Washer
8mm Lock Washer
8mm Hex Nut
Front
(Fig 6) Attach Bracket to threaded end of
Bolt Plate first. Remove 8mm Hex Bolt
(see Fig 3). Rotate Bolt Plate to line up
with remaining factory hex shaped hole.
8mm Hex Bolt
8mm Lock Washer
8mm Flat Washer
Plastic Retainer

RS Running Boards
2009-2018 Doge Ram 1500 - Crew Cab
2010-2018 Ram 2500/3500 - Crew Cab
2018-2022 Ram 1500 Classic - Crew Cab
(Excl. Chassis Cab Diesel models)
Page 6 of 6 4/30/20 (AL)
Driver/Left Side Installation Pictured
(Fig 12) Driver/Left rear mounting location
Rear
Front
(Fig 11) Driver/Left side center location
IMPORTANT: 2009-2012 models without holes in
pinch weld will require drilling 1/4” holes through
pinch weld to attach the bracket. Do complete
installation of Running Boards first, level
Running Boards before drilling holes for bracket.
(Fig 13) Attach the Driver/Left Running
Board to the Mounting Brackets
Front
(2) 10mm Hex Bolts
(4) 10mm Flat Washers
(2) 10mm Nylon Lock Nuts
(Fig 10) Attach the Passenger/Right
Support Bracket to the pinch weld
(2) 6mm Hex Nuts
(4) 6mm Flat Washers
(2) 6mm Nylon Lock Nuts
This manual suits for next models
1
Table of contents
Other ARMORDILLO Automobile Accessories manuals
Popular Automobile Accessories manuals by other brands

Metra Electronics
Metra Electronics AW-333GM installation instructions

Dometic
Dometic CoolAir SP950C installation manual

Webasto
Webasto 300101 Installation & operation manual

walser
walser 16000 Instructions for use

Tyredog
Tyredog TDA-4C quick start guide

Black Horse Off Road
Black Horse Off Road 7G048806SS installation instructions