installation &
operating instructions
3760 Digital
Controller
10
Controller Overview
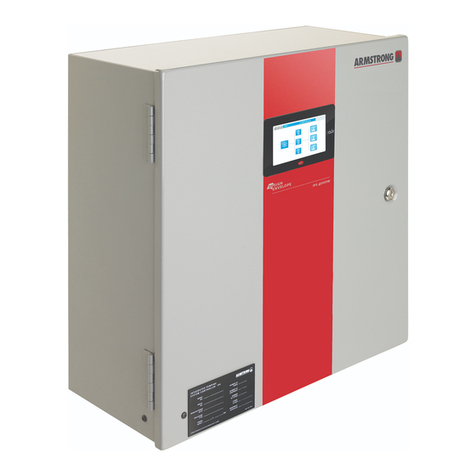
The following image shows the front of the pressurisation unit digital controller. 4 buttons are provided for
programming, and an LED display which shows scrolling messages.
When the controller is first powered up, it will display the controller version number. This manual
relates to controller version >10.0. If the controller is of a dierent version, there may be dierences in
the menu items available.
When in normal operation, the controller will display the current system pressure. If a fault occurs, the controller will
display a fault code and produce an audible alarm.
In normal operation, the functions of the buttons are as follows:
© 2019 Flamco group. All rights reserved.
We reserve the right to change designs and technical specifications of our products.
Errors and omissions excepted.
Nov-19 Page 10 / 35 Rev.19.2
Controller Overview
The following image shows the front of the pressurisation unit digital controller. 4 buttons are
provided for programming, and an LED display which shows scrolling messages.
When the controller is first powered up, it will display the controller version number.
This manual relates to controller version >10.0. If the controller is of a different
version, there may be differences in the menu items available.
When in normal operation, the controller will display the current system pressure. If a fault occurs,
the controller will display a fault code and produce an audible alarm.
In normal operation, the functions of the buttons are as follows:
Show Current System Pressure
Controller Programming
Do not alter any settings without first understanding the implications of doing so.
Incorrect settings may cause damage to the equipment, wider system or property.
To enter the programming menu, hold the (+) button until “enter code” appears on the screen,
followed by “9999” with a flashing cursor after the first digit.
To gain access to the programming menu, one of the following codes must be entered:
To enter the code, change the first digit with the (+) and (-) buttons, then press (SET) to move onto
the next digit. Repeat for all digits, then once the correct code is shown on the display, press (SET) to
enter the programming menu.
Once a correct code has been entered, the first option PR00 –Language will appear, select E for
English or change as appropriate, and then press and hold (SET) & (+) to move to next menu.
© 2019 Flamco group. All rights reserved.
We reserve the right to change designs and technical specifications of our products.
Errors and omissions excepted.
Nov-19 Page 10 / 35 Rev.19.2
Controller Overview
The following image shows the front of the pressurisation unit digital controller. 4 buttons are
provided for programming, and an LED display which shows scrolling messages.
When the controller is first powered up, it will display the controller version number.
This manual relates to controller version >10.0. If the controller is of a different
version, there may be differences in the menu items available.
When in normal operation, the controller will display the current system pressure. If a fault occurs,
the controller will display a fault code and produce an audible alarm.
In normal operation, the functions of the buttons are as follows:
Button
Show Current System Pressure
Controller Programming
Do not alter any settings without first understanding the implications of doing so.
Incorrect settings may cause damage to the equipment, wider system or property.
To enter the programming menu, hold the (+) button until “enter code” appears on the screen,
followed by “9999” with a flashing cursor after the first digit.
To gain access to the programming menu, one of the following codes must be entered:
To enter the code, change the first digit with the (+) and (-) buttons, then press (SET) to move onto
the next digit. Repeat for all digits, then once the correct code is shown on the display, press (SET) to
enter the programming menu.
Once a correct code has been entered, the first option PR00 –Language will appear, select E for
English or change as appropriate, and then press and hold (SET) & (+) to move to next menu.
© 2018 Flamco group. All rights reserved.
We reserve the right to change designs and technical specifications of our products.
Rev 1.0 Aug-18 Page 16 / 48
Commissioning
It is highly recommended to have this equipment commissioned by a Flamco approved engineer.
Any damage or loss incurred through incorrect commissioning by an unapproved engineer will not
be covered by the warranty.
Pre-Commissioning Checklist
The following conditions must be met before starting the commissioning process. Failure to meet
these conditions may result in injury or damage to the equipment, system and property.
Equipment is sited in a frost-free area, away from precipitation and water sprays/jets
All necessary pipe/electrical connections have been made to a satisfactory standard
The temperature and pressure at the point of connection are within the operating limits of the
pressurisation unit.
The heating/cooling system is fitted with a safety valve and expansion vessel
The following conditions must be met for the pressurisation unit and heating/cooling system to
function correctly. If these conditions have not been met, it is not advisable to proceed with the
commissioning process.
The system connection has been made into the system return header / pump suction
There are no non-return valves, pressure reducing valves or RPZ valves installed between the
pressurisation unit and the heating/cooling system
The expansion vessel is pre-charged to the correct pressure (equal to PU cold fill pressure)
It is advisable to fill the heating/cooling system prior to commissioning. If this is not possible, the
pressurisation unit can be used to fill the system after commissioning (Not possible with Mini
Units). Depending on the size of the system, this may take a considerable amount of time.
The heating/cooling system is filled and pressurised to the required cold fill pressure, with the water at
ambient temperature (approximately).
© 2018 Flamco group. All rights reserved.
We reserve the right to change designs and technical specifications of our products.
Rev 1.0 Aug-18 Page 18 / 48
Controller Programming
Do not alter any settings without first understanding the implications of doing so. Incorrect
settings may cause damage to the equipment, wider system or property.
To enter the programming menu, hold the (+) button until “enter code” appears on the screen, followed by
“9999” with a flashing cursor after the first digit.
To gain access to the programming menu, one of the following codes must be entered:
To enter the code, change the first digit with the (+) and (-) buttons, then press (SET) to move onto the next
digit. Repeat for all digits, then once the correct code is shown on the display, press (SET) to enter the
programming menu.
Once a correct code has been entered, the first option PR00 –Language will appear select E and then press and
hold (SET) & (+) to move to next menu.
Once in the menu, the value of the current menu item can be changed using the (+) and (-) buttons. Once the
current value has been set, pressing the (SET) & (+) buttons together to move to the next option or (SET) & (-)
buttons together to move back an option is you made an error.
Once the programming is complete press and hold the (SET) button for few seconds to save the settings.
If the controller loses power while in the programming menu, all changes made up to that point
will be erased. To confirm all changes, the end of the menu must be reached, and press and hold
the (SET) button for few seconds to save the settings
Key:
(SET) & (+) = Move to next menu
(SET) & (-) = Move back to pervious next menu
Hold down (SET) = Hold (SET) button down for few seconds saves the menu
Controller Programming
Do not alter any settings without first understanding the implications of doing so. Incorrect settings
may cause damage to the equipment, wider system or property.
To enter the programming menu, hold the (+) button until “enter code” appears on the screen, followed by “9999”
with a flashing cursor after the first digit.
To gain access to the programming menu, the following code must be entered:
Standard Code Standard set of options 2601
