manuals.online logo
Brands
  1. Home
  2. •
  3. Brands
  4. •
  5. Aroma
  6. •
  7. Fryer
  8. •
  9. Aroma ADF-175RN Use and care manual

Aroma ADF-175RN Use and care manual

LIMITED WARRANTY
Aroma Housewares Company warrants this product free from defects in material and
workmanship for one year from provable date of purchase in continental United
States.
Within this warranty period,Aroma Housewares Company will repair or replace, at its
option, defective parts at no charge, provided the product is returned, freight prepaid
with proof of purchase and U.S. $6.00 for shipping and handling charges payable to
Aroma Housewares Company. Before returning an item, please call the toll free num-
ber below for return authorization number.Allow 2-4 weeks for return shipping.
This warranty does not cover improper installation, misuse, abuse or neglect on the
part of the owner. Warranty is also invalid in any case that the product is taken apart
or serviced by an unauthorized service station.
This warranty gives you specific legal rights and which may vary from state to state
and does not cover areas outside the United States.
AROMAHOUSEWARES COMPANY
6469 Flanders Drive
San Diego, California 92121
1-800-276-6286
M-F, 8:30AM - 5:00 PM, Pacific Time
Website: www.aromaco.com
1.9 Qt.
Deep Fryer
Instruction Manual &
Cooking Guide
Model:ADF-175RN
Fried Jumbo Shrimp
Canola oil for frying
14 large shrimp in the shell
1 teaspoon salt
½ teaspoon white pepper
3 teaspoons corn starch
1 teaspoon Japanese rice wine
Preheat oil to 350°F. Peel and devein shrimp by cutting a slit on the shell along the
back of shrimp and removing black ribbon. Season shrimp with rice wine and salt.
et it sit about 20 minutes.
Evenly dust each shrimp with cornstarch. Add shrimp to the frying basket and lower
into oil. Fry 4 - 5 minutes or until shrimp have reached desired color and crispness.
et drain in the basket then pat dry with paper towels. Garnish with lettuce leaves
and lemon slices.
Fontin Cheese Fritos (Fritters)
Corn oil for frying
¾ lb. chilled fontina cheese
2 eggs,with yolks and whites separated
½ cup minced fresh basil
1 ½ cups unbleached flour
2/3 cup ice water
1 teaspoon baking powder
3 teaspoon olive oil
Salt to taste
Preheat oil to 350°F. Cut cheese into 1-inch cubes. Mix wine, egg yolks and garlic
in a bowl. Add baking powder, flour, ½ teaspoon salt , olive oil and water. Mix until
smooth. et rest at room temperature for 2 hours.
Beat egg whites with a pinch of salt until barely stiff. Fold into batter along with
minced basil.
Dip cheese chunks into batter. Drip off excess batter. ower cheese chunks into oil
until golden, approximately 1-1 ½ minutes. Drain and remove from basket. Serve
immediately.
RECIPES CONTINUED
11
Congratulations on your purchase of the deep fryer. It will surely
become one of the most practical appliances in your kitchen.
Please read all instructions before first use.
Published By:
Aroma Housewares Co.
6469 Flanders Drive
San Diego, CA 92121
U.S.A.
1-800-276-6286
www.aromaco.com
© 2004Aroma Housewares CompanyAll rights reserved.
Preheat oil to 375 °F. Heat 2 teaspoons of corn oil in a fry pan over medium heat.
Add garlic, ginger and green onions. Cook for 2 minutes. Add button mushrooms
and black mushrooms. Cook for 3 minutes. Add salt to taste. Stir in peanuts, car-
rots, bean sprouts and sesame oil, turn off heat.
To prepare egg roll wrappers put 2 ½ teaspoons filling in each one. Roll up, tucking
in edges over filling. Seal the edge with a drop of thick flour paste.
Deep fry 3 rolls at a time for approximately 4-6 minutes or until the egg rolls are
golden brown on all sides. Carefully lift the cooked egg rolls form the fryer. et
drain in the basket then pat dry with paper towels.
Fried Chicken Tenders
Vegetable oil for frying
4 boneless, skinless chicken breasts
1 cup bread crumbs
1 teaspoon lemon juice
1 tablespoon dried basil leaves
1 cup flour
½ teaspoon of salt and pepper
½ cup milk
Preheat oil to 350°F. Cut the chicken into even strips, about 1 inch x 2 inch.
Marinate chicken with salt, pepper, basil leaves and lemon juice for about 30 min-
utes. Coat chicken breasts evenly with flour and bread crumbs.
Deep fry chicken strips at 350°F for 8-10 minutes. et drain in the basket and serve
with honey mustard or ranch dressing.
RECIPES CONTINUED
10
IMPORTANT SAFEGUARDS
Basic safety precautions should always be followed when using electrical
appliances, including the following:
1. Read all instructions before first use.
2. Do not touch hot surfaces. Use handles or knobs.
3. To protect against electrical shock, do not immerse the appliance or electrical
cord in water or other liquid.
4. This appliance is not intended to be used by children. Close supervision is
necessary when the appliance is used near children.
5. Do not leave appliance unattended while in use.
6. Unplug from outlet when not in use and before cleaning. Allow to cool before
putting on or taking off parts, and before cleaning the appliance.
7. Do not operate any appliance with a damaged cord or plug or after the appli-
ance malfunctions or has been damaged in any manner. Return appliance to
the nearest authorized service facility for examination, repair or adjustment.
8. Do not use attachments or accessories other than those supplied or recom-
mended by the manufacturer. Incompatible parts create a hazard.
9. Do not use outdoors.
10. Do not let cord touch hot surfaces or hang over the edge of a counter or table.
11. Do not place on or near a hot burner or in a heated oven.
12. Extreme caution must be used when using or moving an appliance containing
hot oil or other hot liquids.
13. Use only metal cooking utensils in the fryer as rubber or plastic utensils will
become damaged from the hot oil. Do not leave metal utensils in the fryer as
they will become dangerously hot.
14. Do not use the appliance for other than intended use.
15. To disconnect power, unplug the deep fryer from wall outlet.
16. Push the open button to open the lid. As the lid may pop up quickly, use the
other hand to guide it as it opens.
17. The maximum capacity of the frying basket for food is 4 lbs.
18. Extreme caution should be used when removing the fryer containing hot oil.
SAVE THESE INSTRUCTIONS
1
Deep Fried Onion Blossom
Canola oil or blended vegetable oil for frying
1 large onion
2 eggs
½ cup beer
½ cup milk
2 cups all-purpose flour
½ teaspoon baking soda
½ teaspoon black pepper
Preheat oil to 375° F. Peel onion and cut the bottom off. Cut the onion into ¾-inch
wedges without cutting all the way through the base.
Soak onion in ice cold water until wedges open approximately 7-12 minutes. Drain
onion and pat dry. Mix together eggs, beer and milk. In a separate bowl mix flour,
baking soda and black pepper.
Dust the onion with the flour mixture. Dip the onion in the batter. Re-dust with the
flour mixture. Shake off the excess. Make sure that the onion is completely coated.
Carefully lower the blossom into hot oil being very careful to avoid splattering. Cook
for 2 minutes. Turn onion and cook for an additional 2 minutes or until golden
brown. ift the cooked blossom from the oil. Sprinkle with salt and pepper to taste.
Veget ri n Egg Rolls
Corn oil for frying
6 egg roll wrappers
2 green onions, minced
¼ lb. minced white button mushrooms
2 oz. grated carrot
1 teaspoon minced ginger and garlic
2 soaked and minced dried black mushrooms
1 teaspoon sesame oil
1 teaspoon salt
¼ cup bean spouts
1 teaspoon chopped roasted peanuts
RECIPES
9 2
This ppli nce is for household use only.
BREAKAWAY PLUG
As required by Consumer Products Safety Commission, a magnetic breakaway
power cord is provided for this deep fryer. This safety feature allows the cord to
be disconnected easily as to prevent an individual from accidentally pulling the
cord and spilling the contents of the deep fryer on him or herself or someone
nearby.
ON Y the breakaway cord provided by the manufacturer can be used for this
deep fryer. Do not use any other breakaway cord which is NOT provided by the
manufacturer for this specific model as it may cause serious damage and/or
injury.
SHORT CORD INSTRUCTIONS
1. Ashort power-supply cord is provided to reduce risk resulting from becoming
entangled in or tripping over a longer cord.
2. onger extension cords are available and may be used if care is exercised in
their use.
3. If a longer extension cord is used:
a. The marked electrical rating of the extension cord should be at least as great
as the electrical rating of the appliance.
b. The longer cord should be arranged so that it will not drape over the counter
top or tabletop where it can be pulled by children or tripped over
unintentionally.
POLARIZED PLUG
This appliance has a pol rized plug (one blade is wider than the other); follow
the instructions below:
To reduce the risk of electric shock, this plug is intended to fit into a polarized out-
let only one way. If the plug does not fit fully into the outlet, reverse the plug. If it
still does not fit, contact a qualified electrician. Do not attempt to modify the plug
in any other way.
COOKING GUIDES CONTINUED
B tter Suggestions:
Coating the food with batter to fry not only gives you a delicious taste but also
preserves the juice and essence of food after deep frying.
Egg Coating
• Mix 2 whole eggs with 1 ½ teaspoon of vegetable oil, and add a dash of salt and
pepper.
Crispy Coating
• Beat ½ cup milk and one whole egg together. Separately combine ½ cup flour
and your favorite seasonings (salt, pepper, garlic etc.). Dip food into milk and egg
mixture then coat in seasoned flour.
Egg Batter
• Mix 2 egg yolks, ¾ cup flour, 1 ½ teaspoon oil, ½ teaspoon salt and 1 cup of milk.
The amount of milk should be adjusted to create the density of the batter desired.
Dip food in batter and fry.
Beer Batter
• Combine 1 ½ cups flour and 1 ½ cups beer thoroughly in a large bowl. Cover and
allow the batter to sit at room temperature for 3 hours or so. Dip food in batter
and fry.
Helpful Tips for Frying Food Co ted with B tter
• Check that the food is evenly and thinly sliced as it helps to ensure the food is
fried evenly and perfectly.
• Shake off the excess flour or coating such as bread crumbs before frying.
• For foods coated with batter, first lower frying basket into oil and gently place
foods directly into oil. This will prevent coated foods from sticking to the bottom of
the fry basket.
• Do not fill the basket more than 2/3 full.
PARTS IDENTIFICATION
38
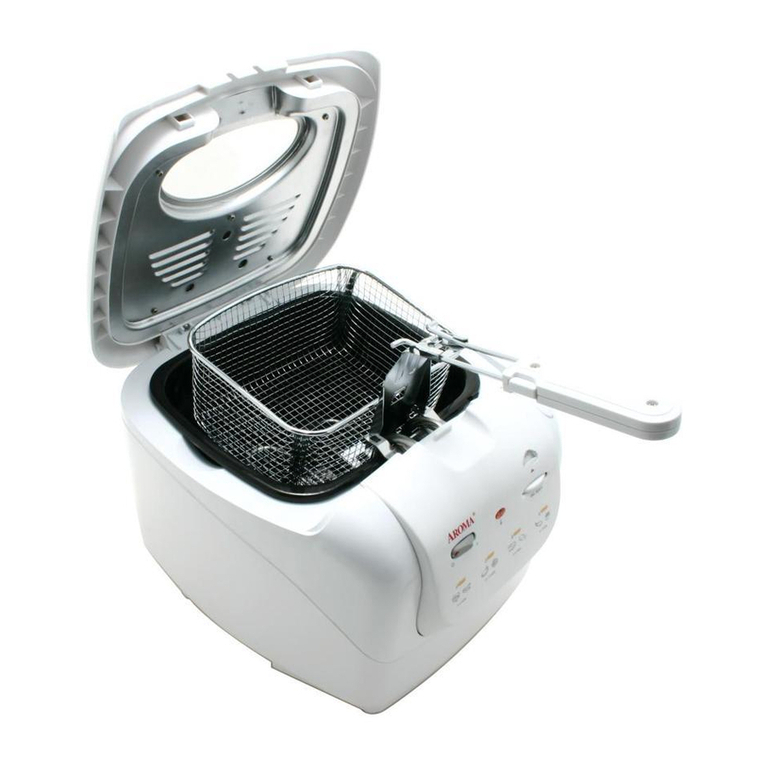
1. Detachable filtering vent
2. Replaceable charcoal filter
3. Detachable id
4. See-through glass viewing window
5. Removable frying basket
FOR REP ACEMENT FI TER:
• Replacement filters are available throughAroma Housewares
Customer Service Department at 1-800-276-6286.
• The life of the filter varies according to the type of food fried
and the frequency of use.
• Aroma Housewares Company recommends the filter be
replaced after 30 times of operation.
6. Basket handle release
7. Frying food / temperature guide
8. Raise / ower basket handle
9. Ready light
10. Frying temperature control
11. Open lid button
3
7
9
10
8
4
5
1
2
11
6
COOKING GUIDES
Cooking times and temperatures given here are only a guide. They may vary
due to differences in meat and temperature of refrigerated food. Adjust your
cooking time and temperature to your preference.
7
Helpful Hints for Deep Frying:
• Prepare food to be fried in equal size and thickness so that they will fry more evenly
and at the same speed.
• Do not fill the frying basket over 2/3 full. If too much food is fried at the same time,
food may not be fried crispy and evenly.
• Before deep frying, always remove excess moisture or ice crystals from food by rub-
bing with paper towel. Moist food may cause excess foaming and spattering of oil.
HOW TO USE
Before First Use:
1. Read all instructions and important safeguards.
2. Remove all packaging materials and make sure items are received in good
condition.
3. Tear up all plastic bags as they can pose a risk to children.
4. Wash the frying basket and nonstick frying pot with a sponge or discloth in warm
soapy water. Completely dry the entire bottom of frying pot.
5. Wipe the body clean with a damp cloth.
6. Place the deep fryer on a level, stable surface.
Do not use br sive cle ners or scouring p ds.
Do not immerse the ppli nce in w ter t ny time.
Oil Selection:
1. We recommend the following oils for healthier deep-frying: corn, canola, or blend-
ed vegetable oil. These oils are cholesterol-free and low in saturated fat.
2. We do not recommend using peanut oil, soy oil, sunflower oil, or lard that may drip
and deteriorate quickly when heated. Heavy flavored oil such as olive oil should
also be avoided.
3. We do not recommend mixing old and new oil together as this spoils new oil
quicker.
4. The number of times that the frying oil can be reused would depend on the food
that is fried in it. For example, when foods such as coated fish battered with
bread or cracker crumbs are fried frequently, the oil will need to be replaced more
often.
Prehe t Oil:
1. Turn the temperature control to the lowest temperature and make sure that the
fryer is unplugged.
2. Wipe dry the nonstick frying pot and fill it with oil no higher than the MAX level line
and no lower than MIN level line. Oil level must always be between the minimum
and maximum line marks.
3. Plug the fryer into a wall outlet, and the power light will illuminate red.
4. Close the lid by pressing down until it snaps closed.
5. Set the temperature control to the desired degree and the fryer will begin heating
the oil.
6. When the green light illuminates, your deep fryer is ready for frying.
4
FOOD SELECTION QUANTITIES TEMP. (F°) FRYING TIME
French Fries (fresh) 10 oz. 350° 6-7 min.
French Fries (frozen) 10 oz. 350° 9-10 min.
Chicken Strips (fresh) 12 oz. 340° 8-9 min
Chicken Breasts, Thighs
and egs 8 oz. 370° 9-11 min.
Fish (fresh) 8 oz. 340° 4-6 min.
Fish (frozen) 8 oz. 340° 7-8 min.
Onion Rings (fresh) 6 oz. 350° 3-4 min.
Zucchini 10 oz. 300° 3-4 min.
Egg Rolls (frozen) 12 oz. 370° 5-6 min.
Doughnuts 2 pieces 370° 6-7 min.
CAUTION:
To avoid overflowing or splashing oil, do not quickly drop the frying basket quickly
into the hot oil. ower slowly into oil.
When frying, hot steam will escape through the edge of the lid. This is normal.
Avoid this area when the fryer is in use.
The fryer may give off a slight odor and smoky haze during the first use. This is nor-
mal and will not harm you or the product. If it continues after the first few uses, stop
using, disconnect and contact customer service.
When opening the lid, be extremely cautious of the hot oil as it could splash.
HOW TO CLEAN
6
Always unplug unit and allow to cool completely before cleaning.
Ch nging Oil:
The oil does not need to be changed after each use. We recommend changing the
oil after using approximately 5 to 8 times or sooner when frying heavily flavored or
battered foods. The oil should be completely changed when it has symptoms as fol-
lows: unpleasant odor, smoke when frying and/or the color becomes darker.
Storing Oil:
Be sure the fryer has co pletely cooled (approxi ately 4 hours) and is unplugged
prior to storing the oil.
1. Before storing the oil, be sure to filter out any food particles that may be left in
the oil.
2. To filter oil: Pour the oil into a container, and then wipe the inner pot with a paper
towel to remove any food particles. Place paper filter in the frying basket and
pour the oil through the paper filter back into the fryer or another container.
3. The oil may be stored in the fryer at room temperature (only if the fryer is used on
a regular basis) or you may store the oil in a separate container in the
refrigerator.
To Cle n:
1. Wash the basket and lid with a sponge or dishcloth in warm soapy water.
3. To clean the interior pot, pour warm water and dish soap into the pot and use a
sponge or dishcloth to remove grease. Empty the pot and rinse with warm water.
4. Dry the pot completely (inside and outside) before next use.
5. Clean the body of the fryer with a damp cloth and then dry.
Do not use h rsh br sive cle ners or products th t re not considered
s fe to use on nonstick co tings.
Do not ttempt to cool the unit by pouring cold w ter into it.
HOW TO USE CONTINUED
To Fry:
1. For foods that are not coated with batter, place directly in the frying basket. Be
sure not to fill fryer basket more than 2/3 full. Over filling will cause food to cook
improperly.
2. ower basket into oil. Be sure to align the handle in the center and fold into
place.
3. For foods coated with batter, first lower frying basket into oil and then gently place
foods directly into oil. This will prevent the coated food from sticking to the
bottom of the fry basket.
4. Close the lid by pressing down until lid clicks shut. ower the frying basket
handle.
5. See the Deep Frying Time Table on page 6 for recommended cooking times.
6. When frying is complete, lift the fry basket out of the oil by simply lifting the fry
basket handle. Now the frying basket is raised and the excess oil will drain.
7. Push the OPEN button to open the lid.
8. Carefully remove the fried food from the frying basket. Be cautious of the hot oil
that might spatter from the frying pot.
9. When finished, unplug deep fryer from the wall outlet to turn off. Allow the oil to
cool completely before moving or cleaning the appliance.
5
CAUTION:
• id pops up quickly; use the other hand to guide the lid when opening.
• Always shake frozen foods to remove ice particles prior to frying. Pat dry fresh-cut
French fries and other damp foods before frying.
COOKING GUIDES
Cooking times and temperatures given here are only a guide. They may vary
due to differences in meat and temperature of refrigerated food. Adjust your
cooking time and temperature to your preference.
7
Helpful Hints for Deep Frying:
• Prepare food to be fried in equal size and thickness so that they will fry more evenly
and at the same speed.
• Do not fill the frying basket over 2/3 full. If too much food is fried at the same time,
food may not be fried crispy and evenly.
• Before deep frying, always remove excess moisture or ice crystals from food by rub-
bing with paper towel. Moist food may cause excess foaming and spattering of oil.
HOW TO USE
Before First Use:
1. Read all instructions and important safeguards.
2. Remove all packaging materials and make sure items are received in good
condition.
3. Tear up all plastic bags as they can pose a risk to children.
4. Wash the frying basket and nonstick frying pot with a sponge or discloth in warm
soapy water. Completely dry the entire bottom of frying pot.
5. Wipe the body clean with a damp cloth.
6. Place the deep fryer on a level, stable surface.
Do not use br sive cle ners or scouring p ds.
Do not immerse the ppli nce in w ter t ny time.
Oil Selection:
1. We recommend the following oils for healthier deep-frying: corn, canola, or blend-
ed vegetable oil. These oils are cholesterol-free and low in saturated fat.
2. We do not recommend using peanut oil, soy oil, sunflower oil, or lard that may drip
and deteriorate quickly when heated. Heavy flavored oil such as olive oil should
also be avoided.
3. We do not recommend mixing old and new oil together as this spoils new oil
quicker.
4. The number of times that the frying oil can be reused would depend on the food
that is fried in it. For example, when foods such as coated fish battered with
bread or cracker crumbs are fried frequently, the oil will need to be replaced more
often.
Prehe t Oil:
1. Turn the temperature control to the lowest temperature and make sure that the
fryer is unplugged.
2. Wipe dry the nonstick frying pot and fill it with oil no higher than the MAX level line
and no lower than MIN level line. Oil level must always be between the minimum
and maximum line marks.
3. Plug the fryer into a wall outlet, and the power light will illuminate red.
4. Close the lid by pressing down until it snaps closed.
5. Set the temperature control to the desired degree and the fryer will begin heating
the oil.
6. When the green light illuminates, your deep fryer is ready for frying.
4
FOOD SELECTION QUANTITIES TEMP. (F°) FRYING TIME
French Fries (fresh) 10 oz. 350° 6-7 min.
French Fries (frozen) 10 oz. 350° 9-10 min.
Chicken Strips (fresh) 12 oz. 340° 8-9 min
Chicken Breasts, Thighs
and egs 8 oz. 370° 9-11 min.
Fish (fresh) 8 oz. 340° 4-6 min.
Fish (frozen) 8 oz. 340° 7-8 min.
Onion Rings (fresh) 6 oz. 350° 3-4 min.
Zucchini 10 oz. 300° 3-4 min.
Egg Rolls (frozen) 12 oz. 370° 5-6 min.
Doughnuts 2 pieces 370° 6-7 min.
CAUTION:
To avoid overflowing or splashing oil, do not quickly drop the frying basket quickly
into the hot oil. ower slowly into oil.
When frying, hot steam will escape through the edge of the lid. This is normal.
Avoid this area when the fryer is in use.
The fryer may give off a slight odor and smoky haze during the first use. This is nor-
mal and will not harm you or the product. If it continues after the first few uses, stop
using, disconnect and contact customer service.
When opening the lid, be extremely cautious of the hot oil as it could splash.
COOKING GUIDES CONTINUED
B tter Suggestions:
Coating the food with batter to fry not only gives you a delicious taste but also
preserves the juice and essence of food after deep frying.
Egg Coating
• Mix 2 whole eggs with 1 ½ teaspoon of vegetable oil, and add a dash of salt and
pepper.
Crispy Coating
• Beat ½ cup milk and one whole egg together. Separately combine ½ cup flour
and your favorite seasonings (salt, pepper, garlic etc.). Dip food into milk and egg
mixture then coat in seasoned flour.
Egg Batter
• Mix 2 egg yolks, ¾ cup flour, 1 ½ teaspoon oil, ½ teaspoon salt and 1 cup of milk.
The amount of milk should be adjusted to create the density of the batter desired.
Dip food in batter and fry.
Beer Batter
• Combine 1 ½ cups flour and 1 ½ cups beer thoroughly in a large bowl. Cover and
allow the batter to sit at room temperature for 3 hours or so. Dip food in batter
and fry.
Helpful Tips for Frying Food Co ted with B tter
• Check that the food is evenly and thinly sliced as it helps to ensure the food is
fried evenly and perfectly.
• Shake off the excess flour or coating such as bread crumbs before frying.
• For foods coated with batter, first lower frying basket into oil and gently place
foods directly into oil. This will prevent coated foods from sticking to the bottom of
the fry basket.
• Do not fill the basket more than 2/3 full.
PARTS IDENTIFICATION
38
1. Detachable filtering vent
2. Replaceable charcoal filter
3. Detachable id
4. See-through glass viewing window
5. Removable frying basket
FOR REP ACEMENT FI TER:
• Replacement filters are available throughAroma Housewares
Customer Service Department at 1-800-276-6286.
• The life of the filter varies according to the type of food fried
and the frequency of use.
• Aroma Housewares Company recommends the filter be
replaced after 30 times of operation.
6. Basket handle release
7. Frying food / temperature guide
8. Raise / ower basket handle
9. Ready light
10. Frying temperature control
11. Open lid button
3
7
9
10
8
4
5
1
2
11
6
Deep Fried Onion Blossom
Canola oil or blended vegetable oil for frying
1 large onion
2 eggs
½ cup beer
½ cup milk
2 cups all-purpose flour
½ teaspoon baking soda
½ teaspoon black pepper
Preheat oil to 375° F. Peel onion and cut the bottom off. Cut the onion into ¾-inch
wedges without cutting all the way through the base.
Soak onion in ice cold water until wedges open approximately 7-12 minutes. Drain
onion and pat dry. Mix together eggs, beer and milk. In a separate bowl mix flour,
baking soda and black pepper.
Dust the onion with the flour mixture. Dip the onion in the batter. Re-dust with the
flour mixture. Shake off the excess. Make sure that the onion is completely coated.
Carefully lower the blossom into hot oil being very careful to avoid splattering. Cook
for 2 minutes. Turn onion and cook for an additional 2 minutes or until golden
brown. ift the cooked blossom from the oil. Sprinkle with salt and pepper to taste.
Veget ri n Egg Rolls
Corn oil for frying
6 egg roll wrappers
2 green onions, minced
¼ lb. minced white button mushrooms
2 oz. grated carrot
1 teaspoon minced ginger and garlic
2 soaked and minced dried black mushrooms
1 teaspoon sesame oil
1 teaspoon salt
¼ cup bean spouts
1 teaspoon chopped roasted peanuts
RECIPES
9 2
This ppli nce is for household use only.
BREAKAWAY PLUG
As required by Consumer Products Safety Commission, a magnetic breakaway
power cord is provided for this deep fryer. This safety feature allows the cord to
be disconnected easily as to prevent an individual from accidentally pulling the
cord and spilling the contents of the deep fryer on him or herself or someone
nearby.
ON Y the breakaway cord provided by the manufacturer can be used for this
deep fryer. Do not use any other breakaway cord which is NOT provided by the
manufacturer for this specific model as it may cause serious damage and/or
injury.
SHORT CORD INSTRUCTIONS
1. Ashort power-supply cord is provided to reduce risk resulting from becoming
entangled in or tripping over a longer cord.
2. onger extension cords are available and may be used if care is exercised in
their use.
3. If a longer extension cord is used:
a. The marked electrical rating of the extension cord should be at least as great
as the electrical rating of the appliance.
b. The longer cord should be arranged so that it will not drape over the counter
top or tabletop where it can be pulled by children or tripped over
unintentionally.
POLARIZED PLUG
This appliance has a pol rized plug (one blade is wider than the other); follow
the instructions below:
To reduce the risk of electric shock, this plug is intended to fit into a polarized out-
let only one way. If the plug does not fit fully into the outlet, reverse the plug. If it
still does not fit, contact a qualified electrician. Do not attempt to modify the plug
in any other way.
Preheat oil to 375 °F. Heat 2 teaspoons of corn oil in a fry pan over medium heat.
Add garlic, ginger and green onions. Cook for 2 minutes. Add button mushrooms
and black mushrooms. Cook for 3 minutes. Add salt to taste. Stir in peanuts, car-
rots, bean sprouts and sesame oil, turn off heat.
To prepare egg roll wrappers put 2 ½ teaspoons filling in each one. Roll up, tucking
in edges over filling. Seal the edge with a drop of thick flour paste.
Deep fry 3 rolls at a time for approximately 4-6 minutes or until the egg rolls are
golden brown on all sides. Carefully lift the cooked egg rolls form the fryer. et
drain in the basket then pat dry with paper towels.
Fried Chicken Tenders
Vegetable oil for frying
4 boneless, skinless chicken breasts
1 cup bread crumbs
1 teaspoon lemon juice
1 tablespoon dried basil leaves
1 cup flour
½ teaspoon of salt and pepper
½ cup milk
Preheat oil to 350°F. Cut the chicken into even strips, about 1 inch x 2 inch.
Marinate chicken with salt, pepper, basil leaves and lemon juice for about 30 min-
utes. Coat chicken breasts evenly with flour and bread crumbs.
Deep fry chicken strips at 350°F for 8-10 minutes. et drain in the basket and serve
with honey mustard or ranch dressing.
RECIPES CONTINUED
10
IMPORTANT SAFEGUARDS
Basic safety precautions should always be followed when using electrical
appliances, including the following:
1. Read all instructions before first use.
2. Do not touch hot surfaces. Use handles or knobs.
3. To protect against electrical shock, do not immerse the appliance or electrical
cord in water or other liquid.
4. This appliance is not intended to be used by children. Close supervision is
necessary when the appliance is used near children.
5. Do not leave appliance unattended while in use.
6. Unplug from outlet when not in use and before cleaning. Allow to cool before
putting on or taking off parts, and before cleaning the appliance.
7. Do not operate any appliance with a damaged cord or plug or after the appli-
ance malfunctions or has been damaged in any manner. Return appliance to
the nearest authorized service facility for examination, repair or adjustment.
8. Do not use attachments or accessories other than those supplied or recom-
mended by the manufacturer. Incompatible parts create a hazard.
9. Do not use outdoors.
10. Do not let cord touch hot surfaces or hang over the edge of a counter or table.
11. Do not place on or near a hot burner or in a heated oven.
12. Extreme caution must be used when using or moving an appliance containing
hot oil or other hot liquids.
13. Use only metal cooking utensils in the fryer as rubber or plastic utensils will
become damaged from the hot oil. Do not leave metal utensils in the fryer as
they will become dangerously hot.
14. Do not use the appliance for other than intended use.
15. To disconnect power, unplug the deep fryer from wall outlet.
16. Push the open button to open the lid. As the lid may pop up quickly, use the
other hand to guide it as it opens.
17. The maximum capacity of the frying basket for food is 4 lbs.
18. Extreme caution should be used when removing the fryer containing hot oil.
SAVE THESE INSTRUCTIONS
1
Fried Jumbo Shrimp
Canola oil for frying
14 large shrimp in the shell
1 teaspoon salt
½ teaspoon white pepper
3 teaspoons corn starch
1 teaspoon Japanese rice wine
Preheat oil to 350°F. Peel and devein shrimp by cutting a slit on the shell along the
back of shrimp and removing black ribbon. Season shrimp with rice wine and salt.
et it sit about 20 minutes.
Evenly dust each shrimp with cornstarch. Add shrimp to the frying basket and lower
into oil. Fry 4 - 5 minutes or until shrimp have reached desired color and crispness.
et drain in the basket then pat dry with paper towels. Garnish with lettuce leaves
and lemon slices.
Fontin Cheese Fritos (Fritters)
Corn oil for frying
¾ lb. chilled fontina cheese
2 eggs,with yolks and whites separated
½ cup minced fresh basil
1 ½ cups unbleached flour
2/3 cup ice water
1 teaspoon baking powder
3 teaspoon olive oil
Salt to taste
Preheat oil to 350°F. Cut cheese into 1-inch cubes. Mix wine, egg yolks and garlic
in a bowl. Add baking powder, flour, ½ teaspoon salt , olive oil and water. Mix until
smooth. et rest at room temperature for 2 hours.
Beat egg whites with a pinch of salt until barely stiff. Fold into batter along with
minced basil.
Dip cheese chunks into batter. Drip off excess batter. ower cheese chunks into oil
until golden, approximately 1-1 ½ minutes. Drain and remove from basket. Serve
immediately.
RECIPES CONTINUED
11
Congratulations on your purchase of the deep fryer. It will surely
become one of the most practical appliances in your kitchen.
Please read all instructions before first use.
Published By:
Aroma Housewares Co.
6469 Flanders Drive
San Diego, CA 92121
U.S.A.
1-800-276-6286
www.aromaco.com
© 2004Aroma Housewares CompanyAll rights reserved.
Arom 's F vorite Fried B n n s
Canola oil for frying
1 cup all purpose flour
½ teaspoon salt
1 tablespoon sugar
1 egg, lightly beaten
1 cup milk
¼ cup powder sugar
2 teaspoons vegetable oil
3-5 bananas, cut into 1 inch lengths
Preheat oil to 370°F. Mix flour, sugar and salt in a large bowl. Combine and mix
egg, milk and 2 teaspoons of heated vegetable oil in another bowl. Combine egg
mixture with flour paste.
Stir with a fork or whisk until the batter is smooth. Dip each 1inch long banana
length into batter, allowing excess batter to drip off. ower frying basket into the pre-
heated oil of the deep dryer.
Slowly place battered banana with a draining spoon (or other metal utensil) into fry-
ing basket, one at a time. Fry all bananas until golden brown, about 3 to 4 minutes.
Drain excess oil by placing bananas on a clean paper towel. Sprinkle fried bananas
with powder sugar and serve immediately.
RECIPES CONTINUED
12
LIMITED WARRANTY
Aroma Housewares Company warrants this product free from defects in material and
workmanship for one year from provable date of purchase in continental United
States.
Within this warranty period,Aroma Housewares Company will repair or replace, at its
option, defective parts at no charge, provided the product is returned, freight prepaid
with proof of purchase and U.S. $6.00 for shipping and handling charges payable to
Aroma Housewares Company. Before returning an item, please call the toll free num-
ber below for return authorization number.Allow 2-4 weeks for return shipping.
This warranty does not cover improper installation, misuse, abuse or neglect on the
part of the owner. Warranty is also invalid in any case that the product is taken apart
or serviced by an unauthorized service station.
This warranty gives you specific legal rights and which may vary from state to state
and does not cover areas outside the United States.
AROMAHOUSEWARES COMPANY
6469 Flanders Drive
San Diego, California 92121
1-800-276-6286
M-F, 8:30AM - 5:00 PM, Pacific Time
Website: www.aromaco.com
1.9 Qt.
Deep Fryer
Instruction Manual &
Cooking Guide
Model:ADF-175RN

Other Aroma Fryer manuals

Aroma The Munchables Series User manual

Aroma

Aroma The Munchables Series User manual

Aroma ADF-190A User manual

Aroma

Aroma ADF-190A User manual

Aroma ADF-212 User manual

Aroma

Aroma ADF-212 User manual

Aroma CoolFry ADF-172T User manual

Aroma

Aroma CoolFry ADF-172T User manual

Aroma ADF-196 User manual

Aroma

Aroma ADF-196 User manual

Aroma ADF-189 User manual

Aroma

Aroma ADF-189 User manual

Aroma ADF-182 User manual

Aroma

Aroma ADF-182 User manual

Aroma SmartFry XL User manual

Aroma

Aroma SmartFry XL User manual

Aroma SmartFry XL ADF-212 User manual

Aroma

Aroma SmartFry XL ADF-212 User manual

Aroma AAF-200 User manual

Aroma

Aroma AAF-200 User manual

Aroma ADF-198 User manual

Aroma

Aroma ADF-198 User manual

Aroma CoolFry ADF-171N Use and care manual

Aroma

Aroma CoolFry ADF-171N Use and care manual

Aroma CoolFry ADF-171N Use and care manual

Aroma

Aroma CoolFry ADF-171N Use and care manual

Aroma SmartFly XL ADF-232 User manual

Aroma

Aroma SmartFly XL ADF-232 User manual

Aroma ADF-190 User manual

Aroma

Aroma ADF-190 User manual

Aroma ADF-198 User manual

Aroma

Aroma ADF-198 User manual

Aroma ADF-189 User manual

Aroma

Aroma ADF-189 User manual

Aroma ADF-135S User manual

Aroma

Aroma ADF-135S User manual

Aroma ADF-196 User manual

Aroma

Aroma ADF-196 User manual

Aroma Gameday Cooker ADF-190C User manual

Aroma

Aroma Gameday Cooker ADF-190C User manual

Aroma ADF-182 Use and care manual

Aroma

Aroma ADF-182 Use and care manual

Aroma SmartFry XL ADF-212 User manual

Aroma

Aroma SmartFry XL ADF-212 User manual

Popular Fryer manuals by other brands

Cook's Companion B422047-00003-00000 owner's manual

Cook's Companion

Cook's Companion B422047-00003-00000 owner's manual

PowerXL AIR FRYER GRILL PLUS owner's manual

PowerXL

PowerXL AIR FRYER GRILL PLUS owner's manual

Oster CKSTDFZM70 user manual

Oster

Oster CKSTDFZM70 user manual

Keating Of Chicago Incredible Frying Machine 20 IFM Specification sheet

Keating Of Chicago

Keating Of Chicago Incredible Frying Machine 20 IFM Specification sheet

Lacor 69169 Instructions for use and maintenance

Lacor

Lacor 69169 Instructions for use and maintenance

Domo DO458FR Instruction booklet

Domo

Domo DO458FR Instruction booklet

Lotus F10T-63EM Installation and operating instructions

Lotus

Lotus F10T-63EM Installation and operating instructions

ACTIVER 140118801 user manual

ACTIVER

ACTIVER 140118801 user manual

Pitco SG Series Solstice Service Manual

Pitco

Pitco SG Series Solstice Service Manual

Frigidaire EAF230 use & care

Frigidaire

Frigidaire EAF230 use & care

Broaster VF-2 Installation & operation manual

Broaster

Broaster VF-2 Installation & operation manual

Kalorik MAXX AFO 52096 BK manual

Kalorik

Kalorik MAXX AFO 52096 BK manual

NuWave Bravo XL owner's manual

NuWave

NuWave Bravo XL owner's manual

Anvil FFA7110 Repair

Anvil

Anvil FFA7110 Repair

Tower Hobbies T17008 Safety and instruction manual

Tower Hobbies

Tower Hobbies T17008 Safety and instruction manual

Lotus F10D-64ET Instructions for installation and use

Lotus

Lotus F10D-64ET Instructions for installation and use

inventum GF500HLDB instruction manual

inventum

inventum GF500HLDB instruction manual

Frymaster RE Series Installation och Bruksanvisning

Frymaster

Frymaster RE Series Installation och Bruksanvisning

manuals.online logo
manuals.online logoBrands
  • About & Mission
  • Contact us
  • Privacy Policy
  • Terms and Conditions

Copyright 2025 Manuals.Online. All Rights Reserved.