HOW TO CLEAN
Always unplug toaster and allow to cool completely before cleaning.
To Cl an Body of Toast r:
Wipe the body of toaster clean with soft, damp cloth.
To Cl an Crumb Tray:
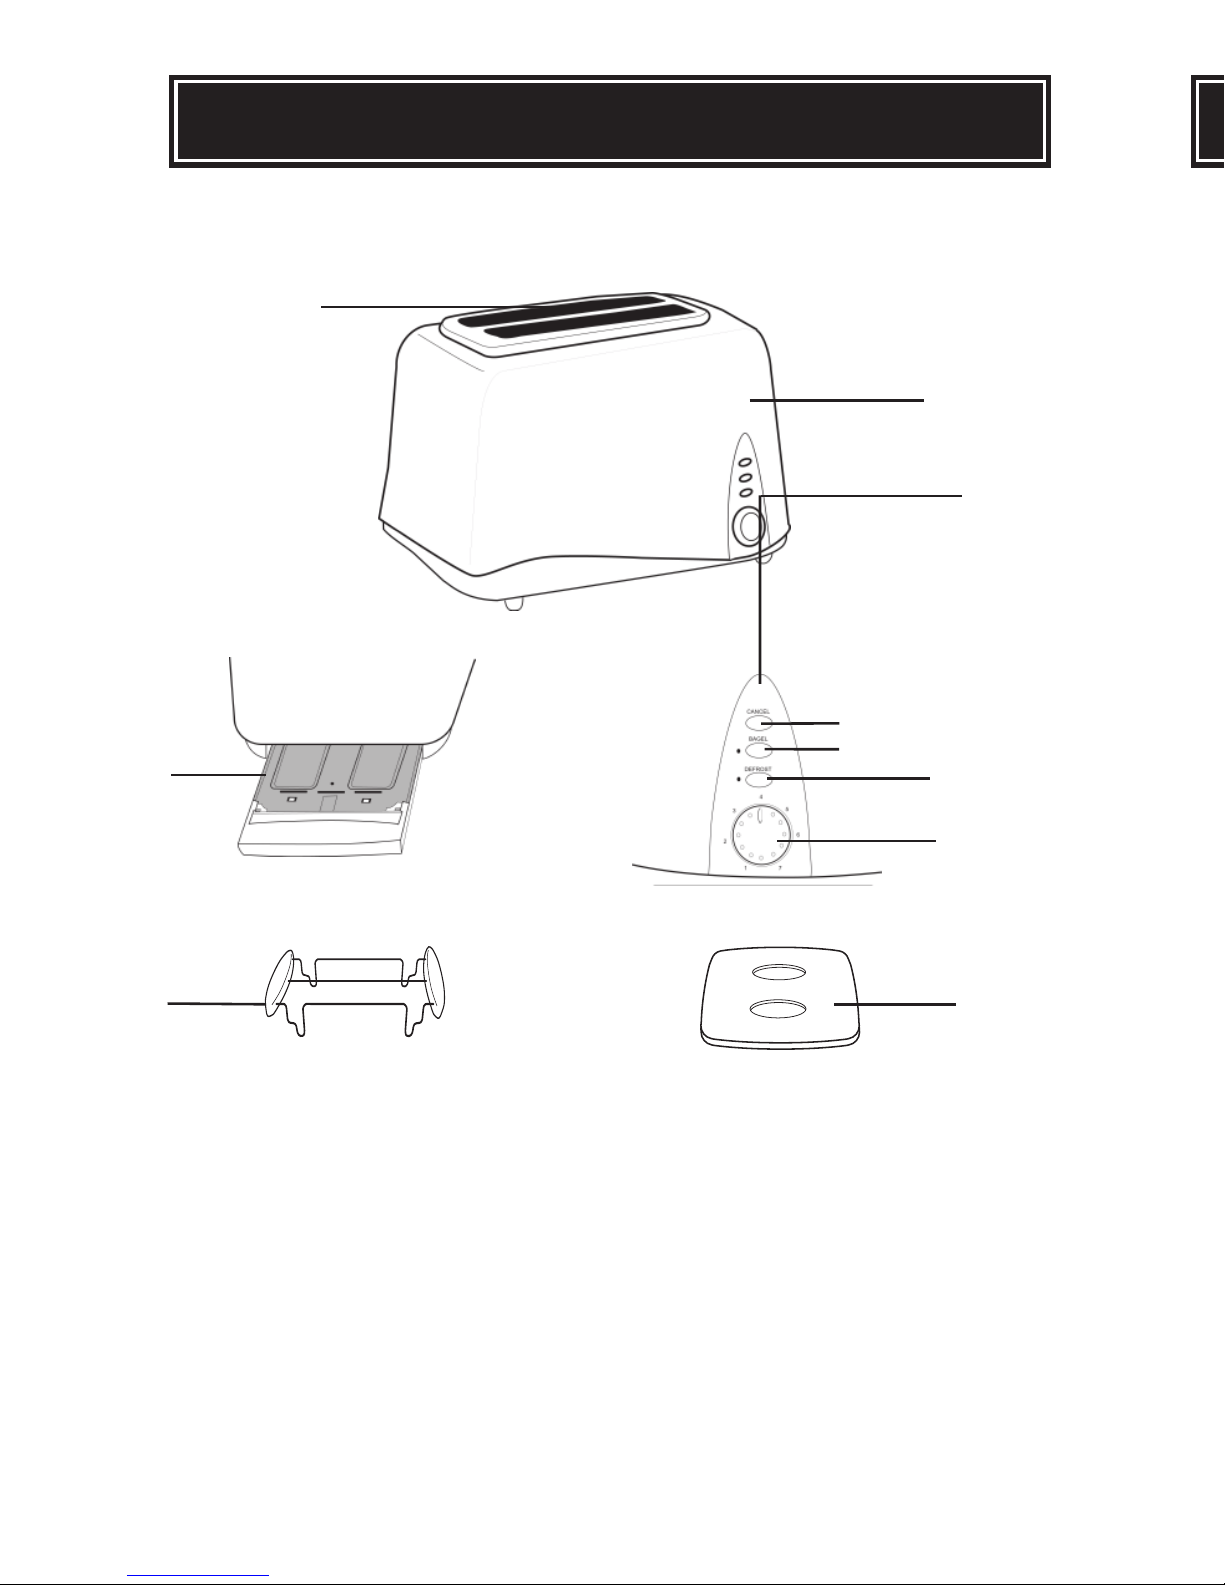
The crumb tray is located at the side of the toaster bottom. It is recommended that
the crumb tray be cleaned out at least every 3-5 uses.
1. Gently slide the tray out.
2. Dump the crumbs in the trash can.
3. Using a damp cloth, clean the crumb tray.
4.Always dry the crumb tray completely before replacing it.
5. Push firmly to close the tray and make sure the tray is securely in position.
6
CAUTION:
• Do not immerse the toaster in water or any liquid.
• Do not use abrasive cleaners or scouring pads for cleaning.
• ever use wet or damp accessories.
• Do not clean the heating elements.
• ever place toaster or accessories in dishwasher.
• Clean the crumb tray often to reduce the risk of fire caused by built up crumbs.
IMPORTANT SAFEGUARDS
Basic safety precautions should always be followed when using electrical
appliances, including the following:
1. Important: Read all instructions carefully before first use.
2. Do not touch hot surfaces. Use handles or knobs.
3. To protect against electrical shock, do not immerse cord, plug or the appliance
itself in water or other liquid.
4. ever leave appliance unattended when in use.
5. This appliance is not intended to be used by children. Close supervision is
necessary when the appliance is in use near children.
6. Do not operate or place the toaster on non-heat-resistant or flammable surface.
7. Do not place or operate toaster on hot burner, or gas stove flame or in a heated
oven.
8. Do not operate this appliance when the power cord or the plug is damaged, or
if it malfunctions, is dropped or has been damaged in any manner. Return the
appliance to an authorized service station for examination, repair or electrical/
mechanical adjustment.
9. Do not use attachments or accessories other than those supplied or
recommended by the manufacturer. Incompatible parts create a hazard.
10. Do not toast food that will drip fillings or coatings when heated. Clean out
accumulated crumbs frequently. Such accumulation inside the toaster is
unsanitary and increases the risk of fire or toaster malfunction.
11. Do not operate the toaster without the crumb tray securely in position.
12. Do not insert fingers, metal and non-metal utensils, foil-covered and over sized
foods, etc in toaster when plugged in as it increases the risk of electric shock.
13. Do not use outdoors.
14. Do not let cord hang over edge of table or counter, or touch hot surfaces.
15. Do not use the appliance for other than intended use.
16. Do not place any of the following or similar materials in or on the oven: paper,
plastic, etc.Arisk of fire is present if the appliance is covered or touching
flammable material such as curtains, walls, etc. ever store any items on top of
the appliance.
17. Unplug from outlet when not in use and before cleaning. Allow the unit to cool
before putting on or taking off parts, and before cleaning the appliance.
18. Do not attempt to dislodge food when toaster is plugged in.
SAVE THESE INSTRUCTIONS
1