Voxelab Aquila Pro User manual

Aquila Pro
V1.3.2-20210926
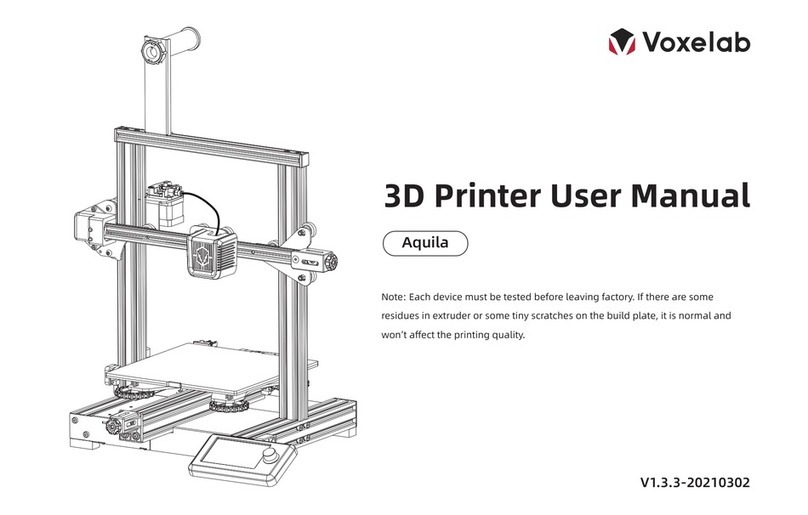
3D Printer User Manual
Note: Each printer is tested before leaving factory. It is normal if there are some
residues in extruder or some tiny scratches on the build plate. It won’t affect the
printing quality.
3D打印机使用说明书
注:每台 3D 打印机在出厂前都经过打印测试,若设备喷头内存在耗材残留或打印平台有
轻微划痕,都属正常现象,不影响使用。


01
Content
Notes
Product Introduction
Spare Parts
A
B
C
Equipment Parameters
Assembly Guide
Operation Guide
Start Printing
Mainboard Information
Printing Notice
Trouble Shooting
Thank you for choosing Voxelab products. For your convenience, please read
the manual carefully before using it. Operate the printer accordingly.
Voxelab team is always at your service; contact us at any time if you need
any assistance.
Official website: www.voxelab3dp.com
(Get tutorials, software, firmware, printer maintenance and relevant
information)
Email:support@voxelab3dp.com
目录
感谢您选择并使用Voxelab的产品:
为了让您更好地使用本产品,请您在使用之前仔细阅读本说明书,并严格按
照说明书的指示进行操作。
Voxelab团队时刻准备为您提供最优质的服务。在使用过程中若遇到问题,
请通过以下联系方式与我们联系。
邮箱:support@voxelab3dp.com
热线电话:400 886 6023
售后电话:0579-82238189
扫一扫
查看最新操作教程
使用须知
组装3D打印机
使用3D打印机
设备简介
设备参数
零部件清单
首次打印
主板信息
打印注意事项
故障检修

02
Notes
1.
2.
3.
4.
5.
6.
7.
8.
9.
10.
11.
12.
13.
Do not make any modifications to the printer. To avoid personal injury or property damage please ensure your operation followed by the Guide.
Dress properly. Do not wear loose clothing or jewelry. Keeping your hair, clothing and gloves away from moving parts.
Do not directly touch the nozzle and build plate to avoid high-temperature burn.
Do not expose the printer in flammable liquid, gas or dust environment (The high temperature generated by operating printer may react with dust,
liquid, and flammable gas in the air and cause fire).
Do not put the printer on a shaking place. It may affect the printing quality.
Children and untrained personnel are not allowed to operate the printer alone.
Operate the printer in a well-ventilated environment. Some materials may emit odors during the printing process.
Do not manually move the nozzle or printing platform while booting up, lest printer damage.
Never use the printer for illegal activities.
Never use the printer to make any food storage.
Never put the printed model into mouth.
Lower the build plate before loading/unloading filament. The distance between the nozzle and build plate should be at least 50 mm.
Ensure regular maintenance for the printer; use dry cloth to remove dust and adhered residues.
Watch out for the sharp edges and corners of the profile.
使用须知
请勿自行对打印机进行任何改装。请按照说明书操作,避免造成意外人身伤害和财产损失。
在使用打印机时,请勿穿戴围巾、手套、珠宝装饰等容易卷入设备的物件。
请勿在打印机工作时接触喷嘴和打印平台,防止出现高温烫伤。
请勿将打印机放置在有可燃性气体、液体及灰尘的环境中(打印机运行产生的高温有可能会与空气中的粉尘、液体、可燃性气体反应引发火灾)。
请勿将打印机放置在振动较大或其他不稳定的环境内,打印机晃动会影响打印质量。
儿童及未经培训的人员请勿单独使用打印机。
请在通风环境下使用打印机,部分耗材打印过程中可能产生异味。
请勿在开机状态下手动快速移动喷头和打印平台,避免打印机故障。
请勿利用该打印机进行违法犯罪的活动。
请勿利用该打印机制作食物储存类产品。
请勿将打印模型放入口腔。
在打印机进行进退丝操作时,喷头和平台请至少保持50mm的距离(距离过近,有可能会造成喷头堵塞)。
请定期维护打印机,用干布进行清洁,拭去灰尘与导轨上的异物。
1.
2.
3.
4.
5.
6.
7.
8.
9.
10.
11.
12.
13.
型材边角比较锐利,注意安全。
Product Introduction
XE-axis assembly XE轴组件
X-axis limit sensor X轴限位传感器
Print platform 打印平台
Z-axis limit sensor Z轴限位传感器
Leveling nut 调平螺母
Y-axis tensioner Y轴张紧器
Extruded assembly 挤出组件
Feeding assembly 送丝机构
Material rack and spool holder 料架及料管筒
X-axis right fixed block X轴右固定块
X-axis tensioner X轴张紧器
Platform clip 平台压扣
Power switch and socket 电源开关及插座
Screen 显示屏
Tool box 工具盒
Printer base 机器底座
Voltage regulator 电压调节档
Y-axis limit sensor Y轴限位传感器
Y-axis motor Y轴电机
E-axis motor E轴电机
Filament detector 丝料检测组件
X-axis motor X轴电机
Coupling 联轴器
Z-axis motor Z轴电机
03
18 19
1
2
3
6
7
10
11
14
15
13
16
9
17
21
20
22
24
23
4
5
8
12
1.
2.
3.
4.
5.
6.
7.
8.
9.
10.
11.
12.
13.
14.
15.
16.
1 7.
18.
19.
20.
21.
22.
23.
24.

04
Voxelab Aquila Pro
235*235*250 mm
FDM
1
0.1 mm - 0.4 mm
Standard | 标配 0.4 mm
±0.2 mm
φ1.75 mm PLA
VoxelMaker / Cura / Simplify 3D
Input | 输入:AC 115/230V 50/60Hz Output | 输出:DC 24V
360W
≤110℃
≤260℃
Yes | 支持
Yes | 支持
Yes | 支持
Windows 7/10 / Mac OS
≤180 mm/s,30-60 mm/s normally | ≤180 mm/s,正常为30-60 mm/s
Chinese / English / Japanese / French / Spanish / German | 中文/英文/日语/德语/法语/西班牙语
USB connection printing / WIFI Online printing | U盘连接打印 / Wifi联机打印
Input | 输入: 3mf / stl / obj / fpp / bmp /png / jpg / jpeg Output | 输出: G File / GX File / Gcode File
Equipment Parameters 设备参数
Model | 型号
Print volume | 成型尺寸
Forming technology | 成型技术
Extruder quantity | 喷头数量
Layer thickness | 层厚
Nozzle diameter | 喷嘴直径
Print precision | 精度
Filament | 打印材料
File format | 支持格式
Connectivity| 打印方式
Compatible slicing software | 可兼容切片软件
Power specification | 电源规格
Total power | 总功率
Hotbed temperature | 热床温度
Nozzle temperature | 喷嘴温度
Resume printing function | 断电续打
Filament detection | 断料检测
Dual Z-axis rails | 双Z轴丝杆
Language switch | 语言切换
Supports(OS) | 电脑操作系统
Print speed | 打印速度

Printer base *1 Gantry Frame *1 Screen *1
Material rack *1 Material pipe and
nut *1
Remove tool *1 Needle *1 USB flash disk*1
M6 Pneumatic joints *2 Diagonal Pliers *1
Power cable *1
Wrenches and
screwdrivers
M4 T nuts *2
Nozzle *1 Filament *1
Hexagon socket head spring
washer combination screws
M5x45 *5
Hexagon socket button
head screws M4x6 *2
Hexagon socket button
head screws M5x8 *2
05
底座组件*1 龙门架*1 显示屏*1
料架*1 料架筒及料架螺母*1
金属铲刀*1 通针*1 U盘*1
M6气管接头*2 剪钳*1
电源线*1
扳手和螺丝刀
M4 T型螺母*2
喷嘴*1 耗材*1
内六角圆柱头弹垫组合螺钉
M5x45 *5
内六角平圆头螺钉M4x6 *2 内六角平圆头螺钉M5x8 *2
Spare Parts 零部件清单

Install the gantry frame
Printer base *1
1
Step: First lift the X-axis assembly up at least 15 cm to the position as shown, then use
four M5x45 screws to fix gantry frame with the base.
Hexagon socket head spring
washer combination screws
M5x45 *4
M5x45
06
Installation video can be found on Voxelab Youtube channel
Gantry Frame *1
安装龙门架
底座组件*1
内六角圆柱头弹垫组合螺钉
M5x45 *4
龙门架*1
步骤:请先将X轴组件上升不少于15cm,再用4颗M5x45组合螺钉将龙门架锁紧在底座组件上。

Install the screen
2
07
Screen *1
Hexagon socket button
head screws M5x8 *2
Pass the display cable through the cable
fixed buckle firstly, then connect it to the
screen. Finally install the screen onto printer
base side with two M5x8 screws (as shown).
M5x8
安装显示屏
显示屏*1
内六角平圆头螺钉M5x8 *2
请先将显示屏线穿过固线扣,与屏幕连接好后,
再使用2颗M5X8螺钉将显示屏固定在机器底座
(位置如图所示)。

Install spool holder
3
Step: Put two M4x6 screws and two M4 T nuts into the material rack (as shown), place the spool
holder on the rack and fix on the profile with screws (as shown).
M4 T nuts *2
Hexagon socket button
head screws M4x6 *2
M4x6
M4 T nut
Connect the filament tube
Back
Install it on the right
08
Material rack *1
Material pipe and nut *1
安装料架
M4 T型螺母 *2
内六角平圆头螺钉M4x6 *2
料架 *1
料架筒及料架螺母 *1
将料架筒及料架螺母安装在料架上,用2颗M4x6螺钉及2颗T型螺母将组装好的料架固定在顶部型材上。
M4 T型螺母
连接导丝管
背面
靠设备顶部右侧安装

Adjust the synchronous belt
4
Move the extruder left and right to check whether it can touch the X-axis limit sensor and check the tension of
synchronous belt. It is best when the extruder is able to touch the X-axis limit sensor and synchronous belt is in a
proper elasticity.
Front
A
B
A B
!
09
调节同步带
左右滑动喷头,检查喷头是否可以触碰到X轴限位传感器,并查看同步带张紧程度;以喷头可以触碰到X轴限位传感器,同
步带松紧适合为宜。
正面
Tips: Manually rotate the X-axis and Y-axis
tensioners to the appropriate tightness.
Reference standard: Press the synchronous belt
to feel its tension. It is best when the belt is
neither too loose nor too tense.
Belt being too loose or too tight both affect the
printing effect, and being too tight may cause
belt break.
注意:需手动将X、Y轴张紧器旋转到合适的松紧度。
A与B螺母位置参考:以手轻按压同步带有一点张力
为参考标准。
同步带过松、过紧均会影响打印效果,过紧可能会造
成同步带崩断。

Wire connection
5
1. Connect the yellow-labeled cables with "Z1" and "Z2" on 6 pin(4 wires) ports to Z-axis motors; 将6针(4线)端口上带有黄色标签丝印“Z1”,“Z2”
的线分别与左右两个Z轴电机连接;
2. Connect the port of black cable to Z-axis limit sensor; 黑色线端口与Z轴限位传感器端口对插;
3. Insert the XE-axis assembly zcable; 插上XE轴组件转接排线;
4. Insert the extruder cable into the extruder; 插上喷头排线;
5. Plug in the power cord (as shown) and toggle the switch to turn on the power.
Z-axis motor port
Z-axis limit sensor
Power cable *1
Z-axis limit sensor
Z-axis motor
Z-axis motor
10
5
2
1
4
3
设备接线
Z轴电机接口
Z轴限位传感器接口
电源线*1
插上电源线(如示意图)拨动开关打开电源。
!
Attention
· Damage might occur if voltage is
set incorrectly. Make sure the
current input voltage matches to
your local mains (115/230 V).
· Plug in power cord and turn
power switch to 1 to turn it on.
· Do not disconnect the cables
when the printer is powered on.
注意
· 如果电压设置不正确,可能会造成
损坏。选择正确的输入电压以匹配您
的本地电源(115/230V)。
· 连接电源线并将电源开关拔至I档即
可开机。
· 当机器通电时,请勿断开连接线。
Z轴限位传感器
Z轴电机
Z轴电机

Level
6
Note: The UI information is
only for reference, the actual UI
may be different.
During the leveling process,
please do not touch the
filament tube and nozzle
cable.
!
11
Leveling operation video can be found on Voxelab Youtube channel
Check the steadiness of the build
plate before leveling. If the build
plate is unsteady, please use an
open-end wrench to adjust the
V-wheel to steady it.
请浏览优酷“Voxelab3d打印”自频道,查看最新调平视频。
调平平台前请确认一下平台有无晃动;
若有,请使用开口扳手调节一下左右两
侧v型轮松紧度,使得平台滑动顺畅且
无晃动。
注意:界面仅供参考,实际以UI
为准。
调平过程中,请不要触碰导丝
管及喷头排线。
调平

12
Level
Nozzle is too far away from build plate
that causes model unable to adhere to
the build plate.
Perfect distance between nozzle and
build plate ensures filament extruded
evenly and adhering rightly on the
build plate.
0.1 mm
Note: If rotating nuts but the nozzle still cannot touch the build plate,
it might due to the position of the Z-axis limit sensor being too
high; please adjust it accordingly.
1. Move the nozzle to the top of the leveling nut. Screw the nut and adjust the distance between the nozzle and the
printing platform to about 0.1 mm (Thickness of a piece of A4 paper).
2. We can use a piece of A4 paper to assist in leveling, so that the nozzle only scratches on the A4 paper. Adjust the
four leveling nuts in turn until you feel slight resistance from the nozzle when pulling the A4 paper.
3. Test whether the distance between the nozzle and the print platform is proper or not. Repeat the above steps 1~2
times if necessary.
Nozzle is too close to build plate that
causes filament failed to sufficiently
extruding. Nozzle may easily be
damaged and clogged, build plate
may be scratched.
It is suggested that the center
position be checked after well
adjusting the upper 4 positions.
调平
注意:如若旋转调平螺母无法使喷嘴触碰到平台,这可能是由于Z轴限位传感
器位置安装过高,请适当调节。
1. 当喷嘴在调平螺母上方时,旋转螺母,调节打印平台,使二者间距约为0.1mm,刚好处于贴合状态(一张A4纸的厚度);
2. 用一张A4纸辅助调平,使喷嘴刚好能在A4纸上产生划痕但不会划破纸张。依次完成底部四个调平螺母的调节,不断调整直到拉
动A4纸时能感受到来自喷嘴的轻微阻力;
3. 测试平台中间间隙是否合适,如有必要可重复上述步骤1-2次。
4个螺母上方位置调整后,
可适当查看中心位置是否合适。
喷嘴离平台太远,耗材无法粘附在平台上。
耗材挤出饱满均匀,刚好贴在平台上。
喷嘴离平台太近,耗材挤出不足,喷嘴容易
受损,造成堵头,刮伤打印平台。

Z-axis calibration
13
Note: The UI information is only for reference, the actual UI may be different.
Tap【Level】-【Z
Calibration】, the leveling
sensor starts to test the
build plate one by one.
When it finished, the
Z-axis calibration is done.
Z轴校准
依次点击【调平】-【Z轴校
准】,调平传感器开始依次
点对点检测。当9个点检测完
成时,代表Z轴校准完成。
注意:界面仅供参考,实际以UI为准。

Preheat
7
Note: If you need to adjust temperature for some
reasons, please tap [Settings] - [Temperature] - [PLA/ABS
preheat setting] to adjust parameter.
14
Note: The UI information is only for
reference, the actual UI may be different.
注意:界面仅供参考,实际以UI为准。
预热
注意:若因打印材料或其他原因需要调整温度,可以在界面首页
【设置】- 【温度】-【PLA/ABS预热设置】调整参数。

15
Load the filament
8
1. When waiting for preheating, please hang the
filament on the material rack.
2. Press the handle to let filament pass through. 按压送丝机构处的把手,将丝料穿过送丝机构。
3. Insert filament into filament tube; tap [Load] to feed filament to the nozzle. Loading is
completed when filament is extruded at the nozzle. Filament can be fed to the nozzle
manually when the printer is preheated.
装料
1. 在等待温度上升时,将耗材挂在料架上。
将丝料送入导丝管,点击【控制】-【进丝】,丝料将会被送入喷嘴,当看到喷嘴处
有丝料挤出,装料完成 ( 若设备已预热,也可手动将丝料送入喷头)。
Note: The UI information is only for reference, the actual UI may be different.
注意:界面仅供参考,实际以UI为准。

The methods of replacing
filament:
1. Tap [Unload], waiting for the
filament unload completed, pull
filament out from the feeding
assembly; repeat the load
process.
2. To replace filament during
the printing process, tap
[Settings], select filament
replacement icon, it will pause
the print and unload the
filament. After unloading
completed, please insert the
new filament then tap [Load].
16
日常中更换耗材:
点击【退丝】,等待耗材自动退丝
完成,抽出送丝机构内剩余耗材,
完成退丝;重复进丝步骤。
打印过程中更换耗材:
点击【设置】-【换丝】图标,暂停
打印并进入退丝操作,退丝完成后
插入新的耗材,点击【进丝】按
钮,完成耗材更换。
Note: The UI information is only
for reference, the actual UI may
be different.
注意:界面仅供参考,实际以UI为准。

Start printing
9
Decompressed the slicing software package in the USB flash drive and
install it to your computer. Open the software, load the stl file for slicing,
then saved the sliced file to the USB flash drive.
1. Ensure that the build plate has been leveled before printing.
2. Ensure that the filament has been loaded in an appropriate approach.
3. Please clean extruder before printing (Load the filament for a while to extrude all the melted filament printed last time).
4. Do not leave the printer unattended during operation.
Insert the USB flash drive, tap [Print], select a file to print.
17
Pro
首次打印
将U盘中的切片软件安装包,安装到电脑上。
打开软件,导入stl文件进行切片,将切片后的文件存入U盘。
1. 打印开始前请确保打印机已经完成调平;
2. 打印开始前请确保耗材安装正确,没有打结或卡住;
3. 打印开始前请将喷头内的耗材清理干净(喷头内可能残留少量耗材,请进丝一段时间,确保上一次打印的耗材已全部挤出);
4. 不允许在长时间无人看守的情况下使用3D打印机。
插入U盘 - 点击【打印】 - 选择要打印的文件

Print
18
Note: The UI information is only for reference, the actual UI may be different.
注意:界面仅供参考,实际以UI为准。
打印
Other Voxelab 3D Printer manuals

Voxelab
Voxelab Aquila User manual

Voxelab
Voxelab Aries User manual

Voxelab
Voxelab Proxima User manual

Voxelab
Voxelab Aquila S2 User manual

Voxelab
Voxelab Proxima 6.0 User manual

Voxelab
Voxelab Aquila X2 User manual

Voxelab
Voxelab Polaris User manual

Voxelab
Voxelab Proxima 8.9 User manual

Voxelab
Voxelab Aquila X2 User manual

Voxelab
Voxelab Aries User manual