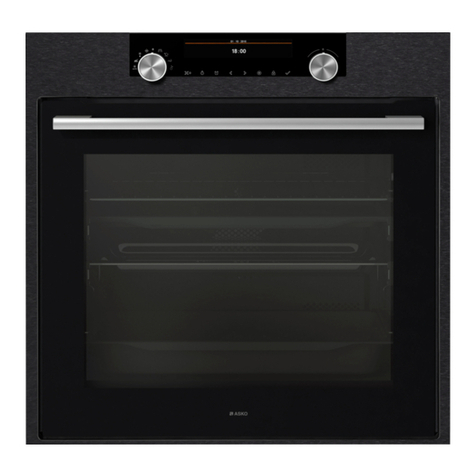
Asko OCS8637B User manual

Instructions for use
OVEN
OCS8637S / BO6SA2I3-42
OCS8437S / BO4CS2I3-42
OCS8637B / BO6SA2I3-42
861441_en_naslovnica_drug_papir.indd EN1861441_en_naslovnica_drug_papir.indd EN1 4. 10. 2022 08:29:234. 10. 2022 08:29:23

EN User manual EN 3 - EN 34
Pictograms used
Important information
Tip
861441_en_naslovnica_drug_papir.indd EN2861441_en_naslovnica_drug_papir.indd EN2 4. 10. 2022 08:29:444. 10. 2022 08:29:44

EN 3
CONTENTS
Your oven
Introduction 4
Description of the appliance 5
Guide rails/Telescopic guide rails 5
Accessories 6
Door 7
Cooling fan 7
Control panel 8
First use
Before using the appliance for the first time 9
Use
Switching on and settings 10
Choosing the cooking system 14
Description of the main functions 14
Choosing the settings 18
Selecting additional functions 21
Starting the cooking process 22
Switching off the oven 22
Operation
Steam function 23
Using the appliance cooking functions 25
Culisensor (when available) 26
Maintenance
Cleaning the appliance 27
Cleaning function (Steam clean) 27
Cleaning the Water Tank Filter 28
Removing and cleaning the guide rails 28
Replacing the oven lamp 29
Removal and installation of the oven door 30
Malfunctions
General 32
Environmental aspects
Disposal of the appliance and packaging 34
861441_en_naslovnica_drug_papir.indd EN3861441_en_naslovnica_drug_papir.indd EN3 4. 10. 2022 08:29:454. 10. 2022 08:29:45

EN 4
YOUR OVEN
Introduction
Congratulations on choosing this oven. This product is designed with simple operation and
optimum comfort in mind.
This manual shows how you can best use this oven. In addition to information about operating
the appliance, you will also find background information that may be useful when using the
appliance.
Please read the separate safety instructions carefully before
using the appliance!
Read this manual before using the appliance and keep it in a safe place for future use.
Installation instructions are supplied separately.
861441_en_naslovnica_drug_papir.indd EN4861441_en_naslovnica_drug_papir.indd EN4 4. 10. 2022 08:29:454. 10. 2022 08:29:45

EN 5
Description of the appliance
1. Control panel
2. Water reservoir cover
Push to open!
3. Oven levels
4. Oven door
5. Door handle
Guide rails/Telescopic guide rails
• The oven has four or five guide rails (Level 1 to 4/5), depending on the model. Level 1 is
mainly used in combination with bottom heat. The two upper levels are mainly used for the
grill function.
• Place the oven rack, baking tray or steam dish in the gap between the guide rail sliders.
• A number of shelf levels can have fully-retractable telescopic guide rails, depending on the
model.
▷Pull the telescopic guide rails out of the oven cavity completely and place the oven rack
/ baking tray / steam dish on them. Then slide the oven rack / baking tray / steam dish
on the telescopic guide rails, back into the oven cavity.
▷Only close the oven door when the telescopic guide rails have been returned completely
back into the oven cavity.
YOUR OVEN
861441_en_naslovnica_drug_papir.indd EN5861441_en_naslovnica_drug_papir.indd EN5 4. 10. 2022 08:29:454. 10. 2022 08:29:45

EN 6
Accessories
Your appliance is accompanied by a range of accessories, depending on the model. Only use
original accessories; they are specially suited toyour appliance. Be sure that all the accessories
that are being used are able to withstand the temperature settings of the chosen oven function.
Note: not all accessories are suitable/available for every appliance (itmay also differ by country).
When purchasing, always provide the exact identification number of your appliance. Please see
the sales brochures or check online for more details about optional accessories.
Note: never place an accessory on the bottom of the oven!
Accessories that can be supplied with your appliance (depending on the model)
Enamelled baking tray; to be used for pastries and cakes.
• Do not use the enamelled baking tray for microwave functions!
• Suitable for pyrolysis cleaning.
Oven rack; mainly used for grilling. A steam dish or pan with food
can also be placed on the oven rack.
• The oven rack is equipped with a safety peg. Lift the rack slightly
at the front to slide it out of the oven.
• Do not use the oven rack for microwave functions!
Deep enamelled baking tray; to be used for roasting meat and
baking moist pastry.
• Do not place the deep baking tray on the lowest level during
a cooking process, except when using it as a drip tray during
grilling, roasting or roasting with a spit roast (when available).
• Do not use the deep enamelled baking tray for microwave
functions!
• Suitable for pyrolysis cleaning.
Glass baking tray; for microwave and oven use.
• NOT suitable for pyrolysis cleaning.
Non-perforated steam dish; 40 mm deep (useful for collecting
moisture during steaming).
• Note: discolouration may occur at temperatures above 180 °C!
Thiswill not influence the proper function of the oven.
Perforated steam dish; 40 mm deep (useful for steam settings).
• Note: discolouration may occur at temperatures above 180 °C!
Thiswill not influence the proper function of the oven.
YOUR OVEN
861441_en_naslovnica_drug_papir.indd EN6861441_en_naslovnica_drug_papir.indd EN6 4. 10. 2022 08:29:454. 10. 2022 08:29:45

EN 7
Accessories that can be supplied with your appliance (depending on the model)
Perforated steam dish; 1/3GN.
Perforated steam dish; 1/2GN.
• Note: discolouration may occur at temperatures above 180 °C!
This will not influence the proper function of the oven.
• The steam dishes can be used simultaneously on two levels.
Place the perforated steam dish in the middle of the oven and the
non perforated steam dish one level below the perforated steam
dish.
• For steaming you can place the perforated steam dish in the non-
perforated steam dish. They can only be used together on a level
with telescopic guide rails.
Culisensor; can be used to measure the core temperature of the
dish. When the desired temperature is reached, the cooking process
will be stopped automatically.
Door
• The door switches interrupt the operation of the oven when the door is opened during use.
The oven continues operating when the door is closed.
Cooling fan
• The appliance is equipped with a cooling fan that cools the casing and control panel.
YOUR OVEN
861441_en_naslovnica_drug_papir.indd EN7861441_en_naslovnica_drug_papir.indd EN7 4. 10. 2022 08:29:464. 10. 2022 08:29:46

EN 8
YOUR OVEN
Control panel
1. Function knob (in ‘Off’ position)
2. Fast preheat
3. Upper and bottom heater
4. Grill
5. Grill with fan
6. Hot air and bottom heater
7. Hot air
8. Eco cooking
9. Cleaning
10. Defrosting
11. Combi steam
12. Steam
13. Cooking information and clock display
14. Settings knob (-/+)
15. Child lock key
16. Oven lighting on/off key
17. Temperature / Weight
18. Electronic program timer
19. Start/stop key
Symbols of cooking systems may be located on the knob or on the front panel
(depending on the appliance model).
The keys will respond better if you touch them with a larger area of your fingertip. Each
time you press a key, a short acoustic signal will be sounded.
861441_en_naslovnica_drug_papir.indd EN8861441_en_naslovnica_drug_papir.indd EN8 4. 10. 2022 08:29:474. 10. 2022 08:29:47

EN 9
FIRST USE
Before using the appliance for the first time
• Upon receiving the appliance, remove all parts, including any transport equipment, from the
oven.
Clean all accessories and utensils with warm water and regular detergent. Do not use any
abrasive cleaners.
• When the oven heats up for the first time, the characteristic smell of a new appliance will be
emitted. Ventilate the room thoroughly during the first use.
861441_en_naslovnica_drug_papir.indd EN9861441_en_naslovnica_drug_papir.indd EN9 4. 10. 2022 08:29:484. 10. 2022 08:29:48

EN 10
Switching on and settings
After connecting your appliance or after an extended power outage, 12:00 will flash on the display
and the symbol will light up.
All the settings as follows:
SETTING THE CLOCK
Rotate the SETTINGS KNOB (-/+) and first set the minutes; then, the cursor will switch to hours.
After three seconds, the settings will be saved.
Turning the knob farther to the right or to the left will change the settings more quickly.
Confirm by pressing START/ STOP. If nothing is pressed within the next three seconds, the setting
will be stored automatically.
The oven will also work if the clock is not set. However, timer functions are not available
in this case (see chapter: SETTING THE TIMER FUNCTIONS).
After a few minutes of idling, the appliance will switch to standby mode.
USE
861441_en_naslovnica_drug_papir.indd EN10861441_en_naslovnica_drug_papir.indd EN10 4. 10. 2022 08:29:484. 10. 2022 08:29:48

EN 11
SETTINGS
To change the settings, rotate the setting knob to the right and hold it for three seconds. Press the
start/sop icon to scroll through respective settings or parameters. To change a parameter, rotate
the setting knob to the right or to the left.
BRIGHTNESS LEVEL
Select between three different options of brightness levels. Mid level is pre-set. Levels can be set
by rotate knob.
Brightness level low Brightness level mid
Brightness level max
SOUND LEVEL
Mid level is pre-selected. Sound levels can be set by rotate knob.
Volume level low Pre-set mid sound level
Volume level max Volume level off
WATER HARDNESS (active only on steam ovens)
Water hardness test should be carried out before first use.
Soak the test paper strip (supplied with the appliance) in water for one (1) second.
Wait one minute and observe the number of stripes on the paper. Enter the information on the
number of stripes into the appliance.
USE
861441_en_naslovnica_drug_papir.indd EN11861441_en_naslovnica_drug_papir.indd EN11 4. 10. 2022 08:29:484. 10. 2022 08:29:48

EN 12
4 green stripes Soft Hrd 1
1 red stripe Slightly hard Hrd 2
2 red stripes Medium hard Hrd 3
3 red stripes Hard Hrd 4
4 red stripes Very hard Hrd 5
You can selected between five different options of water hardness levels. Water hardness level 5 is
pre-set,text is visible. Levels can be set by rotating knob.
DECALTINATION (active only on steam ovens)
You can activate decaltination process by selecting ˝on˝ or ˝off˝ with jogger(rotate) knob and later by
pressing the start/stop icon to confirm it. Decaltination ˝on˝ is pre-set.
STEP1 - Add the descaling agent into the water
tank.
STEP2 - Descaling procedure complete. Please
remove the liquid, rinse the water tank and add
fresh water for the rinsing process.
USE
861441_en_naslovnica_drug_papir.indd EN12861441_en_naslovnica_drug_papir.indd EN12 4. 10. 2022 08:29:514. 10. 2022 08:29:51

EN 13
STEP3/End - Rinsing process complete. Clean
the tank and wipe the oven.
Also clean the filter foam (see chapter CLEANING
THE FILTER FOAM)
END
By pressing the start/stop icon, user can go out of settings menu back to standby mode. You
can go out of settings manu also if you hold selection knob on the left for 3 sec, or it you turn the
system knob.
To change the settings, rotate the setting knob to the right and hold it for three seconds. Press the
start/sop icon to scroll through respective settings or parameters. To change a parameter, rotate
the setting knob to the right or to the left.
After a power outage or after the appliance is switched off, the additional function
settings will remain stored for no more than a few minutes. Then, all settings,
except for the acoustic signal and child lock will be reset to factory defaults.
USE
861441_en_naslovnica_drug_papir.indd EN13861441_en_naslovnica_drug_papir.indd EN13 4. 10. 2022 08:29:554. 10. 2022 08:29:55

EN 14
USE
Choosing the cooking system
Rotate the knob (left and right) to select 0 COOKING SYSTEM (see program table).
The selected icon will appear on the display.
Settings can also be changed during operation.
Description of the main functions
Consult the tables to select the preferred function. Also consult the instructions for preparation
on the dish packaging. Some main functions have sub functions.
Function/
Recommended
temp. °C
Description
160 °C
Oven
• Use one of the functions available for
grilling, baking or roastig.
• Sub functions are available (consult Oven
functions table).
Defrost
• With this function, the air circulates by
means of the fan. The air will be heated to a
temperature of
30 °C. Dishes are defrosted quickly and
efficiently.
100 °C
Steam
• Heating by means of steam.
• See chapter ‘Steam function’ for more
information.
• Steam of 100 °C is sprayed into the oven
cavity at regular intervals.
• Sub functions are available (consult steam
functions table).
861441_en_naslovnica_drug_papir.indd EN14861441_en_naslovnica_drug_papir.indd EN14 4. 10. 2022 08:29:554. 10. 2022 08:29:55

EN 15
USE
Function/
Recommended
temp. °C
Description
160 °C
Combi steam
• Heating by means of hot air in combination
with steam.
• The steam is sprayed into the oven cavity at
regular intervals.
• This mode can be used for baking types of
pastry such as puff pastry, brioche pastry,
yeast dough buns, French bread, gratins
and roasting meat. The hot steam ensures
a nice crispy brown top and an airy texture.
Meat and fish remain nice and juicy inside.
For this mode always make sure that the
water reservoir is filled with fresh water.
• Sub functions are available (consult combi-
steam functions table).
70 °C
Cleaning
• With this function and a damp cloth, you
can easily remove grease and dirt from the
oven walls.
• Use this function only when the oven has
cooled down fully. Steam is sprayed into
the oven cavity at regular intervals.
• After soaking, food residues can be
removed using a damp cloth.
180 °C
Hot Air
• Heating by means of hot air from the
back of the oven.
• This mode provides uniform heating and
is ideal for baking.
• Place the baking tray or oven rack on the
middle of the oven.
• Suggested temperature: 180 °C
• Preheating is recommended.
2
861441_en_naslovnica_drug_papir.indd EN15861441_en_naslovnica_drug_papir.indd EN15 4. 10. 2022 08:29:574. 10. 2022 08:29:57

EN 16
USE
Function/
Recommended
temp. °C
Description
200 °C
Hot Air + Bottom Heat
• Heating by means of hot air from the
back of the oven and the bottom heating
element.
• This mode can be used to bake pizza,
moist pastry, fruitcakes, leavened dough
and short crust.
• Place the baking tray or oven rack in the
middle of the oven.
• Suggested temperature: 200 °C
• Preheating is recommended.
2
200 °C
Top Heat + Bottom Heat
• Heating by means of the upper and lower
heating elements.
• This mode can be used for traditional
baking and roasting.
• Place the baking tray or oven rack in the
middle of the oven.
• Suggested temperature: 200 °C
• Preheating is recommended.
2
230 °C
Grill
• Heating by means of the grill element.
• This mode can be used for grilling a
smaller amount of open sandwiches,
beer sausages, and for toasting bread.
• Place the oven rack in the upper part
of the oven and the baking tray in the
middle of the oven.
• Monitor the cooking process at all times.
The dish may burn quickly due to the
high temperature.
• Preheating is recommended.
2
4
861441_en_naslovnica_drug_papir.indd EN16861441_en_naslovnica_drug_papir.indd EN16 4. 10. 2022 08:29:584. 10. 2022 08:29:58

EN 17
USE
Function/
Recommended
temp. °C
Description
170 °C
Large grill + Fan
• Heating by means of the top heating
elements. The heat is distributed by the
fan.
• This mode can be used for grilling meat,
fish and vegetables.
• Place the oven rack in the upper part
of the oven and the baking tray in the
middle of the oven.
• Suggested temperature: 170 °C
• Monitor the cooking process at all times.
The dish may burn quickly due to the
high temperature.
• Preheating is recommended.
2
4
180 °C
ECO Hot air
• Heating by means of hot air. ECO hot
air uses less energy but gives the same
result as the hot air setting. Cooking
takes a few minutes longer.
• This mode can be used for roasting meat
and baking pastry.
• Place the baking tray or oven rack in the
middle of the oven.
• Suggested temperature: 180 °C
• This setting makes use of the residual
heat (heating is not on the whole time)
to achieve low energy consumption (in
accordance with energy class EN 60350-
1). In this mode the actual temperature in
the oven is not displayed.
861441_en_naslovnica_drug_papir.indd EN17861441_en_naslovnica_drug_papir.indd EN17 4. 10. 2022 08:29:594. 10. 2022 08:29:59

EN 18
Choosing the settings
Each cooking system features basic or default settings which can be adjusted.
Adjust the settings by pressing the relevant key (before pressing the START/STOP key). Some
settings are not available with some programs; an acoustic signal will remind you of such cases.
CHANGING THE COOKING TEMPERATURE AND STEAM FUNCTION
Select the COOKING SYSTEM. Selected icon will appear on the display and PRESET
TEMPERATURE will flash.
Select the COOKING SYSTEM. Selected icon will appear on the display and PRESET
TEMPERATURE will flash.
Touch the TEMPERATURE and TIME KEY and later rotate jogger knob to select the parameters.
Maximum temperature or power is limited in some systems.
USE
861441_en_naslovnica_drug_papir.indd EN18861441_en_naslovnica_drug_papir.indd EN18 4. 10. 2022 08:30:004. 10. 2022 08:30:00

EN 19
When selecting the combi steam program, first select the desired temperature and time.
After confirming with START key, »int« and level bars will appear on the display to indicate the
steam intensity setting (default setting is »mid«).
Use the right knob to choose between three different steam intensity levels.
Press the START key again to confirm the selected intensity level and start the combi steam
program.
STEAM INTENSITY LEVELS
Steam intensity level low Steam intensity level mid
Steam intensity level high
TIMER FUNCTIONS
First rotate the COOKING SYSTEM SELECTOR KNOB; then, set the temperature.
Touch the TIMER key several times to select the symbol.
The icon for the selected timer function will light up and the adjustable cooking start/end time will
flash on the display. Other icons are dimly lit.
Press START to start the cooking process. ELAPSED COOKING TIME will be displayed.
USE
Timer function display
861441_en_naslovnica_drug_papir.indd EN19861441_en_naslovnica_drug_papir.indd EN19 4. 10. 2022 08:30:014. 10. 2022 08:30:01

EN 20
USE
Setting the cooking time
In this mode, you can define the duration of oven operation (cooking time).
Set the desired cooking time. First set the minutes, then the hours. Icon and
cooking time are displayed on the display unit.
Setting the delayed start
In this mode, you may specify the duration of the cooking process (cooking
time) and the time when you wish the cooking process to stop (end time). Make
sure the clock is accurately set to current time.
Example:
Current time: noon
Cooking time: 2 hours
End of cooking: 6 pm
First set the OPERATION DURATION (2 hours). Touch the CLOCK button again and
select END OF OPERATION. The display automatically shows a fl ashing sum of the
time of day and duration of operation of the oven (14:00).
Set the time for the end of baking (18:00)
Press START to start the cooking process. The timer will wait for the time to start the
cooking process and the symbol will be lit up. The oven automatically switches on
(14:00) and stops operating and the selected time (18:00).
Setting the minute minder
The minute minder can be used independently of the oven operation. The
longest possible setting is 24 hours.
During the last minute, the minute minder is displayed in seconds.
After the set time expires, the oven will automatically stop operating (end of cooking).
An acoustic signal will be heard which you may turn off by touching any key. After one
minute, the acoustic signal will be switched off automatically.
All timer functions can be cancelled by setting the time to »0«.
After a few minutes of idling, the appliance will switch to standby mode.
861441_en_naslovnica_drug_papir.indd EN20861441_en_naslovnica_drug_papir.indd EN20 4. 10. 2022 08:30:034. 10. 2022 08:30:03
Table of contents
Other Asko Oven manuals

Asko
Asko BO6SA2T1-42 User manual

Asko
Asko OCM8487S User manual

Asko
Asko OT8464A User manual

Asko
Asko OP8640 User manual

Asko
Asko OCS8456S User manual

Asko
Asko OP8693S User manual

Asko
Asko OCSM8487 Series User manual

Asko
Asko OCM8464A User manual

Asko
Asko BO6PY4I3-42 User manual

Asko
Asko BO6PY4T1-42 OP8676S User manual