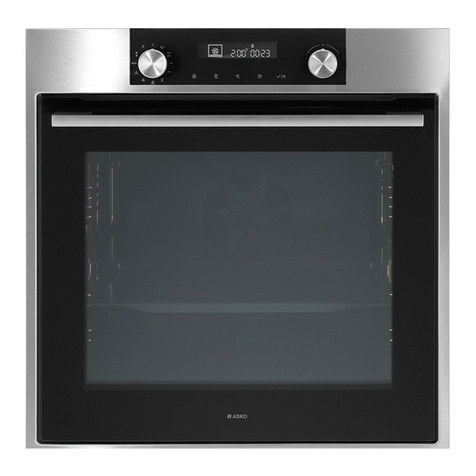
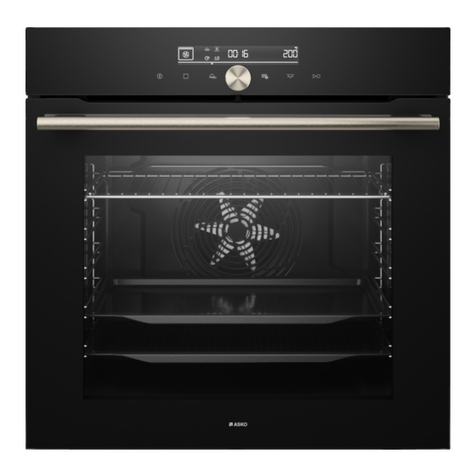
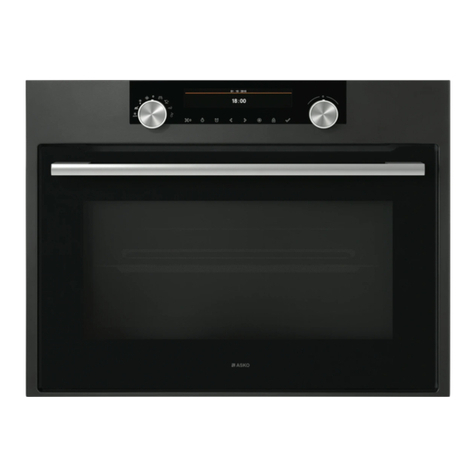
Asko OP8651 User manual

Operating instructions OP8651

sxsdsdf

Dear customer,
Thank you for choosing this quality product from ASKO.
We hope it will meet all of your expectations and full fill your
needs for many years to come.
The Scandinavian design is a combination of clean lines,
everyday functionality and high quality. This is the hallmarks
for all of our products and this is why they are so highly
appreciated all over the world.
To get the most out of your new ASKO product, we
recommend that you read the installation and operating
instructions before using the machine.
INSTRUCTIONS FOR USE
Multi-function pyrolytic oven
OP8651

3Recommendations
4Your oven, how it works
6Accessories
7Child safety
8
Setting the date and time on the
oven
8When switching on the appliance
8
Changing the time on the clock
and the date
9Cooking a dish
10Using the various cooking modes
10The “Individual” function
13
Cooking without selecting the
cooking time
13
Cooking with a cooking time
selected
13
WHEN THE COOKING IS
FINISHED:
13
Cooking without selecting the
cooking time:
13
Cooking with a cooking time
selected:
14“Individual” features guide
16The “Coach” function
17
List of dishes from the "Coach
guide"
18The "Auto" function
18How the"Auto" function operates:
19The "Delayed start" function:
20The “Auto” function guide
23Handy Hints and Tips
24
Accessing the various cooker
settings
27The Cleaning function
27When to clean by pyrolysis?
28
Carrying out the pyrolysis cleaning
of your oven
28Pyromax
29Pyrocontrol
29
The end of the pyrolysis cleaning
cycle
29Cleaning the outer surfaces
30
Cleaning the door (model WITH
PYROLYSIS function)
32Locking the oven controls
33Troubleshooting
34Installer's information
34Connecting up
34Housing
36General maintenance
36Changing the light bulb
2
Contents

Important:
Keep this user guide with your appliance. If the
appliance is ever sold or transferred to another
person, ensure that the new owner receives the user
guide. Please become familiar with these
recommendations before installing and using your
oven. They were written for your safety and the
safety of others.
•This oven was designed for use by private
individuals in their homes. It is intended solely for
cooking foodstuffs. This oven does not contain
any asbestos-based components.
•Please make sure children do not play with the
appliance.
•When you receive the appliance, unpack it or
have it unpacked immediately. Give it an overall
inspection. Make note of any concerns or
reservations on the delivery slip and make sure
to keep a copy of this form.
•Your appliance is intended for standard
household use. Do not use it for commercial or
industrial purposes or for any other purpose than
that for which it was designed.
•Do not modify or attempt to modify any of the
characteristics of this appliance. This would be
dangerous to your safety.
•WARNING: accessible parts may be hot when
in use. It is advisable to keep small children away
from the apppliance.
•Never pull your appliance by the door handle.
•Before using your oven for the first time, heat it
while empty for approximately 15 minutes. Make
sure that the room is sufficiently ventilated. You
may notice a particular odour, or a small release
of smoke. All of this is normal.
•WARNING: accessible parts may become hot
when the grill is used. It is advisable to keep
children away from the apppliance.
•When in use, the appliance becomes hot. Be
careful not to touch the heating elements located
inside the oven.
•When placing dishes inside or removing them
from the oven, do not place your hands close to
the upper heating elements and use
heat-protective kitchen gloves.
•During pyrolysis, the exposed surfaces become
hotter than during normal use. It is advisable to
keep small children away from the oven.
•Before beginning a pyrolysis cleaning cycle in
your oven, remove all parts of your grids, trays
and accessories and remove major spill residue.
During pyrolysis, exposed surfaces become
hotter than during normal use. It is advisable to
keep small children away from the oven.
•At the end of cooking, do not pick up oven or grill
items (grid, rotisserie,...) with your bare hands.
•Never place aluminium foil directly in contact with
the floor of the oven (see the chapter on oven
description), as accumulated heat may cause
deterioration of the enamel.
•Do not place heavy weights on the oven door
when open, and make sure that children cannot
climb or sit on it.
•The oven must be turned off when cleaning inside
the oven.
•This appliance is not intended to be used by
persons (including children) with reduced
physical, sensory or mental abilities, or persons
lacking experience or awareness, unless using
it with the help of a person reponsible for their
safety, or under supervision and with prior
instruction in its use.
•In addition to the accessories supplied with your
oven, only use dishes capable of withstanding
high temperatures (follow the manufacturer’s
instructions).
•After using your oven, make sure that all the
controls are in their stop position.
•Do not use your oven as a larder or to store any
items after use.
•Never use steam or high-pressure devices to
clean the oven (electrical safety requirement).
•For your safety your oven is equipped with an
AUTOMATIC STOP should you inadvertently
forget to turn off your oven. After 10 hours'
operation, the AS (Automatic Stop) function is
activated and your oven stops heating. AS is
displayed in place of the time and a series of 2
successive pips is sounded for a certain time.
3
Recommendations

Oven features
1
3
5
4
1
2
2
3
Rail positions3Programme selector1
Door-open detector plate4Light2
4
Your oven, how it works

The oven programmer
5
4
2
3
11
6
Oven features
1. Selection touch control
2. Switch off the oven or your programme
3. Return to the previous level
4. Information Display
5. Validation touch control
6. Lock the Keypad
Using for the first time
Before you use your oven for the first time, leave
it empty and, with the door closed, turn it on to
maximum temperature and let it heat up for 15
minutes. This "runs the oven in". During this time
there may be some smell from the mineral wool
that insulates the oven and there could be some
smoke.
This is perfectly normal.
Thursday
19
September
List of symbols:
Key
Programmig
Lock
Pyrolysis
odour Control
5
Your oven, how it works

Anti-tip safety shelf
Food can either be placed on the shelf in a dish or
cake tin for cooking or browning. This should be used
for grilled meat (which should be placed directly on
it).
BACK
FRONT
Multi-purpose baking tray (reserved
for pastries)
This tray has a raised edge and can be used for
baking pastries (buns, meringues, small cakes, flaky
pastries, etc).
Inserted in the runners under the shelf, it catches the
cooking juices and fat from grilled meat. It can also
be used half-filled with water as a double boiler.
Joints should not be cooked in this tray uncovered
because fat could spit all over the oven sides.
Multi-purpose baking tray (dripping
pan)
This is used to catch the cooking juices and fat from
cooking carried out in the high grill or pulsed grill
settings. It can also be used as a cooking dish for
suitably sized joints (for example: a chicken surroun-
ded by vegetables, at medium temperature). Inserted
under the shelf,this pan catches cooking juices and
fat from grilled food. It can also be used half filled
with water as a double boiler.
Dish extracting support
Thanks to this system, you can slide out your
enamelled dish all the way and easily access your
preparations during cooking. Remove from the oven
before starting pyrolytic cleaning.
Important information
•Never cover the inside of the oven with alumini-
um foil in order to cut down on cleaning. This
can lead to overheating, which can damage the
enamel interior of your oven.
•After cooking, do not pick up the oven accessor-
ies (shelf, spit, dripping pan, spit cradle etc.)
with your bare hands.
6
Accessories

Child safety
Safety activation
•Open the door.
•Press the switch on the panel until the system
is engaged and then close the door.
Open with safety engaged
•Press the lever and then open the door.
Safety deactivation
•Open the door and press the switch on the
panel.
7
Accessories

When switching on the appliance
The oven displays the following screen.
Press < or > until you reach the box to be adjusted
and confirm with OK.
Then enter the desired information and press
again OK to confirm this.
12 H
Analogue
(2)
(3)
(4)
(1)
Date display (1).
Time display (2).
Display in 12 hour or 24 hour mode (3).
Display the time (4) as:
Thursday
19
September
Analogue clock
15:30
Thursday
19
September
or
Digital clock
•Press OK to confirm.
•Press to return to the main mode.
Changing the time on the clock and
the date
Press on < or > until you reach the "Adjustment"
box, then press on OK. The "Clock" screen
appears, press OK again to access the time
information screen then proceed as you would
when switching on the appliance.
8
Setting the date and time on the oven

The oven allows you to access three different
types of programme concerning the cooking of
your recipe:
•For a recipe with which you are fully familiar
(you choose your own cooking cycle, the
temperature and cooking time): choose the
"Individual" function.
•For a recipe for which you need help from the
oven (you simply choose the type of food to
be cooked as well as its weight, and the oven
automatically chooses the settings best suited
to cooking it for you, including the temperature,
the cooking time and the cooking cycle):
choose the
"Coach" function.
•For a recipe managed automatically by the
oven: you can choose the dish you wish to
cook from a list of 12 of the most popular
dishes (the temperature, cooking time and
cooking cycle are set automatically by the
oven): choose the "Auto" function.
9
Cooking a dish

The “Individual” function
The “Individual” function enables you to set all of
the cooking settings by yourself including
temperature, cooking cycle and
1Press OK. Select “Individual” function with
< or >.
Individual
2Press again OK to select the type of
cooking from among the following list by
pressing < or > :
•Fan
•Fan assisted base
•Pizza/Combined heat Grill Double grill
•Top/bottom heat
•Top/bottom heat ECO
•Keep warm
Confirm your choice by pressing OK.
Example
Fan
The oven will then ask you to enter the other
cooking information.
3The temperature
According to the cooking cycle that you
have selected, the oven will recommend
the ideal cooking temperature. This can be
modified as follows:
-- : --
OK
-- : --
(1)
(2)
(3)
(4)
(5)
Standard
Save
Select the box (1) by pressing < or >. Confirm with
OK, and the box will startflashing. Choose the
desired temperatureby pressing < or > and
confirm with OK.
In the grill position select the "grill power" box. Set
the desired grill power (from 1 to 4) using < or >
and confirm with OK.
4The cooking time and the cooking end
time
You can enter the cooking time for your dish
by selecting the box
You can enter the cooking time for your
.
12 : 30
12 : 30
OK
OK
30 : 00
30 : 00
Standard
Save
Press < or > in order to make this box flash, then
enter the cooking time by pressing < or > and
confirm with OK. When you adjust the cooking
time, the cooking end time (box
you adjust the cooking time, the cooking
) automatically
changes accordingly.
OK
:
00
Standard
Save
10
Using the various cooking modes

You can change this cooking end time if you want
it to be different. In this case, select the box
you want it to be different. In this case,
and proceed in the same manner as for the
adjustment of the cooking time. When you have
chosen your cooking end time, press OK to
confirm.
Your oven will put itself into standby mode(the
symbol
Your oven will put itself into standby
on the display) until the cooking starts
(end time - cooking time).
NB
You can choose not to select the cooking time.
In this case, leave the cooking time and cooking
end time boxes empty and go directly to OK.
Confirm to start cooking. The oven can be turned
off by pressing twice on the STOP button when
you consider that your dish has cooked
sufficiently.
5The "Auto grill" option
You can access the "Auto grill" function by
selecting the "standard" box and pressing
OK.
-- : --
OK
ìèí .
Auto grill
Save
This function enables you to complete the cooking
cycle by a browning for the last five minutes of the
cooking time. This function is shown by the grill
on the screen flashing as it starts up, five minutes
before the end of the cooking cycle.
NB
"Auto grill" can be used with the following
cooking modes: fan, fan assited base,
pizza/combined heat, top/bottom heat.
6The program memory
If you would like to store the programme
that you have just created into the oven
memory, then access this box and press
OK:
Individual
The MEMORIES function enables you to
memorise three cooking modes that you have
tried out using the “Individual” function. Using the
memories, you will no longer need to always enter
the same information. When cooking the same
dish with the same quantity of ingredients, you
will always obtain the same results.
If you would like to store the programme that you
have just defined into the memory, access this
box and press OK.
The screen then proposes recording the
information in an empty memory or replacing one
of the other memories with the new information.
•After cooking, and before using the oven
again, it is possible to enter the
information from the last cooking session
in the memory. Even after having tasted
your dish, it still isn't too late to record
the cooking mode used!
Instructions:
•Select the "program memory”
•Press OK.
•Select "Last dish cooked" with < or >.
11
Using the various cooking modes

Last prog. used
The screen displays the last settings used for the
last dish cooked.
for the last dish cooked.
15:30
20 min
200 C
O K
•Press OK.
•Press OK to confirm the settings.
•Select "Save".
20 min
200 C
19:30
OK
Auto grill
Save
•Press OK.
•Access the "Memories" option.
•Press OK.
•Select the memory number (1, 2 or 3)
Memory 1
•Press OK.
•The screen will then show you:
either an empty memory,
20 min
200 C
O K
or a full memory
20 min
200 C
Replace
•Confirm.
Setting
stored
7Starting cooking
- Access the "Memories" and select your
settings stored. Press OK to start cooking.
15:30
20 min
200 C
O K
As soon as you have confirmed your choice , your
cooking programme either starts immediately or
switches over to standby if you have set the
cooking end time for later.
When cooking starts, the following screen is
displayed and informs you that it is in booster
12
Using the various cooking modes

mode. You can track the changes in oven
temperature as the arrowed scale progresses.
15:30
120 C 200 C
The current oven temperature is shown on the
left, and the required temperature on the right.
As soon as this temperature has been reached,
the oven changes over to cooking mode and the
following screen is then displayed:
Cooking without selecting the
cooking time
1. The temperature inside the oven
2. The time
3. The cooking cycle chosen (animated).
Cooking with a cooking time
selected
1. The temperature
2. The time
3. The cooking cycle chosen (animated).
4. The cooking time.
5. The remaining cooking time (flashing)
6. The cooking end time
(3)
(4) (5) (6)
(1) (2)
WHEN THE COOKING IS FINISHED:
Cooking without selecting the
cooking time:
Turn off the oven when the cooking is complete
by pressing STOP.
Confirm that you wish to stop the cooking by
pressing OK.
Cooking with a cooking time
selected:
The oven automatically turns off, emits a sound
for two minutes and tells you that it is ready.
15:50
It is ready !
Press OK to stop the beeping.
13
Using the various cooking modes

“Individual” features guide
DescriptionFeatureSymbol
Oven rapidly reaches the selected temper-
ature. Some dishes can start off in the cold
oven.
Fan
A heater element at the back of the oven
and the fan help cook the food
Cooking heat from the bottom with a small
amount of heat from the top.
Place the grid on the lowest shelf support.
Fan assisted base
Cooking controlled by the bottom element
combined with a slight dose of the grill and
the fan.
Three associated heat sources: lots of heat
at the bottom of the oven, a small amount
of circulating heat and a slight grill effect.
Pizza/Combined heat
Cooking is carried out by the lower and up-
per elements at the bottom of the oven, and
by the air circulation device.
*
This mode combines the effects of the tur-
bine and the grill. The grill directs infrared
energy at the food and the air movement
created by the turbine enhances this effect.
Grill
Cooking is done alternately by the top ele-
ment and by the fan.
The double grill covers the entire surface of
the oven shelf.
Double grill
The food is cooked by the upper element.
Pre-heating needed to reach the required
temperature.
Top/bottom heat
Food is cooked by a top and bottom ele-
ment. No fan.
This is an energy-saving programme that
still produces good results.
The ECO feature is used to label the oven.
Top/bottom heat ECO
Food is cooked by a top and bottom ele-
ment.
No fan.
*
Stays warm.Keep warm
Heat regulated by the upper and lower ele-
ments with use of fan.
* Cooking methods referred to in the advertisement about energy labelling in accordance with European
Standard EN50304 and the European Directive 2002/40/EC.
14
Using the various cooking modes

Cº Recom’dRecommandations
max.
235°C
recom’d
180°C
min.
35°C
Recommended to prevent meat drying out, and for cooking veget-
ables and fish and food placed on up to 3 shelves.
max.
275°C
recom’d
205°C
min.
35°C
Recommended for moist dishes (quiches, juicy fruit tarts, etc...). The
crust will be thoroughly cooked on the bottom. Recommended for
dishes that rise (cakes, brioche, kugelhopf...) and for soufflés that will
not be hampered by a crust formed on the top.
max.
275°C
recom’d
205°C
min.
35°C
Recommended for juicy quiches, pies and fruit tarts.
max.
230°C
recom’d
200°C
min
180°C
NB. All food is cooked without preheating the oven
max.
4
recom’d
4
min.
1
Recommended for grilling chops, sausages, and large prawns
and for making toast.
max.
275°C
recom’d
225°C
min.
35°C
Recommended for sealing red and white meat and cooking it through
and through.
Also for gently cooking poultry up to 2kg.
max.
275°C
recom’d
200°C
min.
35°C
Recommended for food requiring slow, careful cooking such as
game and braising joints. Ideal for sealing red meat joints and sim-
mering lidded casseroles whose contents have been partially cooked
on the hob first.
max.
100°C
recom’d
80°C
min.
35°C
Recommended for leaving breads to rise (keeping temperature below
40ºC), keeping dishes warm and thawing food.
When in use the oven gets hot.
Do not touch any heating element inside the oven. Young children should be kept well away.
15
Using the various cooking modes

The “Coach” function
The “Coach Guide” function selects cooking
information for you based on the dish to be
prepared and its weight.
1Press < or > to select "Coach" and confirm
with OK.
Coach
2The oven offers a choice of 6 food
categories: press < or > to see each
category appear.:
•White meat poultry
•Meat
•Fish
•Light meals
•Cakes
•Tarts / pudding
White meat poultry
Once you have made your choice, confirm this
by pressing OK.
3Next, you should choose the specific dish
to be prepared, and confirm your choise by
pressing OK again.
0
Chicken
duck
goose
4Once you have selected your dish, the oven
asks you to enter its weight (the box
ìèí .
) or
the material that your dish is made out of
(aluminium, porcelain, etc.) in the case of
cakes, quiches, tarts and vegetables, or the size
of the foodstuff (brioche).
Enter the weight or the material. The oven
automatically makes the necessary calculations
and will display the ideal cooking time. If you wish,
you can modify the cooking end time by selecting
the (“
the cooking end time by selecting the
”) box and displaying the new cooking
end time.
ìèí .
Standard
min
As soon as you press OK to confirm, the oven
recommends the oven shelf level on which you
should put your dish.
5Put your dish in the oven at the shelf level
recommended (from 1 at the bottom to 5 at
the top).
16
Using the various cooking modes

Level 1
6Confirm, by pressing OK. The oven starts
up.
7
The oven emits a sound and turns off when
the cooking time is up and your screen then
shows you that the dish is ready.
15:49
It is ready !
List of dishes from the "Coach
guide"
All cooking is carried out WITHOUT preheating
the oven.
Cooking red meat:
•Lamb - saddle
•Lamb - leg
•Roast beef (medium cooked)
•Roast beef (rare).
Cooking is carried out using the GRILL element.
You should place the meat on the shelf part of the
shelf and drip pan assembly (without using the
dish). You should turn the meat when it is half
cooked.
Cooking cakes and tarts:
Choice of cake tin:
Aluminium: coloured non-stick tins, flexible
silicone tins which are well adapted to moist
dough (quiches or fruit tarts).
Cooking terrine:
Place the terrine dish in a double boiler (a dish
which is larger than the terrine dish and filled up
to half its height with boiling water).
RecipesList of dishes
from the
"Coach
Guide"
•Chicken
•Duck
•Goose
•Pheasant
•Pork roast
•Turkey
•Veal roast
White meat
poultry
•Med. beef roast
•Lamb roast
•Lasagne
•Steak kidney pie
•Yorkshire pudding
Meat
•Fish pate
•Fish pie
•Kedgeree
•Plaice
•Trout
•Whole salmon
Fish
•Casserole
•Gratin dauphinois
•Jacket potatoes
•Moussaka
•Quiche Lorraine
•Stuffed pepper
Light Meals
•Choux pastry
•Meringues
•Rich fruit cake
•Semi-rich cake
•Short bread
•Small cakes
•Victoria sandwich
Cakes
17
Using the various cooking modes

RecipesList of dishes
from the
"Coach
Guide"
•Bread butter
•Cheese cake
•Cheese souffle
•Fruit crumble
•Fruit pie
•Fruit plate tart
•Rice pudding
Tarts/pudding
The "Auto" function
The “Auto” function completely facilitates cooking
for you. It automatically calculates all the cooking
details according to the dish selected
(temperature, cooking time, cooking cycle)
through the use of electronic sensors located in
the oven which constantly measure the level of
humidity and variations in temperature.
How the"Auto" function operates:
This cooking mode cooks in two phases:
an "information gathering" phase when the oven
starts heating in order to determine the ideal
cooking time. This phase lasts between 5 and 40
minutes according to the dish.
1. Press on < or > to select “Auto” and confirm
with OK.
Auto
2. The oven offers a choice of 12 dishes: press
< or > to see each dish appear.
•Pizza
•Savoury tarts
•Roast beef
•Pork roast
•Chicken
•Lamb
•Fish
•Vegetables
•Sweet tarts
•Cakes
•Cookies
•Souffle
Example: Pizza
POULET
PIZZA
Ïèööà
Pizza
•Once the dish has been selected, confirm
this by pressing OK.
•Put your dish in the oven, on the oven shelf
level requested.
15:30 OK
Level 1
•Confirm by pressing OK to start cooking.
NB
No preheating is necessary when using the
“Auto” function. The cooking cycle must
IMPERATIVELY start with a cold oven. You
should wait until the oven is completely cold
before cooking something else.
IMPORTANT
Do not open the door during this phase as this will
spoil the calculation and recording of cooking
information.
18
Using the various cooking modes
Table of contents
Other Asko Oven manuals

Asko
Asko OM8437S User manual

Asko
Asko OCS8493S User manual

Asko
Asko OP8621S User manual

Asko
Asko OCM8487A1 User manual

Asko
Asko OM8487S / BO4SM3F3-77 User manual

Asko
Asko OCS8637B User manual

Asko
Asko BO6PY4I3-42 User manual

Asko
Asko OT8464A User manual

Asko
Asko OP8487S User manual

Asko
Asko OT8637A User manual
Popular Oven manuals by other brands

Viking
Viking VEDO127 Specifications

GE
GE JCK1000 owner's manual

Samsung
Samsung NV68A1110 Series User & installation manual

iGenix
iGenix IG7026 Instructions for use

Middleby Marshall
Middleby Marshall RED LOBSTER PS200-R68 Series OPERATING AND INSTALLATION Manual

IKEA
IKEA IBS550PVW00 installation instructions