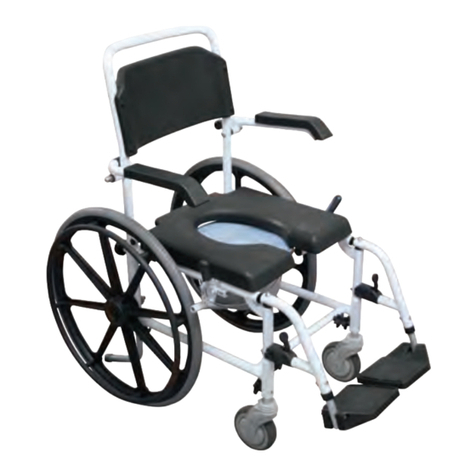
Aspire Relax User manual

USER MANUAL
RELAX
TILT-IN-SPACE WHEELCHAIR
TABLE OF CONTENTS
1. Key Specifications
2. List of Components
3. Use & Transport
4. Troubleshooting
5. Repairs & Service
6. Replacement Parts
3
4
5
11
11
11

2
Thank you for choosing this Aspire RELAX
Tilt-In-Space wheelchair.
This product has been designed to oer the
maximum in comfort, safety and adjustability.
The RELAX Tilt-in-Space wheelchair is
suitable for indoor and outdoor use and is
available in a range of sizes.
It is important that you read this user manual
carefully before using your new wheelchair.

3
Item Code Seat Width Item Description
MWS442025 440-
460mm
Aspire Relax Tilt in Space Wheelchair 440-460mm
MWS442050 490-
510mm
Aspire Relax Tilt in Space Wheelchair 490-510mm
Max. User Weight 136kg (300Ibs)
Weight 36.5kg (chair weight) 22.5kg (transport weight)
Seat Height
(floor to top of seat board) 440mm
Seat Width 440-460mm (MWS442025)
490-510mm (MWS442050)
Seat Depth - adjustable 405mm (16”) – 480mm (19”)
Backrest Height - adjustable
(top of cushion (75mm) to top of
back shell)
490mm – 700mm
Overall Width 700mm
Armrest
Length & Height
Length of arm pad - 42cm with 8cm adjustment range
Height of arm pad from seat - 20cm to 25cm (5 positions)
Approvals TGA# ARTG229422
AS/NZS tested and approved
Footplate Surface to Top of Cushion
(75mm) 390mm - 500mm
Foot Plate Angle 0°- 15°
Legrest Angle (knee) 90°- 180°
Total Height 1050mm - 1590mm
Seat Tilt Angle 0°- 17°
Backrest Recline Angle 0°- 45°
Turning Circle 1570mm
KEY SPECIFICATIONS
ACCESSORIES
• WCA858465 – Tray Table
• MSP421161 – 24” Pneumatic Rear Wheels (Pair)

4
LIST OF COMPONENTS
1. Heavy duty padded elevating legrests (A)
2. Adjustable padded head support
3. Backrest Recline and Tilt (B)
4. Quick release 24” solid rear wheels
5. Attendant controlled Drum Brakes
6. Hand Brakes
7. Front Castors
8. Adjustable anti-tip bars (C)
9. Width and depth adjustable seating
10. Adjustable height and removable padded armrests (D)
11. Soft, contoured seating - removable for cleaning or customisation
1
2
3
4
10
11
8
9
A B C D
5
7
6

5
USE & TRANSPORT
Intended Use
This product has been designed for maximum user comfort and safety. The correct use of this
product is paramount in ensuring user safety at all times. Customisation, modification or servicing
by non-approved or suitably credentialed parties may void warranty and increase the risk of
accident or injury.
This wheelchair is designed to safely transport one user. Use outside of intended design purpose
may cause injury and void warranty.
Safety Considerations
The Safe Working Load (SWL) for this product is 136kg. This should never be exceeded. The
SWL includes any additional accessories, bags, shopping etc.
Before changing or adjusting of this wheelchair, it is important to read the corresponding section of
the user manual.
Safety Notes
Hot Surface Warning: Wheelchair surfaces should not be left in the sun for a long period of time
or near a heat source. Surface temperatures can rise in excess of 40°c and present an injury risk.
CAUTION! Wheelchair brakes are not designed to stop a moving chair but rather to ensure that
wheels remain stationary and avoid unintended rolling. When stopped or on sloping ground,
wheelchair brakes should always be activated.
Before Each Use
• Check quick-release rear wheel axles to ensure they are correctly located and remove any lint
or hair build up at the axle
• Tyres should have sucient tread and brakes should be adjusted so that a firm connection with
the tyre is achieved when in the locked position
Folding & Transportation
To make transportation easier the backrest can be
folded down onto the seat.
• Release the backrest connector pin with the gas
strut.
• Fold the back forwards.
• Remove elevating legrests
• Remove rear wheels using quick-release buttons on
axle hubs.
CAUTION! The backrest gas strut should always be
reconnected securely before re-use.

6
Hand Brakes
The wheelchair is equipped with two hand brakes.
The hand brakes are applied directly against the tyres.
To engage, push both hand brake levers forward.
To release the hand brakes, pull the levers backwards.
Braking power will decrease with:
• Worn tyre tread
• Wet wheels
The hand brakes have not been designed to be used as
brakes. When moving or self-propelling, do not operate
the hand brakes. Always use the handrims for braking.
Make sure that the gap between the hand brakes and
the tyres is correct. To adjust, loosen screws holding the
hand brakes and set the appropriate gap and tighten
screws again.
Rear Wheel Removal & Re-Fitting
The rear wheels are fitted with a quick-release axle.
The wheels can be removed and put back on without
using tools. To remove a wheel, simply depress the
centre (black) quick- release button and pull the rear
wheel o.
Caution! Hold the quick-release button on the axle
depressed when putting the wheel back on. Release
the button to lock the wheel in place. The quick-release
button must spring back to its original position.
Anti-Tip Wheels
The anti-tip wheels (1) provide additional safety for
inexperienced users when they are still learning how to
operate the wheelchair. Anti-tip wheels (1) prevent a
wheelchair from tipping over backwards. Anti-tip wheels
can be length adjusted for additional reach and stability
but should always be adjusted in when being attendant
propelled, particularly outdoors where obstacles and
curbs may need to be negotiated. 75mm adjustable
range provides ground clearance of 10-30mm
1
The Backrest
The upholstered backrest (1) will allow you to sit for long
periods of time, with side support. To remove upholstery
pull it upwards and forwards. The cushion is held by
Velcro and can also be removed. The cover can be
wiped with a cloth soaked with detergent or disinfectant
complying with the CE mark.
(1)

7
Adjustable Backrest Height
The backrest height can be adjusted to various heights
by releasing the 4 clamps and sliding the black rigid
backing up or down as required. Once adjusted tighten
the clamps.
Seating
The comfortable seat cushion allows you to be seated
for a long period of time. The cushion is held in place
by Velcro and can also be removed. The cover can be
washed (see the instructions on the cushion).
Seat Depth Adjustment
After loosening the screws (1) underneath the seat
pan, (with an allen key) the seat depth can be set to the
desired position. Then tighten the screws again.
CAUTION! The maximum seat depth (see marking and
end stop) must not be exceeded.
Adjustable Seat Angle (0°-170°)
By pulling the right hand lever while pushing down on
the silver cross bar the seat can be tilted into the desired
position. When you let go, the seat is automatically fixed
in the new position.
By pulling the left hand lever, only the backrest can be
reclined to the desired position. When you let go, the
back will automatically be fixed in the new position.
Please Note:
Having the back reclined without first tilting the seat
may cause the occupant to slide out of the wheelchair.
CAUTION!
The angle-adjustable seat may only be used with anti-
tip tubes. The gap between the anti-tip tubes and the
ground must be a maximum of 2.5 cm. To ensure the
correct function of the cables, these must never be taut.
There is a danger of trapping your fingers when
adjusting the seat. Never adjust the seat angle if the
wheelchair is on a slope.
Seat Width Adjustment
To adjust the seat width unbolt the mounting brackets
that act as the arm rest post receivers. Relocate the
black plastic shim (spacer) to the outside of the frame
and retighten in place.
This will add 20mm to the seat width between the
armrests.

8
Adjustable Footplates
Footplate length can be adjusted by releasing the
hand wheel (1) and sliding the post up or down then
re-tightened. The footplates can be flipped up to make
it easier to transfer to or from the chair. They can be
adjusted to alter the angle to the ground. Loosen screw
(2) and set the desired angle. Make sure that after any
adjustment work, all screws are tightened correctly.
Ensure that you maintain the minimum gap to the floor
(2.5 cm).
CAUTION!
While making the adjustment, there must be no load on
the footboard!
Calf pads can be height and depth adjusted. To adjust
height, release the screws (3) and slide the calf pad into
the relevant position. By removing the calf pad screw (4)
they can be depth adjusted.
After making the adjustment, all screws must be
correctly tightened.
Height-adjustable Armrest
The armrests can be height adjusted. Remove the bolts
through the upright post and relocate up or down the in-
cremental holes in the metal post. Tighten firmly before
reinserting into the receiver brackets.
CAUTION!
Do not use the side guards or the armrests to lift or carry
the wheelchair.
Headrest
The headrest can be raised, moved sidewards and both
forwards and backwards. Height adjustment: Pull the
release knob (1) and set the desired height. Make sure
that the release knob is always correctly engaged.
Horizontal adjustment: Open the release lever (2), set the
desired position and pull the release lever firmly again.
Side adjustment: After loosening the screws (3) the
headrest can be pushed sideways. Tighten screws again.
1
4
3
2

9
Wheelchair Driving Instructions
The following are some general techniques for
handling a wheelchair in use.
These instructions are general in nature and
should NEVER be attempted without the
evaluation of their applicability for the user’s
circumstances by a qualified healthcare
professional. Training should be provided by
a qualified healthcare professional before this
product is used.
Climbing over a pavement
Climbing a pavement forward:
Note: this technique is recommended only for
expert wheelchair users.
• Bring the wheelchair close to the
pavement curb
• Balance the wheelchair on the rear wheels
in such a way to raise the castors and go
over the curb. Push the rear wheels while
leaning your body forward.
Climbing forward with an attendant’s help:
• The attendant must tilt the wheelchair
backwards, to slightly raise the castors
over the pavement curb
• Hold the push handles tightly while the rear
wheels climb over the curb
Climbing a pavement backwards:
Note: this technique should be used only if the
pavement is low. It is necessary to take into
consideration also the footrests height.
• Turn the wheelchair with the rear part
facing the pavement curb
• Push the rear wheels while leaning your
body forward
Climbing backwards with an attendant’s help:
• The attendant must pull the wheelchair
back until it touches the pavement curb
• Then tilt the wheelchair backwards, to
raise the castors o the ground
• Finally pull the wheelchair up and pull
it back. Make sure that all four wheels
have climbed over the obstacle, before
“lowering” the wheelchair
Getting off a pavement
Getting off a pavement facing forward:
Note: this technique is recommended only for
expert wheelchair users.
• Bring the wheelchair close to the pavement
curb
• Balance the wheelchair on the rear wheels
in such a way to slightly raise the castors
• Get slowly o the pavement and then
“lower” the castors on the ground
Getting off forward with an attendant’s help:
• The attendant must tilt the wheelchair
backwards, using also the tilt-lever, to raise
the castors o the ground
• Get o the pavement very slowly and then
“lower” the castors on the ground
Getting off a pavement facing backwards:
Note: this technique is NOT recommended
when the curb is higher than 10cm
• Pull back the wheelchair to the pavement
curb
• Pull back slowly and at the same time lean
your body forward
• Pay the utmost attention while carrying out
this operation to avoid the risk of tipping
over
Getting off backwards with an attendant’s help:
• Reverse the wheelchair to the pavement
curb
• Get slowly o the pavement and reverse
slowly until the castors have cleared the
obstacle
• “Lower” all the wheels on the ground
Slopes
Make sure to follow the instructions below,
when going up or down a slope, to avoid the
risk of tipping over.
Do not change direction while driving
up/down a slope. Push the wheelchair
in a straight line when going both uphill
or downhill. If you are in doubt when
approaching a gradient, ask someone to help
you rather than running unnecessary risks.

10
Going uphill: lean your body forward to
balance the centre of gravity.
Going downhill: lean your body backwards to
balance the centre of gravity.
Use the handrims to adjust the speed, do not
use the brakes.
Stairs
Users and attendants should NEVER attempt
to ascend or descend stairs using this wheel-
chair.
Transfers
• The transfer techniques should be practised
by the wheelchair user under the guidance
of qualified professionals. Following
are some important recommendations
for positioning of the wheelchair when
transferring in and out of bed.
Transferring from the wheelchair to the bed:
With or without attendant, user facing
forward
Before the transfer:
• Bring the wheelchair close to the bed and
push the wheelchair 5-10cm back to make
sure both castors are facing forward.
• Lock the brakes, lift the armrest/side guard
up and swing away or remove the legrest
which are on the side close to the bed.
Transferring from the bed to the wheelchair:
With or without attendant, end user facing
forward.
Before the transfer:
• Bring the wheelchair close to the bed and
push the wheelchair 5-10cm back to make
sure both castors are facing forward
• Lock the brakes and lift the legrests up
Do not step on the footplates, as the
wheelchair might tip over
The attendants are recommended to carry
out this operation by using their leg strength
and avoiding bending or putting pressure on
their backs.

11
REPAIRS & SERVICE
REPLACEMENT PARTS
TROUBLESHOOTING
For all repairs and service to the wheelchair please contact Aidacare
on 1300 133 120 to find your closest store or dealer.
A spare parts list is available on request.
Wheelchair pulls to one side:
• Check tyre condition
• Check to make sure that the wheel turns easily (bearings, axle)
• Check angles of castors
• Check to make sure both castors are making proper contact with the ground.
Castors begin to wobble:
• Check angles of castors
• Check to make sure all bolts are secure; tighten if necessary
• Check to make sure both castors are making proper contact with the ground.
Wheelchair squeaks and rattles:
• Check to make sure all bolts are secure; tighten if necessary
• Apply small amount of oil to moving parts
Tilt or recline mechanism is not working:
• Check gas strut mounts are in place
• Check cables/levels are adjusted correctly
• Check nothing is under the chair seat frame obstructing movement
• Check gas strut adjustment is correct for activation via lever and cable
• NOTE: Gas struts require a patient to be in the chair to function normally due to their pressure
ratings.
General:
• Check all adjustment bolts are tight
• Check footplates are locked into receiver mounts
• Check anti-tip wheels are adjusted to suit terrain

AIDACARE PTY LTD
4 Noonan Road, Ingleburn NSW 2565
1300 133 120
www.aidacare.com.au
MADE IN CHINA
ASUM13.07
120116
Table of contents
Other Aspire Wheelchair manuals

Aspire
Aspire EVOKE 2 User manual

Aspire
Aspire EVOKE 2 JNR User manual

Aspire
Aspire ASSIST User manual

Aspire
Aspire Community Commode User manual

Aspire
Aspire EVOKE User manual

Aspire
Aspire BTC066000 User manual

Aspire
Aspire LITE User manual

Aspire
Aspire MWS449850 User manual

Aspire
Aspire Metro User manual

Aspire
Aspire Socialite MWS449800 User manual
Popular Wheelchair manuals by other brands

Invacare
Invacare Arrow 4M900 parts catalog

Kuschall
Kuschall KSL user manual

Comfort Company
Comfort Company FLEXION FOOTBOX SINGLE manual

Otto Bock
Otto Bock A200 Service instructions

Stealth Products
Stealth Products Stealth Positioning Pelvic Belts manual

Drive DeVilbiss Healthcare
Drive DeVilbiss Healthcare Silver Sport Wheelchair Instructions for use