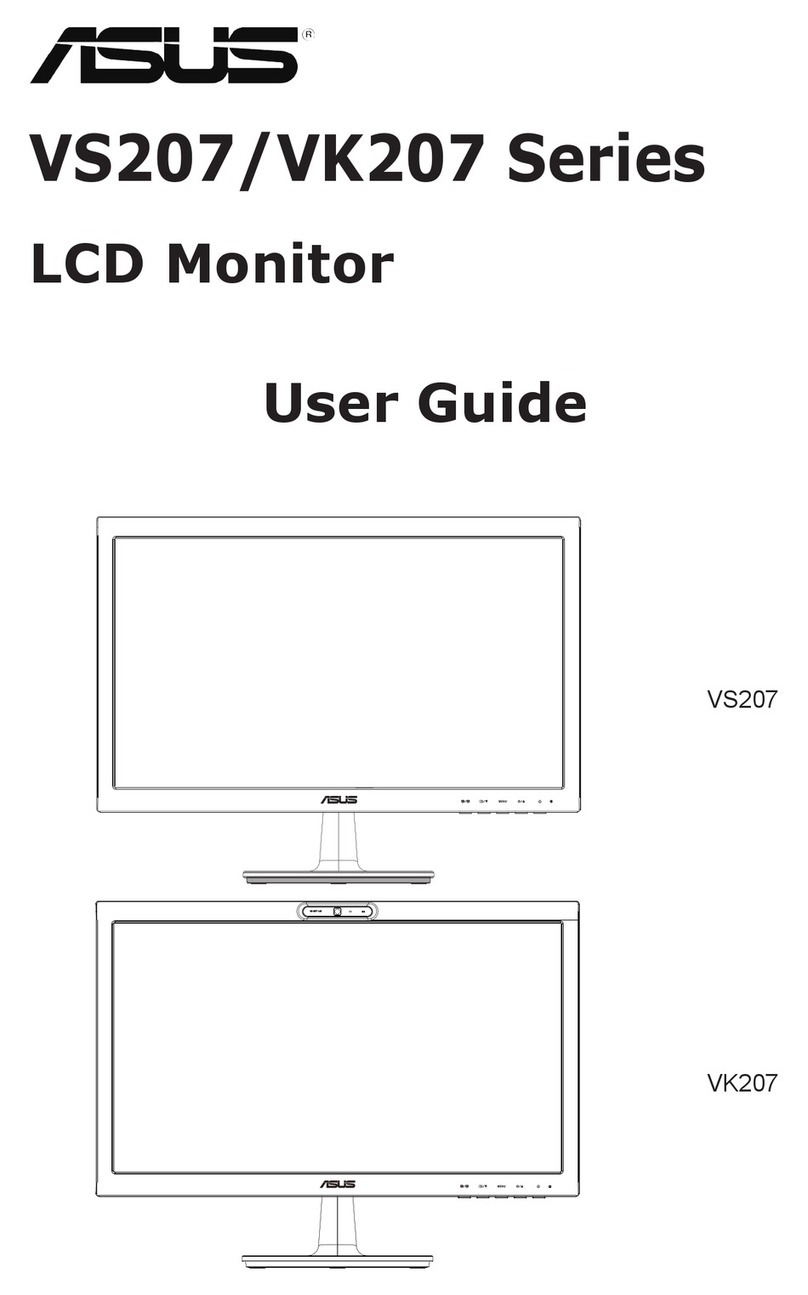
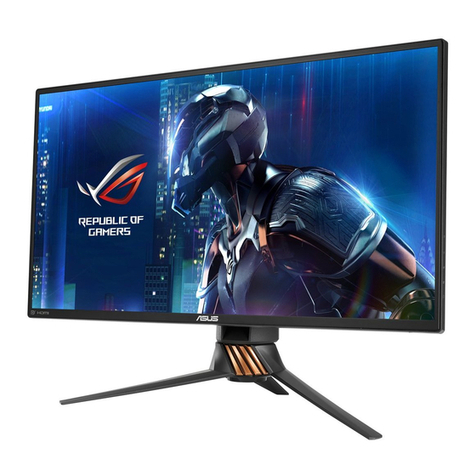
Asus VK221 Series User manual

Safety information
• Before setting up the monitor, carefully read all the documentation that came
with the package.
• To prevent re or shock hazard, never expose the monitor to rain or moisture.
• Never try to open the monitor cabinet. The dangerous high voltages inside the
monitor may result in serious physical injury.
• If the power supply is broken, do not try to x it by yourself. Contact a qualied
service technician or your retailer.
• Before using the product, make sure all cables are correctly connected and the
power cables are not damaged. If you detect any damage, contact your dealer
immediately.
• The monitor should be operated only from the type of power source indicated
on the label. If you are not sure of the type of power supply to your home,
consult your dealer or local power company.
Assembling the monitor base
To assemble the monitor base:
1. Connect the base with the monitor. A click indicates that the base has been
connected successfully.
2. Adjust the monitor to the angle that is most comfortable for you.
We recommend that you cover the table surface with soft cloth to prevent
damage to the monitor.
2
1
ASUS LCD Monitor VK221/VK222 Series
English
1

1Monitor
introduction
1.1 Front of the LCD monitor
1. button:
• Automatically adjust the image to its optimized position, clock, and phase
by long pressing this button for 2-4 seconds (for VGA mode only).
• Use this hotkey to switch from five video preset modes (Game
Mode, Night View Mode, Scenery Mode, Standard Mode, Theater Mode)
with SPLENDID™ Video Enhancement Technology.
• Exit the OSD menu or go back to the previous menu as the OSD
menu is active.
2. Button:
• Press this button to decrease the value of the function selected
or move to the next fuction.
• This is also a hotkey for Volume adjustment.
3. MENU Button:
• Press this button to enter/select the icon (function) highlighted
while the OSD menu is activated.
4. Button:
• Press this button to increase the value of the function selected
or move to the previous fuction.
• This is also a hotkey for Brightness adjustment.
457
1 2 3
1.1.1 VK222H/VK222U
A
6. Power button
• Press this button to turn the monitor on/off.
(for some models)
5. Input Select Button
Use this hotkey to switch from VGA,DVI,HDMI input signal.
7. Power indicator
• Thecolordenitionofthepowerindicatorisasthebelowtable.
6
ASUS LCD Monitor VK221/VK222 Series
English
2
:
:
:

1.1.2
457
1 2 3
1. button:
• Use this hotkey to switch from five video preset modes (Game
Mode, Night View Mode, Scenery Mode, Standard Mode, Theater Mode)
with SPLENDID™ Video Enhancement Technology.
• Exit the OSD menu or go back to the previous menu as the OSD
menu is active.
2. Button:
• Press this button to decrease the value of the function selected
or move to the next fuction.
• This is also a hotkey for Volume adjustment.
3. MENU Button:
• Press this button to enter/select the icon (function) highlighted
while the OSD menu is activated.
4. Button:
• Press this button to increase the value of the function selected
or move to the previous fuction.
• This is also a hotkey for Brightness adjustment.
6. Power button
• Press this button to turn the monitor on/off.
5.
7. Power indicator
• Thecolordenitionofthepowerindicatorisasthebelowtable.
• Automatically adjust the image to its optimized position, clock, and phase
by long pressing this button (for VGA mode only).
button:
6
VK221S/VK222S
ASUS LCD Monitor VK221/VK222 Series
English
3
:
:

Status Description
Blue ON
Amber Standby mode
OFF OFF
4. Button:
• Press this button to increase the value of the function selected
or move to the previous fuction.
•
This is also a hotkey for Brightness adjustment.
6. Power button
• Press this button to turn the monitor on/off.
5.
7. Power indicator
• Thecolordenitionofthepowerindicatorisasthebelowtable.
•
Automatically adjust the image to its optimized position, clock, and phase
by long pressing this button (for VGA mode only).
button:
7
1.1.3 VK221D
457
1 2 3
• Use this hotkey to switch from five video preset modes (Game
Mode, Night View Mode, Scenery Mode, Standard Mode, Theater Mode)
with SPLENDID™ Video Enhancement Technology.
• Exit the OSD menu or go back to the previous menu as the OSD
menu is active.
2. Button:
• Press this button to decrease the value of the function selected
or move to the next fuction.
This is also a hotkey for Contrast Ratio adjustment.
3. MENU Button:
• Press this button to enter/select the icon (function) highlighted
while the OSD menu is activated.
1. button:
•
6
ASUS LCD Monitor VK221/VK222 Series
English
4
:
:

2. Audio-in port. This port connects PC audio source by the bundled audio
cable.(Only for some models)
1.2.2 VK222U/VK222S/VK221S/VK221D
1. AC-IN port. This port connects the power connector from the bundled power
cord.
3. DVI port. This 24-pin port is for PC (Personal Computer) DVI-D digital signal
connection. (Only for some models)
4. VGA port. This 15-pin port is for PC VGA connection.
This port connects the Web-cam .
5. USB-IN port.
5
2
14
3
5
2
14
3
1.2 Rear of the LCD monitor
Rear connectors
Rear
connectors
(from
left
to
right)
1. AC-IN port. This port connects the power connector from the bundled power
cord.
3. DVI port. This 24-pin port is for PC (Personal Computer) DVI-D digital signal
connection.
4. VGA port. This 15-pin port is for PC VGA connection.
Screw holes for
VESA Wall Mount
1.2.1 VK222H
2.HDMI-IN port.This port connects the HDMI source .
5.
7. USB-IN port .This port connects the Web-cam .
6. Earphone-out Port. This port connects earphone or stand alone speakers.
Audio-in port. This port connects PC audio source by the bundled audio
cable.
6
7
ASUS LCD Monitor VK221/VK222 Series
English
5

2Install Life-Frame 2 software
with the webcam,allowing users to create their own photos or video clips.
• LifeFrame 2 only supports Microsoft Windows Vista/XP Service Pack 2
operating systems.
The LifeFrame 2 software is bundled in the support CD.
•
Installation instructions
1. Close all other applications.
2. Insert the support CD into the optical drive and run the LifeFrame 2 program.
3. Follow the on-screen instructions to complete the installation.
®
®
work
ASUS VK221/VK222 series provides the easy-to-use LifeFrame 2 software that can
ASUS LCD Monitor VK221/VK222 Series
English
6

2
1
Sicherheitshinweise
‧ Lesen Sie sorgfältig die mitgelieferte Dokumentation durch, bevor
Sie beginnen, den Monitor einzurichten.
‧ Setzen Sie den Monitor weder Regen noch Feuchtigkeit aus, um
einen Brand oder elektrischen Schlag zu vermeiden.
‧ Versuchen Sie niemals das Monitorgehäuse zu öffnen. Die
gefährliche Hochspannung innerhalb des Monitors kann ernsthafte
Verletzungen verursachen.
‧ Falls das Netzteil defekt ist, versuchen Sie es nicht in eigener
Regie zu reparieren. Wenden Sie sich an einen qualifizierten
Kundendiensttechniker oder Ihren Händler.
‧ Stellen Sie vor dem Verwenden des Produkts sicher, dass alle
Kabel richtig verbunden und die Stromkabel nicht beschädigt sind.
Wenden Sie sich sofort an Ihren Händler, wenn Sie Schäden
festgestellt haben.
‧Die Stromversorgung des Monitors muss mit der Angabe auf dem
Typenschild übereinstimmen. Sind Sie sich hinsichtlich der
Spezifikationen Ihres Stromnetzes unsicher, dann nehmen Sie
bitte mit Ihrem Händler oder Stromanbieter Kontakt auf.
Anbringen des Monitorfußes
So bringen Sie den Monitorfuß an:
1. Bringen Sie den Fuß an dem Monitor an. Sie hören einen Klickton,
wenn der Fuß ricntig einrastet.
2. Verstellen Sie die Lage des Bildschirms, um einen angenehmen
Blickwinkel zu erhalten.
‧ Wir empfehlen Ihnen ein weiches Tuch auf den Tisch zu legen,
um Schäden an dem Monitor zu vermeiden.
ASUS LCD Monitor VK221/VK222-Reihe
Deutsch
1

1
1.1
457
1 2 3
1.1.1 VK222H/VK222U
6
A
Einführung zum Monitor
Frontseite des LCD-Monitors
1. Taste:
‧
Monitor die Bildposition, den Takt und die Phase der Anzeige
automatisch optimieren (nur beim VGA-Modus).
‧
Videomodi (Spielmodus, Nachtmodus,
‧ Mit dieser Taste schließen Sie das OSD-Menü oder kehren zum
vorherigen Menü zurück.
2. Taste:
‧
‧ Diese Taste ist auch ein Hotkey zur Lautstärkeregelung.
3. MENU-Taste:
‧ Drücken Sie diese Taste, um zu der markierten (Funktion) zu
gelangen, wenn das OSD-Menü aktiviert ist.
Taste:
‧
‧ Diese Taste ist auch ein Hotkey zur Helligkeitseinstellung.
Verwenden Sie diesen Hotkey, um zwischen den fünf voreingestellten,
Durch Drücken auf diese Taste für 2 bis 4 Sekunden lassen Sie den
Landschaftsmodus,
Standardmodus und Theatermodus) umzuschalten.
auf der SPLENDID™ Video Enhancement Technology basierenden
Mit dieser Taste verringern Sie den Wert der ausgewählten Funktion
oder springen zur nächsten Funktion.
Mit dieser Taste erhöhen Sie den Wert der ausgewählten Funktion
oder springen zur vorherigen Funktion.
Eingangsauswahltaste
Verwenden Sie diesen Hotkey, um zwischen den Eingängen VGA,
DVI und HDMI umzuschalten (für bestimmte Modelle).
‧
Stromschalter
‧ auszuschalten.
Betriebsanzeige
‧
Drücken Sie auf diese Taste, um den Monitor ein-oder
Die folgende Tabelle zeigt die Bedeutung der Farben der
Betriebsanzeige.
4.
5.
6.
7.
ASUS LCD Monitor VK221/VK222-Reihe
Deutsch
2
:
:
:

1.1.2
457
1 2 36
VK221S/VK222S
A
1.
Taste:
Monitor die Bildposition, den Takt und die Phase der Anzeige
automatisch optimieren (nur beim VGA-Modus).
‧
Videomodi (Spielmodus, Nachtmodus,
‧ Mit dieser Taste schließen Sie das OSD-Menü oder kehren zum
vorherigen Menü zurück.
2. Taste:
‧
‧ Diese Taste ist auch ein Hotkey zur Lautstärkeregelung.
3. MENU-Taste:
‧ Drücken Sie diese Taste, um zu der markierten (Funktion) zu
gelangen, wenn das OSD-Menü aktiviert ist.
Taste:
‧
‧ Diese Taste ist auch ein Hotkey zur Helligkeitseinstellung.
Verwenden Sie diesen Hotkey, um zwischen den fünf voreingestellten,
Durch Drücken auf diese Taste für 2 bis 4 Sekunden lassen Sie den
Landschaftsmodus,
Standardmodus und Theatermodus) umzuschalten.
auf der SPLENDID™ Video Enhancement Technology basierenden
Mit dieser Taste verringern Sie den Wert der ausgewählten Funktion
oder springen zur nächsten Funktion.
Mit dieser Taste erhöhen Sie den Wert der ausgewählten Funktion
oder springen zur vorherigen Funktion.
Stromschalter
‧ auszuschalten.
Betriebsanzeige
‧
Drücken Sie auf diese Taste, um den Monitor ein-oder
Die folgende Tabelle zeigt die Bedeutung der Farben der
Betriebsanzeige.
4.
5.
6.
7.
‧
Taste:
ASUS LCD Monitor VK221/VK222-Reihe
Deutsch
3
:
:

1.1.3 VK221D
457
1 2 36
A
1.
Taste:
Monitor die Bildposition, den Takt und die Phase der Anzeige
automatisch optimieren (nur beim VGA-Modus).
‧
Videomodi (Spielmodus, Nachtmodus,
‧ Mit dieser Taste schließen Sie das OSD-Menü oder kehren zum
vorherigen Menü zurück.
2. Taste:
‧
‧
3. MENU-Taste:
‧ Drücken Sie diese Taste, um zu der markierten (Funktion) zu
gelangen, wenn das OSD-Menü aktiviert ist.
Taste:
‧
‧ Diese Taste ist auch ein Hotkey zur Helligkeitseinstellung.
Verwenden Sie diesen Hotkey, um zwischen den fünf voreingestellten,
Durch Drücken auf diese Taste für 2 bis 4 Sekunden lassen Sie den
Landschaftsmodus,
Standardmodus und Theatermodus) umzuschalten.
auf der SPLENDID™ Video Enhancement Technology basierenden
Mit dieser Taste verringern Sie den Wert der ausgewählten Funktion
oder springen zur nächsten Funktion.
Mit dieser Taste erhöhen Sie den Wert der ausgewählten Funktion
oder springen zur vorherigen Funktion.
Stromschalter
‧ auszuschalten.
Betriebsanzeige
‧
Drücken Sie auf diese Taste, um den Monitor ein-oder
Die folgende Tabelle zeigt die Bedeutung der Farben der
Betriebsanzeige.
4.
5.
6.
7.
‧
Taste:
Diese Taste ist auch ein Hotkey zur Einstellung des
Kontrastverhältnisses.
Status Beschreibung
Blau ON
Orange Standby-Modus
Aus Aus
ASUS LCD Monitor VK221/VK222-Reihe
Deutsch
4
:
:

1.2
1.2.1 VK222H
5
2
14
3
6
7
1.2.2 VK222U/VK222S/VK221S/VK221D
5
2
14
3
Rückseite des LCD-Monitors
Schraubenbohrungen für
VESA-Wandmontage
Anschlüsse an der
Rückseite
Anschlüsse an der Rückseite (von links nach rechts)
1. Netzstromeingang. Hier schließen Sie das beigelegte Netzkabel an.
Audioeingang. Hier schließen Sie das beigelegte Audiokabel für die
Verbindung mit der PC-Audioquelle an.
3.
DVI-D Digitalsignalverbindung vorgesehen.
4.
vorgesehen.
(Bei einigen Modellen)
DVI-Anschluss. Der 24-polige Anschluss ist für die PC (Personal-Computer)
VGA-Anschluss. Dieser 15-polige Anschluss ist für die PC VGA-Verbindung
2. HDMI‐Eingang. Mit diesem Anschluss verbinden Sie die HDMI
-Quelle.
Kopfhörerausgang. Mit diesem Anschluss verbinden Sie einen Kopfhörer
oder eigenständige Lautsprecher.
USB‐Eingang. Mit diesem Anschluss verbinden Sie die Webcam.
Netzstromeingang. Hier schließen Sie das beigelegte Netzkabel an.
2. Audioeingang. Hier schließen Sie das beigelegte Audiokabel für die
Verbindung mit der PC-Audioquelle an.
(Bei einigen Modellen)
3.
DVI-D Digitalsignalverbindung vorgesehen.
4.
vorgesehen.
(Bei einigen Modellen)
DVI-Anschluss. Der 24-polige Anschluss ist für die PC (Personal-Computer)
VGA-Anschluss. Dieser 15-polige Anschluss ist für die PC VGA-Verbindung
USB‐Eingang. Mit diesem Anschluss verbinden Sie die Webcam.
5.
6.
7.
1.
5.
ASUS LCD Monitor VK221/VK222-Reihe
Deutsch
5

2
•
•
InstallierenderSoftwareLife‐Frame2
LifeFrame 2, die mit der Webcam zusammenarbeiten kann und Ihnen erlaubt,
eigene Fotos oder Videoclips zu erstellen.
LifeFrame 2 wird nur von den Betriebssystemen Microsoft@
Windows@Vista und XP Service Pack 2 unterstützt.
Die Software LifeFrame 2 ist auf der Unterstützungs-CD
mitgeliefert.
Installationsanweisungen
1. Schließen Sie alle anderen Applikationen.
2. Legen Sie die Unterstützungs-CD in Ihr optisches Laufwerk ein und führen
das Programm LifeFrame 2 aus.
3. Folgen Sie den Anweisungen auf dem Bildschirm, um die Installation fertig
zu stellen.
Die VK221/VK222-Reihe von ASUS bietet die benutzerfreundliche Software
ASUS LCD Monitor VK221/VK222-Reihe
Deutsch
6

2
1
Informazioni sulla sicurezza
‧
allegata alla confezione.
‧ Per prevenire incendi o scosse elettriche, non esporre mail il monitor a
pioggia o umidità.
‧ Non tentare mai di aprire la copertura del monitor. Al suo interno ci sono
voltaggi pericolosi che possono provocare gravi lesione fisiche.
‧ Se l'alimentatore è guasto, non tentare di ripararlo sa soli.
Contattare un tecnico specializzato, oppure il rivenditore.
‧
appropriato e che i cavi d’alimentazione non siano danneggiati. Se trova
qualsiasi danno, mettersi immediatamente in contatto con il rivenditore.
‧ Questo monitor deve essere fatto funzionare solamente con il tipo di
elettrica locale.
Prima di installare il monitor, leggere con attenzione tutta la documentazione
Prima di usare il prodotto, assicurarsi che tutti i cavi siano collegati in modo
alimentazione indicata sull'etichetta. Se non si conosce il tipo d'alimentazione
fornita alla propria abitazione, consultare il rivenditore oppure la compagnia
Assemblaggio della base del monitor
Per assemblare la base del monitor:
1. Attaccare la base al monitor. Uno scatto indicherà che la base è
stata attaccata correttamente.
2. Regolare il monitor sull’angolazione che è più comoda.
Si raccomanda di coprire la superficie del tavolo con un panno
morbido per prevenire danni al monitor.
Monitor LCD ASUS Serie VK221/VK222
Italiano
1

1
1.1
457
1 2 3
1.1.1 VK222H/VK222U
6
A
Introduzione al monitor
Parte frontale del monitor LCD
1. Tasto :
‧ Premendo questo tasto per 2-4 secondi (solo modalità VGA) si regola
predefinite (giochi, notte, scenario, standard e teatro) con la tecnologia
SPLENDID™ Video Enhancement.
‧ Quando il menu OSD è attivo, permette di uscire dal menu oppure di
tornare al menu precedente.
2. Tasto :
‧
‧ Questo è anche un tasto d scelta rapida per la regolazione del volume.
3. Tasto MENU:
selezionare l’icona (funzione) evidenziata.
4. Tasto :
‧
automaticamente posizione, frequenza e fare dell’immagine sui valori ottimali.
‧ Usare questo tasto di scelta rapida per passare tra cinque modalità video
‧ Quando il menu OSD è attivo, premere questo tasto per accedere/
o per andare alla funzione successiva.
Premere questo pulsante per diminuire il valore della funzione selezionata
o per andare alla funzione precedente.
Premere questo pulsante per aumentare il valore della funzione selezionata
‧ Questo è anche un tasto d scelta rapida per la regolazione della luminosità.
Pulsante Seleziona Input
Usare questo tasto veloce per alternare fra i segnali di input VGA, DVI,
HDMI.(per certi modelli)
:
‧ Premere questo tasto per accendere/spegnere il monitor.
‧ La definizione dei colori dell’indicatore d’alimentazione è descritta nella
tabella che segue.
5.
6. Tasto d’alimentazione
7. Indicatore d’alimentazione
Monitor LCD ASUS Serie VK221/VK222
Italiano
2
:
:

1.1.2
457
1 2 36
VK221S/VK222S
1. Tasto :
‧ Premendo questo tasto per 2-4 secondi (solo modalità VGA) si regola
predefinite (giochi, notte, scenario, standard e teatro) con la tecnologia
SPLENDID™ Video Enhancement.
‧ Quando il menu OSD è attivo, permette di uscire dal menu oppure di
tornare al menu precedente.
2. Tasto :
‧
‧ Questo è anche un tasto d scelta rapida per la regolazione del volume.
3. Tasto MENU:
selezionare l’icona (funzione) evidenziata.
4. Tasto :
‧
automaticamente posizione, frequenza e fare dell’immagine sui valori ottimali.
‧ Usare questo tasto di scelta rapida per passare tra cinque modalità video
‧ Quando il menu OSD è attivo, premere questo tasto per accedere/
o per andare alla funzione successiva.
Premere questo pulsante per diminuire il valore della funzione selezionata
o per andare alla funzione precedente.
Premere questo pulsante per aumentare il valore della funzione selezionata
‧ Questo è anche un tasto d scelta rapida per la regolazione della luminosità.
‧ Premere questo tasto per accendere/spegnere il monitor.
‧ La definizione dei colori dell’indicatore d’alimentazione è descritta nella
tabella che segue.
5.
6. Tasto d’alimentazione
7. Indicatore d’alimentazione
A
Tasto :
Monitor LCD ASUS Serie VK221/VK222
Italiano
3
:
:

1.1.3 VK221D
457
1 2 36
1. Tasto :
‧ Premendo questo tasto per 2-4 secondi (solo modalità VGA) si regola
predefinite (giochi, notte, scenario, standard e teatro) con la tecnologia
SPLENDID™ Video Enhancement.
‧ Quando il menu OSD è attivo, permette di uscire dal menu oppure di
tornare al menu precedente.
2. Tasto :
‧
‧
3. Tasto MENU:
selezionare l’icona (funzione) evidenziata.
4. Tasto :
‧
automaticamente posizione, frequenza e fare dell’immagine sui valori ottimali.
‧ Usare questo tasto di scelta rapida per passare tra cinque modalità video
‧ Quando il menu OSD è attivo, premere questo tasto per accedere/
o per andare alla funzione successiva.
Premere questo pulsante per diminuire il valore della funzione selezionata
o per andare alla funzione precedente.
Premere questo pulsante per aumentare il valore della funzione selezionata
‧ Questo è anche un tasto d scelta rapida per la regolazione della luminosità.
‧ Premere questo tasto per accendere/spegnere il monitor.
‧ La definizione dei colori dell’indicatore d’alimentazione è descritta nella
tabella che segue.
5.
6. Tasto d’alimentazione
7. Indicatore d’alimentazione
A
Tasto :
Stato Descrizione
Blu Acceso
Ambra Modalità di Standby
Spento Spento
Questo è anche un tasto veloce per la regolazione della proporzione
Contrasto.
Monitor LCD ASUS Serie VK221/VK222
Italiano
4
:
:

1.2
1.2.1 VK222H
5
2
14
3
6
7
1.2.2 VK222U/VK222S/VK221S/VK221D
5
2
14
3
Parte posteriore del monitor LCD
Fori per le viti per il
montaggio su parete VESA
Connettori della parte
posteriore
Connettori della parte posteriore (da sinistra a destra)
1.
allegato.
Porta Audio-in. Questa porta collega l’origine audio PC usando il cavo
audio allegato.
3. Porta DVI. Questa porta a 24 pin serve per la connessione del segnale
digitale DVI-D del PC (Personal Computer).
Porta VGA. Questa porta a 15 pin serve per la connessione VGA PC.
(Per alcuni modelli)
Porta AC-IN. Questa porta collega il connettore del cavo d’alimentazione
Connettori della parte posteriore (da sinistra a destra)
1.
allegato.
2. Porta Audio-in. Questa porta collega l’origine audio PC usando il cavo
audio allegato.
3. Porta DVI. Questa porta a 24 pin serve per la connessione del segnale
digitale DVI-D del PC (Personal Computer).
4. Porta VGA. Questa porta a 15 pin serve per la connessione VGA PC.
(Per alcuni modelli)
Porta AC-IN. Questa porta collega il connettore del cavo d’alimentazione
2.PortaHDMI‐IN. Questa porta collega la fonte HDMI.
PortaUSB‐IN. Questa porta collega la Web-cam.
PortaCuffie‐out. Questa porta collega le cuffie o gli altoparlanti indipendenti.
PortaUSB‐IN. Questa porta collega la Web-cam.
5.
5.
6.
4.
7.
Monitor LCD ASUS Serie VK221/VK222
Italiano
5

2
•
•
InstallasoftwareLife‐Frame2
che funziona con la webcam, permettendo all’utente di creare le proprie foto o
sequenze di video.
LifeFrame 2 supporta solo i sistemi operativi Microsoft@
Windows@Vista/XP Service
Pack 2.
Il software LifeFrame 2 è bundled nel CD di supporto.
Istruzioniperl’installazione
1. Chiudere tutte le altre applicazioni.
2. Inserire il CD di supporto nel lettore ottico ed eseguire il programma
LifeFrame 2.
3. Seguire le istruzioni sullo schermo per completare l’installazione.
La serie ASUS VK221/VK222 fornisce il software LifeFrame 2 facile da usare,
Monitor LCD ASUS Serie VK221/VK222
Italiano
6

2
1
Informations relatives à la sécurité
‧ Avant de régler le moniteur, lisez attentivement la documentation fournie
dans l'emballage.
‧ Pour éviter tout incendie ou électrocution, n'exposez jamais le moniteur
à la pluie ni à l'humidité.
‧ N'essayez jamais d'ouvrir le boîtier du moniteur. Les hautes tensions
dangereuses à l'intérieur du moniteur peuvent causer des blessures
physiques graves.
‧ Si l'alimentation électrique est cassée, n'essayez pas de la réparer par
vous-même. Contactez un technicien de maintenance qualifié ou votre
revendeur.
‧ Avant utilisation du produit, assurez-vous que tous les câbles sont
correctement connectés et que les câbles d'alimentation ne sont pas
endommagés. Si vous détectez un quelconque dégât, contactez
immédiatement votre revendeur.
‧ Le moniteur ne doit être utilisé qu'avec le type de source d'alimentation
indiqué sur l'étiquette. Si vous n'êtes pas certain du type d'alimentation
délivrée à votre domicile, consultez votre revendeur ou votre compagnie
locale d'électricité.
Assembler l'embase du moniteur
Pour assembler l'embase du moniteur:
1. Reliez l'embase au moniteur. Un clic signale que la base a été
correctement reliée.
2. Réglez le moniteur à un angle qui vous est le plus confortable.
Nous vous recommandons de couvrir la surface de la table avec un
chiffon doux pour éviter d'endommager le moniteur.
Moniteur LCD ASUS de la gamme VK221/VK222 1

1
1.1
457
1 2 3
1.1.1 VK222H/VK222U
6
A
Moniteur LCD ASUS de la gamme VK221/VK222
Présentation du moniteur
Face avant du moniteur LCD
1. Bouton:
‧ Règle automatiquement l'image sur une position, une fréquence, et
une phase optimisées, par un appui long sur ce bouton, de l'ordre
de 2-4 secondes (pour le mode VGA seulement).
‧ Utilisez cette touche de raccourci pour commuter entre les modes
vidéo prédéfinis (Mode jeux, Mode visualisation nocturne, Mode
Scénique, Mode Standard, Mode Théâtre) avec la technologie
d'amélioration vidéo SPLENDID™.
‧ Quitter le menu OSD ou retourner au menu précédent quand le
menu OSD est actif.
2. Bouton:
‧
‧
3. Bouton de MENU:
‧ Appuyez sur ce bouton pour entrer / sélectionner l'icône
(fonction) sélectée lorsque le menu OSD est activé.
4. Bouton:
‧
‧ Ceci est également une touche de raccourci pour le réglage de
luminosité.
ou passer à la fonction suivante.
ou passer à la fonction précédente.
Ceci est également une touche de raccourci pour le réglage du volume.
Appuyez sur ce bouton pour diminuer la valeur de la fonction choisie
Bouton de sélection de l’entrée
(VGA, DVI, HDMI). (pour certains modèles)
Appuyez sur ce bouton pour augmenter la valeur de la fonction choisie
Utilisez ce raccourci-clavier pour passer d’un signal d’entrée à un autre
Bouton d'alimentation
‧ Appuyez sur ce bouton pour allumer / éteindre le moniteur.
‧ La définition de la couleur du témoin d'alimentation suit le tableau
ci-dessous.
‧
5.
6.
7. Indicateur d'alimentation
2
:
:
:
Other manuals for VK221 Series
1
This manual suits for next models
6
Table of contents
Other Asus Monitor manuals

Asus
Asus MB16AWP User manual

Asus
Asus VK222U User manual

Asus
Asus PA24US Series User manual

Asus
Asus PA32DC User manual

Asus
Asus PB278 Series User manual

Asus
Asus VA27D Series User manual

Asus
Asus VW198S User manual

Asus
Asus VW226 Series User manual

Asus
Asus VN289QR User manual

Asus
Asus PA27UCX Series User manual