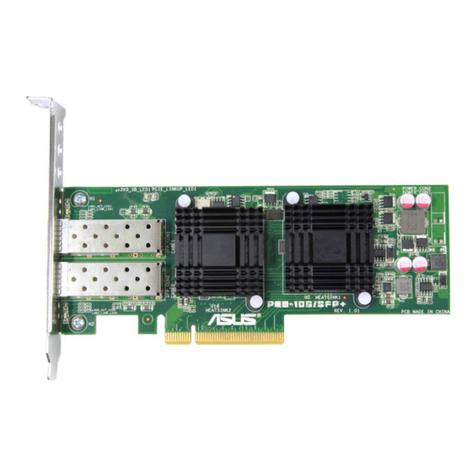
Asus AAM6000PI User manual

AAM6000PI
ADSL Modem Card

Table of Contents
Congratulations! ................................................................................................... 1
Step 1 – Know your PC’s Operating System ................................................... 1
Step 2 – Determine your Connection Settings.................................................. 2
Step 3 – Install the ADSL Modem Card........................................................... 3
Step 4 – Install the Drivers and Make a Connection....................................... 4
Windows 95A....................................................................................................... 5
Windows 95B ....................................................................................................... 8
Windows 98, 98SE............................................................................................. 12
Making a RFC 1483/1577 connection - 95A, 95B, 98, 98SE .................... 15
Making a RFC 2364 connection - 95A, 95B, 98, 98SE ..............................17
Windows 2000.................................................................................................... 19
Making a RFC 1483/1577 connection - 2000 ............................................ 22
Making a RFC 2364 connection - 2000 ...................................................... 24
Windows NT4.0 - RFC 1483/1577 .................................................................... 26
Windows NT4.0 - RFC 2364 ............................................................................. 29
Appendix
Editing your Service Connection........................................................................ 33
Removing Drivers .............................................................................................. 34
Diagnostic Tools ................................................................................................ 35
Trouble Shooting................................................................................................ 37
Connector Pin-out............................................................................................... 38
System Requirements & Compliance information.............................................. 39
Copyright & Regulatory Information ................................................................. 39

1
Congratulations!
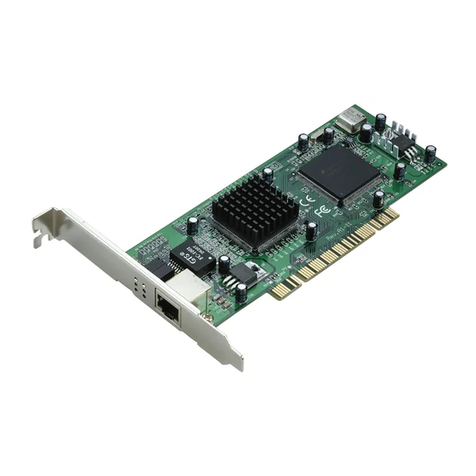
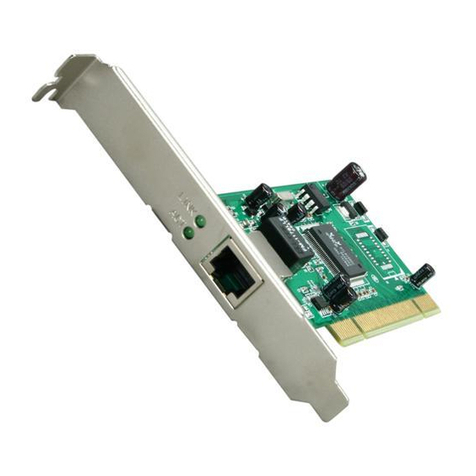
You are about to accelerate into ADSL technology. Your new ADSL modem card is an
internal Asymmetric Digital Subscriber Line (ADSL) PCI modem card, which
conveniently plugs into your computer system. The
modem connects directly to your telephone line via a
standard connector.
This guide is designed to walk you through installation of
your ADSL Modem card in the easiest and quickest way
possible. Please follow the instructions carefully.
Step 1 – Know you PC’s Operating System
You will need to know the exact version of Microsoft Windows installed in your
computer. If you do not know or are unsure, please proceed as follows to determine your
version of the Microsoft Operating System.
On the desktop, right click My Computer. Then select Properties. The version number
of the Microsoft Windows Operating System installed in your computer will be displayed
on the General tab. Refer to the following table for more detailed information.
Windows OS System Properties Description Release (Microsoft Web)
Win 95A
4 00 950A
Windows 95 OSR1
Win 95B 4.00.950B Windows 95 OSR2
Win 98 4.10.1998 Window 98
Win 98SE 4.10.2222A 2nd Edition Windows 98 2nd Edition
Win 2000 5.00.2195 Windows 2000
Win NT 4.00.1381 Windows NT 4.0
If you have questions regarding your PC system and the Microsoft Windows Operating
System, please contact your original PC manufacturer or Microsoft for assistance.
Before Installing the ADSL PCI Modem Card, it is important to verify that the ADSL data port RJ-
11 jack is configured so that the center two pins, pins 3 and 4, are used for ADSL data, otherwise
the ADSL PCI modem card will not make a proper connection. If the ADSL data port installation
uses pins 2 and 5 for data, then a wiring converter will be required. Do not alter or remove a wiring
converter if present. Consult with your ADSL service provider regarding a wiring converter or
before attempting any wiring changes.
2
Step 2 – Determine your Connection settings
You need to know your PC systems Windows OS and Internet Protocol supplied by
your ADSL service provider. Refer to the following chart for your ADSL Driver.
Protocol Selection
RFC1483 Ö
ÖÖ
Ö
Bridged Ethernet over ATM
RFC2364 Ö
ÖÖ
Ö
Point-to-Point Protocol over ATM
RFC1577 Ö
ÖÖ
Ö
Classical Internet Protocol over ATM
RFC2516 Ö
ÖÖ
Ö
Point-to-Point Protocol over Ethernet
ADSL Driver Selection RFC1483 RFC2364 RFC1577 RFC2516
Win 95A & 95B 1483w95 2364w95 See Note#
##
#
Win 98 & 98SE 1483w98 2364w98 1577w98
See Note#
##
#
Win NT 4.0 1483nt4 2364nt4 See Note#
##
#
Win 2000 1483w2k 2364w2k See Note#
##
#
Note#
##
#: RFC2516 (Point-to-Point Protocol over Ethernet) is supported by third
party developers. See the PPPoE driver supplement for detailed information and
installation instructions.
Having determined the ADSL Driver you will be installing, you now need to gather the
connection information supplied by your ADSL service provider.
VPI value:_________
VCI value:_________
Framing: VC/MUX LLC/SNAP
Mode: ANSI T1.413 ITU G.lite ITU G.dmt
For RFC 1483 or 2516 For RFC 2364 or 1577
Host: User Name:
Domain: Password:
Gateway: Host or IP Address:
IP Address:
Subnet Mask:
DNS or server address:

3
Step 3 – Install the ADSL modem card
Caution: To avoid possible damage to your modem card, touch the metal chassis of your
PC system to remove static charge from your person, and then remove your ADSL
modem card from the protective anti-static bag.
1. Shut down your computer and switch the
power off.
2. Unplug the power cord for your
computer from the electrical outlet.
4. Unscrew “slot cover bracket” from an
unused PCI (usually white in color) slot.
6. Make sure the card is firmly seated and
secure the card with the bracket screw.
3. Remove the cover from your systems
chassis. (see you PC manufacturer’s
manual)
5. Gently and evenly insert the PCI
modem card into your empty PCI slot.
7. Replace the cover of your computer
system.
8. Connect the ADSL/phone line to the
connector port on the modem card and
plug the other end of the cable into
your ADSL/phone service.

4
Step 4
– Install the drivers and make a connection
You will be installing drivers and then proceeding to make an Internet connection. This
process requires you to enter in information as prompted by the Microsoft Installation
Wizard.
NOTE:You may need the Microsoft Windows Operating System installation files (CAB
files) to complete the installation. The CAB files are contained in the Microsoft’s system
CD-ROM. Some systems may have already installed the CAB files to the hard drive, but
you should have the Microsoft Windows CD-ROM handy just in case.
Proceed now to the installation procedure for the Windows Operating
System installed in your computer.
Windows 95A -------------------------------------------------------------------------------Page 5
Windows 95B -------------------------------------------------------------------------------Page 8
Windows 98, 98SE------------------------------------------------------------------------- Page 12
Windows 2000 ------------------------------------------------------------------------------Page 19
Windows NT - RFC 1483 or RFC 1577 -----------------------------------------------Page 26
Windows NT - RFC 2364----------------- -----------------------------------------------Page 29

5
Windows 95A
After installing the ADSL modem card, plug the power cable back into the PC system
and turn the power on.
Before you proceed to install drivers you will need to upgrade your Dial-Up Networking
(DUN) application to version 1.3 or above. The Microsoft DUN is conveniently
contained on your ADSL Driver CD-ROM.
1. After restart, the Update Device Driver
Wizard will detect the ADSL modem as a
PCI Network Controller. CANCEL the
New hardware found window.
2. At your desktop, click Start, and then
select Run.
3. The
Run window appears. Insert the
ADSL Driver CD, then click on Browse
and proceed to locate the ADSL Driver
95 CD-ROM. Then locate and select the
MSDUN13.EXE file. The Msdun13.exe
appears in the Open box. Click OK.
4. The
Microsoft Dial-Up Networking 1.3
window appears with the message This
will install Microsoft Dial-Up
Networking 1.3 for Windows 95. Do
you wish to continue? Click Yes.
5. An
End-User License Agreement will
appear. To accept, click Yes.
6. Back in the Microsoft Dial-Up
Networking 1.3 window. You will be
asked Do you want to restart your
computer now? Click Yes.

6
NOTE:You may need the Microsoft Windows Operating System installation files (CAB
files) to complete the installation. The CAB files are contained in the Microsoft’s system
CD-ROM. Some systems may have already installed the CAB files to the hard drive, but
you should have the CD-ROM handy just in case.
1. The
New Hardware Found window will
detect the ADSL modem card as a PCI
Network Controller. Select the Driver
from disk provided by hardware
manufacturer option. Click OK.
2. Insert the
ADSL Driver CD-ROM into
your systems CD drive.
3. The
Install From Disk window appears.
Click Browse to locate the driver on your
CD-ROM for the protocol supported by
your ADSL provider: 1483w95 or
2364w95 or 1577w95 (The example uses
“D” as the CD-ROM drive letter. Your
drive may have a different letter.) Then
click OK.
4. When the
Service Option window
appears, click Advanced.
5. The
Service Options window displays
the Connection Address and Select
ADSL Mode sections. Enter in the VPI,
VCI and Framing values supplied by
your ADSL service provider.
In the Select ADSL Mode section, select
the mode(s) recommended by your ADSL
service provider. Click on the mode(s)
required and then click OK.
NOTE: The service mode type will be one of
the following:❑ANSI T1.413 Issue 2
❑ITU G.992.2 Annex A(G.lite)
❑ITU G.992.1 Annex A(G.dmt)
RFC 1483
RFC 1577
RFC 2364

7
6. The previous
Service Option window
will appear, click Next.
NOTE:During the installation process
you may be asked to insert your
Windows 95 CD. Insert the Windows
95 CD into the CD drive and click OK.
NOTE: If during the file copying
process a file is reported as “not found”
enter the path <CD Drive letter> and
:\Win95 (e.g. D:\Win95)
7. You must now make an Internet connection. Locate the Internet protocol supported
by your ADSL service provider from the following table, and proceed to that section
to make the Internet connection.
R
FC1483 Bridged Ethernet over ATM Ö
ÖÖ
Ö
Go to page 15
R
FC1577 Classical Internet Protocol over ATM Ö
ÖÖ
Ö
Go to page 15
R
FC2364 Point-to-Point Protocol over ATM Ö
ÖÖ
Ö
Go to page 17

8
Windows 95B
After installing the ADSL modem card, plug the power cable back into the PC system
and turn the power on.
Before you proceed to install drivers you will need to upgrade your Dial-Up Networking
(DUN) application to version 1.3 or above. The Microsoft DUN is conveniently
contained on your ADSL Driver CD-ROM.
1. After restart, the Update Device Driver
Wizard will detect the ADSL modem
card as a PCI Network Controller.
CANCEL the New hardware found
window.
2. At your desktop, click Start, and then
select Run.
3. The
Run window appears. Insert the
ADSL Driver CD, then click on Browse
and proceed to locate the ADSL Driver
95 CD-ROM. Then locate and select the
MSDUN13.EXE file. The Msdun13.exe
appears in the Open box. Click OK.
4. The
Microsoft Dial-Up Networking 1.3
window appears with the message This
will install Microsoft Dial-Up
Networking 1.3 for Windows 95. Do
you wish to continue? Click Yes.
5. An
End-User License Agreement will
appear. To accept, click Yes.
6. Back in the Microsoft Dial-Up
Networking 1.3 window. You will be
asked Do you want to restart your
computer now? Click Yes.

9
You may need the Microsoft Windows Operating System installation files (CAB files) to
complete the installation. The CAB files are contained in the Microsoft’s system CD-
ROM. Some systems may have already installed the CAB files to the hard drive, but you
should have the CD-ROM handy just in case.
1. The Update Device Driver Wizard will
detect the ADSL modem card as a PCI
Network Controller, click Next.
2. Insert the ADSL Driver CD-ROM into
you systems CD drive.
3. The Update Device Driver Wizard will
appear and indicate that “Windows was
unable to locate a driver for this
device”. Click Other Locations.
4. The Select Other Location window
appears. Click Browse to locate the driver
on your CD-ROM for the protocol
supported by your ADSL provider:
1483w95 or 2364w95 or 1577w95
(The example uses “E” as the CD-ROM
drive letter. Your drive may have a
different letter.) Then click OK.
5. The Update Device Driver Wizard will
then find the ASUS ADSL PCI NIC.
Click Finish.
NOTE: During the installation process
you may be asked to insert your Windows
95 CD-ROM. Insert the Windows 95 CD
into the drive and click OK.

10
NOTE: Due to an installation anomalie.
The Copying Files window may appear
again. Click Browse to locate the driver
on your CD-ROM for the protocol
supported by your ADSL provider:
1483w95 or 2364w95 or 1577w95
Click OK.
6. When the Service Option window
appears, click Advanced
7. In the Network Protocol and PVC
Settings section, enter in the VPI, VCI
and Framing values supplied by your
ADSL service provider.
In the Select ADSL Mode section, select
the mode(s) recommended by your ADSL
service provider. Click on the mode(s)
required and then click OK.
NOTE: The service mode type will be one of
the following:
ANSI T1.413 Issue 2
ITU G.992.2 Annex A (G.lite)
ITU G.992.1 Annex A (G.dmt)
8. The previous Service Option window
will appear, click Next.
NOTE: During the installation process
you may be asked to insert your Windows
95 CD-ROM. Insert the Win95 CD into
the drive. Click OK.
RFC 1483
RFC 1577
RFC 2364

11
NOTE: If during the file copying process a file is reported as “not found” enter the
path <CD Drive letter> and :\Win95 (e.g. D:\Win95)You must now make an
Internet connection. Locate the Internet protocol supported by your ADSL service
provider from the following table, and proceed to that section to make the Internet
connection.
R
FC1483 Bridged Ethernet over ATM Ö
ÖÖ
Ö
Go to page 15
R
FC1577 Classical Internet Protocol over ATM Ö
ÖÖ
Ö
Go to page 15
R
FC2364 Point-to-Point Protocol over ATM Ö
ÖÖ
Ö
Go to page 17

12
ASUS ADSL PCI NIC
D:\1577W98\W95ASUS.INF
Windows 98, 98SE
After installing the ADSL modem card, plug the power cable back into the PC system
and turn the power on.
1. The Add New Hardware Wizard
window will automatically appear and
indicate that a new PCI Network
Controller has been found. Click Next.
2. Still in the Add New Hardware Wizard.
You will be asked “What do you want
Windows to do?” Select “Search for the
best driver for your device”, then click
Next.
3. Insert the ADSL Driver CD into your
systems CD-ROM drive.
4. Then select Specify a location and Click
Browse to locate the driver on your CD-
ROM for the protocol supported by your
ADSL provider: 1483w98 or 2364w98
or 1577w98 (The example uses “D” as
the CD-ROM drive letter. Your drive may
have a different letter.) Then click Next.
5. The Add New Hardware Wizard will
appear and indicate the ASUS ADSL PCI
NIC. Click Next.

13
6. When the Service Option window
appears, click Advanced.
7. The Service Options window appears. In
the Network Protocol and PVC Settings
section, enter in the VPI,VCI and
Framing values supplied by your ADSL
service provider.
In the Select ADSL Mode section, select the
mode(s) recommended by your ADSL service
provider. Then click OK.
NOTE: The service mode type will be one of the
following: ❑ANSI T1.413 Issue 2
❑ITU G.992.2 Annex A (G.lite)
❑ITU G.992.1 Annex A (G.dmt)
8. The previous Service Option window
will appear, click Next.
9. If prompted to insert your Windows CD
do so at this time then click OK.
10. Enter the <CD drive Letter> and then
:\Win98 (e.g. D:\Win98) and click OK.
11. At the conclusion of the ADSL modem
driver installation, the Add New
Hardware Wizard window appears and
displays you new ASUS ADSL PCI NIC.
Click Finish.
RFC 1483
RFC 1577
RFC 2364
A
SUS ADSL PCI NIC

14
12. The System Settings Change window
appears. For the PC system to set up the
ASUS Apollo 2 Drivers, a system
Restart is required. Click Yes.
NOTE: After restarting the system, the Diagnostic Tool icon (See Appendix) is
active and monitoring connectivity.
13. You must now make an Internet connection. Locate the Internet protocol supported
by your ADSL service provider from the following table, and proceed to that section
to make the Internet connection.
R
FC1483 Bridged Ethernet over ATM Ö
ÖÖ
Ö
Go to page 15
R
FC1577 Classical Internet Protocol over ATM Ö
ÖÖ
Ö
Go to page 15
R
FC2364 Point-to-Point Protocol over ATM Ö
ÖÖ
Ö
Go to page 17

15
Making an ADSL connection
RFC 1483 – Bridged Ethernet over ATM – 95/98
RFC 1577 - Classical Internet Protocol over ATM – 95/98
1. From the Start menu on the tool bar,
select Settings, Control Panel, and then
double click on the Network icon.
2. The Network window appears. Select
the Configuration tab, scroll the
installed network component window
and find ASUS ADSL PCI NIC.
3. When the Network window appears
select the Configuration tab, scroll the
installed network component window
and select TCP/IP ÆASUS ADSL PCI
NIC. Then click the Properties button.
4. The TCP/IP Properties window will
appear. Select the IP Address tab and
then select the Specify an IP Address
option. Enter the IP Address and
Subnet Mask settings supplied by your
ADSL provider.

16
5. To setup a new gateway, select the
Gateway tab, and then enter the setting
in the New Gateway section. Click
Add.
6. Select DNS Configuration tab. Select
the Enable DNS option.
NOTE: You now need to have available
the Host, Domain and DNS settings
supplied by your ADSL service provider.
7. Enter your host name into Host: box.
8. Enter your domain name into Domain:
box.
9. Enter
DNS number into DNS Server
Search Order box and click Add. If
you have more than one DNS numbers,
repeat this step.
10. After setting all the necessary TCP/IP
properties, click OK.
11. The Network window appears. Click
OK.
12. The
System Setting Change window
appears. You will be asked if you want
to restart your computer. Click Yes.
Congratulations, you are done. Your ADSL Internet connection is established!

17
3. The Make New Connection window
appears. The default name for the
computer you are dialing is My
Connection. However, You can
name the connection anything you
wish. In the Select a device bar, use
the scroll down menu to locate the
ASUS ADSL PCI NIC, click Next.
4. A new Make New Connection
window appears. Enter (0) zero, into
the Telephone number box. Click
Next.
5. Another Make New Connection
window appears. It will indicate that
You have successfully created a
new Dial-Up Networking
connection called “My
Connection”. Click Finish.
1. Double-click the My Computer icon
on the desktop. Then double-click the
Dial-Up Networking icon.
Making an ADSL connection
RFC 2364 - Point-to-Point Protocol over ATM – 95/98
2. The Dial-Up Networking window
appears. Double-click on the Make
New Connection icon.

18
6. The new connection will appear in
the Dial-Up Networking window.
Double-click the new connection e.g.
“My Connection” icon to begin a
Dial-Up session.
7. The Connect To window appears.
Enter the User Name and Password
supplied by your Internet service
provider (ISP). Then click Connect.
8. The
Connecting to My Connection
window appears. The message
Logging on to network confirms a
valid connecting process.
9. The
Connection Established
window appears. Internet service is
now established. Click Close and the
Diagnostic tool icon appears on the
task bar.
Congratulations, you are done. Your ADSL Internet connection is established!
Table of contents
Other Asus Network Card manuals

Asus
Asus PCI-G31 User manual

Asus
Asus USB-N13 User manual

Asus
Asus WL-106gM User manual

Asus
Asus WL-100W User manual

Asus
Asus PEB-10G/SFP+ Series User manual

Asus
Asus PCI Express x1 Network Interface PEB-G21 User manual

Asus
Asus WL-160N User manual

Asus
Asus WL-169GE User manual

Asus
Asus WL-107 User manual

Asus
Asus WL-160W User manual