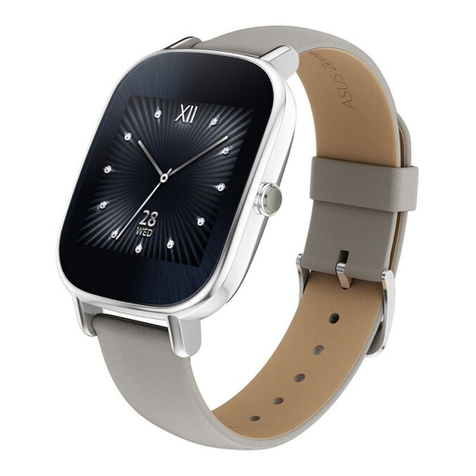
Asus ZenWatch Owner's manual

Parts and features

2
touch screen
display panel
microphone
Package contents
ASUS ZenWatch
Charging cradle
USB to micro USB
cable
Technical documentations
Power adapter
IMPORTANT!
• Thebundledpoweradaptervarieswith
country or region.
• Ifanyoftheitemsisdamagedormissing,
contact your retailer immediately.

3
Get to know your ASUS ZenWatch
strap
touch screen
display panel
deployment
buckle
adjustment
hole
loop
charging
connectors
power and reset
button
spring bar
microphone
metal
sensor
release button

4
Adjusting the straps
1. Pressthereleasebuttonstounfoldthe
deployment buckle.
2. Detachthepinfromitscurrenthole,then
movethestrapaccordingtoyourdesired
length.

5
Replacing the strap
1. Pressthepinonyourcurrentstrap,asshown
below,todetachitfromtheASUSZenWatch.
2. Gently pull out the current strap to replace it
withanewone.Refertoyournewwristband’s
replacement instructions.
IMPORTANT! Your ASUS ZenWatch is compatible
withwatchstrapsthathaveastandard22mm
spring bar pin.

6
Power adapter:
input +5V 0.5A,2.5W
Parts of the charging cradle
micro USB port charging pins
LED indicator
Charging the ASUS ZenWatch
1. Connect the charging pins to the charging
connectors.

7
2. Connect the micro USB to USB cable to your
poweradapter,thenconnectthepower
adapter to a nearby power outlet.
3. Connect the micro USB to USB cable to the
charging cradle to start charging your ASUS
ZenWatch.

8
Resetting your ASUS ZenWatch
Resetting your ASUS ZenWatch restores it to its
factorysettings.
1. Press the power and reset button at the
backofyourASUSZenWatchtolaunchthe
Settings screen.
2. Swipe upward then tap Reset device then the
check mark.
IMPORTANT! AfterresettingyourASUSZenWatch,you
needtopairitagainwithyourphone.Fordetails,referto
Pairing for the rst time.
Pairing with another device
IMPORTANT! ResetyourASUSZenWatchtoitsfactory
settingsbeforeyoustartpairingitwithanotherphone.
1. Press the power and reset button at the
backofyourASUSZenWatchtolaunchthe
Settings screen.
2. Swipe upward then tap Reset device then the
check mark.
3. The next time your ASUS ZenWatch powers
on,itwilldisplayInstall Android wear on
your phone.
4. RefertoPairing for the rst time in the quick
startguidefordetailsonpairingyourASUS
ZenWatch with a phone.
9
1. Power on your ASUS ZenWatch.
2. Getyourphone,enableBluetooth,thenplace
it near your ASUS ZenWatch.
3. Launch Android Wear on your phone then
tap > Pair with a new wearable.
4. TapthenameoftheASUSZenWatchyou
would like to pair.
5. Compare the passcodes on your ASUS
ZenWatch and phone and ensure that they
match.Iftheydo,tapPair onbothdevices.
Pairing with multiple
ASUS ZenWatch devices
Restarting your ASUS ZenWatch
1. Press the power and reset button at the
backofyourASUSZenWatchtolaunchthe
Settings screen.
2. Swipe upward then tap Restart then the
check mark.

10
Powering o
1. Press and hold the reset button to launch
Settings.
2. Swipe up on the Settings screen and touch
Power o.
3. Touch .
Safety precautions
• YourASUSZenWatchiswater-resistant,notwaterproof.Keep
itdryandrefrainfromusingitnearliquids,rain,moisture,and
othersourcesofwaterorliquid.Ifitgetswet,wipeimmediately
usingasoftdrycloth.
• EnsurethatyourASUSZenWatchisdrybeforeusingitwithapp
features.
• Followthewarninglabelsforyourpersonalsafety.
• Neverattempttoshort-circuitthebatteryinsideyourASUS
ZenWatch.
• Neverattempttodissambleandreassemblethebattery.
• Discontinueusageifleakageisfound.
• TheASUSZenWatchandthechargingcradlemustberecycled
ordisposedofproperly.
• Keepanysmallcomponentsawayfromchildren.
• YourASUSZenWatchshouldonlybeusedinenvironmentswith
ambient temperatures between 10°C and 40°C.

11
Notices
RF exposure warning
TheequipmentcomplieswithFCCRFexposurelimitssetforthforan
uncontrolledenvironment.Theequipmentmustnotbeco-locatedor
operating in conjunction with any other antenna or transmitter.
Radio Frequency (RF) Exposure Information
TheradiatedoutputpoweroftheWirelessDeviceisbelowtheIndustry
Canada(IC)radiofrequencyexposurelimits.TheWirelessDeviceshouldbe
usedinsuchamannersuchthatthepotentialforhumancontactduring
normal operation is minimized.
ThisdevicehasalsobeenevaluatedandshowncompliantwiththeICRF
Exposure limits under portable exposure conditions. (antennas are less than
20cmofaperson'sbody).
ThisdevicecomplieswithIndustryCanadalicence-exemptRSSstandard(s).
CANICES-3(B)/NMB-3(B)
Informations concernant l'exposition aux
frequences radio (RF)
Lapuissancedesortieemiseparl’appareildesanslestinferieurealalimite
d'expositionauxfrequencesradiod'IndustryCanada(IC).Utilisezl’appareil
desansldefaconaminimiserlescontactshumainslorsdufonctionnement
normal.
Ceperipheriqueaegalementeteevalueetdemontreconformeauxlimites
d’expositionauxRFd’ICdansdesconditionsd’expositionadesappareils
portables.(lesantennessontmoinsde20cmducorpsd’unepersonne).
LepresentappareilestconformeauxCNRd’IndustrieCanadaapplicables
aux appareils radio exempts de licence.
CANICES-3(B)/NMB-3(B)

12
Copyright information
Nopartofthismanual,includingtheproductsandsoftwaredescribed
init,maybereproduced,transmitted,transcribed,storedinaretrieval
system,ortranslatedintoanylanguageinanyformorbyanymeans,except
documentationkeptbythepurchaserforbackuppurposes,withoutthe
expresswrittenpermissionofASUSTeKCOMPUTERINC.(“ASUS”).
ASUSPROVIDESTHISMANUAL“ASIS”WITHOUTWARRANTYOFANY
KIND,EITHEREXPRESSORIMPLIED,INCLUDINGBUTNOTLIMITEDTOTHE
IMPLIEDWARRANTIESORCONDITIONSOFMERCHANTABILITYORFITNESS
FORAPARTICULARPURPOSE.INNOEVENTSHALLASUS,ITSDIRECTORS,
OFFICERS,EMPLOYEESORAGENTSBELIABLEFORANYINDIRECT,SPECIAL,
INCIDENTAL,ORCONSEQUENTIALDAMAGES(INCLUDINGDAMAGESFOR
LOSSOFPROFITS,LOSSOFBUSINESS,LOSSOFUSEORDATA,INTERRUPTION
OFBUSINESSANDTHELIKE),EVENIFASUSHASBEENADVISEDOFTHE
POSSIBILITYOFSUCHDAMAGESARISINGFROMANYDEFECTORERRORIN
THISMANUALORPRODUCT.
Products and corporate names appearing in this manual may or may not
beregisteredtrademarksorcopyrightsoftheirrespectivecompanies,and
areusedonlyforidenticationorexplanationandtotheowners’benet,
withoutintenttoinfringe.
SPECIFICATIONSANDINFORMATIONCONTAINEDINTHISMANUALARE
FURNISHEDFORINFORMATIONALUSEONLY,ANDARESUBJECTTOCHANGE
ATANYTIMEWITHOUTNOTICE,ANDSHOULDNOTBECONSTRUEDASA
COMMITMENTBYASUS.ASUSASSUMESNORESPONSIBILITYORLIABILITY
FORANYERRORSORINACCURACIESTHATMAYAPPEARINTHISMANUAL,
INCLUDINGTHEPRODUCTSANDSOFTWAREDESCRIBEDINIT.
Copyright©2014ASUSTeKCOMPUTERINC.AllRightsReserved.

13
E-Manual version
ForthefullmanualversionofyourASUSZenWatch,visitourmulti-language
web site at:
http://support.asus.com
Limitation of liability
CircumstancesmayarisewherebecauseofadefaultonASUS’partor
otherliability,youareentitledtorecoverdamagesfromASUS.Ineach
suchinstance,regardlessofthebasisonwhichyouareentitledtoclaim
damagesfromASUS,ASUSisliablefornomorethandamagesforbodily
injury(includingdeath)anddamagetorealpropertyandtangiblepersonal
property;oranyotheractualanddirectdamagesresultedfromomissionor
failureofperforminglegaldutiesunderthisWarrantyStatement,uptothe
listedcontractpriceofeachproduct.
ASUSwillonlyberesponsiblefororindemnifyyouforloss,damagesor
claimsbasedincontract,tortorinfringementunderthisWarrantyStatement.
ThislimitalsoappliestoASUS’suppliersanditsreseller.Itisthemaximumfor
whichASUS,itssuppliers,andyourresellerarecollectivelyresponsible.
UNDERNOCIRCUMSTANCESISASUSLIABLEFORANYOFTHEFOLLOWING:
(1)THIRD-PARTYCLAIMSAGAINSTYOUFORDAMAGES;(2)LOSSOF,OR
DAMAGETO,YOURRECORDSORDATA;OR(3)SPECIAL,INCIDENTAL,OR
INDIRECTDAMAGESORFORANYECONOMICCONSEQUENTIALDAMAGES
(INCLUDINGLOSTPROFITSORSAVINGS),EVENIFASUS,ITSSUPPLIERSOR
YOURRESELLERISINFORMEDOFTHEIRPOSSIBILITY.
October 2014
First Edition

15060-44600000
Other manuals for ZenWatch
3
Table of contents
Other Asus Watch manuals

Asus
Asus VivoWatch 5 AERO User manual

Asus
Asus VivoWatch Guide

Asus
Asus VivoWatch BP User manual

Asus
Asus VivoWatch SP User manual

Asus
Asus ZenWatch User manual

Asus
Asus VivoWatch 5 User manual

Asus
Asus ZENWATCH3 Guide

Asus
Asus ZenWatch Guide

Asus
Asus VivoWatch 5 User manual

Asus
Asus VivoWatch BP User manual