AT&T 2355 User manual

Please also read
Part 1 — Important
Product Information
USER’S MANUAL
Part 2
© 2002 Advanced AmericanTelephones. All rights reserved.
AT&T and the Globe Design are trademarks of AT&T Corp., licensed to Advanced AmericanTelephones.
2.4 GHz Cordless Speakerphone
2355 with Caller ID/Call Waiting

Visit us at www.telephones.att.com
© 2002 Advanced American Telephones.
All rights reserved.
AT&T and the Globe Design are
trademarks of AT&TCorp., licensed to
Advanced American Telephones.
Printed in China. Issue 1AT&T 11/02

CONTENTS
BEFORE YOU BEGIN . . . . . . 1
Parts List . . . . . . . . . . . . . . . 1
About Caller Identification
(Caller ID). . . . . . . . . . . . . 2
About the Call Log . . . . . . . . 2
About Adding Handsets . . . . . 2
INSTALLATION . . . . . . . . . . 3
Base Installation . . . . . . . . . . 3
Headset . . . . . . . . . . . . . . . . 5
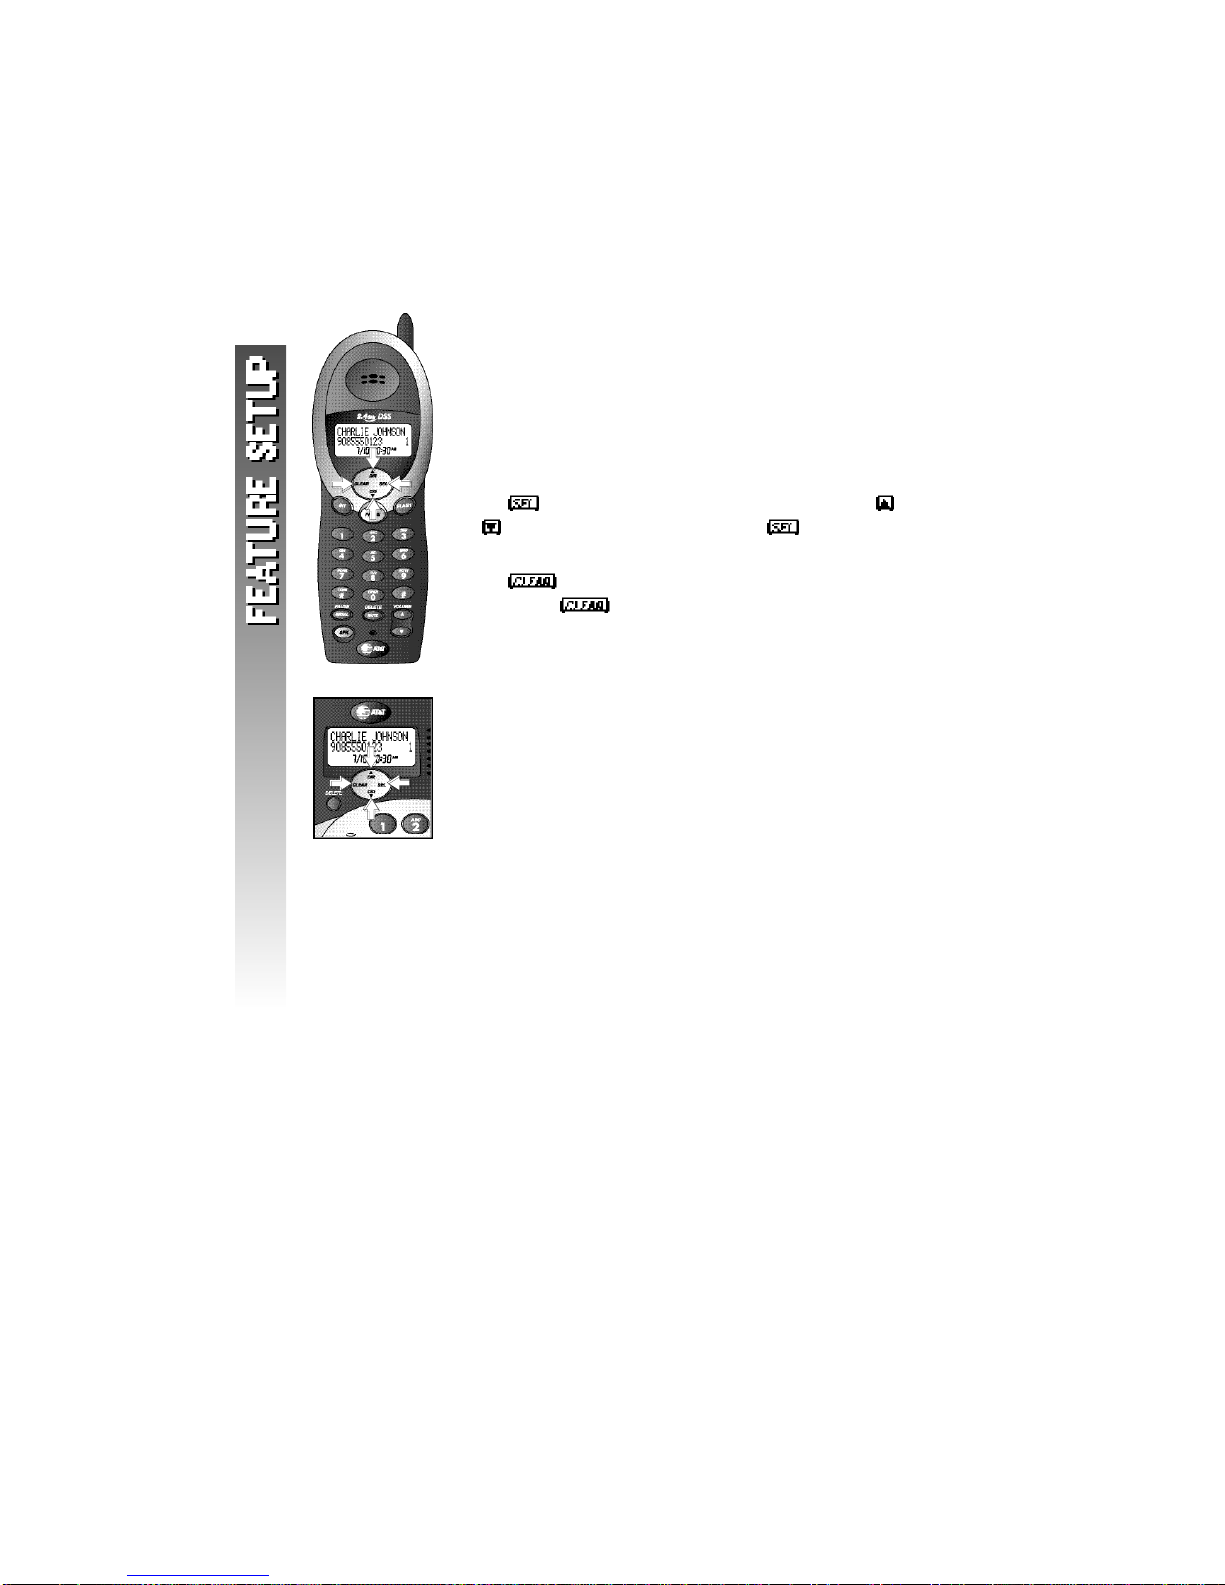
FEATURE SETUP . . . . . . . . . 6
Feature Setup Menu . . . . . . . 6
Ring Volume . . . . . . . . . . . . . 7
Ring Pattern . . . . . . . . . . . . . 8
Key Click . . . . . . . . . . . . . . . 9
Handset Name . . . . . . . . . . 10
Language Setting . . . . . . . . . 11
Clear Message Waiting . . . . . 12
Set Dial Method . . . . . . . . . 13
TELEPHONE OPERATION . . . 14
Idle Screen . . . . . . . . . . . . . 14
Make a Call . . . . . . . . . . . . 14
Answer a Call . . . . . . . . . . . 15
Volume . . . . . . . . . . . . . . . . 15
Call Timer . . . . . . . . . . . . . . 16
Handset Speakerphone . . . . 16
Redial . . . . . . . . . . . . . . . . . 17
Flash/Call Waiting . . . . . . . . 18
Mute . . . . . . . . . . . . . . . . . 18
Handset Locator . . . . . . . . . 19
Temporary Tone Dialing . . . .19
Display Screen Messages . . . 20
Display Screen Icons . . . . . . 21
Base Lights . . . . . . . . . . . . . 22
Tones and What They Mean . 23
INTERCOM OPERATION . . . 24
Intercom Calls . . . . . . . . . . . 24
Answer an Incoming Call
While on an Intercom Call . 25
Transfer a Call . . . . . . . . . . . 26
Forward a Call . . . . . . . . . . 27
Conference Calling . . . . . . . 28
PHONE BOOK . . . . . . . . . . 29
Store a Number and Name
in Phone Book . . . . . . . . . 29
Keypad Characters . . . . . . . . 31
Dial a Number
in Phone Book . . . . . . . . . 32
Edit a Number/Name
in Phone Book . . . . . . . . . 33
Delete a Number/Name
from Phone Book . . . . . . . 35
CALLER ID OPERATION . . . 37
Review Call Log . . . . . . . . . 38
Remove Call Records. . . . . . 39
Store a Call Record
in Phone Book. . . . . . . . . 41
Display Dial . . . . . . . . . . . . 42
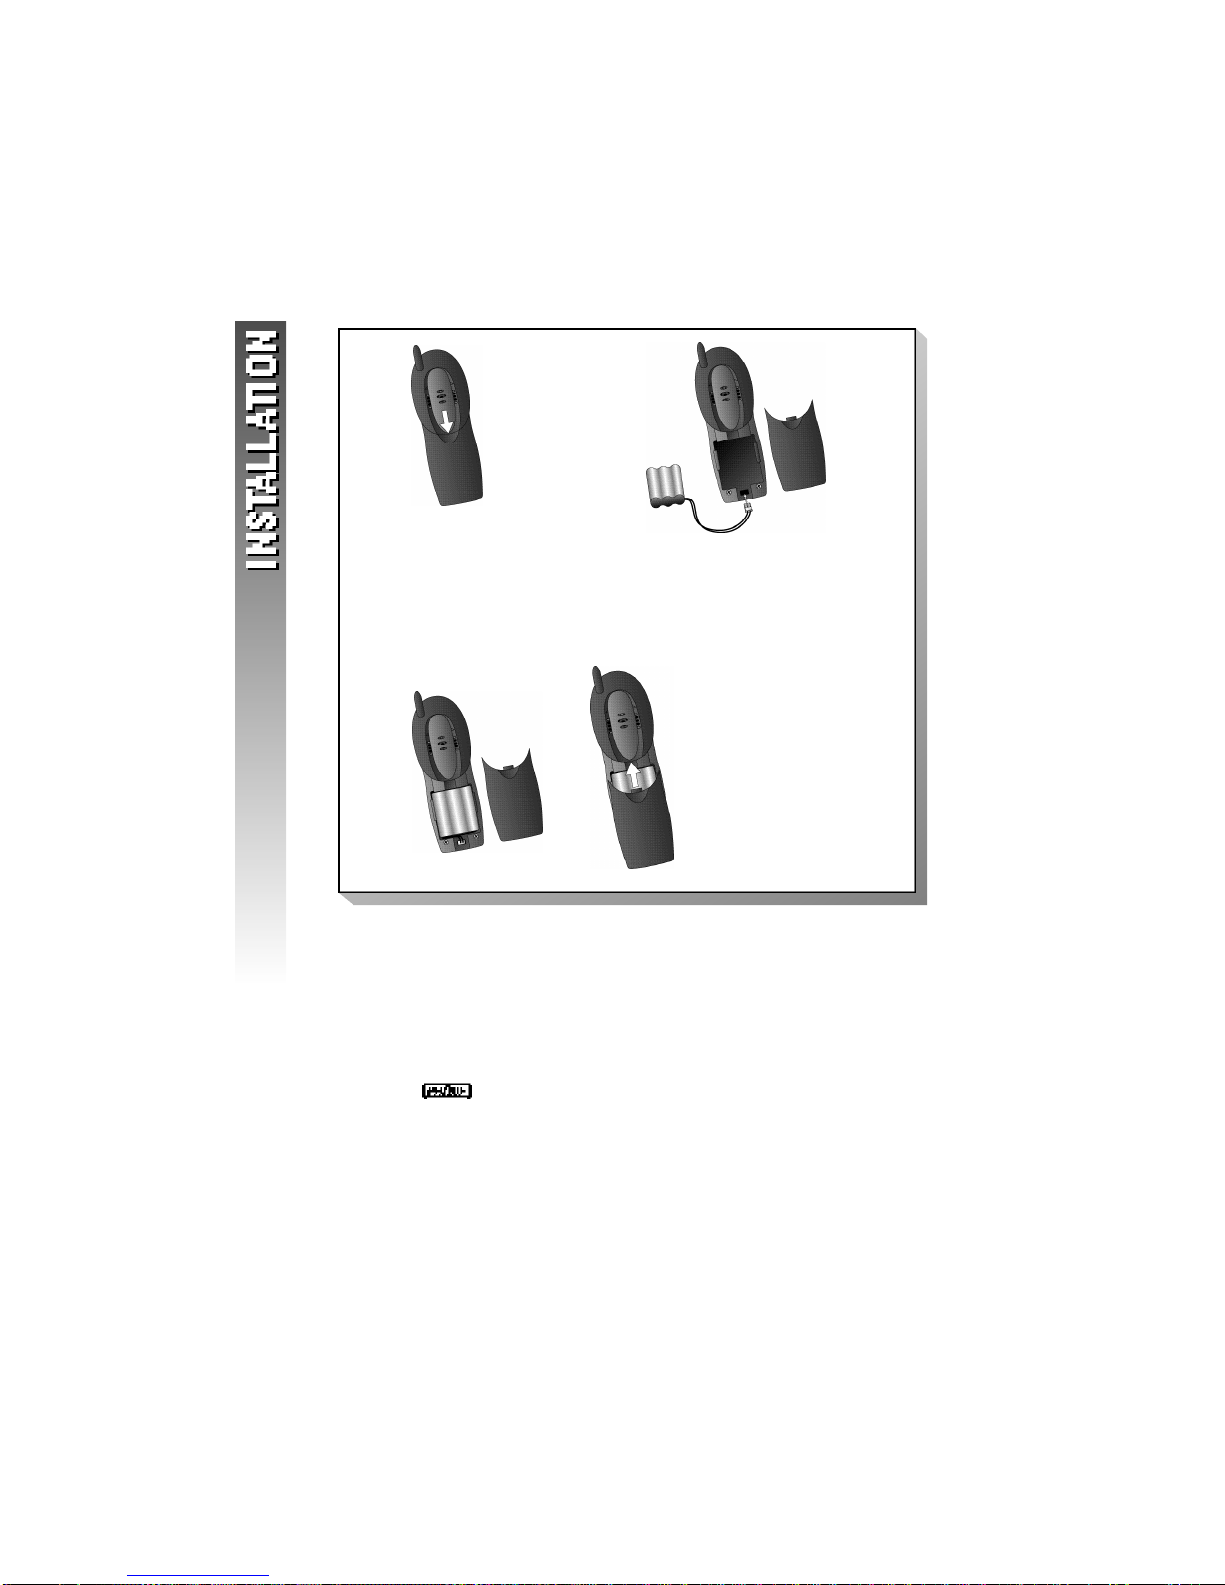
BATTERIES . . . . . . . . . . . . 43
Battery Life . . . . . . . . . . . . . 43
Charge the Handset
Battery Pack . . . . . . . . . . .43
Replace the Handset
Battery Pack . . . . . . . . . . . 44
IN CASE OF DIFFICULTY . . . 45
DEFAULT SETTINGS . . . . . . 49
TECHNICAL
SPECIFICATIONS . . . . . . 50
INDEX . . . . . . . . . . . . . . . 51

1
BEFORE YOU BEGIN
Parts List
Your box should include:
This User’s
Manual Quick
Start
Guide
Base unit
NiCd battery pack
Handset
Telephone
line cord
Power
adapter

2
BEFORE YOU BEGIN
About Caller Identification (Caller ID)
This product has a Caller ID with CallWaiting feature that works with
service from your local phone service provider.
Caller ID with CallWaiting lets you see who’s calling before you answer
the phone,even when you’re on another call.
You may need to change your phone service to use this feature.
Contact your phone service provider if:
• You have both Caller ID and CallWaiting,but as separate
services (you may need combined service)
• You have only Caller ID service,or only Call Waiting service
• You don’t subscribe to any Caller ID or CallWaiting services.
You can use this product with regular Caller ID service,and you can
use this product’s other features without subscribing to either Caller ID
or combined Caller ID with CallWaiting service.
There are fees for Caller ID services,and they may not be available in
all areas.
This product can provide information only if both you and the caller
are in areas offering Caller ID service,and if both telephone companies
use compatible equipment.
About the Call Log
This phone assigns each incoming call a number from 1 to 50.
The most recent call will have the lowest number. When the memory
is full,the oldest call information is deleted to make room for new
incoming call information. See CALLER ID OPERATION,beginning
on page 37,for more details.
If you answer a call before call information appears on the screen,
it will not appear in the call log.
About Adding Handsets
This product is compatible with the AT&T 2300 Expansion Handset.
You may use up to three 2300 units (purchased separately) with this
phone. Follow the instructions provided with the additional handset(s)
for installation and registration.

3
INSTALLATION
Base Installation
¥NOTE: Install the base unit away from electronic equipment,
such as personal computers, television sets or microwave ovens.
Avoid excessive heat, cold, dust or moisture.
1Connect the power cord to the base and an electrical
outlet not controlled by a wall switch.
Use only the power cord supplied with this product.
If you need a replacement,call 1 800 222–3111.
Standard
electrical
outlet
Modular
telephone
jack
2 Connect the
telephone
line cord.

4
3 Install the handset battery.
Use onlyAT&T Battery 3301,SKU# 91076.
4Charge the handset battery.
•Place the handset in the base.
• Charge the battery for at least 12 hours. After the first
charge,the battery will charge in eight hours.
5 Check for dial tone.
• After the batteries are charged,lift the handset and press
;you should hear a dial tone.
b) Plug the battery pack
connector into handset.
Place the battery pack and
wires in the compartment.
a) Remove battery
compartment cover by
pressing on indentation
and sliding downward.
c) Replace cover by
sliding it on its
track up over
battery case until
it snaps firmly
into place.

5
Headset
You can use this telephone
hands-free when you install
any industry standard 2.5 mm
headset (purchased separately).
For best results use anAT&T
2.5 mm headset.
Plug the headset into the jack
located on the right side of
the handset (under the small
rubber flap). Do not force the
connection,but make sure the
plug fits securely.

6
Feature Setup Menu
¥NOTE: When you follow the directions to “Clear
MessageWaiting”or “Set Dial Method” you change
settings for ALL registered handsets and the base.
All other features must be set separately at each
handset and the base. (See “About Adding
Handsets”on page 2 for details about additional
handsets.)
Press to enter the Feature Setup menu. Use
or to choose features,then press to save your
choice.
Press at any time to return to the previous menu
item. Press repeatedly to exit Feature Setup and
return to the idle screen.
¥NOTE: If you wait more than 30 seconds
without pressing a key, the set returns to the idle
screen.
¥NOTE: If you receive an incoming call while in
Feature Setup, the phone automatically exits the
menu to take the call.
FEATURE SETUP

7
Ring Volume

8
Ring Pattern
The external ring pattern sets which ringer you hear
when you have an outside call. The intercom ring
pattern sets which ringer you hear when you have
an intercom call from the base or a registered handset.
External ring pattern default setting is ;intercom ring
pattern default setting is .
1Press . The screen displays
2Press or until the screen displays
— OR —
3Press . The screen displays
4Press or then to choose
or .
5Use the keypad to enter a ring pattern
selection ( – )
— OR —
Press or to display desired setting.
A sample of the displayed setting is played
briefly.
6Press to save displayed setting. You will
hear a confirmation tone.
7Press to exit ring pattern setup.

9
Key Click
(Handset Only)
When this feature is on,each key press makes a sound.
Default setting is .
1Press . The screen displays
2Press or until the screen displays
3Press . The screen displays
4Press or to select .
— OR —
Press or to select .
5Press to save the displayed setting.

10
Handset Name
(Handset Only)
You can customize the handset to display a name or
word of your choice (up to 16 characters) in place of
•on the idle screen and
• (during intercom calls).
The default setting is .
1Press . The screen displays
2Press or until the screen displays
3Press . The screen displays
4Use the keypad and thechart on page 31 to
enter a handset name.
5Press to save the displayed name.
To change the name again at any time,simply repeat
Steps 1-5.
¥NOTE: Each handset must have a unique name.
If an already assigned name is entered,
will be displayed. Repeat
Steps 1-5 using a new name.

11
Language Setting
You can set each registered handset and the base so
the display appears in English,Spanish,or French.
The default setting is .
1Press . The screen displays
2Press or until the screen displays
3Press . The screen displays the current
language
4Press or to scroll through the
language choices.
5Press to save the displayed language.
The screen returns to
¥NOTE: The display will appear in the language
you have selected.

12
Clear Message Waiting
If you subscribe to telephone company voice mail
service,and the message waiting indicator remains
on even after you have reviewed all messages,follow
the directions below to turn off the indicator.
¥NOTE: These steps will clear the message waiting
indicator for ALL registered handsets and the
base. (See “About Adding Handsets”on page 2
for details about additional handsets.)
1Press . The screen displays
2Press or until the screen displays
3Press . The screen displays
4Press to confirm and remove the message
waiting indicator
— OR —
Press to exit the menu without clearing
the message waiting indicator.
The screen returns to

13
Set Dial Method
¥NOTE: When you change the dial method setting
ALL registered handsets and the base are affected.
(See“About Adding Handsets”on page 2 for
details about additional handsets.)
This phone comes set for touch tone ( ) dialing.
If you have dial pulse (rotary) service,you must set
the dial method to .
1Press . The screen displays
2Press or until the screen displays
3Press . The screen displays
4Press or to select
— OR —
Press or to select .
5Press to save the displayed setting.

14
TELEPHONE OPERATION
Idle Screen
When the handset is within range of the base and the
handset and the base are not on a call or in Feature
Setup mode,the screen displays
If you assign a name to the handset (see “Handset
Name”on page 10),that name will be displayed
instead of .
Make a Call
At the Handset
1Press ,then dial the number
— OR —
Dial the number,then press .
2To end the call,press again
— OR —
Place the handset in the base.
At the Base
1Press (the SPEAKER light will go on),
then dial the number
— OR —
Dial the number,then press .
2To end the call,press again. The
SPEAKER light will go off.

15
Answer a Call
At the Handset
1Press to answer a call.
2To end the call,press again
— OR —
Place the handset in the base.
At the Base
1Press to answer a call. The SPEAKER
light will go on.
2To end the call,press again. The
SPEAKER light will go off.
Volume
You can adjust the volume of what you hear through
the handset or base speakerphone during a
conversation by pressingVOLUME orVOLUME .
While you adjust the volume level,the screen display
is similar to
— OR —
¥NOTE: When you reach the highest or lowest
setting, you will hear a triple beep.

16
Call Timer
When the handset or base is on a call,the screen
displays a timer and whether the call is external or
intercom. For example:
Handset Speakerphone
When the handset speakerphone is activated,you can
use the phone hands-free. Stand the handset on a flat
surface (not in the base) and continue your
conversation.
Make a Call
1Press ,then dial the number
— OR —
Dial the number,then press .
2To end the call,press again
— OR —
Place the handset in the base.
Answer a Call
1Press to answer a call.
2To end the call,press again
— OR —
Place the handset in the base.
Switch Between Handset and Handset Speakerphone
While on a call you can press to switch to
the handset speakerphone. While on a handset
speakerphone call,press to return to the
handset.

17
Redial
¥NOTE: While scrolling through redial memory
you can press to exit.
At the Handset
The last five phone numbers dialed at the handset
are stored in handset redial memory.
Press repeatedly until the number you want
to call is displayed,then press or to dial
the displayed number
— OR —
Press or ,then press repeatedly
until the number you want to call is displayed.
Press to dial the displayed number.
At the Base
The last five numbers dialed at the base are stored in
base redial memory.
Press repeatedly until the number you want
to call is displayed,then press to dial the
displayed number
— OR —
Press ,then press repeatedly until the
number you want to call is displayed. Press to
dial the displayed number.
Table of contents
Other AT&T Telephone manuals

AT&T
AT&T CRL81112 User manual

AT&T
AT&T TRIMLINE 210 User manual

AT&T
AT&T 9002 User manual

AT&T
AT&T CL2939 User manual

AT&T
AT&T 962 User manual

AT&T
AT&T BELL SYSTEM Touch-A-Matic 870A1 Instruction manual

AT&T
AT&T CL4939 User manual

AT&T
AT&T SB67030 User manual

AT&T
AT&T ML17928 User manual

AT&T
AT&T U-verse TV User manual

AT&T
AT&T Synapse SB67020 User manual

AT&T
AT&T SynJ SB67148 User manual

AT&T
AT&T Private Pay Phone User manual

AT&T
AT&T Trimline 205 User manual

AT&T
AT&T 830 User manual

AT&T
AT&T CL84100 User manual

AT&T
AT&T 874 User manual

AT&T
AT&T 945 User manual

AT&T
AT&T Partner MLS 12D User manual

AT&T
AT&T Synapse SB67020 User manual