AG-188 User Manual
2
/
40
1 AG-198 Features ...................................................................................................... 4
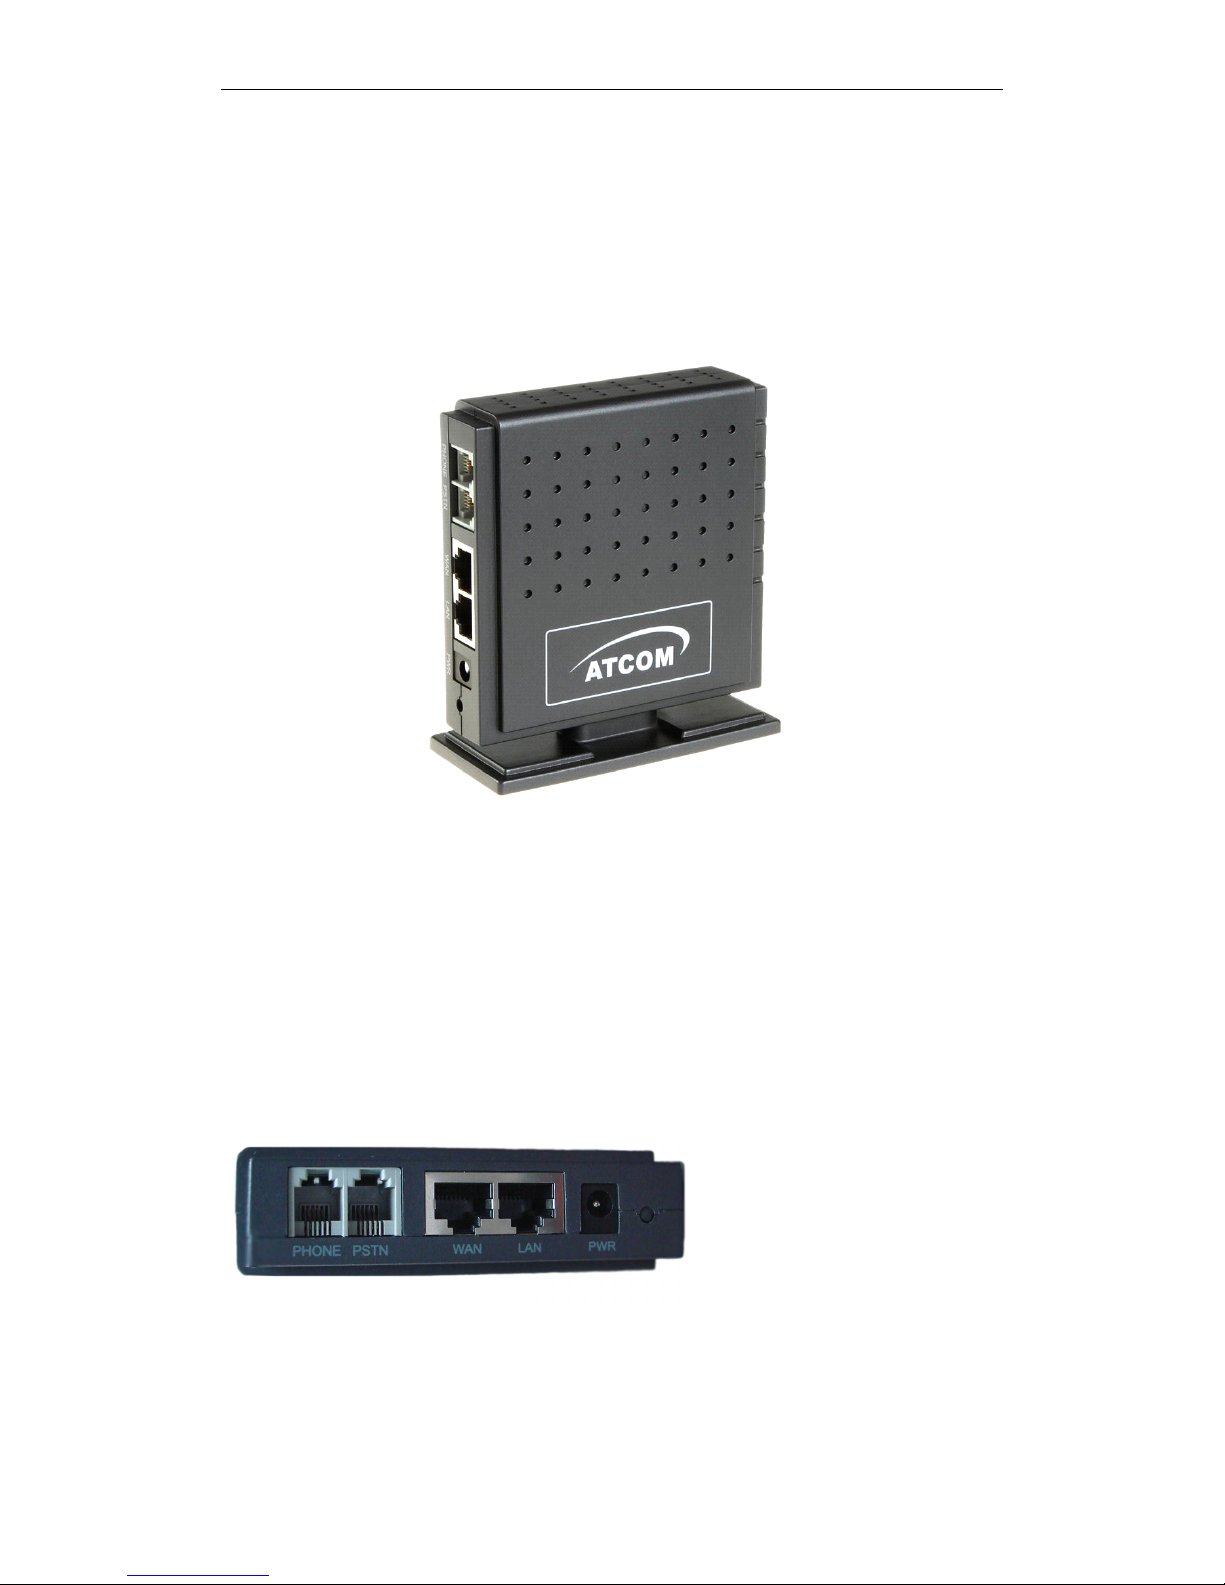
1.1 Appearance ....................................................................................................................... 4
1.2 Interface ............................................................................................................................. 4
1.3 Electricity characteristic ................................................................................................... 5
1.4 Software ............................................................................................................................. 5
1.5 Standard and Protocols ................................................................................................... 5
1.6 C ompliant Standards ....................................................................................................... 6
1.7 Operating requirement .................................................................................................... 6
1.8 Package ............................................................................................................................. 6
1.9 Installation ......................................................................................................................... 7
2 Web Configuration .................................................................................................... 7
2.1 Access Web setting page ............................................................................................... 7
2.2 Current state ..................................................................................................................... 8
At the bottom of the page, there shows firmware version. ............................................... 8
Version: VOIP Gateway V1.0.178.16 Jul 12 2011 ............................................................. 8
Network .................................................................................................................................... 9
2.2.1 Wan Config
............................................................................................................
9
2.2.2 LAN Config
...........................................................................................................
10
2.3 VoIP .................................................................................................................................. 10
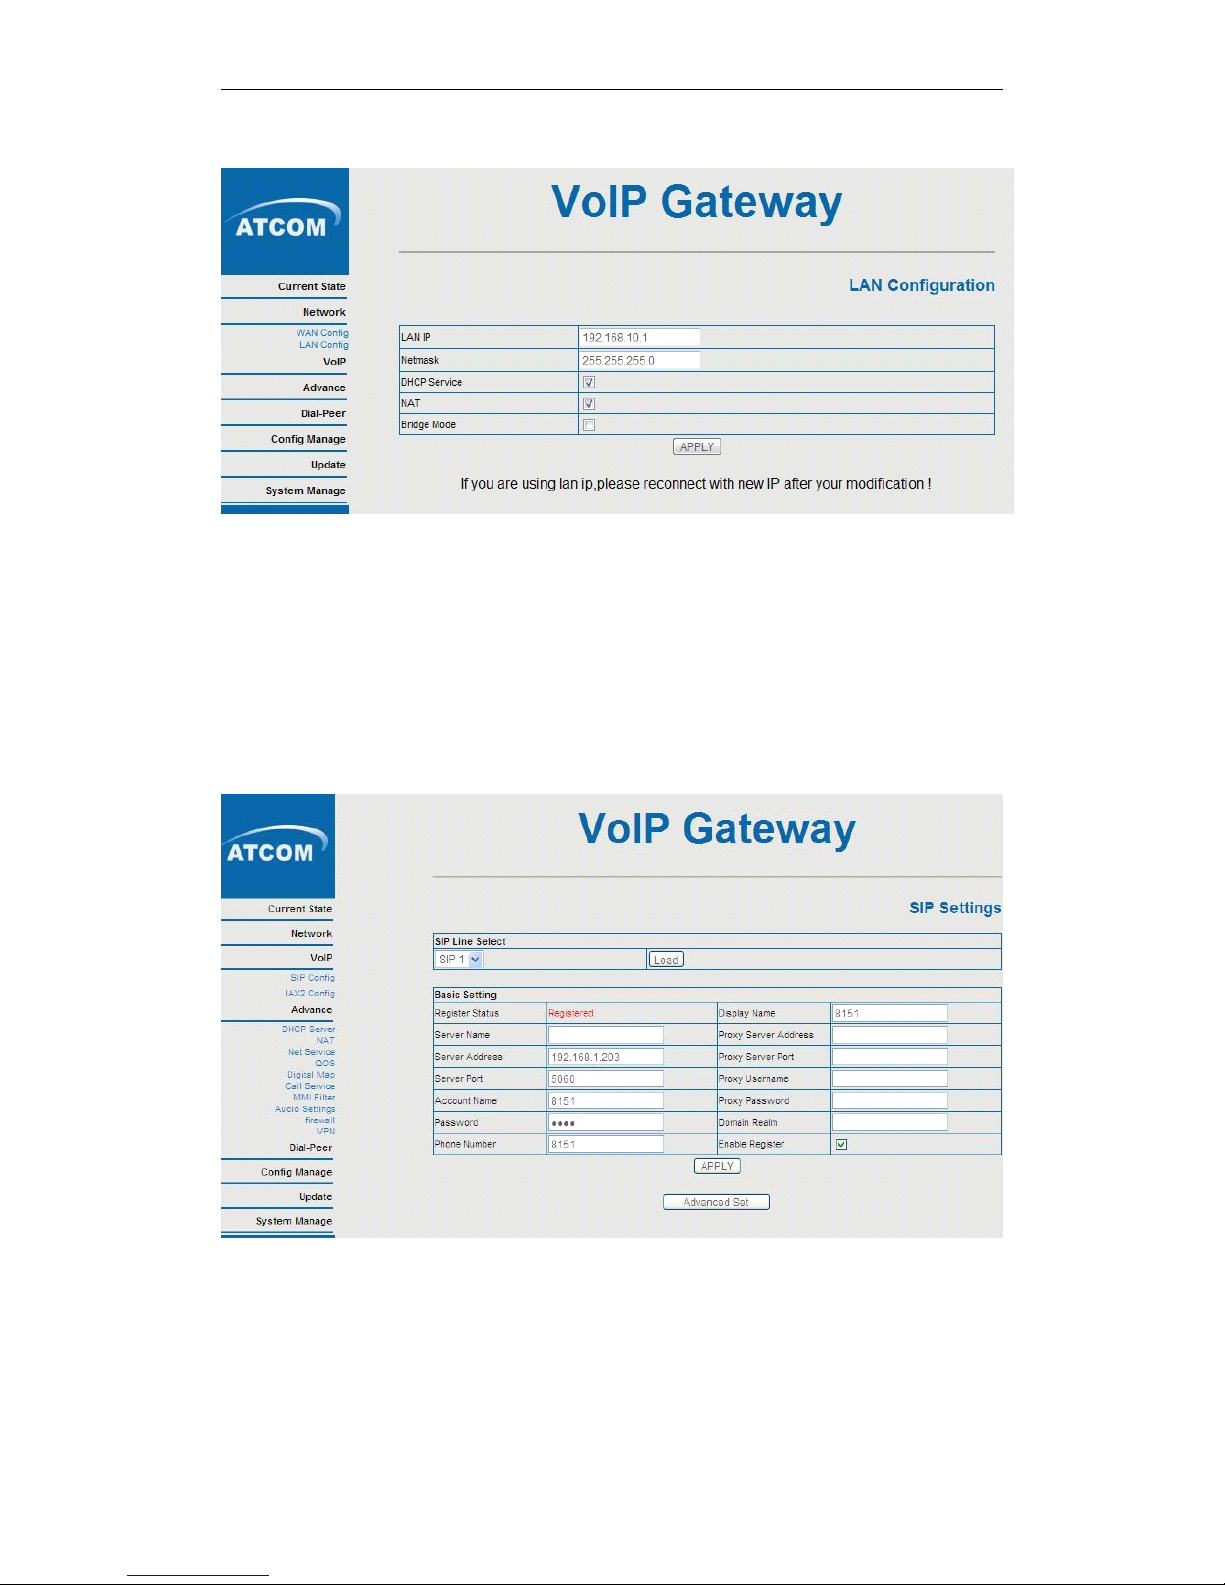
2.4.1 SIP Config
............................................................................................................
10
2.4.2 I ax2 Config
...........................................................................................................
13
2.4 Advance ........................................................................................................................... 15
2.4.1 DHCP Server
.......................................................................................................
15
2.4.2 NAT
.......................................................................................................................
16
2.4.3 Net Service
...........................................................................................................
17
2.4.4 QoS settings
........................................................................................................
18
2.4.5 Digital Map
...........................................................................................................
19
2.4.6 Call Service
.........................................................................................................
20
2.4.7 MMI Filter
.............................................................................................................
21
2.4.8 Audio Settings
.....................................................................................................
22
2.4.9 Firewall
.................................................................................................................
23
2.4.10 VPN
....................................................................................................................
24
Dial-Peer Settings .................................................................................................................... 25
2.5 Config Manage ............................................................................................................... 26
2.6 Update ............................................................................................................................. 27
2.7 System Manage .............................................................................................................. 29
2.7.1 Account Manage
.................................................................................................
29
2.7.2 Syslog Config:
.....................................................................................................
29
2.7.3 Time Set:
..............................................................................................................
30
2.7.4 Logout&Reboot
...................................................................................................
30
3 IVR ............................................................................................................................ 31
POST Mode(safe mode) ........................................................................................... 31
4 FAQ ........................................................................................................................... 34