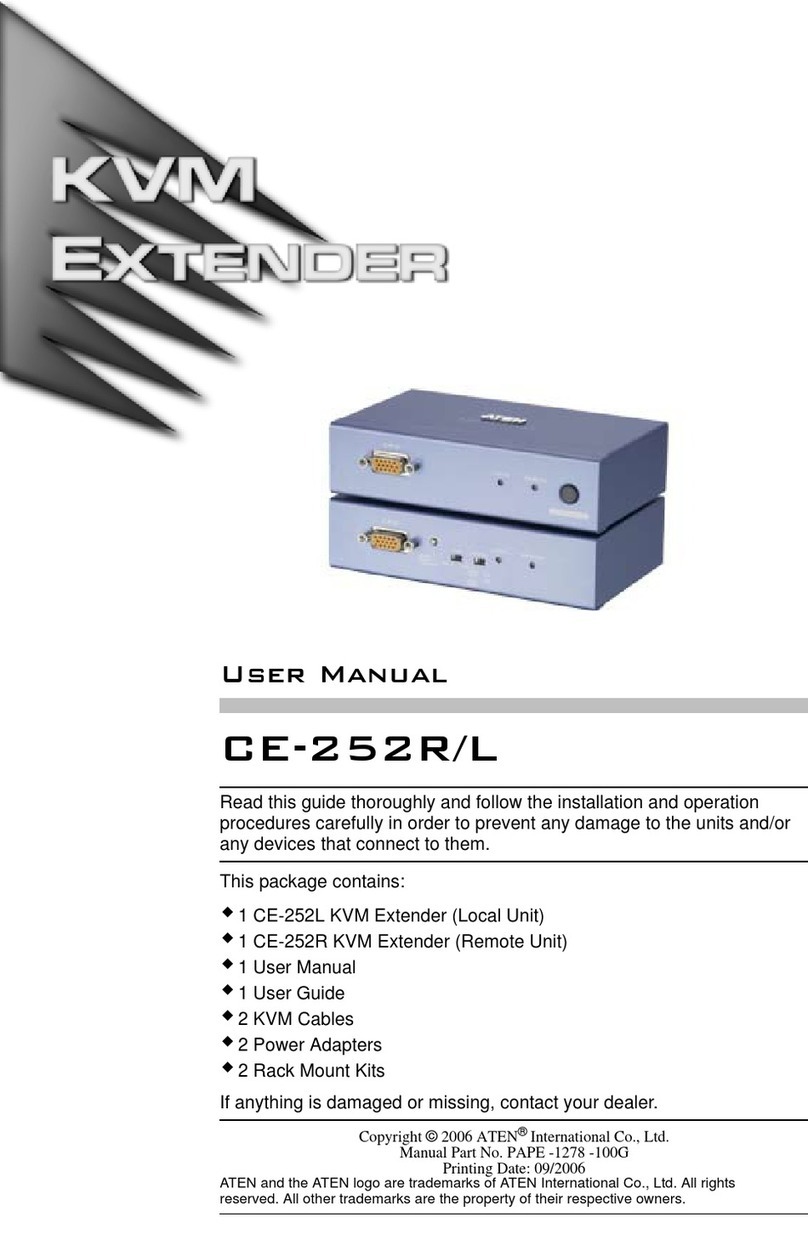
ATEN Altusen KA-9250 User manual

1

2

3
FCC Information
Note: This equipment has been tested and found to comply with the limits
for a Class B digital device, pursuant to Part 15 of the FCC Rules. These
limits are designed to provide reasonable protection against harmful
interference in a residential installation. This equipment generates, uses
and can radiate radio frequency energy, and if not installed and used in
accordance with the instruction manual, may cause interference to radio
communications. However, there is no guarantee that interference will not
occur in a particular installation. If this equipment does cause harmful
interference to radio or television reception, which can be determined by
turning the equipment off and on, the user is encouraged to try to correct
the interference by one or more of the following measures:
• Reorient or relocate the receiving antenna;
• Increase the separation between the equipment and receiver;
• Connect the equipment into an outlet on a circuit different from that
which the receiver is connected;
• Consult the dealer or an experienced radio/television technician forhelp.
© Copyright 2003 Altusen® PKG-M0048
All brand names and trademarks are the registered property of their respective owners.

4

5
Table of Contents
Table of Contents ...................................................................
About this Manual ..................................................................
How this manual is organized .....................................................................
Document conventions ...............................................................................
Special message conventions .....................................................................
Additional help .............................................................................................
Altusen website ........................................................................................
Altusen authorized reseller .....................................................................
Chapter 1
Introduction ........................................................................
Features ..........................................................................................................
Package contents ..........................................................................................
System requirements ....................................................................................
KA9250 Front View ......................................................................................
Chapter 2
Installation ..........................................................................
Operation .......................................................................................................
Appendix.........................................................................................................
Specifications ................................................................................................
Trouble Shooting...........................................................................................
Limited Warranty............................................................................................
04
05
05
06
06
06
14
15
15
16
17
10
10
11
12
3
04
03
09
13

6
About this Manual
Welcome to the KVM Extender Module (KA9250) User Manual, which
provides information for understanding and using Altusen’s KA9250 KVM
Extender Module.
How This Manual is Organized
The overall organization of this manual is described in the following table:
Chapter 1
Chapter 2
Appendix
4
Introduction provides an overview of the KVM Extender Module’s
features and functionality.
Installation procedures and operations.
Specifications, Trouble Shooting, and Warranty

7
Document Conventions
This manual uses a variety of formats to identify different types of information,
reiruoc retupmocneercs-no,stnemetatsxatnyssahcusnoitamrofnidepytsetacidnI
.yrotceridevirddnaelif,htap,txet
>.noitponadnaunemaneewtebnoitarapessetacidnI
.unemtratSehtninuRtcelesneht,unemtratSehttceles:nuR>tratS
SPACLLA.snoitaiverbbadnasmynorcasetacidnI
scilati tsrifehtrofdesusesarhprosdrowlaiceps,seltitretpahcrotnemucodsetacidnI
.sdrowdezisahpmednaemit
][.draobyekruoynosserpotyekasetacidnI
.yektlAehtsserp:]tlA[
.emitemasehttasyeklortnoCdnatlAehtsserp:]lrtC+tlA[
emasehttasyeklortnoCdnatlAehtsserp:]leD[,]lrtC+tlA[
.yeketeleDehtsserpnehtdnaemit
][txetepyT .draobyekruoyno]yek[asserpnehtdnaepyttsumuoynoitamrofnisetacidnI
.yekretnEehtsserpnehtdnallatsniepyt:]retnE[llatsnI
•.tsillanoitamrofninaetacidnistsiltelluB
.1.spetserudecorpetacidnistsilderebmuN
Special Message Conventions
This manual uses the following message conventions:
Indicates information that helps prevent system failure or data loss.
NOTE: Indicates information of special interest or importance.
5

8
Additional Help
Altusen provides the following support options for additional help, advice
and information:
6
troppuSlacinhceTnesutlA
lacinhceTaciremAhtroN
troppuSenohP
otdeltitneerauoy,renwotcudorpnesutlAderetsigerasA
nesutlAehttcatnocoT.troppuslacinhcetenohpeleteerf
5888-354-949-1:llac,retneCtroppuSlacinhceT
lacinhceTlanoitanretnI
troppuSenohP
troppuSlacinhceTnesutlAehtrorelaedlacolruoytcatnoC
9596-2968-2-688:retneC
liam-E .moc.nesutla@troppus:otsnrecnocdnasnoitseuqruoyliamE
noitatnemucoDenilnO enilnosseccaoT.yllacinortceleelbaliavasilaunaMresUehT
:etisbewtroppusnesutlAehttisiv,noitatnemucod
.troppus/moc.nesutla.www//:ptth
gnitoohselbuorT ylnommoctsomehtfoemossebircsedgnitoohselbuortenilnO
tisiV.snoituloselbissopsedivorpdnasmelborpderetnuocne
.troppus/moc.nesutla.www//:ptth:etisbewtroppusnesutlAeht
setadpUerawtfoSerawmrifdnasrevirdretupmoctsetalehtdaolnwodoT
:etisbewtroppusnesutlAehttisiv,sedargpu
.troppus/moc.nesutla.www//:ptth
etisbeWNESUTLA
noitamrofnItcudorP plehnacstcudorpnesutlAwohtuobanoitamrofnieromdeeN
:bewehtnonesutlAtisiV?stimiltuohtiwtcennocuoy
moc.nesutla.www//:ptth
relleseRdezirohtuANESUTLA
relleseRdezirohtuAdniF
aerAruoYnI
dezirohtuanadnifotsdohtemysaeeerhtsedivorpnesutlA
:relleser
:tcatnocaciremAhtuoSdnaadanaC,setatSdetinU-
NESUTLA-668
9596-2968-2-688:tcatnoclanoitanretnI-
enohpeletdnasnoitacolrofetisbewnesutlAehttisiV-
srebmun

9
Please have the following information ready before contacting Altusen
technical support:
• Product model number, serial number and date of purchase.
• Your current computer configuration, including operating system, revision
level, add-on boards and software.
• Error messages displayed at the time the error occurred.
• The sequence of computer operations that cause the error.
• Any other helpful information.
7

10
8

11
Chapter 11
11
1
Introduction
The KVM Extender Module allows the 16-port High Density KVM
Switch (KH0116), and the 16-port LCD KVM Switch (KL0116) to
be operated from a remote console up to 150m (500 feet) away.
The KVM Extender Module connects to the KH0116 or KL0116’s
RJ-45 Remote Console port via industry standard Category 5e (or
Category 6) cable for a reliable installation.
The KVM Extender Module features a custom ASIC to ensure the
utmost in reliability and compatibility, that can also sense the
distance to the high density KVM switches and automatically adjust
the gain to compensate.
Setup is quick and easy - simply plug the remote console
components (keyboard, monitor and mouse) into the KVM Extender
Module’s Console ports; run the CAT5e cable to the KVM’s
Remote Console port; plug in the power adapter; and you are ready
to go.
8
9

12
Features
Package Contents
The complete KVM Extender Module package includes the following items:
• 1 KVM Extender Module (KA9250)
• 1 Power Adapter
• 1 User Manual
• 1 Warranty / Registration Card
Check to make sure that each item in the above list is included in your
package. If an item is missing or damaged in shipment, please contact your
dealer.
Read this manual thoroughly. Follow the installation and operation
procedures carefully to prevent damage to the KVM Switch and any
connected devices.
10
The main features of the KA9250 unit are as follows:
• Built-in ASIC for greater reliability and compatibility
• Control KH0116 or KL0116 up to 150m (500 feet) via Category 5e Cable
• High resolution video - Up to 1280 x 1024
• Supports VGA, SVGA, and Multisync Monitors
• Local Monitor Supports DDC; DDC2; DDC2B
• Automatic gain control - automatically adjusts signal strength to
compensate for distance

13
System Requirements
Remote Console
• A VGA, SVGA or Multisync monitor capable of the highest resolution that
you plan to use on any computer in the installation.
• A PS/2 style mouse
• A PS/2 style keyboard
Note:
Cables
11
To use the KVM Extender Module to remotely access our High Density
KVM Switches and LCD Console KVM Switches, the following
requirements must be available:
Category 5e rated UTP (Unshielded Twisted Pairs) cable is the
minimum required to connect the KVM Extender Cable to the High
Density KVM Switches. Cable of a lesser standard will result in
degrading of the video signal. For best performance, we strongly
recommend Category 5e or Category 6 cables.
If you connect a DDC type monitor to the Local unit, the monitor
that connects to the Remote unit must be able to support the
highest video resolution that the DDC monitor can provide.

14
12
Front View of KA9250
1. Port LEDs
• KA9250 has two LEDs (Power and Link) to indicate the operating status
2. Mouse Port
• The remote PS/2 mouse plugs into this port
3. Keyboard Port
• The remote PS/2 keyboard plugs into this port
4. Monitor Port
• The remote VGA monitor plugs into this port
5. Remote I/O
• The Category 5e cable that connects to the High Density KVM’s or LCD
KVM’s Remote Console port plugs into this port
6. Power Jack
• The cable from the AC power adapter plugs into this jack

15
Chapter 22
22
2
Installation
This chapter details installation procedures for the KVM Extender Module:
1. Plug the keyboard, monitor, and mouse cables for the remote console devices
into their ports on the Console side of the KVM Extender Module.
2. Plug either end of the Category 5e (or better grade) cable into the KVM Extender
Module’s Remote I/O port. Plug the other end of the cable into the Remote
Console port of your KVM Switch.
3. Plug the power adapter (supplied with the KVM Extender Module) into an AC
source; plug the adapter’s power cable into the KVM Extender Module’s Power
Jack.
4. Power up your KVM Switch installation according to the steps
given in the Installation section of its User Manual.
13
(KH0116 Installation)
(KL0116 Installation)

16
The default operating environment for KA9250 is for both the Local and Remote
consoles to be active.
For security and privacy purposes, however, the Remote console can be disabled
so that it cannot have access to the KH0116 / KL0116 or any of the equipment
attached to it.
To disable the Remote console, press the Disable Remote toggle button (KH0116
or KL0116), until it clicks and locks into the Local position. Now, only the Local
Console has access to the Switch.
To reenable the Remote console, press the toggle button again, so that it clicks
and returns to the Remote position.
The KH0116/KL0116 and KA9250 have LEDs that indicate the Local/Remote
operating status as shown in the two tables, below:
KH0116 / KL0116 (Local Console):
Operation
14
DEL edoMgnitarepO
lacoLotuA
lacoLtahtetacidniotsthgiL
sielosnoclacoleht
etomeReht(vitca
)tuosiDEL
elosnoclacolehtnehwsthgiL.1
siDELetomeReht(evitcasi
)tuo
etomerehtnehwffosnruT.2
etomeReht(evitcasielosnoc
)nosnrutDEL
yletanretlaffodnanosehsalF.3
nehwDELetomeRehthtiw
evitcasielosnocrehtien
etomeRffosiDELehTetomerehtnehwsthgiL.1
lacoLeht(evitcasielosnoc
)tuosiDEL
lacolehtnehwffosnruT.2
lacoLeht(evitcasielosnoc
)nosnrutDEL
yletanretlaffodnanosehsalF.3
nehwDELlacoLehthtiw
evitcasielosnocrehtien

17
KH0116 / KL0116 (Remote Console):
Appendix
KA9250 Specifications:
* DDC, DDC2, and DDC2B support is for the Local monitor only.
15
DELnoitacidnI
rewoPehtotnoitcennocehttahtetacidniotylidaetssthgiL.1
.kositinUlacoL
otnoitcennocehthtiwmelborpasierehtnehwsehsalF.2
tinUlacoLeht
kniLevitcasielosnocetomerehtnehwsthgiL.1
evitcasielosnoclacolehtnehwffOsI.2
otnoitcennocehthtiwmelborpasierehtnehwffOsI.3
tinUlacoLeht
noitcnuF0529AK
srotcennoC draobyeKelamefNID-inimnip6x1
esuoMelamefNID-inimnip6x1
rotinoMelamefBDHnip51x1
MVKkcaJC8P8
sDEL nOrewoP1
eniLnO1
htgneLelbaC)xam(]'005[m051
noituloseRoediV 4201x4821
B2CDD;2CDD;CDD
noitpmusnoCrewoP)xam(W0.4V9CA
gnisuoHlateM
thgieW).sbl44.o(g022
)HxWxL(snoisnemiD mm53x08x001
)sehcni4.1x2.3x4(

18
Trouble Shooting
16
notpmySnoitcA
oediVoN stekcosriehtotnideggulpyleruceseraselbacllatahterusekaM

19
Limited Warranty
Altusen warrants this product against defect in material or workmanship for a period of
three (3) years from the date of purchase. If this product proves to be defective, contact
Altusen's support department for repair or replacement of your unit. Altusen will not
issue a refund. Return requests can not be processed without the original proof of purchase.
When returning the product, you must ship the product in its original packaging or
packaging that gives an equal degree of protection. Include your proof of purchase in the
packaging and the RMA number clearly marked on the outside of the package.
This warranty becomes invalid if the factory-supplied serial number has been removed or
altered on the product.
This Warranty does not cover cosmetic damage or damage due to acts of God, accident,
misuse, abuse, negligence or modification of any part of the product. This warranty does
not cover damage due to improper operation or maintenance, connection to improper
equipment, or attempted repair by anyone other than Altusen. This warranty does not
cover products sold AS IS or WITH FAULTS.
IN NO EVENT SHALLALTUSEN'S LIABILITY EXCEED THE PRICE PAID FOR THE PRODUCT.
FURTHER, ALTUSEN SHALL NOT BE RESPONSIBLE FOR DIRECT, INDIRECT, SPECIAL,
INCIDENTAL, OR CONSEQUENTIAL DAMAGES RESULTING FROM THE USE OF THE
PRODUCT, IT'S ACCOMPANYING SOFTWARE, OR IT'S DOCUMENTATION. ALTUSEN
SHALL NOT IN ANY WAY BE RESPONSIBLE FOR, WITHOUT LIMITATION, LOSS OF
DATA, LOSS OF PROFITS, DOWNTIME, GOODWILL, DAMAGE OR REPLACEMENT OF
EQUIPMENT OR PROPERTY, AND ANY EXPENSES FROM RECOVERY, PROGRAMMING
AND REPRODUCTION OF ANY PROGRAM OR DATA. Altusen makes no warranty or
representation, expressed, implied, or statutory, with respect to its products, contents or
use of this documentation and all accompanying software, and specifically disclaims its
quality, performance, merchantability, or fitness for any particular purpose. Altusen
reserves the right to revise or update its product, software or documentation without
obligation to notify any individual or entity.
For details about extended warranties, please contact one of our dedicated value added
resellers.
Address: 23 Hubble Irvine, CA 92618
Web: www.altusen.com
Phone: 949-453-8885
Fax: 949-453-8887
17

20
Other manuals for Altusen KA-9250
2
Table of contents
Other ATEN Extender manuals