7USER MANUAL AM.150
FRAME HARDWARE
Additional Information:
• Loctite 241 thread lock to be applied to threaded
sections of all bolts (excluding seat clamp, BB
shell and wheel axle).
• Multi-purpose grease to be applied to all pivot
shafts, the rear axle shaft and the bearing
housings.
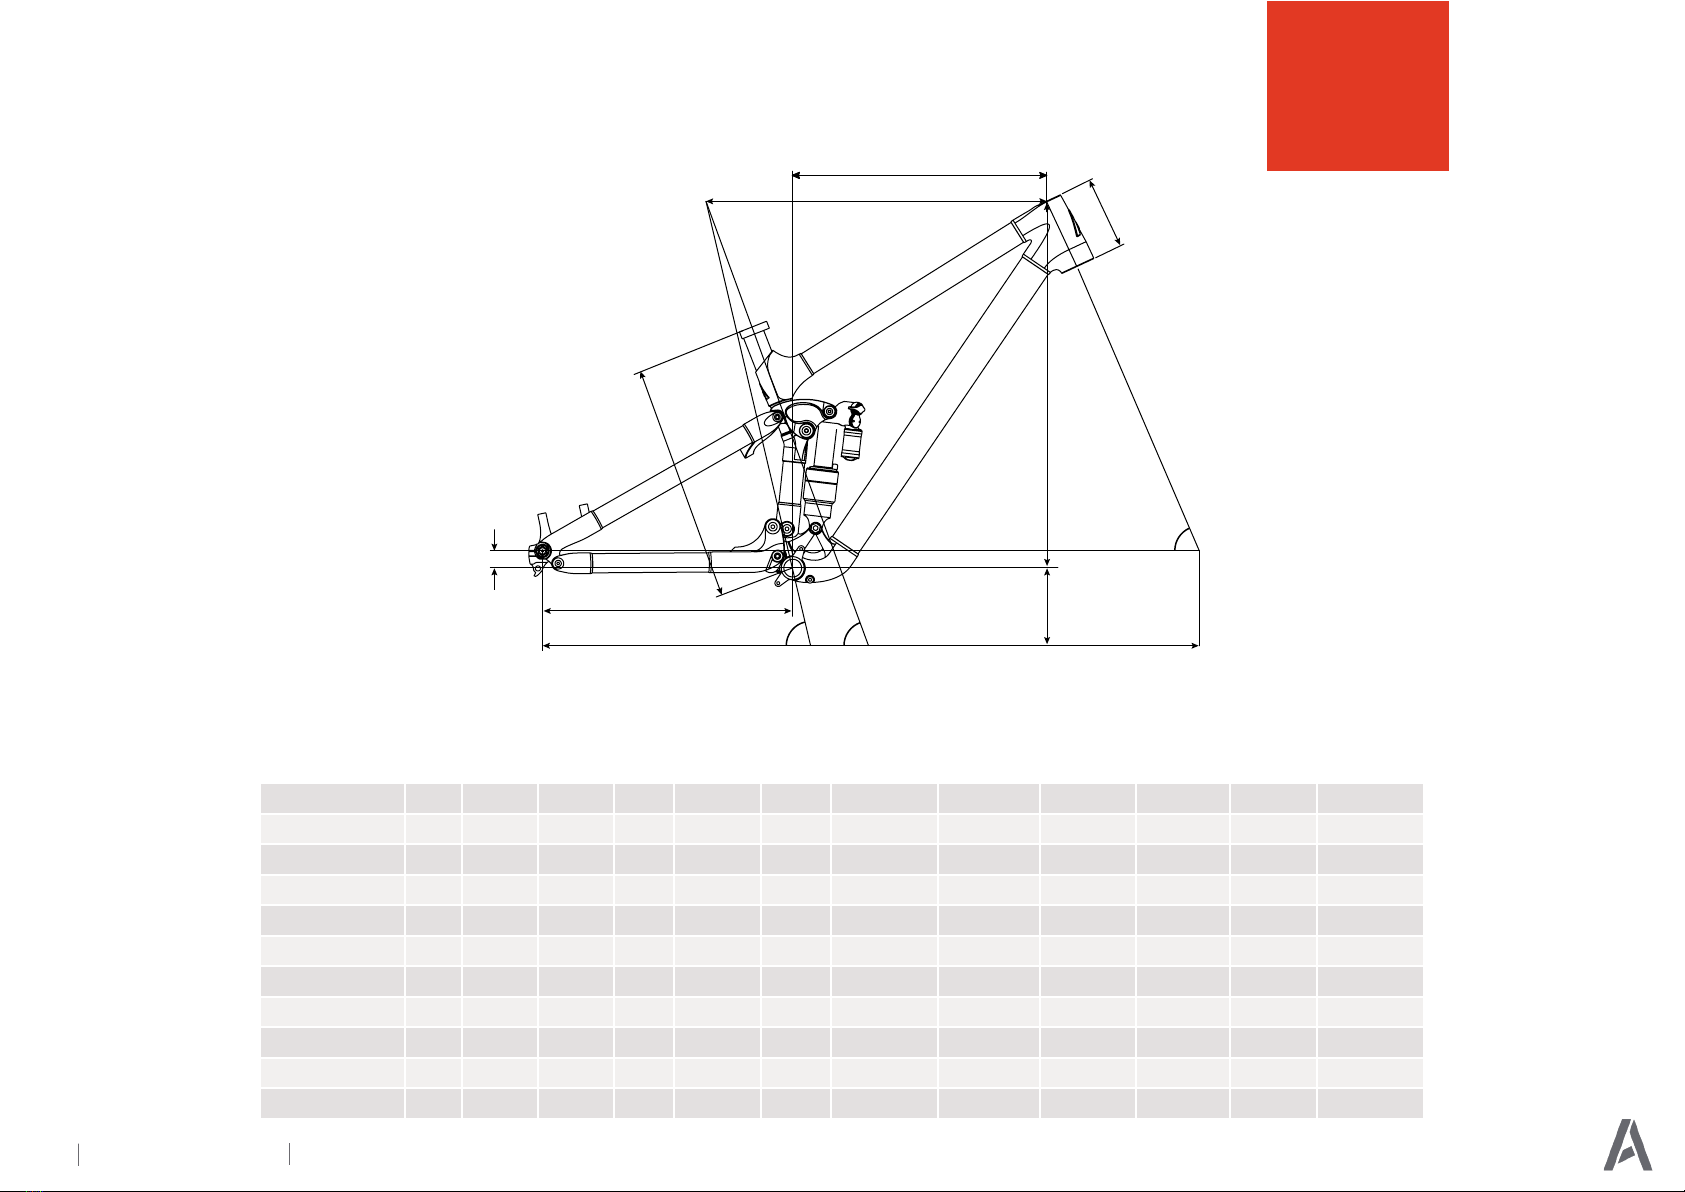
• Torque values are location specific (see exploded
diagrams). If using the bottle cage mounting
threads, bolts should be torqued to 3Nm.
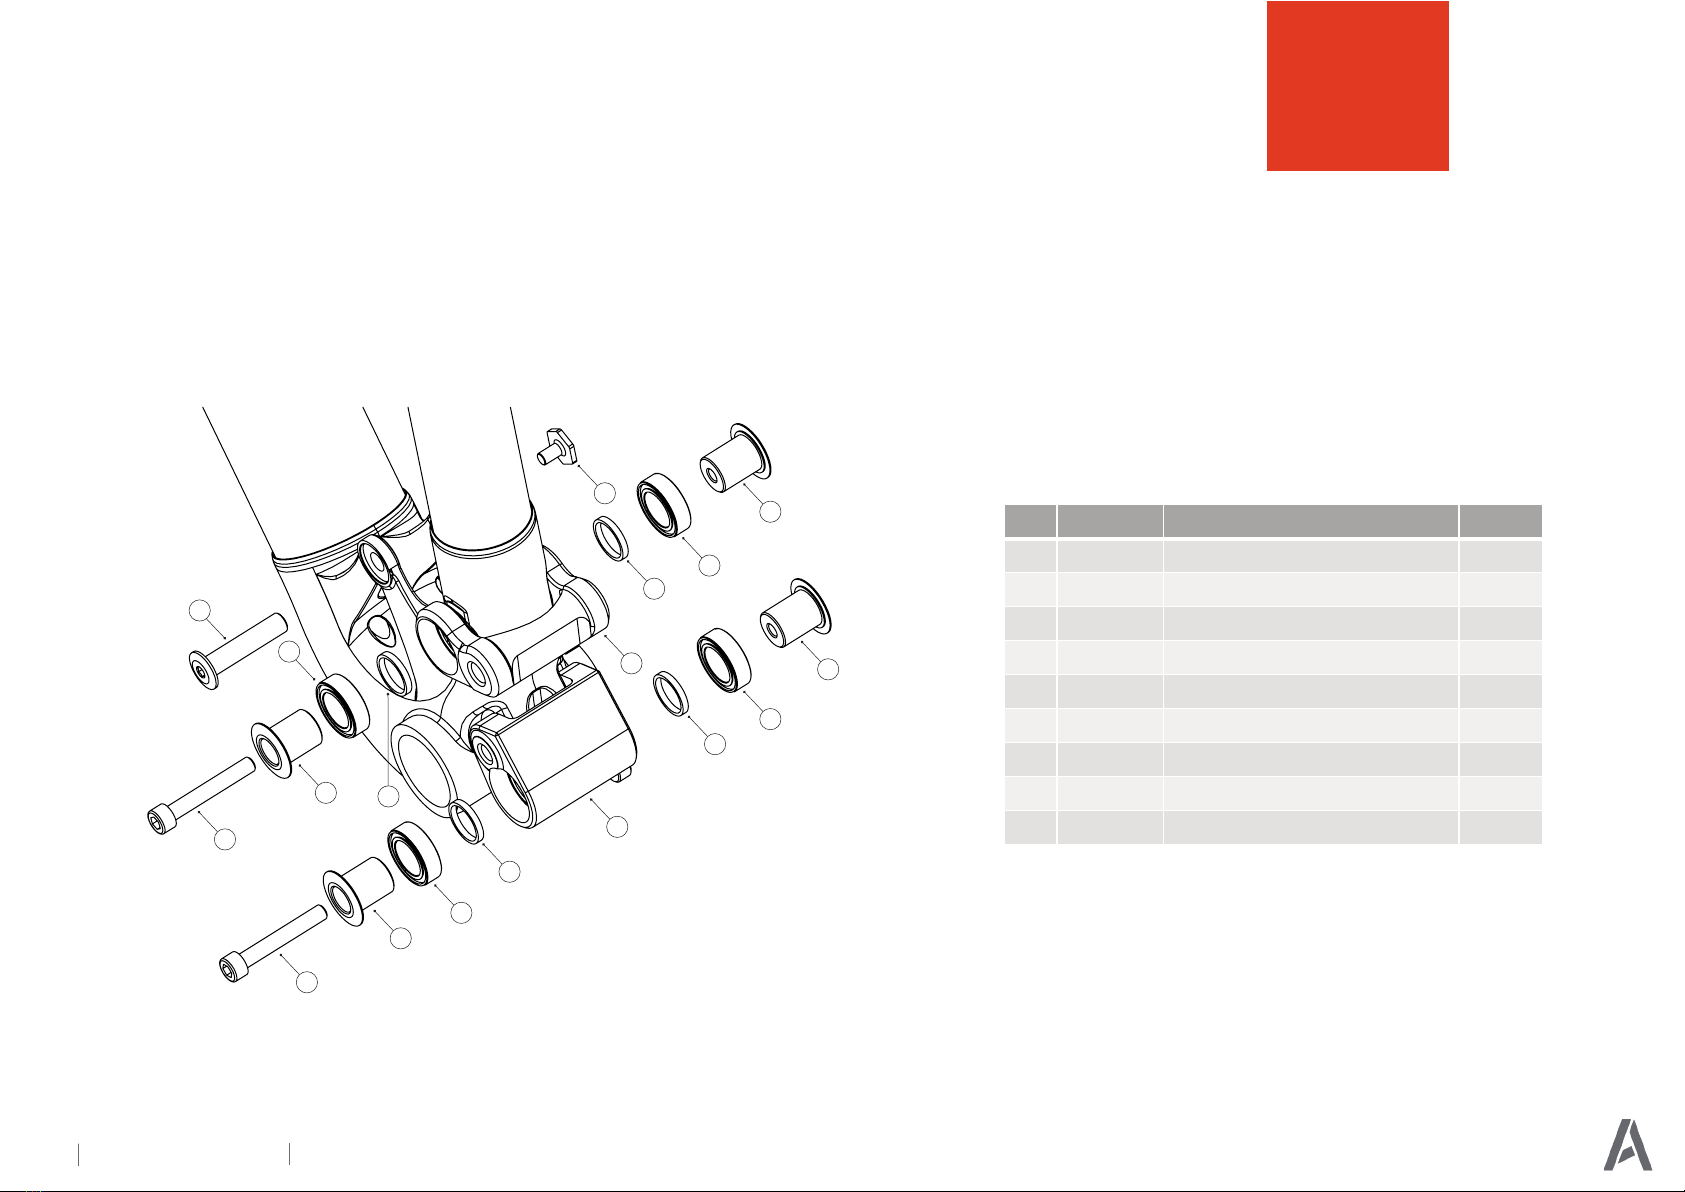
Ref. Part No. Description Qty.
22 011.1007 M6 BARREL NUT 2
23 00.4318.050.001 SRAM AM AX MAXLE STLTH AXLE (180) 1
24
00.7918.093.000
UDH FRAME WASHER 1
25 UDH BOLT 1
26 UDH REAR DERAILLEUR HANGER 1
27 011.1005 SOCKET HEAD CAP SCREW M5 X 14 1
28 011.1006 M5 BARREL NUT 1
29 001.1007 SEAT POST CLAMP 1
Ref. Part No. Description Qty.
1 002.2008 SHOCK LOWER MOUNT PIVOT 1
2 002.1004 SPACER (15 x 18 x 2.5) 8
3 011.1001 SOCKET HEAD CAP SCREW M6 X 40 2
4 002.2011 SEAT TUBE PIVOT MALE 3
5 011.1050 BEARING 3802 8
6 101.5003 LOWER LINK 1
7 101.5002 UPPER LINK 1
8 002.2010 PIVOT HEX BOLT 3
9 002.2002 SEAT STAY PIVOT 2
10 011.1051 BEARING 11197-2RS 6
11 002.1002 SPACER (11 x 14 x 2.5) 6
12 002.2011 SEAT TUBE PIVOT FEMALE 3
13 002.2009 SHOCK UPPER MOUNT 4
14 101.5001 ROCKER 1
15 101.0005 SEAT STAY ASSEMBLY 1
16 011.1002 SOCKET HEAD CAP SCREW M6 X 50 1
17 002.2007 YOKE PIVOT UPPER 2
18 002.2001 DROPOUT PIVOT 2
19 011.1052 BEARING 698 LLU MAX-E 4
20 002.2003 REAR END SCREW CAP 2
21 011.1004 M5 X 10 T25 PAN HEAD TORX 2