Atlas Copco Secoroc G10 Guide

Secoroc Pneumatic Tools
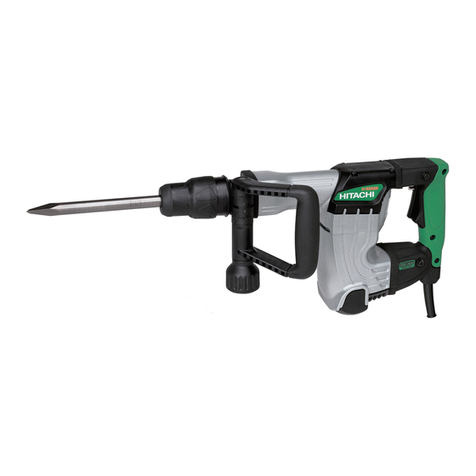
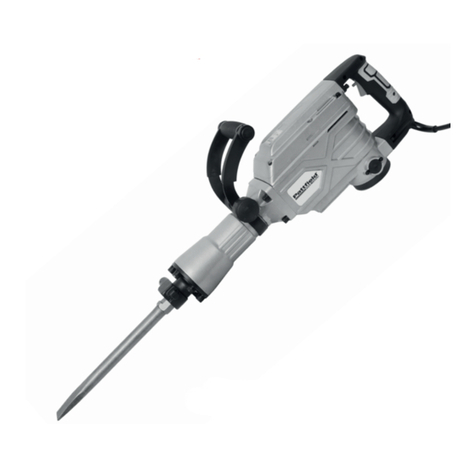
Secoroc G10/G10L Pneumatic Pick Hammer
Operator's instructions / Spare parts list
Secoroc Rock Drilling Tools

2
Foreword
Thank you for selecting the Secoroc pick hammer G10/G10L.
These instructions were developed to help you get the best performance and
productivity from the use of your new pick hammer.
Please refer to them also for the correct maintenance of the pick hammer.

3
Table of Contents
Scope of application ................................................... 4
Specification.......................................................... 4
Safety instructions..................................................... 5
Operation ............................................................ 6
Using the pick hammer for the first time ................................ 6
Preparations before starting .......................................... 6
Fitting the insertion tool.............................................. 7
Before fitting the insertion tool ......................................7
Fitting the insertion tool............................................8
Start and Stop...................................................... 8
Starting the pick hammer ..........................................8
Stopping the pick hammer .........................................8
Starting a cut....................................................... 8
Operating ......................................................... 9
Maintenance ....................................................... 9
Once a shift (after 8 hours of operation) ..............................9
Once a week (after 40 hours of operation) .............................9
Once a month (after 200 hours of operation)...........................9
Selection of spare parts .............................................. 9
Storage .......................................................... 10
Scrapping and waste disposal ....................................... 10
Trouble shooting ..................................................... 10
Spare parts list and exploded drawing ................................... 12

4
Scope of application
The Secoroc pneumatic pick hammer G10/G10L is a machine with D-handle,
designed for light demolition and plant work.The machine can be used both
horizontally and vertically. No other use is permitted.
Specification
Pneumatic pick hammer G10 G10L
Weight 10.6 10.6 kg
Dimension (L x W x H) 575x170x90 575x170x90 mm
Cylinder diameter 38 38 mm
Piston stroke 155 155 mm
Working pressure 4–5 4–5 bar(e)
Impact energy (at 5.0 bar (e)) ≥39 ≥39 J
Impact energy (at 4.0 bar (e)) ≥32 ≥32 J
Air consumption (at 5.0 bar (e)) ≤20 ≤20 l/s
Air consumption (at 4.0 bar (e)) ≤16 ≤16 l/s
Impact frequency (at 5.0 bar (e)) ≥16.5 ≥16.5 Hz
Impact frequency (at 4.0 bar (e)) ≥15 ≥15 Hz
Air hose inner diameter 16 16 mm
Working temperature -30 to +50 -30 to +50 ºC
Shank size R25x75 R24x70 mm

5
Safety instructions
To reduce the risk of serious injury or death to yourself or others, carefully read
through this instruction booklet before putting the pick hammer to use. Always
follow the instructions given in this manual.
hAlways wear a safety helmet, impact resistant eye protection with side protection
and ear protectors during breaking. Any local regulations that exist must also be
observed.
hWhen breaking in certain minerals, there is a risk of spark generation. Before
starting work, check that the machine is approved (in accordance with local
regulations) for work under such conditions.
hAlways take great care when using the machine. The insertion tool is subjected to
heavy loading and can break, with a risk of injury to personnel.
hCheck that the hoses used are of the right quality, and that all hose connections
are in good condition and properly tightened.
hBefore starting work on any of the systems, make sure that the air and water
systems are un-pressurized.
hThe machine is not electrically insulated. If the machine comes into contact
with electricity serious injuries or death may result. To reduce the risk of such
injury or death, never operate the machine near any electric wire or other source
of electricity. Make sure that there are no concealed wires or other sources of
electricity.
hExposure to crystalline silica (sometimes called 'silica dust') as a result of
breaking in rock may cause silicosis, cancer or death. To reduce silica exposure,
use respiratory protective equipment.
hA compressed air hose that comes loose can lash around and cause personal
injury or death. Check that the compressed air connections are not damaged and
that they are properly attached.

6
Operation
Using the pick hammer for the first time
When the pick hammer arrives from the factory, the inside of the tool is coated with
heavy oil to prevent corrosion.
After unpacking and installing the machine, pour a small amount of thin lubrication
oil into the air connection and operate the machine on partial throttle to clean the
interior. Follow this immediately with a liberal amount of air tool oil.
The pick hammer is lubricated with oil mixed with compressed air, which is taken to
the parts that need continuous lubrication.
Preparations before starting
1. Check the equipment
hCheck that all of the equipment is in good working order.
hCheck that the impact surface of the insertion tool shank is flat with no signs of
wear.
hMake sure that the air inlet and exhaust ports are free from obstructions.
hEnsure that the fittings are tight and leak-proof.
WARNING
A compressed air hose that comes loose can lash around and cause personal
injury or death. Check that the compressed air connections are not damaged
and that they are properly attached.
2. Blow out the air hose
Every day before using the pick hammer, blow out the air hose to clear it from
accumulated dirt and moisture.
3. Lubricate
hPour 5 ml of air oil into the air hose once every 2–3 impact hours.
hAlways use a recommended lubricant.
Lubricant recommendation
Use a mineral-based air tool oil
Ambient
temperature ºC
Viscosity grade
(ISO 3448)
-30 to 0 ISO VG 32-68
-10 to +20 ISO VG 68-100
+10 to +50 ISO VG 100-150

7
4. Air pressure and hose dimensions
Air pressure
Ensure that the compressor can deliver the required air pressure of 5 bar at the
machine. Measure the pressure close to the inlet nipple when operating the pick
hammer.
hHigh pressure (>5 bar) causes rough operation and damage.
hLow pressure (<4 bar) results in a slow breaking speed.
Air hose dimensions
The air hose diameter must be no less than 19 mm. The ideal overall air hose
length is less than 15 m.
5. Prevent freezing
In low ambient temperatures, ice can form in the machine. This can be avoided if
the water in the compressed air is removed. This can be done by equipping the air
line with an in-line water separator.
If the pick hammer ices up, it must not be heated to melt the ice. Let the ice thaw at
room temperature.
Never pour methylated spirits or similar substances into the pick hammer, as they
will interfere with the lubrication and lead to increased wear.
Fitting the insertion tool
Before fitting the insertion tool
hTo prevent an accidental start: switch off the air supply and disconnect the
machine from the power source.
hCheck that the insertion tool shank is of the correct size and length for the chuck
used.
hThe shank must be clean and the insertion tool must be in good condition.
hThe suitable quenching hardness of the shank is HRC48-53. A harder end face will
cause piston damage and breakage of the end face of the piston. If the shank face
is too soft it will be easily deformed by the piston which will result in difficulty in
removing the insertion tool.
hThe shank end face shall be flat and perpendicular to the axis.
hRemove sharp edges from the shank's end face. A rough shank surface will cause
premature piston failure.
hInspect the insertion tool: A dull insertion tool will slow down the breaking speed
and overstrain the hammer mechanism.

8
Fitting the insertion tool
1. Unscrew the tool retainer from the cylinder.
2. Insert the insertion tool into the chuck.
3. Screw the tool retainer onto the cylinder. Tighten it using a hammer.
Start and Stop
Starting the pick hammer
The pick hammer starts when the inserted tool is pushed into the cylinder. Start the
pick hammer by pressing the tip of the inserted tool against the work piece.
Stopping the pick hammer
The pick hammer will stop when the tip of the inserted tool is no longer pressed
against the work piece.
Starting a cut
hStand steady and make sure that your feet and hands are at a safe distance from
the inserted tool.
hAdjust the breaking distance so that the inserted tool does not get stuck. Do not
try to cut too big a bite.

9
Operating
hAvoid working in extremely hard materials e.g. granite and reinforcing iron
(reinforcement bar) which would cause substantial vibrations and excessive wear
on the pick hammer.
hCheck regularly that the machine is well lubricated. The chuck and insertion tool
shank must always be covered by a film of oil.
Maintenance
Regular maintenance is a prerequisite for machine safety. Replace damaged and
worn components in good time.
Check the machine and insertion tool for wear and damage at regular intervals. Do
not use a very worn or damaged insertion tool.
When cleaning mechanical parts with a solvent, make sure that you comply with
current health and safety regulations and ensure that there is sufficient ventilation.
Daily maintenance, regular checking of wearing parts and carrying out repairs in
good time prevents breakdowns and increases the service life of the machine.
hMake sure that no foreign matter enters the machine.
hAlways hose down and wipe clean the pick hammer after use.
Once a shift (after 8 hours of operation)
hCheck the wear in the chuck bushing. If the wear limit has been exceeded, the
insertion tool shank will wear more quickly, or become deformed. This will lead
to stoppages and increased insertion tool consumption.
hCheck the hoses, couplings and controls for leakage and damage.
hEvery day before using the pick hammer, blow out the air hose to clear it from
accumulated dirt and moisture.
hDrain the water separator (if one is used).
Once a week (after 40 hours of operation)
Carry out a basic check of all functions of the equipment.
Once a month (after 200 hours of operation)
hSend the pick hammer to a workshop for inspection. The local operating
conditions will determine whether or not this is a suitable interval for overhauling
the machine.
hClean out the water separator (if one is used).
Selection of spare parts
Use only genuine parts for replacement, to ensure stable performance. Never
use pattern parts, which not only have a short working life but also cause
consequential damage to other parts, due to differing measurements and methods
of manufacturing.

10
Storage
hAlways oil the pick hammer before putting it into storage.
hStore the pick hammer in a clean and dry place.
hIn the case of long-term storage, pour a quantity of oil directly into the pick
hammer air intake and then turn on the air briefly. This will protect the machine
from corrosion.
hProtect the chuck using a wooden plug or a clean piece of cotton waste.
Scrapping and waste disposal
Used and worn-out machines must be disposed of in such a way that as much of
the material as possible can be recycled and the impact on the environment is kept
to a minimum.
Trouble shooting
If the pick hammer does not start, has low power or uneven performance, check the
following points.
hCheck that the inserted tool being used has the correct shank dimension.
hCheck that the pick hammer is receiving the correct amount of lubricant.
Too much lubrication can cause starting problems, low power or uneven
performance.
hCheck that the compressed air system supplies the machine with sufficient air
pressure to provide full power.
hCheck that the dimension and length of the air hose is in accordance with the
recommendations. See “Preparations before starting”.
hIf there is a risk of freezing, check that the machine’s exhaust ports are not
blocked.
If the machine function is still not satisfactory after this procedure, contact an
authorized service workshop.

11

12
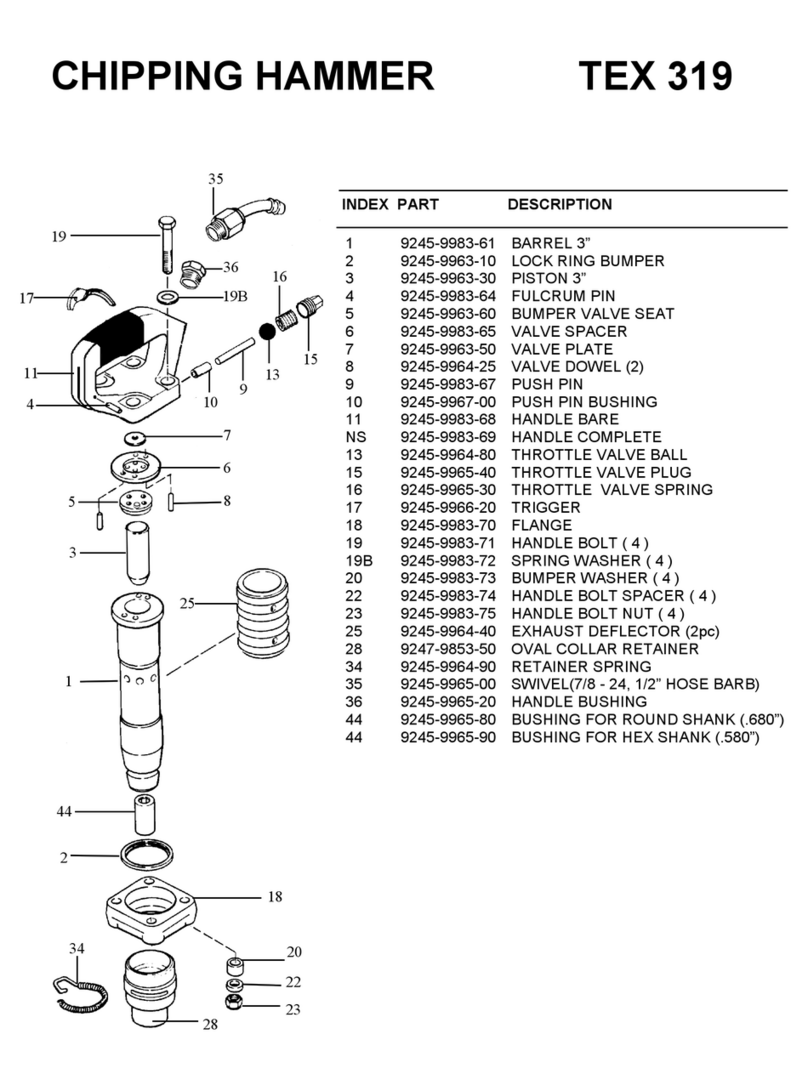
Spare parts list and exploded drawing

13
No. Description Quantity Product no. Product code
G10 G10L
1 Handle 1 1 3312 3104 86 966P-1-3312310486
2 Handle spring 2 2 3312 3104 89 966P-1-3312310489
3 Stop valve sleeve 1 1 3312 3104 90 966P-1-3312310490
4 Stop valve 1 1 3312 3104 92 966P-1-3312310492
5 Stop valve spring 1 1 3312 3104 93 966P-1-3312310493
6 Valve chest pad 1 1 3312 3104 94 966P-1-3312310494
7 Valve 1 1 3312 3104 95 966P-1-3312310495
8 Valve chest 1 1 3312 3104 96 966P-1-3312310496
9 Fix pin 2 2 3312 3104 97 966P-1-3312310497
10 Connection sleeve 1 1 3312 3104 98 966P-1-3312310498
11 Air guiding cover 1 1 3312 3104 99 966P-1-3312310499
12 Piston 1 1 3312 3105 00 966P-1-3312310500
13 Cylinder - 1 3312 3105 12 966P-1-3312310512
13 Cylinder 1 - 3312 3105 02 966P-1-3312310502
14 Bush - 1 3312 3105 13 966P-1-3312310513
14 Bush 1 - 3312 3105 03 966P-1-3312310503
15 Tool retainer 1 1 3312 3105 04 966P-1-3312310504
16 Connection pipe 1 1 3312 3105 07 966P-1-3312310507
17 Connection swivel washer 1 1 3312 3105 08 966P-1-3312310508
18 Fix pin 1 1 3312 3105 10 966P-1-3312310510
19 Dust plug 1 1 3312 3105 11 966P-1-3312310511
20 Wing nut 1 1 3312 3105 05 966P-1-3312310505
21 Conical hose connection 1 1 3312 3105 06 966P-1-3312310506
22 Filter 1 1 3312 3105 09 966P-1-3312310509
23 Filter pad 1 1 3312 3105 01 966P-1-3312310501

14
NOTES

15
NOTES

Atlas Copco Secoroc AB
Box 521, SE-737 25 Fagersta, Sweden
Phone: +46 223 461 00
E-mail: [email protected]
www.atlascopco.com
9852 3039 01 2012.07
This manual suits for next models
1
Table of contents
Other Atlas Copco Power Hammer manuals