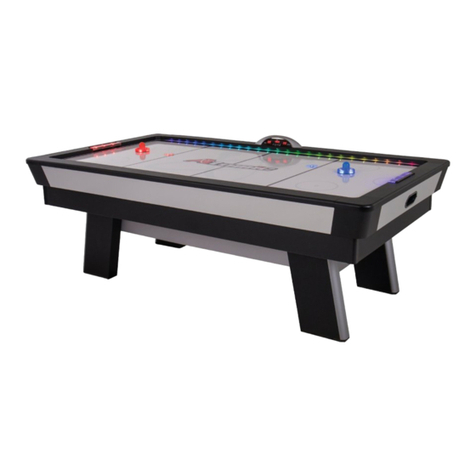
Atomic G01889CF User manual

888-996-2729-1
1353-378-668-1:XAF
moc.stropsedalacse@gameroom
ytilauqtsehgihehtfoerastcudorpruotahterusneotevirtseW
fi,revewoH.strapgnissimrostcefedgnirutcafunamfoe
erfdna
,tcudorpwenruoyhtiwsmelborpynaevahuoy
EROTSEHTOTTINRUTERTONOD ,
:@eerfllotsutcatnocesaelp
:otetirwrO
stropSedalacsE
tnemtrapeDecivreSremotsuC
988xoB.O.P
60774NI,ellivsnavE
date code (if,rebmunledomruoyedivorpesaelpstropSedalacsEgnitcatnocnehW
erasrebmunesehT.traptnemecalp
eragnitseuqerfirebmuntrapdna,)elbacilppa
.launamsrenwosihtnidna,gnigakcap,tcudorpehtnodetacol
rebmuNledoMruoY
.straptuobagniriuqninehwdate coderuoyevahesaelP
G01889CF
Date Code: 2 - G01889CF - - WJ
Purchase Date:
PLEASE RETAIN THIS INSTRUCTION MANUAL FOR FUTURE REFERENCE
© 2018 Escalade Sports For Customer Service Call 1-888-996-2729
1
All Rights Reserved.

Make sure you understand the following tips before you begin to assemble your soccer table.
1. Start all bolts by hand before tightening.
2. Some drawings or images in this manual may not look exactly like your product. Please
read and understand the text before starting each assembly step.
TWO ADULTS ARE REQUIRED TO ASSEMBLE
THIS ATOMIC GLADIATOR SOCCER TABLE
Assembly Tips
Tools Required:
READ AND FOLLOW ALL ASSEMBLY, OPERATION, AND
SAFETY INSTRUCTIONS CAREFULLY. AT LEAST TWO
ADULTS ARE NEEDED TO ASSEMBLE THIS SOCCER TABLE
T1 - Allen Wrench (Included)
IMPORTANT! READ EACH STEP
IN THIS MANUAL BEFORE YOU
BEGIN THE ASSEMBLY.
Phillips Screwdriver
Furniture Polish and Cloth
ATTENTION:
© 2018 Escalade Sports For Customer Service Call 1-888-996-2729
2
All Rights Reserved.
FEATURING TWO GAME OPTIONS
EUROPEAN STYLE OR AMERICAN STYLE

HARDWARE IDENTIFIER
( To Scale)
H1 - 5/16” x 1-1/2”
Allen Head Bolt
(8 pcs)
H2 - 5/16” x 1-1/4”
Allen Head Bolt
(16 pcs)
H3 - 5/16”
Flat Washer
(24 pcs)
H5 - #4 x 2”
Phillips Flat
Head Screw
(6 pcs)
H6 - #4 x 5/8”
Phillips Round
Head Screw
(6 pcs)
(Not to Scale)
H7 - #4 x 1/2”
Phillips Round
Head Screw
(20 pcs)
H9 - #3 x 15mm
Phillips Flat Head
Screw (8 pcs)
H10 - #4 x 1”
Phillips Round Head
Bolt (26 pcs)
T1 - Allen Wrench
(1 pc)
ACCESSORIES IDENTIFIER
( Not to Scale)
A1- Soccer Ball (4 pcs)
H4 - #3.5 x 1-1/2”
Phillips Washer
Head Screw
(12 pcs)
H8 - 3/16” x 5/8”
Phillips Round
Head Bolt
(8 pcs)
H11 - #4
Lock Nut
(26 pcs)
H12 - 5/16”
Lock Washer
(24 pcs)
© 2018 Escalade Sports For Customer Service Call 1-888-996-2729
3
All Rights Reserved.

PARTS IDENTIFIER
( Not to Scale)
P1 - Side Apron
(2 pcs)
P2 - End Apron
(2 pcs)
P3 - Playfield (1 pc)
P5 - Playfield Support
Brace (3 pcs)
P6 - Goal Box
(2 pcs)
P4 - Leg
(4 pcs)
P7 - Ball Catcher
(2 pcs)
P8 - Ball Return
Tube (2 pcs)
P9 - Long Playfield Trim
(2 pcs) P10 - Leg Leveler
(4 pcs)
P11 - Corner Cap
(4 pcs)
P12 - Corner Post
(4 pcs)
P13R - Scorer (2 pcs) P14 - Rod Bumper
(16 pcs)
P15 - Rod End
Cap (8 pcs)
P16 - Rod Handle
(8 pcs)
P18 - Ball Entry
Cup (2 pcs)
P19 - Red Shirt /
Black Shorts
Player (13 pcs)
P20 - Blue Shirt /
White Shorts
Player (13 pcs)
P17 - Rod Bushing
(16 pcs)
P22 - 3 Player Rod
or 1 Player Rod
(4 pcs)
P26 - One Player
Rod Stop
(4 pcs)
P25 - Corner Ramp
(4 pcs)
P23 - 5 Player Rod
(2 pcs)
P21 - 2 Player Rod
(2 pcs)
P24 - Cup Holder
(4 pcs)
© 2018 Escalade Sports For Customer Service Call 1-888-996-2729
4
All Rights Reserved.
(To be used for
European style only) (To be used for
European style only)
(To be used for
European style only)
P27 - Screw Cover Cap
(4 pcs)
For P25 Corner Ramp
(To be used for
European style only)
(To be used for
American style only)
P28 - Short Playfield Trim
(2 pcs)

© 2018 Escalade Sports For Customer Service Call 1-888-996-2729
5
All Rights Reserved.
PARTS REQUIRED:
2 pcs - P1 Side Apron
1 pc - P3 Playfield
STEP 1:
Find a clean, level place to begin the assembly of your
soccer table. We recommend building the table on the
box top to protect the parts during assembly.
It is very important to assemble table on a level and
flat surface. This will keep the end aprons and side
aprons “FLUSH” on the top and bottom edges.
Set P3 Playfield into the grooves in P1 Side
Apron as shown in FIGURE 1.
FIGURE 1
P1
P1
P3
NOTE:
Graphic on this side.
Groove
PARTS REQUIRED:
8 pcs - H1 Allen Head Bolt 8 pcs - H7 Phillips Round Head Screw 2 pcs - P2 End Apron 1 pc - T1 Allen
8 pcs - H3 Flat Washer 8 pcs - H12 Lock Washer 4 pcs - P12 Corner Post Wrench
STEP 2:
Attach P2 End Aprons onto P1 Side Apron using H1 Allen Head Bolts with H12 Lock Washers and H3 Flat Washers
as shown in DETAIL A. Do not tighten H1 Bolts at this time.
Slide P12 Corner Posts onto each end of the P1 Side Apron and P2 End Apron. Center P3 Playfield and tighten H1
Bolts using T1 Allen Wrench.
Use H7 Screws to secure the P12 Corner Posts as shown in FIGURE 2. Tighten, but do not strip out H7 Screws.
THIS STEP REQUIRES TWO OR MORE ADULTS.
VERY CAREFULLY SET P3 PLAYFIELD INTO THE GROOVES
IN P1 SIDE APRONS.
DETAIL A
H1
H7
H7 H3
H3
P12
P1
P1
P12
P12
P12
P2
P2
FIGURE 2
THIS STEP REQUIRES TWO OR MORE ADULTS.
VERY CAREFULLY ATTACH P12 CORNER POST
ONTO EACH P1 & P2 APRON.
NOTE: P12 Corner Post
should be flush with
bottom of P1 Side and
P2 End aprons.
NOTE: Install P12 Corner Posts
with arrow pointing down.
ATTENTION:
ATTENTION:
IMPORTANT NOTE: Center P3 Playfield
before tightening H1 Bolts.
VERY IMPORTANT! DO NOT TIGHTEN H1 BOLTS AT THIS TIME.
THE P12 CORNER POSTS MUST BE INSTALLED BEFORE
TIGHTENING THE H1 BOLTS. INSTALLATION OF THE P12
CORNER POSTS WILL SQUARE UP THE SIDE AND END APRONS
FOR CORRECT ASSEMBLY.
TIGHTEN THE H1 BOLTS ONLY AFTER THE P12 CORNER POSTS
ARE CORRECTLY INSTALLED.
H12
H12

© 2018 Escalade Sports For Customer Service Call 1-888-996-2729
6
All Rights Reserved.
IMPORTANT NOTE: Be sure playfield is
centered before installing any H4 Screws.
PARTS REQUIRED:
12 pcs - H4 Phillips Washer Head Screw 3 pcs - P5 Playfield
6 pcs - H5 Phillips Flat Head Screw Support Brace
STEP 3:
Center and attach the P3 Playfield into the cabinet using predrilled holes with H4 Screws as shown in FIGURE 3 .
Place each P5 Playfield Support Brace and attach using predrilled holes with H5 Screws as shown in FIGURE 3.
Important Note: Please be sure to install H4 screws and H5 screws
exactly as per FIGURE 3. Screws must be screwed straight down. FIGURE 3
H5
H4
P5
P5
P5
PARTS REQUIRED:
16 pcs - H2 Allen Head Bolt 4 pcs - P4 Leg
16 pcs - H3 Flat Washer 4 pcs - P10 Leg Leveler
16 pcs - H12 Lock Washer 1 pc - T1 Allen Wrench
STEP 4:
Attach P4 Legs using H2 Allen Head
Bolts with H12 Lock Washers and H3 Flat
Washers as shown in FIGURE 4 &DETAIL B.
Use T1 Allen Wrench to tighten H1 Bolts.
Thread P10 Leg Levelers onto each P4 Leg
as shown in FIGURE 4.
FIGURE 4
P10
P10
P10
P10
P4
P4
P4
P4
DETAIL B
H2
H12
IMPORTANT NOTE: Center P3
Playfield before installing H4 and
H5 Screws.
If P3 playfield is not centered,
you may need to loosen H1
Bolts ( in Step 2 ) to correctly
center the P3 Playfield
- Retighten H1 Bolts once P3
Playfield is correctly centered.
H3

© 2018 Escalade Sports For Customer Service Call 1-888-996-2729
7
All Rights Reserved.
PARTS REQUIRED:
12 pcs - H7 Phillips Round Head Screw 2 pcs - P7 Ball Catcher
2 pcs - P6 Goal Box 2 pcs - P8 Ball Return Tube
STEP 5:
Center the
Do not Strip out the H7 Screws.
P6 Goal Box over the opening in the end panel and attach using pilot holes with H7 Screws as
shown in FIGURE 5.
Center the P7 Ball Catcher over the opening in the side panel and attach using pilot holes with H7 Screws
as shown in FIGURE 5.
Make sure the round opening of the
P7
Ball Catcher is towards the floor (when table is turned upright).
Repeat for both ends of the table.
Attach P8 Ball Return Tubes between P6 Goal Box and P7 Ball Catcher as shown in FIGURE 5.
FIGURE 5
H7
NOTE: Make sure the round opening
for the ball return tube is towards the
floor (when table is turned upright)
P6
P7
P8
THIS STEP REQUIRES FOUR OR MORE ADULTS.
VERY CAREFULLY TURN THE TABLE OVER AND SET IT ON
ITS LEGS. BE CAREFUL. THE TABLE IS VERY HEAVY.
CAUTION:
NOTE: Make sure the
opening is on this side.

© 2018 Escalade Sports For Customer Service Call 1-888-996-2729
8
All Rights Reserved.
IMPORTANT NOTE
We provide two game options in this Soccer Table.
2. “ American Soccer Table Style ” (Three Goalies Per End)
Please Continue the assembly STEP 6 thru STEP 11,
and Skip STEP 12 thru STEP 16.
Please Skip STEP 6 thru STEP 11,
and Continue the assembly starting at STEP 12 thru STEP 16.
1. “ European Soccer Table Style ” (Only One Goalie Per End)
STEP 6:
H11
P27 Screw Cover Cap
P25 Corner Ramp
OVERHEAD VIEW
LOOKING DOWN ONTO TABLE
Attach the Corner Ramp to the playfield with one H11 Screw per Corner Ramp and then Install the P27 Screw Cover Cap
onto the P25 Corner Ramp as shown in FIGURE 6.
NOTE: P25 Corner Ramps are only used
for European Soccer Style.
NOTE: Install Screw Cover Cap
“Flush” with the Corner Ramp.
FIGURE 6
PARTS REQUIRED:
4 pcs - H11 Phillips Round Head Screw
4 pcs - P25 Corner Ramp
4 pcs - P27 Screw Cover Cap for P24 Corner Ramp
EUROPEAN
SOCCER STYLE
NOTE: Hold each Corner Ramp tightly
and flush into each corner during the
H11 Screw installation. Be careful not
to strip out H11 Screws.

© 2018 Escalade Sports For Customer Service Call 1-888-996-2729
9
All Rights Reserved.
PARTS REQUIRED:
6 pcs - H6 Phillips Round Head Screw 4 pcs - P11 Corner Cap 2 pcs - P18 Ball Entry Cup
8 pcs - H9 Phillips Flat Head Screw 2 pcs - P13R Scorer 4 pcs - P24 Cup Holder
16 pcs - P17 Rod Bushing
FIGURE 7
STEP 7:
Carefully peel the paper protective coating from adhesive strips from the back of the P11 Corner Caps to reveal
adhesive strips. Attach P11 Corner Caps using H9 Screws as shown in FIGURE 7.
Tighten, but do not strip out H9 Screws.
Attach P13R Scorers onto the top of P2 End Aprons as shown in FIGURE 7.
Insert P17 Rod Bushings onto both P1 Side Aprons as shown in FIGURE 7.
Please make sure to insert P17 Rod Bushings from the inner side of P1 Side Aprons for correct assembly.
Attach P18 Ball Entry Cups using H6 Screws as shown in DETAIL C.
Tighten, but do not strip out H6 Screws.
Carefully - Tap P24 Cup Holders down into P2 End Aprons as shown in FIGURE 7.
P13R
Note:
Red Bead scorer should
be on opposite side of
Ball Return.
P13
Note:
Red Bead scorer should
Pilot Holes
be on opposite side of
Ball Return.
P11
H9
H9
DETAIL C
P17
P18
H6
P24
Note:
Carefully tap P24
Cup Holders down.
Rubber
Hammer
IMPORTANT NOTE: P17 Rod Bushings may require the use of a rubber hammer for installation into side apron.
With a rubber hammer, lightly tap bushing squarely into place. DO NOT USE STEEL HAMMER!
If a rubber hammer is not available, place a piece of wood squarely on bushing and lightly tap into place.
EUROPEAN
SOCCER STYLE
P28
45° Angle
Cut
Peel the adhesive strip protective coating off the underside of the P28 Short Playfield Trims, then very carefully
place them along P3 Playfield as shown in FIGURE 7.
2 pcs - P28 Short Playfield Trim

© 2018 Escalade Sports For Customer Service Call 1-888-996-2729
10
All Rights Reserved.
STEP 8:
Slide P22 3 Player Rods, P23 5 Player Rod and
P21 2 Player Rod through P17 Rod Bushings of
one side of the P1 Side Apron as shown in FIGURE 8.
IMPORTANT NOTE: Please note the location
of the hole that is near one end of each rod.
This is the handle end of the rod.
Place one P14 Rod Bumper on each rod as
shown in FIGURE 8.
Place
P26 One Player Rod Stop on rods as shown
P19 Red Shirt / Black Shorts Players and
in FIGURE 8 .
IMPORTANT NOTE: The goalie should be
at your left and your team (player face)
facing to the right.
Looking ahead to Page 11 FIGURE 10 - will
help you with correct player and rod handle
assembly onto rods.
Place one P14 Rod Bumper on each rod as
shown in FIGURE 8.
PARTS REQUIRED:
4 pcs - H8 Phillips Round Head Bolt 1 pc - P21 2 Player Rod 8 pcs - P14 Rod Bumper
13 pcs - H10 Phillips Round Head Bolt 2 pcs - P22 3 Player Rod 4 pcs - P15 Rod End Cap
13 pcs - H11 Lock Nut 1 pc - P23 5 Player Rod 4 pcs - P16 Rod Handle
13 pcs - P19 Red Shirt / Black Shorts Player
FIGURE 8
STEP 9:
Align P19 Red Shirt / Black Shorts Players and
P26 One Player Rod Stop to each player hole and
attach using H10 Bolts with H11 Lock Nut as shown
in FIGURE 9 and DETAIL D.
Attach P15 Rod End Caps to the rods as shown in
FIGURE 9.
Slide P16 Rod Handles onto each rod end with the
small hole as shown in FIGURE 9.
Attach P16 Rod Handles using H8 Bolts as shown
in FIGURE 9.
Hole / Handle End
P17 Rod
Bushing
OVERHEAD VIEW
LOOKING DOWN ONTO TABLE
LEFT RIGHT
P1
Side Apron
P22
3 Player Rod
P22
3 Player Rod
P23
5 Player Rod
P21
2 Player Rod
= P14 Rod Bumper
= P19 Red Shirt /
Black Shorts Player
P14
P19
P14
P15
Rod End Cap
P15
Rod End Cap
P16
Rod Handle
P16
Rod Handle
DETAIL D
Soccer player
facing up
Rod
H10
H11
P19
FIGURE 9
OVERHEAD VIEW
LOOKING DOWN ONTO TABLE
H8
IMPORTANT NOTE: Soccer players should be in vertical
position while attaching P16 Handles.
NOTE:
Small Hole
Be careful not to cross thread H8 Bolts.
= P26 One Player Rod Stop
P26
P26
2 pcs - P26 One Player Rod Stop
EUROPEAN
SOCCER STYLE
EUROPEAN
SOCCER STYLE

© 2018 Escalade Sports For Customer Service Call 1-888-996-2729
11
All Rights Reserved.
STEP 10:
Slide P22 3 Player Rods, P23 5 Player Rod and
P21 2 Player Rod through P17 Rod Bushings of
one side of the P1 Side Apron as shown in FIGURE 10.
IMPORTANT NOTE: Please note the location
of the hole that is near one end of each rod.
This is the handle end of the rod.
Place one P14 Rod Bumper on each rod as
shown in FIGURE 10.
IMPORTANT NOTE: The goalie should be
at your left and your team (player face)
facing to the right.
Place one P14 Rod Bumper on each rod as
shown in FIGURE 10.
STEP 11:
Attach P15 Rod End Caps to the rods as shown in
FIGURE 11.
Slide P16 Rod Handles onto each rod end with the
small hole as shown in FIGURE 11.
Attach P16 Rod Handles using H8 Bolts as shown
in FIGURE 11.
P17 Rod
Bushing
OVERHEAD VIEW
LOOKING DOWN ONTO TABLE
RIGHT LEFT
DETAIL E
P20
FIGURE 10
Hole / Handle End
P21
2 Player Rod
P23
5 Player Rod
P22
3 Player Rod
P22
3 Player Rod
Soccer player
facing up
H10
H11
Rod
P16
Rod Handle
P16
Rod Handle
P15
Rod End Cap
FIGURE 11
= P14 Rod Bumper
= P20 Blue Shirt /
White Shorts Player
PARTS REQUIRED:
4 pcs - H8 Phillips Round Head Bolt 1 pc - P21 2 Player Rod 8 pcs - P14 Rod Bumper
13 pcs - H10 Phillips Round Head Bolt 2 pcs - P22 3 Player Rod 4 pcs - P15 Rod End Cap
13 pcs - H11 Lock Nut 1 pc - P23 5 Player Rod 4 pcs - P16 Rod Handle
13 pcs - P20 Blue Shirt / White Shorts Player
H8
NOTE:
Small Hole
Be careful not to cross thread H8 Bolts.
= P26 One Player Rod Stop
2 pcs - P26 One Player Rod Stop
EUROPEAN
SOCCER STYLE
EUROPEAN
SOCCER STYLE
Align P20 Blue Shirt / White Shorts Players and
P26 One Player Rod Stop to each player hole
and attach using H10 Bolts with H11 Lock Nut
as shown in FIGURE 11 and DETAIL E.
Place
P26 One Player Rod Stop on rods as shown
P20 Blue Shirt / White Shorts Players and
in FIGURE 10.
P26
P26
IMPORTANT NOTE: Soccer players should be in vertical
position while attaching P16 Handles.
IMPORTANT NOTE: Soccer players should be in vertical
position while attaching P16 Handles.

© 2018 Escalade Sports For Customer Service Call 1-888-996-2729
12
All Rights Reserved.
PARTS REQUIRED:
6 pcs - H6 Phillips Round Head Screw 4 pcs - P11 Corner Cap 2 pcs - P18 Ball Entry Cup
8 pcs - H9 Phillips Flat Head Screw 2 pcs - P13R Scorer 4 pcs - P24 Cup Holder
2 pcs - P9 Long Playfield Trim 16 pcs - P17 Rod Bushing
FIGURE 12
STEP 12:
Peel the adhesive strip protective coating off the underside of the P9 Long Playfield Trims, then very carefully
place them along P3 Playfield as shown in FIGURE 12 .
FIGURE 12 .
FIGURE 12 .
FIGURE 12 .
FIGURE 12 .
Carefully peel the paper protective coating from the adhesive strips from the back of the P11 Corner Caps to
reveal adhesive strips. Attach P11 Corner Caps using H9 Screws as shown in
Tighten, but do not strip out H9 Screws.
Attach P13R Scorers onto the top of P2 End Aprons as shown in
Insert P17 Rod Bushings onto both P1 Side Aprons as shown in
Please make sure to insert P17 Rod Bushings from the inner side of P1 Side Apron for correct assembly.
Attach P18 Ball Entry Cups using H6 Screws as shown in DETAIL F.
Tighten, but do not strip out H6 Screws.
Carefully - Tap P24 Cup Holders down into P2 End
Aprons as shown in
P9
P13R
Note:
Red Bead scorer should
be on opposite side of
Ball Return.
P13
Note:
Red Bead scorer should
be on opposite side of
Ball Return.
P11
H9
H9
DETAIL F
P17
P18
H6
P24
Note:
Carefully tap P24
Cup Holders down.
Rubber
Hammer
IMPORTANT NOTE: P17 Rod Bushings may require the use of a rubber hammer for installation into side apron.
With a rubber hammer, lightly tap bushing squarely into place. DO NOT USE STEEL HAMMER!
If a rubber hammer is not available, place a piece of wood squarely on bushing and lightly tap into place.
AMERICAN
SOCCER STYLE
Pilot Holes
Right Angle
Cut

© 2018 Escalade Sports For Customer Service Call 1-888-996-2729
13
All Rights Reserved.
STEP 13:
Slide P22 3 Player Rods, P23 5 Player Rod and
P21 2 Player Rod through P17 Rod Bushings of
one side of the P1 Side Apron as shown in FIGURE 13.
FIGURE 13.
FIGURE 13.
FIGURE 13.
IMPORTANT NOTE: Please note the location
of the hole that is near one end of each rod.
This is the handle end of the rod.
Place one P14 Rod Bumper on each rod as
shown in
Place P19 Red Shirt / Black Shorts Players on
each rod as shown in
IMPORTANT NOTE: The goalie should be
at your left and your team (player face)
facing to the right.
Looking ahead to Page 14 FIGURE 16 - will
help you with correct player and rod handle
assembly onto rods.
Place one P14 Rod Bumper on each rod as
shown in
PARTS REQUIRED:
4 pcs - H8 Phillips Round Head Bolt 1 pc - P21 2 Player Rod 8 pcs - P14 Rod Bumper
13 pcs - H10 Phillips Round Head Bolt 2 pcs - P22 3 Player Rod 4 pcs - P15 Rod End Cap
13 pcs - H11 Lock Nut 1 pc - P23 5 Player Rod 4 pcs - P16 Rod Handle
13 pcs - P19 Red Shirt / Black Shorts Player
FIGURE 13
STEP 14:
Align P19 Red Shirt / Black Shorts Players to each
player hole and attach using H10 Bolts with H11
Lock Nut as shown in FIGURE 14 and DETAIL G.
Attach P15 Rod End Caps to the rods as shown in
FIGURE 14 .
FIGURE 14 .
FIGURE 14 .
Slide P16 Rod Handles onto each rod end with the
small hole as shown in
Attach P16 Rod Handles using H8 Bolts as shown
in
Hole / Handle End
P17 Rod
Bushing
OVERHEAD VIEW
LOOKING DOWN ONTO TABLE
LEFT RIGHT
P1
Side Apron
P22
3 Player Rod
P22
3 Player Rod
P23
5 Player Rod
P21
2 Player Rod
= P14 Rod Bumper
= P19 Red Shirt /
Black Shorts Player
P14
P19
P14
P15
Rod End Cap
P15
Rod End Cap
P16
Rod Handle
P16
Rod Handle
DETAIL G
Soccer player
facing up
Rod
H10
H11
P19
FIGURE 14
OVERHEAD VIEW
LOOKING DOWN ONTO TABLE
H8
NOTE:
Small Hole
Be careful not to cross thread H8 Bolts.
AMERICAN
SOCCER STYLE
AMERICAN
SOCCER STYLE
IMPORTANT NOTE: Soccer players should be in vertical
position while attaching P16 Handles.

© 2018 Escalade Sports For Customer Service Call 1-888-996-2729
14
All Rights Reserved.
STEP 15:
Slide P22 3 Player Rods, P23 5 Player Rod and
P21 2 Player Rod through P17 Rod Bushings of
one side of the P1 Side Apron as shown in
IMPORTANT NOTE: Please note the location
of the hole that is near one end of each rod.
This is the handle end of the rod.
Place one P14 Rod Bumper on each rod as
shown in FIGURE 15.
FIGURE 15.
FIGURE 15.
FIGURE 15.
Place P20 Blue Shirt / White Shorts Players on
each rod as shown in
IMPORTANT NOTE: The goalie should be
at your left and your team (player face)
facing to the right.
Place one P14 Rod Bumper on each rod as
shown in
STEP 16:
Align P20 Blue Shirt / White Shorts Players on each
player hole and attach using H10 Bolts with H11 Lock
Nut as shown in FIGURE 16 and DETAIL H.
Attach P15 Rod End Caps to the rods as shown in
FIGURE 16.
Slide P16 Rod Handles onto each rod end with the
small hole as shown in FIGURE 16.
Attach P16 Rod Handles using H8 Bolts as shown
in FIGURE 16.
P17 Rod
Bushing
OVERHEAD VIEW
LOOKING DOWN ONTO TABLE
RIGHT LEFT
DETAIL H
P20
FIGURE 15
Hole / Handle End
P21
2 Player Rod
P23
5 Player Rod
P22
3 Player Rod
P22
3 Player Rod
Soccer player
facing up
H10
H11
Rod
P16
Rod Handle
P16
Rod Handle
P15
Rod End Cap
FIGURE 16
= P14 Rod Bumper
= P20 Blue Shirt /
White Shorts Player
PARTS REQUIRED:
4 pcs - H8 Phillips Round Head Bolt 1 pc - P21 2 Player Rod 8 pcs - P14 Rod Bumper
13 pcs - H10 Phillips Round Head Bolt 2 pcs - P22 3 Player Rod 4 pcs - P15 Rod End Cap
13 pcs - H11 Lock Nut 1 pc - P23 5 Player Rod 4 pcs - P16 Rod Handle
13 pcs - P20 Blue Shirt / White Shorts Player
H8
NOTE:
Small Hole
Be careful not to cross thread H8 Bolts.
AMERICAN
SOCCER STYLE
AMERICAN
SOCCER STYLE
IMPORTANT NOTE: Soccer players should be in vertical
position while attaching P16 Handles.
IMPORTANT NOTE: Soccer players should be in vertical
position while attaching P16 Handles.

© 2018 Escalade Sports For Customer Service Call 1-888-996-2729
15
All Rights Reserved.
Congratulations! You have now assembled your soccer table. Please note the Care and Use
instructions below to insure many years of trouble free use of your soccer table.
CARE AND USE OF YOUR GLADIATOR SOCCER TABLE
1. Apply a few drops of lubricant (not provided) to the rods and the bearings.
Rotate rods to make sure you spread lubricant evenly.
2. Use spray furniture polish to clean all exterior surfaces of your soccer table.
3. Use a carpenters level to properly level table using the leg levelers.
4. This product is intended for INDOOR use only.
5. DO NOT sit, climb or lean on the table.
6. DO NOT drag the table when moving it. This will damage the legs.
7. DO NOT set drinks on the table.
Description Qty.
H1
H2
H3
H4
H5
H6
H7
H8
H9
H10
H11
H12
T1
A1
P1
P2
P3
P4
P5
P6
P7
P8
P9
P10
P11
P12
P13R
P14
P15
P16
P17
P18
P19
P20
P21
P22
P23
P24
P25
P26
Key # Part #
PRODUCT PARTS LIST FOR MODEL # G01889CF
01889WJH1
01889WJH2
01889WJH3
01889WJH4
01889WJH5
01889WJH6
01889WJH7
01889WJH8
01889WJH9
01889WJH10
01889WJH11
01889WJH12
01889WJT1
01889WJA1
01889WJP1
01889WJP2
01889WJP3
01889WJP4
01889WJP5
01889WJP6
01889WJP7
01889WJP8
01889WJP9
01889WJP10
01889WJP11
01889WJP12
01889WJP13
01889WJP14
01889WJP15
01889WJP16
01889WJP17
01889WJP18
01889WJP19
01889WJP20
01889WJP21
01889WJP22
01889WJP23
01889WJP24
01889WJP25
01889WJP26
5/16” x 1-1/2” Allen Head Bolt
5/16” x 1-1/4” Allen Head Bolt
5/16” Flat Washer
#3.5 x 1-1/2” Phillips Washer Head Screw
#4 x 2” Phillips Flat Head Screw
#4 x 5/8” Phillips Round Head Screw
#4 x 1/2” Phillips Round Head Screw
3/16” x 5/8” Phillips Round Head Bolt
#3 x 15mm Phillips Flat Head Screw
#4 x 1” Phillips Round Head Bolt
#4 Lock Nut
5/16” Lock Washer
Allen Wrench
Soccer Ball
Side Apron
End Apron
Playfield
Leg
Playfield Support Brace
Goal Box
Ball Catcher
Ball Return Tube
Long Playfield Trim
Leg Leveler
Corner Cap
Corner Post
Scorer
Rod Bumper
Rod End Cap
Rod Handle
Rod Bushing
Ball Entry Cup
Red Shirt / Black Shorts Player
Blue Shirt / White Shorts Player
2 Player Rod
3 Player Rod
5 Player Rod
Cup Holder
Corner Ramp
One Player Rod Stop
8
16
24
12
6
6
20
8
8
26
26
24
1
4
2
2
1
4
3
2
2
2
2
4
4
4
2
16
8
8
16
2
13
13
2
4
2
4
4
4
P27 01889WJP27 Screw Cover Cap for Corner Ramp 4
P28 01889WJP28 Short Playfield Trim 2
K1
M1
01889WJK1
01889WJM1
Hardware Kit
Owner Manual
1
1

© 2018 Escalade Sports For Customer Service Call 1-888-996-2729
16
All Rights Reserved.
This consumer warranty extends to the original consumer purchase of any ESCALADESPORTS
Product (hereinafter referred as the "Product").
WARRANTY DURATION: This Product is warranted to the original consumer purchase of a pe-
riod of 90 days from the original purchase.
WARRANTY COVERAGE: ESCALADE SPORTS warrants to the original Consumer Purchaser
that any Product of its manufacture is free from defects in material and workmanship when used
for the intended purpose under normal use and conditions. THIS WARRANTY IS VOID IF THE
PRODUCT HAS BEEN DAMAGED BY ACCIDENT, UNREASONABLE USE, NEGLIGENCE,
IMPROPER SERVICE, FAILURE TO FOLLOW INSTRUCTIONS PROVIDED WITH THE PROD-
UCT OR OTHER CAUSES NOT ARISING OUT OF DEFECTS IN MATERIAL AND WORKMAN-
SHIP.
WARRANTY PERFORMANCE: During the above 90 day warranty period, ESCALADESPORTS
shall repair or replace with a comparable model, and Product, or component thereof, which may
prove defective under normal use and proper care, and which our examination shall disclose to
our satisfaction to be thus defective, please contact our Warranty Dept.
1-888-996-2729 / Warranty Dept.
Or Write us at:
Escalade® Sports, Inc. - P.O. Box 889, Evansville, IN 47706
Attn: Warranty Dept.
Or E-mail us at:
Other than shipping requirements no charge will be made for such repair or replacement of in-
warranty Products. ESCALADE SPORTS strongly recommends that the Product is insured for
value prior to mailing.
WARRANTY DISCLAIMERS: ANY IMPLIED WARRANTIES ARISING OUT OF
THIS SALE, INCLUDING BUT NOT LIMITED TO THE IMPLIED WARRANTIES OF
MERCHANTABILITY AND FITNESS FOR A PARTICULAR PURPOSE, ARE LIM-
ITED IN DURATION TO THE ABOVE 90 DAY PERIOD. ESCALADE SPORTS
SHALL NOT BE LIABLE FOR LOSS OF USE OF THE PRODUCT OR OTHER
CONSEQUENTIAL OR INCIDENTAL COSTS, EXPENSES OR DAMAGES IN-
CURRED BY THE CONSUMER OF ANY OTHER USE.
Some states do not allow the exclusion or limitation of implied warranties or consequential or
incidental damages, so the above limitations or exclusions may not apply to you.
LEGAL REMEDIES: This warranty gives you specific legal rights and you may also have other
rights which may vary from state to state.
90 DAY LIMITED WARRANTY
Table of contents
Other Atomic Arcade Game Machine manuals
Popular Arcade Game Machine manuals by other brands

Sega
Sega THE HOUSE OF THE DEAD III DELUXE Operator's manual

NAMCO
NAMCO Mazan Operator's manual

AtGames
AtGames Legends Ultimate instruction manual

Sega
Sega Crazy Taxi High Roller Installation & service manual

Adrenaline Amusements
Adrenaline Amusements Blackout Prize Operation & service manual

Midway
Midway CART Fury Championship Racing Operation manual