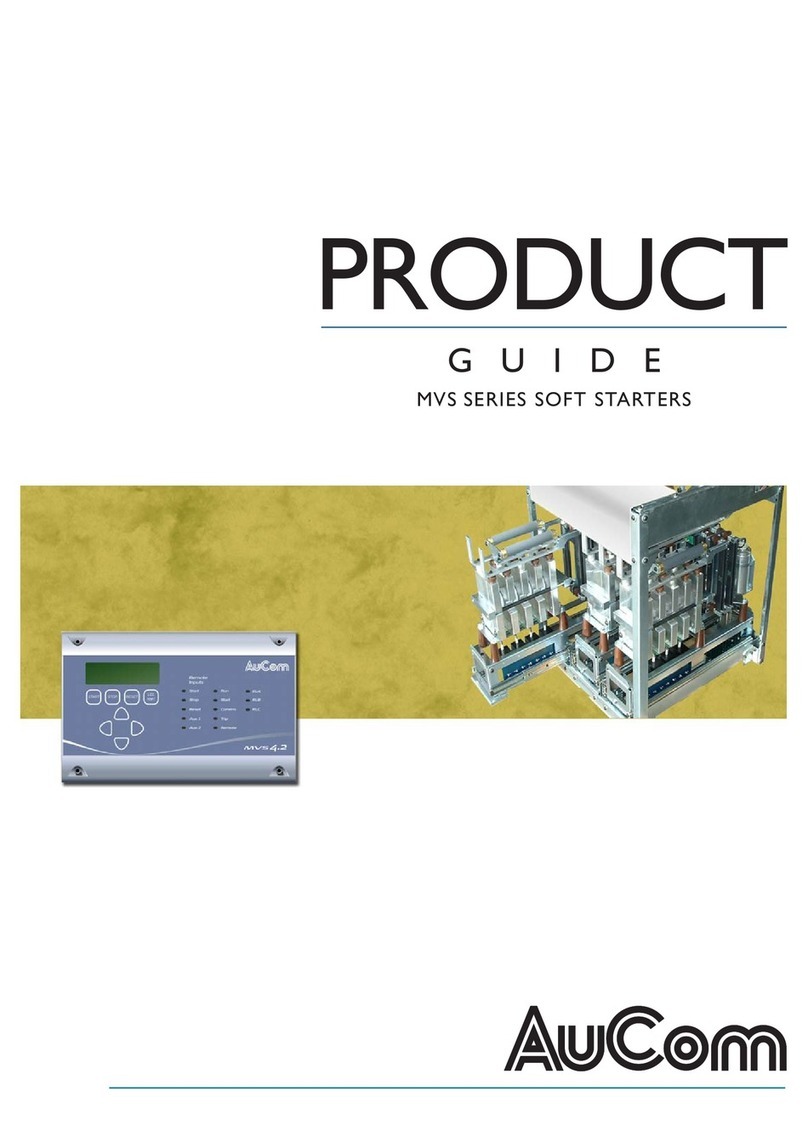
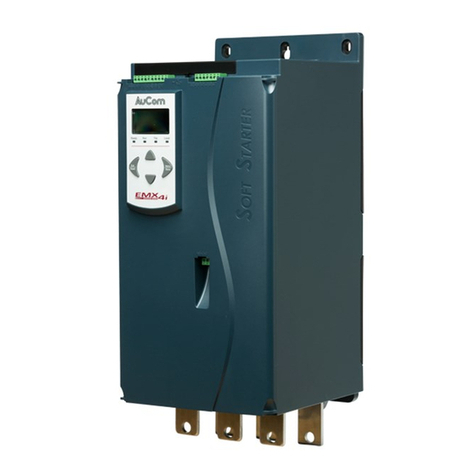
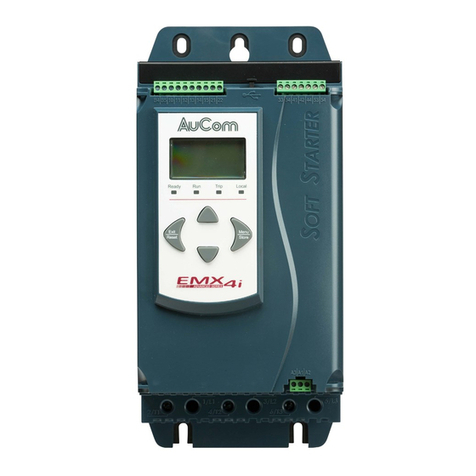
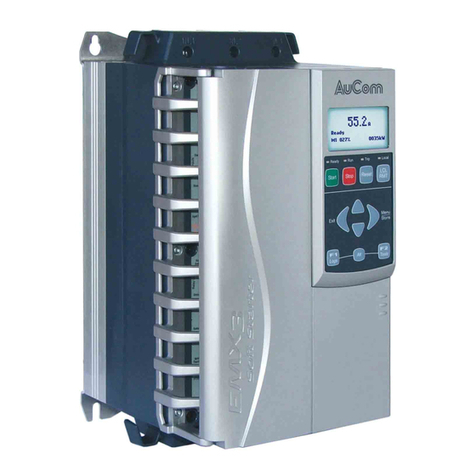
AuCom EMX3-1600C User manual

EMX3 Soft Starter
USER MANUAL

CONTENTS
1. About This Manual.......................................................2
1.1 Disclaimer ..............................................................................2
2. Caution Statements ....................................................3
2.1 Electrical shock risk..............................................................3
2.2 Unexpected Operation ..........................................................3
2.3 Avertissements à l'attention des clients canadiens..........4
3. Introduction .................................................................6
3.1 Feature List ............................................................................6
4. Basic Setup ..................................................................7
4.1 Setup Procedure Overview...................................................7
4.2 Testing the Installation .........................................................7
4.3 Simulation Tools....................................................................8
5. Installation...................................................................9
5.1 Physical Installation ..............................................................9
5.2 Control Terminals .................................................................9
5.3 Control Voltage ......................................................................9
5.4 Control Wiring......................................................................10
5.5 Relay Outputs.......................................................................10
5.6 Motor Thermistors ..............................................................10
5.7 RTD/PT100............................................................................11
5.8 Earth Terminals...................................................................11
5.9 Power Input and Output Configurations...........................11
5.10 Power Terminations............................................................13
5.11 Schematic Diagrams...........................................................14
6. Power Circuits ...........................................................15
6.1 Motor Connection ................................................................15
6.2 Bypass Contactor.................................................................19
6.3 Main Contactor.....................................................................19
6.4 Circuit Breaker.....................................................................19
6.5 Power Factor Correction....................................................19
6.6 Short Circuit Protection Devices (SCPD)..........................19
6.7 UL Short Circuit Ratings.....................................................20
6.8 Fuse Selection for Type 2 Coordination............................22
7. Keypad and Feedback ...............................................23
7.1 The Keypad...........................................................................23
7.2 Displays.................................................................................24
8. Maintenance Tools ....................................................26
8.1 Testing the Installation .......................................................26
8.2 Commissioning Menu (Tools)............................................26
8.3 Logs Menu............................................................................29
9. Operation ...................................................................31
9.1 Priority of Commands.........................................................31
9.2 Start, Stop and Reset Commands.....................................31
9.3 Soft Start Methods...............................................................32
9.4 Stop Methods .......................................................................34
9.5 Jog Operation.......................................................................37
9.6 Inside Delta Operation ........................................................37
10. Programming Menu..................................................38
10.1 Programming Menu ...........................................................38
10.2 Adjustment Lock................................................................. 38
10.3 Access Code ........................................................................ 39
10.4 Quick Setup.......................................................................... 39
10.5 Standard Menu ................................................................... 40
10.6 Extended Menu ................................................................... 41
10.7 Load/Save Settings............................................................. 45
10.8 Parameter Descriptions.................................................... 46
11. Application Examples................................................62
11.1 Installation with Main Contactor....................................... 62
11.2 Installation with External Bypass Contactor................... 63
11.3 Emergency Run Operation................................................ 64
11.4 Auxiliary Trip Circuit ........................................................... 65
11.5 DC Brake with External Zero Speed Sensor................... 66
11.6 Soft Braking......................................................................... 67
11.7 Two-Speed Motor ............................................................... 68
11.8 Slip-Ring Motor................................................................... 69
12. Troubleshooting ........................................................71
12.1 Protection Responses........................................................ 71
12.2 Trip Messages..................................................................... 71
12.3 General Faults..................................................................... 75
13. Appendix.....................................................................77
13.1 Model code .......................................................................... 77
13.2 IEC ratings ........................................................................... 77
13.3 NEMA motor ratings .......................................................... 80
13.4 Minimum and Maximum Current Settings..................... 82
13.5 Dimensions and Weights................................................... 83
13.6 Specifications ...................................................................... 85
13.7 UL Compliant Installation.................................................. 87
13.8 Disposal Instructions ......................................................... 87
13.9 Accessories ......................................................................... 88
13.10 Parameter Values............................................................... 89
14. Busbar Adjustment Procedure................................93
Contents
User Manual (710-04840-00M) | 1

ABOUT THIS MANUAL
1. About This Manual
WARNING
Indicates a hazard that may cause personal injury or death.
CAUTION
Indicates a hazard that may damage the equipment or installation.
NOTE
Provides helpful information.
1.1 Disclaimer
The examples and diagrams in this manual are included solely for illustrative purposes.
The information contained in this manual is subject to change at any time and without prior notice. In no event will responsibility or
liability be accepted for direct, indirect or consequential damages resulting from the use or application of this equipment.
© 2017 AuCom Electronics Ltd. All Rights Reserved.
As AuCom is continu
ously improving its products it reserves the right to modify or change the specification of its products at any time
without notice. The text, diagrams, images and any other literary or artistic works appearing in this document are protected by
copyright.
Users may copy some of the material for their personal reference but may not copy or use material for any other purpose
without the prior consent of AuCom Electronics Ltd. AuCom endeavours to ensure that the information contained in this document
including images is correct but does not accept any liability for error, omission or differences with the finished product.
2| User Manual (710-04840-00M)

CAUTION STATEMENTS
2. Caution Statements
Caution Statements cannot cover every potential cause of equipment damage but can highlight common causes of damage. It is the
installer's responsibility to read and understand all instructions in this manual prior to installing, operating or maintaining the
equipment, to follow good electrical practice including applying appropriate personal protective equipment and to seek advice before
operating this equipment in a manner other than as described in this manual.
NOTE
The EMX3 is not user serviceable. The unit should only be serviced by authorised service personnel. Unauthorised
tampering with the unit will void the product warranty.
2.1 Electrical shock risk
WARNING – ELECTRICAL SHOCK RISK
The voltages present in the following locations can cause severe electric shock and may be lethal:
•AC supply cables and connections
•Output cables and connections
•Many internal parts of the starter
The AC supply must be disconnected from the starter using an approved isolation device before any cover is removed from
the starter or before any servicing work is performed.
WARNING
- ELECTRICAL SHOCK HAZARD
Models EMX3-0500B~EMX3-1600C: The busbar and heatsink must be treated as live whenever the unit has mains voltage
connected (including when the starter is tripped or waiting for a command).
SHORT CIRCUIT
The EMX3 is not short circuit proof. After severe overload or short circuit, the operation of the EMX3 should be fully tested
by an authorised service agent.
GROUNDING AND BRANCH CIRCUIT PROTECTION
It is the responsibility of the user or person installing the EMX3 to provide proper grounding and branch circuit protection
according to local electrical safety codes.
FOR YOUR SAFETY
•The STOP function of the soft starter does not isolate dangerous voltages from the output of the starter. The soft
starter must be disconnected by an approved electrical isolation device before accessing electrical connections.
•Soft starter protection features apply to motor protection only. It is the user’s responsibility to ensure safety of
personnel operating machinery.
•The soft starter is a component designed for integration within an electrical system; it is therefore the responsibility
of the system designer/user to ensure the system is safe and designed to comply with relevant local safety
standards.
2.2 Unexpected Operation
WARNING – ACCIDENTAL STARTS
In some installations, accidental starts may pose an increased risk to safety of personnel or damage to the machines
being driven. In such cases, it is recommended that the power supply to the soft starter is fitted with an isolating switch
and a circuit-breaking device (eg power contactor) controllable through an external safety system (eg emergency stop,
fault detector).
WARNING – STARTER MAY START OR STOP UNEXPECTEDLY
The EMX3 will respond to control commands from various sources, and could start or stop unexpectedly. Always
disconnect the soft starter from mains voltage before accessing the starter or load.
AUTO-START
Use the auto-start feature with caution. Read all the notes related to auto-start before operation.
User Manual (710-04840-00M) | 3

CAUTION STATEMENTS
WARNING – DISCONNECT MAINS BEFORE ACCESSING STARTER OR LOAD
The soft starter has built-in protections which can trip the starter in the event of faults and thus stop the motor. Voltage
fluctuations, power cuts and motor jams may also cause the motor to trip.
The motor could restart after the causes of shutdown are rectified, which may be dangerous for personnel. Always
disconnect the soft starter from mains voltage before accessing the starter or load.
CAUTION – MECHANICAL DAMAGE FROM UNEXPECTED RESTART
The motor could restart after the causes of shutdown are rectified, which may be dangerous for certain machines or
installations. In such cases, it is essential that appropriate arrangements are made against restarting after unscheduled
stops of the motor.
2.3 Avertissements à l'attention des clients canadiens
AVERTISSEMENT
L'icône AVERTISSEMENT ci-contre signale les informations concernant des risques pouvant entraîner des blessures
graves, voire mortelles. Pour votre sécurité, veuillez consulter les avertissements sur cette page ou demander une copie
du présent manuel en français auprès de votre distributeur local.
AVERTISSEMENT – RISQUE DE CHOC ÉLECTRIQUE
Les zones suivantes sont soumises à des tensions pouvant provoquer des risques de chocs électriques graves, voire
mortels :
•Raccordement et câbles d'alimentation AC
•Câbles et raccordements de sortie
•De nombreuses pièces internes du démarreur
L'alimentation AC doit être déconnectée du démarreur au moyen d'un dispositif d'isolation agréé avant de retirer des
capots ou avant de procéder à des travaux d'entretien.
AVERTISSEMENT - DANGER D'ELECTROCUTION
Modèles EMX3-0500B à EMX3-1600C : Les barres de puissance et le radiateur doivent être traités comme étant des
éléments sous tension si l'appareil est relié au secteur (y compris lorsque le démarreur s'est mis en sécurité ou s'il
attend une commande).
PAR SECURITE
•La fonction STOP du démarreur progressif n'isole pas des tensions dangereuses de la sortie du démarreur. Le
démarreur progressif doit être déconnecté par un dispositif d'isolement électrique approprié avant d'accéder aux
connexions électriques.
•Les fonctions de protection du démarreur progressif ne concernent que la protection du moteur. Il relève de la
responsabilité de l'utilisateur d'assurer la sécurité des personnes travaillant sur les machines.
•Le démarreur progressif est un appareil conçu pour s'intégrer dans un système électrique ; il relève donc de la
responsabilité du concepteur ou de l'utilisateur de veiller à ce que ce système soit sûr et conçu selon les normes de
sécurité locales en vigueur.
AVERTISSEMENT – DÉMARRAGES ACCIDENTELS
Dans certaines installations, des démarrages accidentels peuvent provoquer un risque supplémentaire pour la sécurité
des personnes ou endommager les machines contrôlées. Da
ns de tels cas, il est recommandé de doter l'alimentation du
démarreur progressif d'un interrupteur d'isolement et d'un coupe-circuit (par exemple, un disjoncteur) contrôlable à
partir d'un système de sécurité externe (par exemple, un arrêt d'urgence, un détecteur de défaut).
AVERTISSEMENT – LE DÉMARREUR PEUT DÉMARRER OU S'ARRÊTER À TOUT MOMENT
Le EMX3 répond aux commandes de contrôle de différentes origines et peut par conséquent démarrer ou s'arrêter à tout
moment. Toujours déconnecter le démarreur de la tension secteur avant d'accéder au démarreur ou à la charge.
DEMARRAGE AUTOMATIQUE
Utiliser la fonction de démarrage automatique avec précautions. Lire toutes les notes relatives au démarrage
automatique avant utilisation.
4| User Manual (710-04840-00M)

CAUTION STATEMENTS
AVERTISSEMENT
Cette fonction ne doit pas être utilisée en association avec la commande à distance 2 fils.
Le démarreur progressif acceptera encore les commandes de démarrage et d'arrêt issues des entrées de commande à
distance ou du réseau de communication série. Pour désactiver la commande locale ou à distance, utiliser le
parameter 6Q.
Si le démarrage automatique est activé et que l'utilisateur navigue dans le système de menus, ce démarrage ne
deviendra actif que si aucune activité du clavier n'est détectée pendant cinq minutes.
AVERTISSEMENT
Le bouton STOP (ARRET) du clavier est toujours actif. Lors de l'utilisation d'une commande à distance 2 fils, le démarreur
progressif redémarrera si les entrées de démarrage/arrêt et de reset sont toujours actives.
AVERTISSEMENT – DÉCONNECTER L'ALIMENTATION PRINCIPALE AVANT D'ACCÉDER AU DÉMARREUR OU À LA
CHARGE
Le démarreur progressif comporte des protections intégrées qui peuvent déclencher des mises en sécurité dans
l'éventualité de défauts et ainsi arrêter le moteur. Des fluctuations de tension, des coupures d'alimentation et des
blocages du moteur peuvent produire des mises en sécurité de celui-ci.
Le moteur pourrait redémarrer une fois que les causes de l'arrêt ont été résolues, ce qui pourrait mettre en danger le
personnel. Toujours déconnecter le démarreur de la tension secteur avant d'accéder au démarreur ou à la charge.
AVERTISSEMENT
Ne pas appliquer la tension du secteur au démarreur tant que tout le câblage n'est pas terminé.
AVERTISSEMENT
Toujours appliquer la tension de commande avant (ou en même temps que) la tension secteur.
AVERTISSEMENT
Lors du raccordement du EMX3 en connexion 6 fils, toujours installer un contacteur principal ou un disjoncteur
magnéto-thermique à bobine de déclenchement.
User Manual (710-04840-00M) | 5

INTRODUCTION
3. Introduction
3.1 Feature List
Selectable soft starting profiles
•Adaptive Control
•Constant Current
•Current Ramp
Selectable soft stopping profiles
•Coast To Stop
•Timed voltage ramp soft stop
•Adaptive Control
•Brake
Extensive input and output options
•Remote control inputs
(3 x fixed, 2 x programmable)
•Relay outputs
(1 x fixed, 3 x programmable)
•Analog output
•Built-in PT100 RTD input
•Optional expansion cards
Easy-to-read display with comprehensive feedback
•Removable keypad
•Multi-language feedback
•Date and time stamped event logging
•Operational counters (number of starts, hours-run, kWh)
•Performance monitoring (current, voltage, power factor,
kWh)
•User-programmable monitoring screen
Customisable protection
•Motor overload
•Excess Start Time
•Undercurrent
•Instantaneous overcurrent
•Current imbalance
•Mains frequency
•Input Trip
•Motor thermistor
•Power circuit
•Phase sequence
Models for all connection requirements
•23 A~1600 A (nominal)
•200~440 VAC
•380~690 VAC
•Internally bypassed options
•In-line or inside delta connection
Optional features for advanced applications
•Input/output expansion
•RTD and Ground fault protection
•Communication modules: Ethernet (Profinet,
Modbus TCP, Ethernet/IP), Profibus, DeviceNet,
Modbus RTU, and USB
6| User Manual (710-04840-00M)

BASIC SETUP
4. Basic Setup
4.1 Setup Procedure Overview
WARNING
Do not apply mains voltage to the starter until all wiring is complete.
1. Mount the soft starter (refer to
Physical Installation
on page 9 for details).
2. Connect control wiring (refer to
Control Terminals
on page 9 for details).
3. Apply control voltage to the starter.
4. Set the date and time (refer to
Set Date and Time
on page 26 for details).
5. Configure your application:
1. Press
MENU
to open the Menu.
2. Use to scroll to Quick Setup and press to open the Quick Setup menu.
3. Scroll through the list to find your application, then press to begin the configuration process (refer to
Quick Setup
on page 39 for details).
6. If your application is not listed in Quick Setup:
1. Press to return to the Menu.
2. Use to scroll to Standard Menu and press .
3. Scroll to Motor Data 1 and press , then press again to edit parameter 1A
Motor Full Load Current
.
4. Set parameter 1A to match the motor's full load current (FLC).
NOTE
For advanced applications, refer to
Extended Menu
on page 41 and
Parameter Descriptions
on page 46.
7. Close the Menu by pressing repeatedly.
8. (Optional) Use the built-in simulation tools to check that the control wiring is connected correctly (refer to
Run Simulation
on page 27).
9. Connect mains supply cables to starter input terminals 1/L1, 3/L2, 5/L3 (refer to
Power Input and Output Configurations
on
page 11).
10. Connect the motor cables to starter output terminals 2/T1, 4/T2, 6/T3.
The soft starter is now ready to control the motor.
4.2 Testing the Installation
The EMX3 can be connected to a small motor for testing. During this test, the soft starter's control input and relay output protection
settings can be tested. This test mode is not suitable for testing soft starting or soft stopping performance.
The FLC of the test motor must be at least 2% of the soft starter's minimum FLC (refer to
Minimum and Maximum Current Settings
on page 82).
NOTE
When testing the soft starter with a small motor, set parameter 1A
Motor Full Load Current
to the minimum allowable
value.
User Manual (710-04840-00M) | 7

BASIC SETUP
4.3 Simulation Tools
Software simulation functions let you test the soft starter's operation and control circuits without connecting the soft starter to mains
voltage.
•The run simulation simulates a motor starting, running and stopping to confirm that the soft starter and associated
equipment have been installed correctly. Refer to
Run Simulation
on page 27 for details.
•The protection simulation simulates activation of each protection mechanism to confirm that the soft starter and
associated control circuits are responding correctly. Refer to
Protection Simulation
on page 27 for details.
•The output signal simulation simulates output signalling to confirm that outputs and associated control circuits are
operating correctly. Refer to
Output Signal Simulation
on page 28 for details.
The simulations are only available when the soft starter is in Ready state, control voltage is available and the keypad is active.
NOTE
Access to the simulation tools is protected by the security access code.
The default access code is 0000.
8| User Manual (710-04840-00M)

INSTALLATION
5. Installation
5.1 Physical Installation
1
EMX3-0023B ~ EMX3-0220B: Allow 100 mm (3.94 inches) between soft starters.
EMX3-0255B ~ EMX3-1000B: Allow 200 mm (7.88 inches) between soft starters.
EMX3-0255C: Allow 100 mm (3.94 inches) between soft starters.
EMX3-0360C ~ EMX3-1600C: Allow 200 mm (7.88 inches) between soft starters.
2
EMX3-0023B ~ EMX3-0220B: Allow 50 mm (1.97 inches) between the soft starter and solid surfaces.
EMX3-0255B ~ EMX3-1000B: Allow 200 mm (7.88 inches) between the soft starter and solid surfaces.
EMX3-0255C: Allow 100 mm (3.94 inches) between the soft starter and solid surfaces.
EMX3-0360C ~ EMX3-1600C: Allow 200 mm (7.88 inches) between the soft starter and solid surfaces.
3
Soft starters may be mounted side by side with no clearance (that is, if mounted without communications modules).
4
The soft starter may be mounted on its side. Derate the soft starter's rated current by 15%.
5.2 Control Terminals
Control terminations use 2.5mm2plug-in terminal blocks. Unplug each block, complete the wiring, then reinsert the block.
Remote Control Inputs Relay Outputs
Analog
Output
5.3 Control Voltage
Different models require control voltage to different terminals:
•C1 (110~210 VAC) A1, A2
•C1 (220~440 VAC) A2, A3
•C2 (24 VAC/VDC) A1, A3
User Manual (710-04840-00M) | 9

INSTALLATION
5.4 Control Wiring
The EMX3 has three fixed inputs for remote control. These inputs should be controlled by contacts rated for low voltage, low current
operation (gold flash or similar).
1
A
B
A B
C
A
B
C
C
23
C32
C31
C24
C23
C42
C41
03943.D
C32
C31
C24
C23
C42
C41
C32
C31
C24
C23
C42
C41
1
Two-wire control
2
Three-wire control
3
Four-wire control
A
Start
B
Stop
C
Reset
CAUTION
The control inputs are powered by the soft starter. Do not apply external voltage to the control input terminals.
Cables to the control inputs must be segregated from mains voltage and motor cabling.
The reset input can be normally open or normally closed. Use parameter 6M to select the configuration.
5.5 Relay Outputs
The EMX3 provides four relay outputs, one fixed and three programmable.
The Run output closes when the soft start is complete (when the starting current falls below 120% of the programmed motor full load
current) and remains closed until the beginning of a stop (either soft stop or coast to stop).
Operation of the programmable outputs is determined by the settings of parameters 7A~7I.
•If assigned to Main Contactor, the output activates as soon as the soft starter receives a start command and remains
active while the soft starter is controlling the motor (until the motor starts a coast to stop, or until the end of a soft
stop).
•If assigned to a trip function, the output activates when a trip occurs.
•If assigned to a flag, the output activates when the specified flag is active (parameters 7M~7O).
CAUTION
Some electronic contactor coils are not suitable for direct switching with PCB mount relays. Consult the contactor
manufacturer/supplier to confirm suitability.
Three additional outputs are available on the input/output expansion card.
5.6 Motor Thermistors
Motor thermistors can be connected directly to the EMX3. The soft starter will trip when the resistance of the thermistor circuit
exceeds approximately 3.6 kΩ or falls below 20 Ω.
If no motor thermistors are connected to the EMX3 thermistor input terminals B4, B5 must be open. If B4, B5 are shorted, the EMX3
will trip.
The thermistor input is disabled by default, but activates automatically when a thermistor is detected. If thermistors have previously
been connected to the EMX3 but are no longer required, either:
•connect a 1.2 kΩresistor between B4, B5 or
•reset the starter to factory defaults (refer to
Load/Save Settings
on page 45). If you wish to retain the starter’s
configuration, save the starter’s settings to a user set before resetting. Reload the settings after the thermistor input
has been reset
NOTE
The thermistor circuit should be run in screened cable and must be electrically isolated from earth and all other power
and control circuits.
10 | User Manual (710-04840-00M)

INSTALLATION
5.7 RTD/PT100
RTDs (PT100) can be connected directly to the EMX3. RTD/PT100s B ~ G are only available if the RTD/PT100 and Ground Fault
expansion card is fitted.
The soft starter will trip when the temperature exceeds the value specified in parameters 11A~11G (refer to
11 RTD Temperatures
).
When fitting an RTD/PT100, always review the parameter settings. The default value for each RTD/PT100 input is 50 °C.
The RTD/PT100 input is disabled by default, but activates automatically when an RTD/PT100 is detected.
NOTE
Resistors are required on any unused RTD inputs to avoid trips from electrical fast transient (EFT) noise. When
connecting an RTD, remove the resistor and associated jumper wire.
If RTD/PT100s have previously been connected to the EMX3 but are no longer required, either:
•connect a 120Ω~160Ωresistor between Signal + and Return – (B6, B8) to ensure the input remains at a known value,
then adjust parameter(s) 11A~11G so that the starter does not trip or
•reset the starter to factory defaults (refer to
Load/Save Settings
on page 45). If you wish to retain the starter’s
configuration, save the starter’s settings to a user set before resetting. Reload the settings after the RTD/PT100 input
has been reset
5.8 Earth Terminals
Earth terminals are located at the back of the soft starter.
•EMX3-0023B ~ EMX3-0105B have one terminal on the input side (top).
•EMX3-0145B ~ EMX3-1000B and EMX3-0255C ~ EMX3-1600C have two terminals, one on the input side (top) and one
on the output side (bottom).
5.9 Power Input and Output Configurations
Internally Bypassed Models (EMX3-0023B~EMX3-1000B)
Models EMX3-0023B ~ EMX3-0220B have power inputs at the top of the unit and outputs at the bottom of the unit.
Internally bypassed models EMX3-0255B ~ EMX3-0425B have output busbars at the bottom of the unit and input busbars at both the
top and bottom of the unit. The AC supply can be connected 'Top in, Bottom out' or 'Bottom in, Bottom out'.
Internally bypassed models EMX3-0500B ~ EMX3-1000B have input and output busbars at the top and bottom of the unit. The AC
supply can be connected 'Top in, Bottom out', 'Top in, Top out', 'Bottom in, Bottom out' or 'Bottom in, Top out'.
EMX3-0023B~
EMX3-0105B
EMX3-0145B~EMX3-0220B EMX3-0255B~EMX3-0425B EMX3-0500B~EMX3-1000B
1/L1, 3/L2, 5/L3
2/T1, 4/T2, 6/T3
1/L1 3/L2 5/L3
2/T1 4/T2 6/T3
1/L1 3/L2 5/L3
2/T1 4/T2 6/T3
1/L1 3/L2 5/L3
2/T1 4/T2 6/T3
1/L1 3/L2 5/L3
1/L1 3/L2 5/L3
2/T1 4/T2 6/T3
15763.A
6/T34/T2 5/ L33/L21/L1 2/T 1
5/L33/L21/L1
6/T34/T22/T1 5/L3
3/L21/L1
6/T34/ T22/ T1 5/L33/L21/L1
User Manual (710-04840-00M) | 11

INSTALLATION
Non-bypassed Model - EMX3-0255C
EMX3-0255C has dedicated bypass terminals at the bottom of the unit.
The bypass terminals are T1B, T2B, T3B.
15764.A
1/L1 3/L2 5/L3
T1B T2B T3B
2/T1 4/T2 6/T3
Non-bypassed Models (EMX3-0360C~EMX3-1600C)
EMX3-0360C~EMX3-1600C have dedicated bypass terminals, on the input busbars. The bypass terminals are L1B, L2B, L3B.
The busbars on non-bypassed models EMX3-0360C ~ EMX3-1600C can be adjusted for top or bottom input and output as required.
Refer to
Busbar Adjustment Procedure
on page 93 for step-by-step instructions. All units are manufactured bottom in/bottom out.
(L1B L2B L3B)
1/L1 3/L2 5/L3
2/T1 4/T2 6/T3
1/L1 3/L2 5/L3
(L1B L2B L3B)
2/T1 4/T2 6/T3
(L1B L2B L3B)
1/L1 3/L2 5/L3
2/T1 4/T2 6/T3
1/L1 3/L2 5/L3
(L1B L2B L3B)
2/T1 4/T2 6/T3
12 | User Manual (710-04840-00M)

INSTALLATION
5.10 Power Terminations
NOTE
For personnel safety, the power terminals on models up to EMX3-0105B are protected by snap-off tabs. When using
large cables, it may be necessary to break off these tabs.
NOTE
Some units use aluminium busbars. When connecting power terminations, we recommend cleaning the surface
contact area thoroughly (using an emery or stainless steel brush) and using an appropriate jointing compound to prevent
corrosion.
Use only copper stranded or solid conductors, rated for 75 ºC or higher.
EMX3-0023B~EMX3-0105B
05966.E
Cable size:
6-50 mm2(AWG 10-1/0)
Torque: 4 Nm (2.9 ft-lb)
11290.A
14 mm (0.55 inch)
Torx T20 x 150
Flat 7 mm x 150
EMX3-0145B
EMX3-0170B~EMX3-0220B
EMX3-0255B
19 Nm (14.0 ft-lb) 38 Nm (28.0 ft-lb) 38 Nm (28.0 ft-lb)
6 mm
19 mm
8.5 mm
(M8)
08351.B
08352.B
6 mm
19 mm
10.5 mm
(M10)
5 mm
28 mm
11mm
(M10)
13181.B
EMX3-0350B~EMX3-0425B
EMX3-0500B~EMX3-1000B
EMX3-0255C
38 Nm (28.0 ft-lb) 38 Nm (28.0 ft-lb) 38 Nm (28.0 ft-lb)
6 mm
28 mm
11 mm
(M10)
14543.A
13 mm
32 mm
11 mm
(M10)
09866.B
6mm
32 mm
10.5mm
(M10)
08353.B
EMX3-0360C~EMX3-0930C
EMX3-1200C~EMX3-1600C
38 Nm (28.0 ft-lb) 66 Nm (48.7 ft-lb)
13 mm
32 mm
10.5 mm
(M10)
08354.B
16 mm51 mm
12.5 mm
(M12)
08355.B
User Manual (710-04840-00M) | 13

INSTALLATION
5.11 Schematic Diagrams
Internally bypassed models
Non-bypassed models
04477.D
7
6
5
4
3
2
1
32
31
6/T3
2/T1
13
14
P24
COM
4/T2
24
23
34
B10
B11
41
42
44
B5
B4
C31
C32
C41
C42
C53
C54
C24
C64
C63
B7 Comp
B8 -
B6 +
A2
A1
A3
5/L3
3/L2
C23
E
1/L1
C BB A
B7 Comp
B8 -
B6 +
B7 Comp
B8 -
B6 +
4
B7 Comp
B8 -
B6 +
B7 Comp
B8 -
B6 +
B7 Comp
B8 -
B6 +
*
*
*
04480.C
CB
BA
1
Control voltage (model dependent) C23, C24 Start
2
Remote control inputs C31, C32 Stop
3
Motor thermistor input C41, C42 Reset
4A
RTD/PT100 input - 2-wire C53, C54 Programmable input A
4B
RTD/PT100 input - 3-wire C63, C64 Programmable input B
4C
RTD/PT100 input - 4-wire 13, 14 Relay output A
5
24 VDC output
23, 24
Run relay output
6
Relay outputs 31, 32, 34 Relay output B
7
Analog output 41, 42, 44 Relay output C
Different models require control voltage to different terminals:
•C1 (110~210 VAC) A1, A2
•C1 (220~440 VAC) A2, A3
•C2 (24 VAC/VDC) A1, A3
NOTE
* EMX3-0255C current transformers are located on the output. Bypass terminals are labelled T1B, T2B and T3B.
14 | User Manual (710-04840-00M)

POWER CIRCUITS
6. Power Circuits
6.1 Motor Connection
The EMX3 can be connected to the motor in-line or inside delta (also called three-wire and six-wire connection). When connecting in
inside delta, enter the motor full load current (FLC) for parameter 1A. The EMX3 will automatically detect whether the motor is
connected in-line or inside delta and will calculate the correct inside delta current level.
Models which are internally bypassed do not require an external bypass contactor.
Internally bypassed models:
EMX3-0023B, EMX3-0043B, EMX3-0050B, EMX3-0053B, EMX3-0076B, EMX3-0097B, EMX3-0100B, EMX3-0105B, EMX3-0145B,
EMX3-0170B, EMX3-0200B, EMX3-0220B, EMX3-0255B, EMX3-0350B, EMX3-0425B, EMX3-0500B, EMX3-0580B, EMX3-0700B,
EMX3-0820B, EMX3-0920B, EMX3-1000B
Non-bypassed models:
EMX3-0255C, EMX3-0360C, EMX3-0380C, EMX3-0430C, EMX3-0620C, EMX3-0650C, EMX3-0790C, EMX3-0930C, EMX3-1200C,
EMX3-1410C, EMX3-1600C
In-line installation, internally bypassed
6/T3
2/T1
5/L3
3/L2
1/L1
13
14
4/T2
E
K1
K1 F1
M
3
K1
Main contactor (optional)
F1
Semiconductor fuses (optional)
13, 14
Relay output A (= Main Contactor,
default)
User Manual (710-04840-00M) | 15

POWER CIRCUITS
In-line installation, externally bypassed
Non-bypassed models have dedicated bypass terminals, which allow the EMX3 to continue providing protection and monitoring
functions even when bypassed via an external bypass contactor. The bypass contactor must be connected to the bypass terminals
and controlled by the soft starter's run output (terminals 23, 24).
Power connections - in-line installation, externally bypassed (EMX3-0255C)
F1
K1
K1
K2
K2
13039.B
M
3
6/T3
2/T1
5/L3
3/L2
1/L1
13
14
4/T2
E
T3B
T3B
T3B
24
23
Power connections - in-line installation, externally bypassed (EMX3-0360C to EMX3-1600C)
6/T3
2/T1
5/L3
3/L2
1/L1
13
14
4/T2
E
K1
K1
L1B
*
L2B
*
L3B
*
K2
24
23
K2
M
3
F1
K1
Main contactor
K2
Bypass contactor (external)
F1
Semiconductor fuses (optional)
16 | User Manual (710-04840-00M)

POWER CIRCUITS
In-line installation, non-bypassed
6/T3
2/T1
5/L3
3/L2
1/L1
13
14
4/T2
E
K1
K1 F1
M
3
K1 Main contactor (optional)
F1 Semiconductor fuses (optional)
13, 14 Relay output A (= Main Contactor,
default)
Inside delta installation, internally bypassed
M
3
6/T3
2/T1
13
14
4/T2
K1
U1(1) U2(4)
V1(2) V2(5)
W1(3) W2(6)
5/L3
3/L2
1/L1
E
K1 F1
K1
Main contactor (strongly recommended)
F1
Semiconductor fuses (optional)
13, 14
Relay output A (= Main Contactor,
default)
WARNING
When connecting the EMX3 in inside delta configuration, always install a main contactor or shunt trip circuit breaker.
NOTE
When connecting in inside delta, enter the motor full load current (FLC) for parameter 1A. The EMX3 will automatically
detect whether the motor is connected in-line or inside delta and will calculate the correct inside delta current level.
User Manual (710-04840-00M) | 17

POWER CIRCUITS
Inside delta installation, externally bypassed
Non-bypassed models have dedicated bypass terminals, which allow the EMX3 to continue providing protection and monitoring
functions even when bypassed via an external bypass contactor. The bypass contactor must be connected to the bypass terminals
and controlled by the soft starter's run output (terminals 23, 24).
04484.C
M
3
6/T3
2/T1
5/L3
3/L2
1/L1
13
14
4/T2
E
K1
K1 F1
U1(1) U2(4)
V1(2) V2(5)
W1(3) W2(6)
L2B
L1B
L3B
K2
24
23
K2
K1 Main contactor (strongly recommended)
K2 Bypass contactor (external)
F1 Semiconductor fuses (optional)
13, 14 Relay output A (= Main Contactor, default)
23, 24 Run relay output
Inside delta installation, non-bypassed
6/T3
2/T1
5/L3
3/L2
1/L1
13
14
4/T2
K1
K1 F1
U1(1) U2(4)
V1(2) V2(5)
W1(3) W2(6)
M
3
04483.D
K1 Main contactor (strongly recommended)
F1 Semiconductor fuses (optional)
13, 14 Relay output A (= Main Contactor, default)
18 | User Manual (710-04840-00M)

POWER CIRCUITS
6.2 Bypass Contactor
Some EMX3 soft starters are internally bypassed and do not require an external bypass contactor.
Non-bypassed soft starters may be installed with an external bypass contactor. Select a contactor with an AC1 rating greater than
or equal to the full load current rating of the connected motor.
Internally bypassed models:
EMX3-0023B, EMX3-0043B, EMX3-0050B, EMX3-0053B, EMX3-0076B, EMX3-0097B, EMX3-0100B, EMX3-0105B, EMX3-0145B,
EMX3-0170B, EMX3-0200B, EMX3-0220B, EMX3-0255B, EMX3-0350B, EMX3-0425B, EMX3-0500B, EMX3-0580B, EMX3-0700B,
EMX3-0820B, EMX3-0920B, EMX3-1000B
Non-bypassed models:
EMX3-0255C, EMX3-0360C, EMX3-0380C, EMX3-0430C, EMX3-0620C, EMX3-0650C, EMX3-0790C, EMX3-0930C, EMX3-1200C,
EMX3-1410C, EMX3-1600C
6.3 Main Contactor
A main contactor must be installed if the EMX3 is connected to the motor in inside delta format and is optional for in-line connection.
Select a contactor with an AC3 rating greater than or equal to the full load current rating of the connected motor.
6.4 Circuit Breaker
A shunt trip circuit breaker may be used instead of a main contactor to isolate the motor circuit in the event of a soft starter trip. The
shunt trip mechanism must be powered from the supply side of the circuit breaker or from a separate control supply.
6.5 Power Factor Correction
If power factor correction is used, a dedicated contactor should be used to switch in the capacitors.
To use the EMX3 to control power factor correction, connect the PFC contactor to a programmable relay set to Run. When the motor
reaches full speed, the relay will close and power factor correction will be switched in.
CAUTION
Power factor correction capacitors must be connected to the input side of the soft starter. Connecting power factor
correction capacitors to the output side will damage the soft starter.
6.6 Short Circuit Protection Devices (SCPD)
Fuses may be installed to protect the soft starter or the installation.
Type 1 Coordination
Type 1 coordination requires that, in the event of a short circuit on the output side of a soft starter, the fault must be cleared without
risk of injury to personnel. There is no requirement that the soft starter must remain operational after the fault.
HRC fuses (such as Ferraz/Mersen AJT fuses) can be used for Type 1 coordination according to IEC 60947-4-2 standard.
Type 2 Coordination
Type 2 coordination requires that in the event of a short circuit on the output side of a soft starter, the fault must be cleared without
risk of injury to personnel or damage to the soft starter.
Semiconductor fuses for Type 2 circuit protection are additional to HRC fuses or MCCBs that form part of the motor branch circuit
protection.
CAUTION
Adaptive Control controls the motor's speed profile, within the programmed time limit. This may result in a higher level
of current than traditional control methods.
CAUTION
DC Brake: A high brake torque setting can result in peak currents up to motor DOL being drawn while the motor is
stopping. Ensure protection fuses installed in the motor branch circuit are selected appropriately.
CAUTION
Integral solid state short circuit protection does not provide branch circuit protection. Branch circuit protection must be
provided in accordance with the National Electrical Code and any additional local codes.
User Manual (710-04840-00M) | 19
This manual suits for next models
10
Table of contents
Other AuCom Controllers manuals

AuCom
AuCom CSXI-007 User manual

AuCom
AuCom MVSxxxx-V03 User manual

AuCom
AuCom CSX-007 User manual

AuCom
AuCom MVE series User manual

AuCom
AuCom EMXAe User manual

AuCom
AuCom CSX-007 User manual

AuCom
AuCom Modbus RTU Card User manual

AuCom
AuCom EMX3 User manual

AuCom
AuCom MVS0080 User manual

AuCom
AuCom CSX-007 User manual
Popular Controllers manuals by other brands

PumpSmart
PumpSmart PS220 Operation manual

FlowLine
FlowLine Commander LI90 Series user manual

CLIVET
CLIVET TALK manual

Samson
Samson series 43 Mounting and operating instructions

Varian
Varian Turbo-V 2000 ICE instruction manual

Curtiss-Wright
Curtiss-Wright EXLAR GTX Series Installation & service instructions