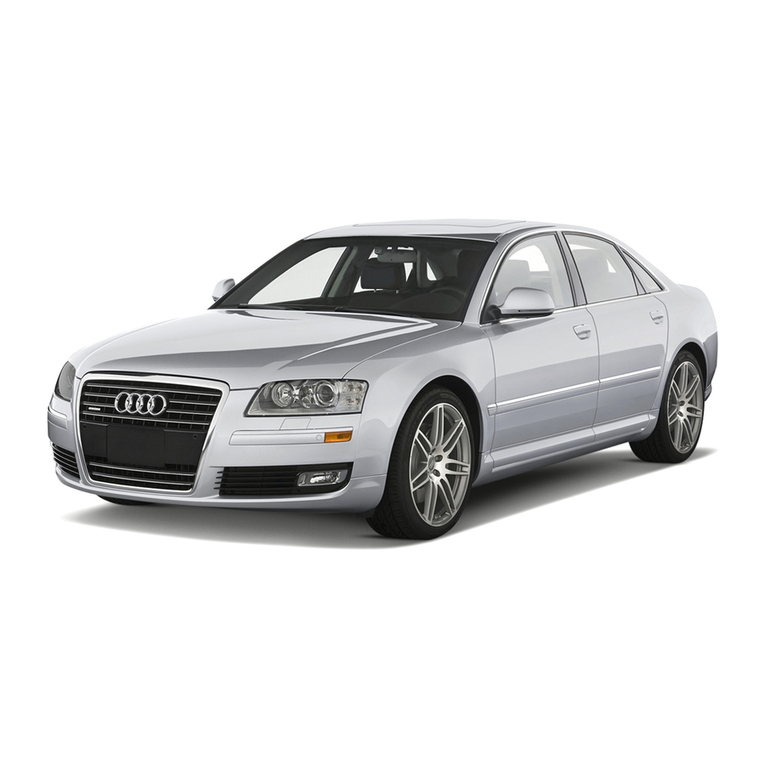
Audi A8 2008 User manual

2008 Audi AS
Owner's Manual


Introduction
Thank you for choosing an Audi A8 -we value your trust in us.
Your new Audi A8 incorporates the newest technology as well as numerous features designed for
your comfort, convenience and safety. We recommend you read your Owner's Manual thoroughly
so that you can quickly become acquainted with your Audi.
In addition to explaining how the different feaitures work, we also give you many useful tips and
information concerning your safety and that of your passengers, how to care for your vehicle and
maintain your veh icle's value.
We hope you enjoy driving your Audi A8 and we wish you safe and pleasant motoring .
AUDI AG

Table of contents
Table of contents
Vehicle literature ....... . .
About this Owner's
Manual ..................... .
Controls and
equipment .. . .. . .. .. . . . ... . .
Inst r umen t s and contr o ls ..... .
Genera l i ll ustration ............. .
Instruments and
warning/indica to r lig h ts ....... .
Instruments ................... .
Warning/indicator lights ........ .
Driver in f orma t io n d isplay .. . . . .
Introduction ................... .
On-Board Diagnostic system (080)
Auto Check Control ............ .
Speed war ni ng system ... .. .... .
Trip computer ..... .. .......... .
Tire pressure monitoring system ..
Opening and closing .......... .
Keys ............ . . . .. . .. · · · · · · ·
Power locking system .......... .
Rear lid/Trunk li d .......... . .... .
Ch ild safety loc k . . .. . .. . . .. . . .. .
5 Advanced Key ............. . .. .
Anti-theft a larm system ..... . .. .
Powe r w in dows . .. . .. . .. . .. . . .
S lid ing/ti lt ing power sunroof ... .
6 Clear vision . .. .. . . .. . .. .. . .... .
9
11
1 1
12
12
16
2 4
2 4
27
28
36
38
40
47
47
49
55
58
Lights ..................... . .. .
Interior lights . .. . ..... . . .. . . .. .
V is ion ........... ....... .. . . .. .
W iper and washer system ... . .. .
Mirrors .. . . . .. . ........ .. . . . . . .
Seats and storage .. ....... . .. .
Genera l recommendat ions .. . .. .
Powe r seat . . .. . .. . ........ . .. .
Head restraints ...... .. ...... . .
Arm rest ..................... .
Seat memory . .. . .. .. . . .. .. ... .
Rear sea t s . . .. . .. . .. . .. . .. . . . . .
Ind ividua l rear seats ........ . .. .
Luggage compartment ..... . . . .
Roof rack .. . ..... . .. . . . . .... . . .
Cup h o lder .................... .
As h t ray . . .. . .. . .. . ........ . .. .
Cigarette lighter/socket ....... . .
Long center console ........... .
Storage .... .. . . .. .. .......... .
Warm and cold ............ . .. .
Climate controls .............. .
W indshield defogg ing / defrosting .
Rear clim ate controls . .... ... .. .
Basic settings ......... . .. . . . .. .
On the road . .. . . . . .. . .. .. . . . .. .
Stee ring .... . .. . .. . ........... .
Ignition lock and ignition sw itch .
Starting and stopping the engine
59 Starting and stopping the eng ine
61 using t h e Advanced Key . . . . . . . . . 131
62 Electromechanical parking brake . 13 4
65 Cru ise control . . . . . . . . . . . . . . . . . . 137
69 A dapt ive Cruise Control . . . . . . . . 139
69 Speed and distance control system 139
7 4 Drive r informat ion . . . . . . . . . . . . . . 144
77 Specia l dr iv ing si t ua t ions . . . . . . . . 14 9
80 Audi lane assist . . . . . . . . . . . . . . . . 151
83 La n e assist . . . . . . . . . . . . . . . . . . . . 151
86 A udi side assist . . . . . . . . . . . . . . . . 15 4
86
87
91
93
9 4
96
97
100
103
105
106
107
108
109
1 14
11 4
123
125
126
128
128
129
130
Lane Change Assistant ........ . .
No t es ........ .... . . ........ . . .
Automatic transmission ...... . .
tiptron ic® (6 -speed automatic
transm ission) ................. .
Advanced Park ing System .. . . .
Advanced Parking System with rear
v iew camera .................. .
Specia l parking situations . . .... .
Towing h itch .. . ...... . ........ .
Settings in the MM I ..... .. .... . .
Safety t ips .............. . ..... .
Adaptive A ir Suspension ...... .
Adaptive Air Suspension and
Damping ..... . . .............. .
Homelink® ................... . .
Universa l remo te control ....... .
154
161
163
163
170
170
178
180
180
183
185
185
191
191
Table of contents
Safety first . . . . .. . . . . . . . . . . . 197 Vehicle operation . . . . . . . . 267 Vehicle care ................ 287
Driving Safely . . . . . . . . . . . . . . . . . . 198 Intel l igent technology . . . . . . . . . . 268 C leaning and protection ........ 288
Genera l notes . . . . . . . . . . . . . . . . . . 198
Proper occupant seating positions 200
Driver and passenger s ide footwell 204
Peda l area . . . . . . . . . . . . . . . . . . . . . 204
Stow ing luggage . . . . . . . . . . . . . . . 205
Reporting Safety Defects . . . . . . . . 207
Safety belts . . . . . . . . . . . . . . . . . . . . 209
Genera l notes . . . . . . . . . . . . . . . . . . 209
Why safety be lts? . . . . . . . . . . . . . . 21 O
Safety belts . . . . . . . . . . . . . . . . . . . 21 3
Safety belt pretensioners . . . . . . . 216
A i rbag system .. . .. .. . . .. . . . . . . 218
Important th ing s to know . . . . . . . 218
Front airbags . . . . . . . . . . . . . . . . . . 222
Monitoring the Advanced Airbag
System . . . . . . . . . . . . . . . . . . . . . . . 229
Knee airbags . . . . . . . . . . . . . . . . . . 234
Side a ir bags . . . . . . . . . . . . . . . . . . . 237
Side c urtain airbags (SIDEGUARD™) 240
Child Safety . . . . . . . . . . . . . . . . . . . . 243
Impor tan t things to know . . . . . . . 243
Child safety seats . . . . . . . . . . . . . . 248
Instal li ng a ch il d safety seat . . . . . 253
Addit ional Information . . . . . . . . . . 256
Lower anchorages and tethe r for
children (LATCH) . . . . . . . . . . . . . . . . 258
Not ice about da t a recorded by
vehicle contro l modules . . . . . . . . . 268
El ectron ic Stab il izat ion Program
(ESP) . . . . . . . . . . . . . . . . . . . . . . . . . . 268
Braking . . . . . . . . . . . . . . . . . . . . . . . . 270
Servotronic® - advanced power
steer ing system . . . . . . . . . . . . . . . . 273
Driv ing w it h your quattro® . . . . . . 273
Energy management . . . . . . . . . . . . 274
Driving and environment . . . . . . . 277
The first 1,000 m il es (1,500 km) and
afterwards . . . . . . . . . . . . . . . . . . . . . 277
Cata lytic converter . . . . . . . . . . . . . 278
Avoid damaging the vehic le . . . . . 279
Operate your vehicle economically
and minimize pollution . . . . . . . . . . 279
Trailer t owing . . . . . . . . . . . . . . . . . . 282
Driv ing w ith a trailer . . . . . . . . . . . . 282
Trai ler towing tips . . . . . . . . . • . . . . 284
Genera l info rma tion . . . . . . . . . . . . . 288
Care of exterior . . . . . . . . . . . . . . . . . 288
Care of in te rior . . . . . . . . . . . . . . . . . 295
Fuel supply and filling your fuel
tank ............................ 301
Gasoline . . . . . . . . . . . . . • . . . . . . . . . 301
Fuel tank ....................... 302
Checking and filling . . . . . . . . . . . . 306
Engine hood . . . . . . . . . . . . . . . . • . . 306
Engine compartment . . . . . . . . . . . . 308
Engine oil . . . . . . . . . . . . . . . . . . . . . . 309
Engin e cooling system . . . . . . . . . . 3 14
Brake fluid .. .. .... . ............ 3 17
Battery . . . . . . . . . . . . . . . . . . . . . . . . 31 8
W indshield/headlight washer
container . . . . . . . . . . . . . . . . . . . . . . 323
Tires and wheels . . . . . . . . . . . . . . . 324
Tires . . . . . . . . . . . . . . . . . . . . . . . . • . . 324
Vehicle care I I irechnical data

Table of contents
Do-it-yourself service .. . 347
What do I do now? . . . . . . . . . . . . . 348
Trunk escape handle . . . . . . . . . . . . 348
Emergency warning triang le . . . . . 348
Jack, too ls and spare wheel . . . . . . 349
Changing a wheel . . . . . . . . . . . . . . 351
Fuses and bulbs . . . . . . . . . . . . . . . . 358
Fuses . . . . . . . . . . . . . . . . . . . • . . . . . . 358
Bu lbs . . . . . . . . . . . . . . . . . . . . . . . . . . 362
Em e rgency s ituat ions . . . . . . . . . . 36 4
Gener a l . . . . . . . . . . . . . . . . . . . . . . . . 36 4
Sta rting by pushing or towing . . . . 364
Start in g with jumpe r cab les . . . . . . 364
Use of jumper cab les . . . . . . . . . . . . 365
Em erge n cy towing with commercia l
t ow truck . . . . . . . . . . . . . . . . . . . . . . 366
Lifting veh ic le . . . . . . . . . . . . . . . . . . 369
Technical data
General information
373
37 4
Expla n ation of technical data . . . . 374
Vehic le ident ificat ion . . . . . . . . . . . . 374
Displaying Vehic le Identifica t ion
Number in MMI . . . . . . . . . . . . . . . . 375
Weights . . . . . . . . . . . . . . . . . . . . . . . 375
Dim ensio ns . . . . . . . . . . . . . . . . . . . . 376
Da t a . . . . . . . . . . . . . . . . . . . . . . . . . . . 3 7 8
350 hp, 8 -cylinder engine, with a ll
whee l dr ive . . . . . . . . . . . . . . . . . . . . 378
450 hp, 12 -c ylinder engine , wi t h all
whee l drive, long wheel base . . . . 379
Consumer Information . . . . . . . . . 380
Warran ty cov er ages . . . . . . . . . . . . 380
Operating you r veh icle outs ide the
U.S.A. or Canada . . . . . . . . . . . . . . . 380
Audi Se rv ice Repair Manuals and
Literature . . . . . . . . . . . . . . . . . . . . . . 380
Maintenance . . . . . . . . . . . . . . . . . . 380
Ad di tional accessor ies,
mod ificat ions and parts
rep lacement . . . . . . . . . . . . . . . . . . . 382
Alphabetical index . . . . . . 385

Vehicle literature
In addition to this Owner's Manual, your Audi comes with the
• MMI Operating Instructions
• Warranty & Maintenance booklet.
If you are missing one of these publications, or if you believe that
the informat ion is not comp lete, contact your author ized Audi
dea ler for assistance .
MMI Operating Instructions
contain detailed description of the Audi Multi Media Interface (MMI)
including the navigation system, the sound system and the hand-
held phone .
The Warranty & Maintenance booklet
exp lains how you can keep your Audi in top driving condition by
having it serviced regu larly and contains detai led information about
the warranties covering your Audi. Always have the booklet with you
when you take your vehicle to an aut horized Aud i dea ler for service.
Your Audi Serv ice Adviser will record each schedu led service and
can answer any questions you may have regarding how to maintain
your vehic le.
In Canada,
the vehicle literature is also avai lab le in French. To obtain a copy,
contact your dealer or write to :
Au Canada , on peut se procurer un exemplaire en fran9ais de ce
document aup res du concessionna ire ou de:
Volkswagen Canada Inc.
Client Assistance
Assistance a la Clientele
777 Bayly Street, West,
Ajax , Ontario L1S 7G7
Controls and equip-
ment Safety first Vehicle operation
V e hi c le lite rat ur e
If you sell your Audi
all literature should be left in the vehic le to make the Warranty terms
as well as all operating, safety and maintenance information avail -
able to the next owner .
If you change your address or if you bought this
Audi used
be sure to send in a "Notice of Address Change"/ "Notice of Used
Car Purchase" post card. This card can be found in the Warranty &
Ma intenance booklet or obtained from your authorized Aud i dealer.
It is in your ow n inte rest th at w e are able to conta ct you should the
need ari se. •
Vehicle care Do-it-yourself service Technical data

About this Own e r's Manu a l
About this Owner's Manual
This owner's manua l contains important information, tips, sugges-
tions, and warnings for the use of your vehicle.
Make sure that th is owner's manual is always located in the vehicle.
This is especial ly important if you allow other people to drive the
vehi cle, or if you sell it.
This owner's manua l describes the equipment range specified for
t his model at the editor ial deadline date . Some of the equ ipment
described here will on ly be availab le at a later date, or on ly in
specific mar kets.
Some sect ions in th is owner's manual do not apply to all veh icles.
In that case, the range of applicability is given at the beginning of
the sect ion, e. g. "Appl ies to ve hicles : wit h Advanced Parking
System". In addition, optional equipment is indicated by an asterisk
"*"
The deta ils in the illustrations may be different from t hose in your
vehic le, and are intended to be viewed as a basic guide.
You wil l find a table of content s at the beg inning of th is book , wh ich
displays all topics described in this manua l in order of appearance.
You wil l fi nd an alphabetical index at the end of th is book.
All directions , such as "left", "right", "front", "back", are relative to
the direction of trave l.
* optiona l equipment
.,. This section continues on the next page.
• Ind icates the end of a section .
® Registered trademarks are identified with a® . If t his symbo l is
missing, it is no guarantee that the terms can be used freely.
~ & Cross-reference to a "WAR NING!" within a section . For indi -
cation with a page number, the corresponding "WARN ING!" can be
found outs ide of the section.
& WARNING
Text w ith thi s symbol conta ins impo rtant inform ation on safety
and how to reduce the risk of personal injury or death .
0 Note
Text with this symbol draws your attention to potential sources of
damage to your veh icle.
<£'For the sake of the environment
Text wit h this symbol contai ns information about the environment
and how you can help protect it.
(I) Tips
Text with this symbol contains specia l tips and other information
about getting t he most out of your vehicle and it s features . •

Controls and equip-
ment Safety first Vehicle operation Vehicle care
About this Owner's Manual
Do-it-yourself service Technical data


Controls and equipment

Instruments and controls
Fig. 1 Some of the equipment or features shown in the general illustration may be standard equipment on your vehicle or may be optional equipment depending on your
model. Always ask your authorized Audi dealer if you have a question about your vehicle .

Instruments and controls
General illustration
G) Power window switches ........................ .
@ Door handle
G) Power locking switches .. . .. .. .. .. .. .. .. .. .. .... .
© Adjuster contro l for outside mirrors .. .. .. .. .. .. . . .
© Light switch .. .. .. .. . ... . .. .. .. .. .. .. .. .. . .. .. .
© Contro l lever for:
- Cruise control .. .. .. .. .. . ... . ...... .. .. .. .. . .
- Adaptive Cruise Contro l .. .. .. .. .. .. . ... . ... . . .
0 Air outlets . .. .. .. .. .. .. . ... . ... . .. .. .. .. .. .. .. .
@ Contro l lever for:
- Turn signal and high beam ... . ... . .. .. .. .. .. . .
- Lane assist .. .. . ... . .. .. .. .. .. .. .. . .. .. .. .. . .
© Multi f unction steering wheel with :
- Horn
- Driver's airbag .. .. .. .. . .. .. .. .. .. .. .. .. .. . .. .
- Shift buttons ............................... .
Button for steer ing whee l heating .. .. . ... . .. .. .
@ Instrument cluster . . ... . ... . ... . ...... . ... . ... . .
@ Switches for
- Windshield wiper/washer ..... .. .. ...... . ..... .
- Trip computer .. .. . ...... .. .. .. .. .. .. .. .. . .. .
@ Steering lock/ignit ion/starter switch
@ Buttons for:
- Advanced Parking System .. .. .. .. .. . ... . ... . . .
- Side assist ................................. .
- Power sunshade
@ MM I Disp lay
Controls and equip-
ment
62
53
84
69
137
139
122
73
151
222
168
119
12
80
38
129
170
154
78
Ins t rum e nts and c ontrols
@ Buttons/Indicator light for :
- Electronic Stabilization Program (ESP) 268
- PASSENGERAIR BAG OFF
- Emergency flashers . . . . . . . . . . . . . . . . . . . . . . . . . . . 73
@ Storage tray . . . . . . . . . . . . . . . . . . . . . . . . . . . . . . . . . . . 110
@ Glove compartment . . . . . . . . . . . . . . . . . . . . . . . . . . . . . 109
@ Front passe nger's airbag . . . . . . . . . . . . . . . . . . . . . . . . 222
@ Shift lever for automatic transmission . . . . . . . . . . . . . 163
@ Climate controls . . . . . . . . . . . . . . . . . . . . . . . . . . . . . . . . 116
@ Rear window defogger switch . . . . . . . . . . . . . . . . . . . . 124
@ Ashtray with cigarette lighter . . . . . . . . . . . . . . . . . . . . . 106
@ ISTART ~~STOP ~butto n . . . . . . . . . . . . . . . . . . . . . . . . . 131
@ MMI Terminal
@ Storage with cup holder . . . . . . . . . . . . . . . . . . . . . . . . . 105
@ Electromechanical parking brake . . . . . . . . . . . . . . . . . . 134
@ Data Link Connector for On Board Diagnostics (OBD Ill 27
@ Engine hood release . . . . . . . . . . . . . . . . . . . . . . . . . . . . 306
@ Adjustable steering co lumn . . . . . . . . . . . . . . . . . . . . . . 128
@ Me mory buttons (driver's seat) . . . . . . . . . . . . . . . . . . . 94
@ Switc h for
- unlocking the fuel fil ler door
- unlocking t he tr unk lid
[i ]Tips
303
55
Operation of the Mu lt i Media Interface (MMI) is described in a sepa -
rate manual. •

Instruments and warning / indicator lights
Instruments and warning/indicator lights
Instruments
Instrument cluster and controls
The instrument cluster is your central source of informa-
tion.
Fig. 2 Overview of the instrume nt cluster
G) Coolant temperature gauge . ... ... ............. . .
0 Tachometer with time and date display .. . ........ .
® Warning/indicator lights .. . .. . .... . .. . ....... . . .
© Driver information system . . .......... . . .. .. .. . . .
© Speedome t er with odometer . . . .. .. .. .. . . . ..... .
© Fuel gauge . .. .. .. .. .. .. . ... .. ... . . . ... ... .. . . .
G) Reset button for trip odometer ... . . . . .. . .. .. .. . . .
12
13, 13
16
24
14
14
14
© ICH ECK] button .. . .. .. .. . ... .. . ... . .. .. .. . .... .
® Instrument cluster illumination .. . ... . ... . .. .. .. . .
[i ]Tips
15
15
The illumination for the instrument cluster lights up whenever you
switch on the ignition with the vehicle headlights off. As the
daylight fades, the instrument cluster illumination likewise dims
automatically and wil l go out complete ly when the outside light is
very low . This feature is meant to remind you to switch on the head-
lights when outside light conditions become poor. •
Engine coolant temperature gauge
The engine coolant gauge => fig. 2 G)only works when the ignition
is on. To prevent damage to your engine, please note the following
important points:
Engine co ld
As long as the needle remains at the left end of the gauge, the
engine still has not reached its operating temperature. Avoid high
engine speeds, heavy engine loads and heavy throttle applications .
Normal temperature
When the engine has reached its operating temperature, the needle
will move into the middle of the gauge and remain there. If the
engine is working hard at high outside temperatures, the needle
may go further to the right. This is no need to worry as long as the
-~- warning light in the instrument cluster does not illuminate.
Warning light in the instrument cluster - L
When the _L warning light starts to flash, this can mean one of two
things: either the coolant temperature is too high, or the coolant
level is too low => page 31. _.,

If the indicator goes all the way to the right side inside the coolant
temperature gauge, then the engine coolant temperature is too
high. Pull off the road to safe location, turn off the engine and let it
cool down. If the warning light comes on again after you have driven
a short distance, contact a qualified workshop.
& WARNING
• Always observe the warning in :::::,page 299, "Engine compart-
ment", before opening the hood and checking the engine coolant
level.
• Never open the engine hood if you see or hear steam, or if you
see engine coolant dripping from the engine compartment. You
could burn yourself. Let the engine cool off first so that you cannot
hear or see any steam or engine coolant.
0 Note
• Mounting additional lights or accessories in front of the air inlets
reduces the cooling effect of the radiator. At high outside tempera -
tures or high engine load, the engine could overheat.
• The front spoiler has been designed to properly distribute the
cooling air when the vehicle is moving . If the spoiler is damaged,
this could reduce the cooling effect and the engine could then over -
heat. Ask your authorized Audi dealer for assistance. •
Tachometer (engine rev counter)
The tachometer indicates the engine RPM (revolutions per
minutes).
The tachometer 0 :::::,page 12,fig. 2 is the left of the two large clock-
type displays.
The engine turns at a speed 1,000 times the single digit in the
display, e.g. if the needle is pointing at the "2" the engine is turning
at 2,000 RPM.
Controls and equip-
ment
Instruments and warning/indicator lights
If engine RPM drops below 1,500, you should downshift to the next
lower gear. The red area at the end of the scale indicates maximum
permissible engine RPM after the break-in period . Before reaching
this area, move the selector lever to position "D (Drive)" or ease your
foot off the accelerator pedal.
0 Note
The tachometer needle should not move into the red range . If it
does, then only for a very short period of time. You could damage
your engine by driving at high RPM.
<£>For the sake of the environment
Upshifting early saves fuel and reduces engine noise . •
Digital clock with date display
Date and time of day can be set in MM/.
Fig. 3 Instrument
cluster with digital
clock
The date, time of day, and time and date format can be set in MMI.
You can find out more in the MMI manual.
~

In st rum e n t s a nd warning / indi ca t o r lig h ts
[i J Tip s
• The digital clock and the odometer are turned on for about 30
seconds when the driver's door is opened.
• When the ignition is turned off, the odometer reading and the
digital clock with date display can be switched on for about
30 seconds by pressing the ICHECK) button => page 15, fig. 5. •
Speedometer with odometer
The speedometer shows you the vehicle speed, and the
odometer shows you how many miles (kilometers) you
have driven .
Fig. 4 Instr ume nt
cluster Odomete r and
reset butt on
The odometer and trip odometer are located inside the speedom-
eter.
• USA models - Miles
• Canada models - Kilometers
You can swi t ch the display from mi les to kilometers and vice versa
via the MMI.
Lower odom et e r
The lower odometer shows the total number of miles (kilometers)
driven.
U p p e r od om e t e r (tr ip odo m e t er)
The upper odometer shows the total number of mi les (kilometers)
driven since you last reset the odometer to zero. You can use this
odometer when you wan t to keep track of how many mi les (kilome -
ters) you have driven for a single trip or errand. The last digit indi-
cates 1/10 of a mile (100 meters).
You can reset the trip odometer to zero by pressing the Reset button
(0.0).
M a lf un ct io n message
If there is a malfunction somewhere in the instrument cluster, dEF
wi ll appear in the trip odometer and will stay on. Contact your
authorized Audi dealer to have the prob lem corrected.
Imm ob ilize r
When you switch on the ignition, the data chip inside the key is
"read" by the immobilizer system.
If an unauthorized key is inserted into the ignition lock, the word
SAFE will come on and stay on. You will not be able to start the
vehicle=> page 49.
[i J Tips
• The digita l clock and the odometer are turned on for about 30
seconds when the driver's door is opened.
• When the ignition is turned off, the odometer reading and the
digital clock with date display can be switched on for about
30 seconds by pressing the !CHECK) button=> page 15, fig. 5. •
Fuel gauge
The fuel gauge only works when the ignition is on.
The fuel tank holds about 23.8 gallons (90 liters). When the need le
reaches the reserve mark, the=> page 35 symbol appears in the
instrument cluster display as well as the message Please refue l. .,_

There is still approximately 2.4 gallons (9 liters) of fuel left. This
message is meant to remind you t o refuel .
(D Note
Never run the tank completely dry . An irregular supp ly of fuel can
cause engine misfiring and fuel could enter the exhaust system . The
cata lytic converter could then overheat and be damaged . •
[C H ECK] button
You can perform different functions with this button .
Fig. 5 CHECKbutto n in
th e instrument cluster
The [CHECK ] button performs the following functions:
Swi t ch ing o n th e c lock and o dom e t e r
With the ignition turned off, the odometer reading and the digital
clock with date display can be sw itched on for about 30 seconds by
pressing the ICHECK Ibut ton ~ fig. 5.
St a rtin g t h e Au t o-C h eck se qu e n ce
The Auto -Check system ~ page 28 constantly monitors certain indi -
vidual functions and components of the vehicle when the ignition is
turned on and when the vehicle is moving.
With the ignition turned on, you can start the "Auto -Check
sequ ence" by pr essing the !CHECK ] butt on . You can perform an
Controls and equip-
ment
In st rum e n t s a nd warning / indi c ator light s
Auto -Check sequence when the vehicle is stationary and the ignition
is turned on or when the vehicle is moving not faster than 3 mph
(5 km/h).
Calling up the dri v er inf o rmatio n
A yellow or red symbol appears in the instrument cluster display ,
usually with a driver message. The driver message display disap -
pears after about 5 seconds . The driver message can be displayed
again by briefly pressing the ICHECK ] button .
Se tting th e sp ee d w a rni n g
By pressing the [CHECK! but ton briefly, you can set threshold 1 of
the speed warning while you are driving ~ page 37. By maintaining
pressure on the [CHECK ! button, you delete the warning
threshold. •
Instrument cluster illumination
The basic brightness of the illuminati on for the instru-
ments, the center console and the display can be
adjusted .
I
r ,- i:,.- .. I+,- i:,.-
-•/, ,,,,
Fig. 6 Instr ument
cluster illumi nat ion
Press the"+" button to increase t he brightness during
the hours of dar kn ess.
~
Vehicle care I I irechnical data

Instruments and warning / indicator lights
- Press the"-" button to decrease the brightness during
the hours of darkness.
A light sensor in the instrument cluster controls the illumination for
the instrument clust er, the center console and the displays . In a
bright environment , using the buttons to change the brightness has
no effect .
[i ]Tips
The illumination for the instrument cluster lights up whenever you
switch on the ignition with the vehicle headlights off. As the
daylight fades, the instrument cluster illumination likewise dims
automatically and will go out completely when the outside light is
very low. This feature is meant to remind you to switch on the head-
lights when outside light conditions become poor. •
Warning / indicator lights
Overview
The warning/indicator lights indicate different functions
or a possible malfunction.
iWiii i·il·ihii
Fig. 7 Instrument cluster with warning/indicator light s
Your vehicle is equipped with several important warning and indi -
cator lights to help you monitor the continued reliab le operation of
your vehicle =>
&-
0
Electronic power control
Generator
=>
page 18
=>page 18
Electronic Stabilization Program (ESP) =>page 18

tl~ Airbag system
--
/: \ Lane assist (system is ready)
Lane assist (system is not ready)
¢ Left turn signal
--
D High beam
}D Fog lights
Rear fog lights
Tire pressure monitoring syst em
Malfunction Indicator Lamp (MIU
Safety belt
Adaptive Air Suspension
<+:) Adaptive Air Suspension
Right turn signal
--
CRUISE
--
USA models:
Cruise control activated
Canada models:
Cruise control activated
USA models:
Anti-lock brake system (ABS) defec-
tive
Controls and equip-
ment
=>page 19
-
=>page 19
=>page 19
=>page 79
-
=>page 19
=>pag e 79
=>page 19
=>page 20
=>page 20
=>page 20
=>page20
=>page 21
=>page 79
-
=>page 27
=>page 27
-
=>page 21
Instruments and warning/indicator lights
PARK
BRAKE
(®)
----
Canada models:
Anti-lock brake system (ABS) defec-
tive
USA models :
Electromechanical parking brake
Canada models:
Electromechanical parking brake -
BRAKE
USA models:
Brake malfunct ion
--
((D) Canada models:
Brake malfunction
=>page 27
=>page 22
=>page 22
-
=>page 22
-
=>page22
Vehicl es wi t h th e Adaptive Cruis e Control * have the f ollow ing addi -
tional check lamps:
Open road
~
1111
~
Driving in traffic
~
1111
~
Request for driver to
assume control
& WARNING
=>page 145
=>page 145
=>page 145
• Failure to heed warning lights and other important vehicle
information may result in serious personal injury or vehicle
damage.
• Whenever stalled or stopped for repair, move the vehicle a safe
distance off the road, stop the engine, and turn on the emergency
flasher =>page 73.
• The engine compartment of any motor vehicle is a potentially
hazardous area. Before you check anything in the engine compart-
ment, stop the engine and let it cool down. Always exercise
~

Instruments and warning / indicator lights
&, WARNING (cont inued )
extreme caution when working under the hood =>page 299,
''Engine compartment "
[i ]Tips
Many functions are monitored by the Auto -Check system
=>
page 28 . Ma lfunctions or faults wil l be identified either with a red
symbo l (pr iority 1 - Danger!) or with a yel low symbol (priority 2 -
Warning) . •
Electronic power control EPC
This warning/indicator light monitors the electronic
power control.
The EPCwarning/indicator light (Electronic Power Control) illumi -
nates when you turn on the ignition as a function check.
[i ]Tips
If this warning/indicator light illuminates whi le you are driving, then
there is a malfunction in the engine electronics . Have the malfunc-
t ion corrected as soon as possible by your authorized Audi dea ler or
qualified repair facility . •
Generator D
This warning/indicator light detects a malfunction in the
generator or in the vehicle's electrical system.
The D warning/indicator light illuminates when you switch on the
igni ti on and must go out after the eng ine has started.
If the D warning/indicator light illuminates while you are driving,
you shou ld contact your authorized Audi dealer. Since the vehic le
battery is discharging, you should switch off any unnecessary elec-
t rical consumers (for example, the air conditioner).
0 Note
If the _f_ warning/indicator light (ma lfu nction in the engine coo ling
system) in the instrument cluster shou ld illuminate=> page 31, stop
the vehicle and turn off the engine . The water pump is not working
- this can cause engine damage. •
Electronic stabilization program (ESP) f1.
This warning/indicator light monitors the electronic stabi -
lization program.
The warning/indicator light has the following functions:
• It blinks while you are driving when the ESP is working .
• It illuminates when you switch on the ignition for approximate ly
2 seconds as a function check .
• It illuminates when there is a malfunction in the ESP.The
message ESP fault! See owner's manual also appears in the instru -
ment cluster display and a warning tone sounds .
• It illuminates continuously when the ESP is switched off.
• It illuminates if there is a malfunction in the ABS, since the ESP
is part of the ABS syste m.
If the battery terminals were disconnected and re-connected , the
vehic le was jump sta rt ed or t he battery is very weak, the ESPsensor
system goes through a learning process for the first few yards. The
warning/indicator light illuminates. The warning/indicator light
goes out as soon as the learning process is complete.
If the ESPwarning/indicator light illuminates and stays on after you
have started the engine, this may mean that t he control system has
temporarily switched off the ESP. If this is case, you can reactivate
th e ESP by turning the ignition off and then on again . The
~
Table of contents
Other Audi Automobile manuals

Audi
Audi TT 2010 User manual

Audi
Audi S4 Assembly instructions

Audi
Audi A4 User manual

Audi
Audi Q7 361 Assembly instructions

Audi
Audi Q7 V12 TDI QUATTRO - User manual

Audi
Audi A7 Sportback 2012 User manual

Audi
Audi A5 SPORTBACK Manual

Audi
Audi RS 5 Cabriolet 2013 User manual

Audi
Audi RS 4 CABRIOLET User manual

Audi
Audi S3 User manual

Audi
Audi 2008 A6 Quattro User manual

Audi
Audi TT RS Manual

Audi
Audi A7 2021 Instruction Manual

Audi
Audi Q5 80A 2017 User manual

Audi
Audi AS Coupe 2016 User manual

Audi
Audi 2003 A8 Instruction manual

Audi
Audi A5 2021 Instruction Manual

Audi
Audi 90 1993 Series Quick start guide

Audi
Audi A6 2005 - Electrics Instruction manual

Audi
Audi Avant RS2 1994 Instruction manual