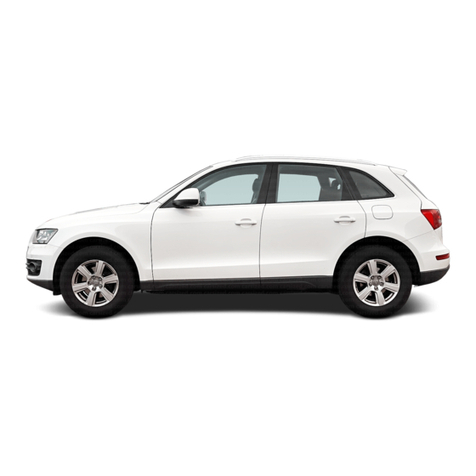
Audi Q5 80A 2017 User manual

Installation instructions
Audi Q5 (80A) 2017 ►
Fixed/mechanically removable towing
bracket with E-set (NAR),
for package number 80A.092.115
Audi Genuine Accessories
Edition 01
Service
Service Department. Technical Information

Contents
1 General notes . . . . . . . . . . . . . . . . . . . . . . . . . . . . . . . . . . . . . . . . . . . . . . . . . . . . . . . . . . . . . . . . . . . . . . . . . . . . . . . . . . . . . . . . . . . 1
2 Safety instructions for pyrotechnical, electrical and mechanical components of the re-
straint system . . . . . . . . . . . . . . . . . . . . . . . . . . . . . . . . . . . . . . . . . . . . . . . . . . . . . . . . . . . . . . . . . . . . . . . . . . . . . . . . . . . . . . . . . . 2
2.1 General safety instructions . . . . . . . . . . . . . . . . . . . . . . . . . . . . . . . . . . . . . . . . . . . . . . . . . . . . . . . . . . . . . . . . . . . . . . . . . . . . . 2
2.2 Storing, transporting and disposing of airbag, belt tensioner and battery disconnector units (py-
rotechnic components) . . . . . . . . . . . . . . . . . . . . . . . . . . . . . . . . . . . . . . . . . . . . . . . . . . . . . . . . . . . . . . . . . . . . . . . . . . . . . . . . . . 3
3 Safety notes on the towing bracket – Fitting and operation . . . . . . . . . . . . . . . . . . . . . . . . . . . . . . . . . . . . . 4
3.1 Notes on the towing vehicle . . . . . . . . . . . . . . . . . . . . . . . . . . . . . . . . . . . . . . . . . . . . . . . . . . . . . . . . . . . . . . . . . . . . . . . . . . . . 4
3.2 Notes on the towing bracket . . . . . . . . . . . . . . . . . . . . . . . . . . . . . . . . . . . . . . . . . . . . . . . . . . . . . . . . . . . . . . . . . . . . . . . . . . . . 4
3.3 Safety notes on assembly . . . . . . . . . . . . . . . . . . . . . . . . . . . . . . . . . . . . . . . . . . . . . . . . . . . . . . . . . . . . . . . . . . . . . . . . . . . . . . 5
3.4 Safety notes on operation . . . . . . . . . . . . . . . . . . . . . . . . . . . . . . . . . . . . . . . . . . . . . . . . . . . . . . . . . . . . . . . . . . . . . . . . . . . . . . 6
4 Overview of components . . . . . . . . . . . . . . . . . . . . . . . . . . . . . . . . . . . . . . . . . . . . . . . . . . . . . . . . . . . . . . . . . . . . . . . . . . . . . 7
4.1 Overview of mechanical components . . . . . . . . . . . . . . . . . . . . . . . . . . . . . . . . . . . . . . . . . . . . . . . . . . . . . . . . . . . . . . . . . . 7
4.2 Overview of electrical system components . . . . . . . . . . . . . . . . . . . . . . . . . . . . . . . . . . . . . . . . . . . . . . . . . . . . . . . . . . . . 8
4.3 Additional required parts . . . . . . . . . . . . . . . . . . . . . . . . . . . . . . . . . . . . . . . . . . . . . . . . . . . . . . . . . . . . . . . . . . . . . . . . . . . . . . . . 8
5 Assembly overview and tightening torques . . . . . . . . . . . . . . . . . . . . . . . . . . . . . . . . . . . . . . . . . . . . . . . . . . . . . . . 10
5.1 Towing bracket with cross member . . . . . . . . . . . . . . . . . . . . . . . . . . . . . . . . . . . . . . . . . . . . . . . . . . . . . . . . . . . . . . . . . . . . 10
5.2 Luggage compartment electrical system . . . . . . . . . . . . . . . . . . . . . . . . . . . . . . . . . . . . . . . . . . . . . . . . . . . . . . . . . . . . . . 11
6 Preparations . . . . . . . . . . . . . . . . . . . . . . . . . . . . . . . . . . . . . . . . . . . . . . . . . . . . . . . . . . . . . . . . . . . . . . . . . . . . . . . . . . . . . . . . . . . . 12
6.1 Disconnecting the battery . . . . . . . . . . . . . . . . . . . . . . . . . . . . . . . . . . . . . . . . . . . . . . . . . . . . . . . . . . . . . . . . . . . . . . . . . . . . . . . 13
6.2 Removing the following equipment . . . . . . . . . . . . . . . . . . . . . . . . . . . . . . . . . . . . . . . . . . . . . . . . . . . . . . . . . . . . . . . . . . . . 13
7 Installing the towing bracket . . . . . . . . . . . . . . . . . . . . . . . . . . . . . . . . . . . . . . . . . . . . . . . . . . . . . . . . . . . . . . . . . . . . . . . . . 15
7.1 Fitting the towing bracket . . . . . . . . . . . . . . . . . . . . . . . . . . . . . . . . . . . . . . . . . . . . . . . . . . . . . . . . . . . . . . . . . . . . . . . . . . . . . . . 15
7.2 Installing the towing bracket . . . . . . . . . . . . . . . . . . . . . . . . . . . . . . . . . . . . . . . . . . . . . . . . . . . . . . . . . . . . . . . . . . . . . . . . . . . . 15
7.3 Connector panel assembly . . . . . . . . . . . . . . . . . . . . . . . . . . . . . . . . . . . . . . . . . . . . . . . . . . . . . . . . . . . . . . . . . . . . . . . . . . . . . 16
8 Electrical connection . . . . . . . . . . . . . . . . . . . . . . . . . . . . . . . . . . . . . . . . . . . . . . . . . . . . . . . . . . . . . . . . . . . . . . . . . . . . . . . . . . 17
8.1 Fitting the socket with retrofit wiring harness to the connector panel . . . . . . . . . . . . . . . . . . . . . . . . . . . . . . . . 17
8.2 Installing the bracket for the trailer detector control unit -J345- . . . . . . . . . . . . . . . . . . . . . . . . . . . . . . . . . . . . . . 17
8.3 Routing and connecting the socket retrofit wiring harness . . . . . . . . . . . . . . . . . . . . . . . . . . . . . . . . . . . . . . . . . . . 17
8.4 Connecting the supply line for the brake booster . . . . . . . . . . . . . . . . . . . . . . . . . . . . . . . . . . . . . . . . . . . . . . . . . . . . . 19
8.4.1 Workflow for variant 1 . . . . . . . . . . . . . . . . . . . . . . . . . . . . . . . . . . . . . . . . . . . . . . . . . . . . . . . . . . . . . . . . . . . . . . . . . . . . . . . . . . . 19
8.4.2 Workflow for variant 2 . . . . . . . . . . . . . . . . . . . . . . . . . . . . . . . . . . . . . . . . . . . . . . . . . . . . . . . . . . . . . . . . . . . . . . . . . . . . . . . . . . . 20
9 Concluding operations . . . . . . . . . . . . . . . . . . . . . . . . . . . . . . . . . . . . . . . . . . . . . . . . . . . . . . . . . . . . . . . . . . . . . . . . . . . . . . . . 21
9.1 Reassembling the vehicle . . . . . . . . . . . . . . . . . . . . . . . . . . . . . . . . . . . . . . . . . . . . . . . . . . . . . . . . . . . . . . . . . . . . . . . . . . . . . . 21
9.2 Connecting the battery . . . . . . . . . . . . . . . . . . . . . . . . . . . . . . . . . . . . . . . . . . . . . . . . . . . . . . . . . . . . . . . . . . . . . . . . . . . . . . . . . . 21
9.3 Adapting the trailer detector control unit -J345- coding . . . . . . . . . . . . . . . . . . . . . . . . . . . . . . . . . . . . . . . . . . . . . . . 21
9.4 Commissioning and functional check . . . . . . . . . . . . . . . . . . . . . . . . . . . . . . . . . . . . . . . . . . . . . . . . . . . . . . . . . . . . . . . . . . 21
Service
All rights reserved.
No reproduction without prior agreement from publisher.
Copyright © 2017 Audi AG, Ingolstadt Printed in Germany

9.5 Adjusting the cooling system . . . . . . . . . . . . . . . . . . . . . . . . . . . . . . . . . . . . . . . . . . . . . . . . . . . . . . . . . . . . . . . . . . . . . . . . . . . 22
Installation instructions - Audi Q5 (80A) 2017 ► Fixed/mechanically removable towing
bracket with E-set (NAR),
Edition 01
Contents 3

Service
All rights reserved.
No reproduction without prior agreement from publisher.
Copyright © 2017 Audi AG, Ingolstadt Printed in Germany

1 General notes
Please read and take note of these WARNING, Caution and
Note descriptions before carrying out maintenance or repair
work.
WARNING
Text with this symbol contains information concerning
your safety and indicates potential accident and injury
risks.
Caution
Text with this symbol indicates the risk of damage to your
vehicle.
Note
Text with this symbol contains additional information.
Caution
Towing mode places increased demands on the cooling
system.
◆The cooling system must be adapted to the vehicle op-
erating conditions ⇒ Page 22.
Special tools are required for assembly. Improper installa-
tion can cause damage to the vehicle or the add-on parts.
WARNING
For safety reasons, the towing bracket must only be fitted
by skilled personnel – risk of accident!
AUDI AG will not accept responsibility in the event of fail-
ure to comply with these assembly instructions.
Installation instructions - Audi Q5 (80A) 2017 ► Fixed/mechanically removable towing
bracket with E-set (NAR),
Edition 01
1 General notes 1

2 Safety instructions for pyrotech-
nical, electrical and mechanical
components of the restraint
system
2.1 General safety instructions
Pyrotechnical components comprise:
◆Airbag units
◆Belt tensioners
◆Belt force limiters
◆Battery disconnecting elements
General
◆Testing, installation and maintenance tasks must only be
carried out by trained personnel.
◆There are no replacement intervals for airbag units.
◆Do not check using circuit tester, voltmeter, or ohmmeter un-
der any circumstances.
◆Pyrotechnic components must only be checked when instal-
led and using ⇒ vehicle diagnostic testers that have been
approved by the manufacturer.
◆When working on pyrotechnic components and the airbag
control unit -J234-, the battery earth wire must be disconnec-
ted when the IGNITION is SWITCHED ON. The battery neg-
ative terminal must subsequently be covered.
◆You must wait ten seconds after the battery -A- has been
disconnected.
◆The battery -A- must be connected when the IGNITION is
SWITCHED ON. There must not be anybody inside the vehi-
cle during this process. Exception: vehicles with battery -A-
located inside the vehicle. Do not sit within the airbag and
seat belt deployment range.
◆Observe the appropriate steps after connecting the bat-
tery⇒ Page 21.
◆Before performing any work on pyrotechnic components in
the restraint system, e.g. before disconnecting the electrical
connector, the mechanic carrying out the task must dis-
charge any static electricity. Electrostatic discharging can be
performed by touching earthed metal parts, e.g. by briefly
touching the door striker plate.
◆Wash hands after touching ignited pyrotechnical compo-
nents of the restraint system.
◆Pyrotechnical components must neither be opened nor re-
paired. New parts must always be used (risk of injury).
◆Pyrotechnic components that have fallen onto a hard surface
or that show any sign of damage must not be installed.
Installation instructions - Audi Q5 (80A) 2017 ► Fixed/mechanically removable towing
bracket with E-set (NAR),
Edition 01
22 Safety instructions for pyrotechnical, electrical and mechanical components of the restraint system

◆Pyrotechnic components must be installed immediately after
they are removed from the transport container.
◆If work is interrupted, the pyrotechnic component must be re-
turned to the transport container.
◆Pyrotechnic components must not be left unattended.
◆When connecting the pyrotechnic components in the re-
straint system, only the person performing the work may be
inside the vehicle.
◆Pyrotechnic components must not be treated with grease,
cleaning agents or similar products.
◆If the fabric becomes contaminated with substances such as
oil, grease, paint, colour or solvents, the airbag unit must be
replaced.
◆In addition, pyrotechnic components must not be exposed to
temperatures above 100°C, even for short periods.
2.2 Storing, transporting and disposing of
airbag, belt tensioner and battery dis-
connector units (pyrotechnic compo-
nents)
◆Storage is subject to the applicable national legislation.
◆Transportation is subject to national and international laws
governing packaging, naming, labelling and accompanying
documentation.
◆Pyrotechnic components that have not been ignited must be
returned in the original packaging for appropriate recycling in
line with the applicable national legislation. Contact your im-
porter if you have any questions.
◆Only pyrotechnic components that have been completely ig-
nited may be disposed of as industrial waste.
WARNING
This does not apply for belt tensioners that operate ac-
cording to the Wankel tensioner principle. Tensioners of
this kind should be handled in the same way as pyrotech-
nic components that have not been ignited (e.g. airbags).
Background: For belt tensioners that operate according
to the Wankel tensioner principle, it is not possible to
check whether all ignition stages have completed using
workshop tools.
Installation instructions - Audi Q5 (80A) 2017 ► Fixed/mechanically removable towing
bracket with E-set (NAR),
Edition 01
2 Safety instructions for pyrotechnical, electrical and mechanical components of the restraint system 3

3 Safety notes on the towing
bracket – Fitting and operation
3.1 Notes on the towing vehicle
Manufacturer: AUDI AG
Model: Q5 2017 ►
Offic. Type designation: FY
Maximum trailer weight or trailer drawbar load in kg, as speci-
fied by the manufacturer for the above-named vehicle model: ⇒
Vehicle registration certificate/Owner's Manual.
3.2 Notes on the towing bracket
Technical data Vehicles with steel-spring suspension/air sus-
pension
Bosal type: E555
Audi part no.: 80A.092.115
Bosal part no.: 10027740 with connector panel NAR
D-value: 12.6 kN
Permitted drawbar load: 200 kg
WARNING
The drawbar load figures specified on the towing bracket
identification plate are only given as test values. Vehicle-
specific figures are often lower than these values and can
be found in the vehicle documents.
Please see your vehicle documents for your maximum trailer
weight.
WARNING
Do not exceed the verified D-value and the permitted trail-
er drawbar load – risk of accident!
The towing bracket is intended for towing trailers fitted with a
tow ball and for operating carriers suitable for mounting to the
coupling ball.
Nationally applicable regulations must be adhered to in EU and
non-EU countries.
Improper use is prohibited.
Use is only permitted under favourable road conditions and
must be adapted to road conditions.
Installation instructions - Audi Q5 (80A) 2017 ► Fixed/mechanically removable towing
bracket with E-set (NAR),
Edition 01
43 Safety notes on the towing bracket – Fitting and operation

3.3 Safety notes on assembly
WARNING
For safety reasons, the towing bracket must only be fitted
by skilled personnel – risk of accident!
◆If replacement parts are required, these must only be
installed by skilled personnel and to undamaged gen-
uine parts – risk of accident!
◆Installation must be in line with AUDI AG/Volkswagen
AG guidelines – risk of accident!
◆Modification of the towing bracket is prohibited. This
will invalidate the type approval – risk of accident and
legal implications!
◆Use of the mounting points approved as standard by
the vehicle manufacturer is mandatory – risk of acci-
dent!
Caution
Towing mode places increased demands on the cooling
system.
◆Please consult a qualified AUDI AG/Volkswagen AG
workshop should modifications to the cooling system
be required. Further notes can be found in the “towing
mode” guidebook.
– Remove underbody sealing, body cavity sealant (wax) or in-
sulation material from the area around the contact surfaces
of the towing bracket with the vehicle.
– In order to provide adequate corrosion protection to bare
metal body parts, apply the following products with a brush.
◆Single-component primer surfacer LGF.008.001.42/43
◆Two-component HS vario surfacer LGF.786.004.A4
◆Paint to match the vehicle colour
◆Body cavity preserving agent D.330.KD2.A1
Installation instructions - Audi Q5 (80A) 2017 ► Fixed/mechanically removable towing
bracket with E-set (NAR),
Edition 01
3 Safety notes on the towing bracket – Fitting and operation 5

3.4 Safety notes on operation
WARNING
Vehicle handling is affected by the use of towing mode;
increased driver awareness is required – risk of accident!
◆Read the notes in the “Towing mode” chapter of the
⇒
Owner's Manual – risk of accident!
◆If you are using trailer stabilisers, the coupling ball
must be free from grease. Read and observe the
notes in the relevant Owner's Manuals – risk of acci-
dent!
The diameter of the ball coupling must be checked at reg-
ular intervals.
◆For safety reasons, use of the towing bracket must be
discontinued if the diameter reaches 49 mm at any
point. If this situation occurs, contact a qualified
workshop – risk of accident!
For safety reasons, you are advised to remove the ball
rod when not in use – risk of accident!
Installation instructions - Audi Q5 (80A) 2017 ► Fixed/mechanically removable towing
bracket with E-set (NAR),
Edition 01
63 Safety notes on the towing bracket – Fitting and operation

4 Overview of components
4.1 Overview of mechanical components
1 - Towing bracket with
cross member
q1x
2 - Cover
q1x
3 - "Type plate" sticker
q1x
4 - Connector panel for
trailer socket with
type plate
q1x
5 - Hexagon socket head
bolt for connector
panel
qM5x12
q2x
6 - Bolt with washer for
towing bracket
qM10x35
q4x
Note
The ball mount is not included in delivery of the towing bracket.
Installation instructions - Audi Q5 (80A) 2017 ► Fixed/mechanically removable towing
bracket with E-set (NAR),
Edition 01
4 Overview of components 7

4.2 Overview of electrical system components
1 - Fitting trailer detector
control unit -J345-
q1x
2 - Socket
q7-pin
q1x
3 - Retrofit electrical
socket wiring har-
ness
q1x
4 - Activation document
q1x
5 - Safety information
sheet
q1x
6 - Adhesive spots
q4x
7 - Cable ties
q2x long
q5x short
8 - Securing bolt for the
socket
q4x
q2.5 Nm
4.3 Additional required parts
Order and fit on vehicles with 1D0+KA0/KA2 or 1D8+KA0/
KA2:
Bracket 80A.907.297 -1-⇒ Electronic parts catalogue
Order and fit according to equipment:
Note
Before ordering, check whether the bumper has a recess (on
vehicles with preparation) for the towing bracket.
Installation instructions - Audi Q5 (80A) 2017 ► Fixed/mechanically removable towing
bracket with E-set (NAR),
Edition 01
84 Overview of components

Bumper fitted without towing bracket Replace with:
80A.807.521.B 80A.807.521.C + 80A.807.941.B – Only replace in-
sert part!
80A.807.521 80A.807.521.A + 80A.807.941.B
80A.807.521.D 80A.807.521.E + 80A.807.941.A
Note
The complete bottom part of the bumper must be replaced and
painted!
Bottom part of the bumper ⇒ Electronic parts catalogue
Installation instructions - Audi Q5 (80A) 2017 ► Fixed/mechanically removable towing
bracket with E-set (NAR),
Edition 01
4 Overview of components 9

5 Assembly overview and tightening torques
5.1 Towing bracket with cross member
1 - Towing bracket with
cross member
qAssembly
⇒ Page 15
2 - Bolt with washer
qM10x35
q4x
q75 Nm
qReplace after re-
moval.
3 - Hexagon socket head
bolt
qM5x12
q2x
q5 Nm
4 - Connector panel for
trailer socket with
type plate
qAssembly
q1x
Installation instructions - Audi Q5 (80A) 2017 ► Fixed/mechanically removable towing
bracket with E-set (NAR),
Edition 01
10 5 Assembly overview and tightening torques

5.2 Luggage compartment electrical system
1 - Bracket for trailer de-
tector control unit
-J345-
qAdditional required
parts ⇒ Page 8
2 - Fitting trailer detector
control unit -J345-
3 - Earth stud on left in
luggage compartment
q9 Nm
4 - Onboard supply wir-
ing harness
5 - Retrofit electrical
socket wiring har-
ness
6 - Fuse holder in rear
left luggage compart-
ment
7 - Convenience system
central control unit
-J393-
qUnderneath the fuse
holder
Installation instructions - Audi Q5 (80A) 2017 ► Fixed/mechanically removable towing
bracket with E-set (NAR),
Edition 01
5 Assembly overview and tightening torques 11

6 Preparations
Required special tools, testing instruments, measuring in-
struments and auxiliary devices
◆Torque wrench -V.A.G 1410-
◆Torque wrench -V.A.G 1332-
◆Removal lever -80 - 200-
◆Wedge -3409-
Installation instructions - Audi Q5 (80A) 2017 ► Fixed/mechanically removable towing
bracket with E-set (NAR),
Edition 01
12 6 Preparations

6.1 Disconnecting the battery
– Disconnect the battery⇒ Electrical system; Rep. gr. 27; Bat-
tery; Disconnecting and connecting the battery
WARNING
◆Always make sure that the vehicle's electrical system
is protected by disconnecting the battery before per-
forming work on the electrical system.
◆Only unscrew the battery negative terminal (-) of the
battery.
◆The battery positive terminal (+) of the battery must
only be unscrewed once the battery has been re-
moved from the vehicle.
6.2 Removing the following equipment
– Remove the luggage compartment floor mat – Equipment
variant⇒ General body repairs, Interior; Rep. gr. 70; Luggage
compartment trims; Removing and installing the luggage
compartment floor mat
– Remove the subwoofer -R211- – equipment variant⇒ Com-
munication; Rep. gr. 91; Sound system; Removing and in-
stalling the subwoofer -R211-
– Remove the front luggage compartment floor – Equipment
variant⇒ General body repairs, Interior; Rep. gr. 70; Luggage
compartment trims; Removing and installing the front lug-
gage compartment floor
– Remove the rear lid lock trim ⇒ General body repairs, interi-
or; Rep. gr. 70; Luggage compartment trim; Removing and
installing the rear lid lock trim
– Remove the fastening rings⇒ General body repairs, Interior;
Rep. gr. 70; Luggage compartment trims; Removing and in-
stalling the fastening rings
– Remove the rear shelf⇒ General body repairs, interior; Rep.
gr. 70; Interior trims; Removing and installing the rear shelf
– Remove the left and right luggage compartment lights -W3-
⇒ Electrical system; Rep. gr. 96; Lights; Removing and in-
stalling the left and right luggage compartment lights -W3-
– Remove the luggage compartment side trim⇒ General body
repairs, Interior; Rep. gr. 70; Luggage compartment trims;
Removing and installing the luggage compartment side trim
– Assembly overview of the bumper cover ⇒ General body re-
pairs, Exterior; Rep. gr. 63; Rear bumper; Assembly over-
view of the bumper cover
– Remove rear bumper cover⇒ General body repairs, exterior;
Rep. gr. 63; Rear bumper; Removing and installing the
bumper
Installation instructions - Audi Q5 (80A) 2017 ► Fixed/mechanically removable towing
bracket with E-set (NAR),
Edition 01
6 Preparations 13

– Assembly overview of the impact bar ⇒ General body re-
pairs, Exterior; Rep. gr. 63; Rear bumper; Assembly over-
view of the impact bar
– Remove the impact bar⇒ General body repairs, Exterior;
Rep. gr. 63; Rear bumper; Removing and installing the im-
pact bar
Installation instructions - Audi Q5 (80A) 2017 ► Fixed/mechanically removable towing
bracket with E-set (NAR),
Edition 01
14 6 Preparations

7 Installing the towing bracket
7.1 Fitting the towing bracket
Special tools and workshop equipment required
◆Hot air blower
◆Cartridge gun for bodywork sealant
Preparatory work
Caution
The body fold and threaded holes must be sealed using a
suitable bodywork sealant to prevent any moisture from
entering them.
Seal the holes of the detached damper
Note
The area of the bonding surfaces on the rear of the vehicle
must be cleaned. Treat bare metal body parts with anti-rust
paint.
– Stick the adhesive spots -A- onto the holes and heat using a
hot air blower.
Note
Applying heat to the adhesive spots increases their elasticity
and bonds them with the body.
Seal the longitudinal member body fold
Note
The area of the bonding surfaces around the body folds must
be cleaned. Treat bare metal body parts with anti-rust paint.
– Seal the body fold of longitudinal member -B- on the right,
left and in the upper area using bodywork sealant.
7.2 Installing the towing bracket
– Position the towing bracket on the ends of the frame with the
help of a second technician.
Caution
Make sure that the towing bracket with cross member is
handled and transported correctly. Only transport the tow-
ing bracket on the cross member -1-.
Installation instructions - Audi Q5 (80A) 2017 ► Fixed/mechanically removable towing
bracket with E-set (NAR),
Edition 01
7 Installing the towing bracket 15

– Remove adhesive spots in the luggage compartment that
are covering the mounting holes on the longitudinal member.
–Insert bolts -A to D- on the left and right on the inside for se-
curing the towing bracket and tighten the bolts by hand.
– Align the towing bracket and tighten bolts -A to D- with the
torque specified for towing brackets with cross members.
WARNING
Securing bolts must only be used once.
7.3 Connector panel assembly
– Fit connector panel -1- for the trailer socket to the towing
bracket.
– Tighten bolts -2- to the required torque ⇒ Page 10
Installation instructions - Audi Q5 (80A) 2017 ► Fixed/mechanically removable towing
bracket with E-set (NAR),
Edition 01
16 7 Installing the towing bracket
Table of contents
Other Audi Automobile manuals

Audi
Audi A4 2015 Operating instructions

Audi
Audi A8 2010 Instruction manual

Audi
Audi A7 2013 Assembly instructions

Audi
Audi A3 Sportback 2013 User manual

Audi
Audi A6'05 323 Assembly instructions

Audi
Audi R8 - QUICK EFEENCE GUIDE User manual

Audi
Audi AS Cabriolet 2015 User manual

Audi
Audi A6 2011 Instruction manual

Audi
Audi A3 Sportback User manual

Audi
Audi RS 7 Assembly instructions

Audi
Audi A8 User manual

Audi
Audi A5 SPORTBACK Assembly instructions

Audi
Audi R8 2009 User manual

Audi
Audi A7 2023 User manual

Audi
Audi Q5 2016 User manual

Audi
Audi A8 Instruction manual

Audi
Audi A8 1994 User manual

Audi
Audi A6 Assembly instructions

Audi
Audi Q7 V12 TDI QUATTRO - User manual

Audi
Audi TT RS Manual