,
Further information for these items is given on the following pages.
Audi RS 4/RS 4 Avant Kurzanleitung englisch 11.06 272.562.782.20
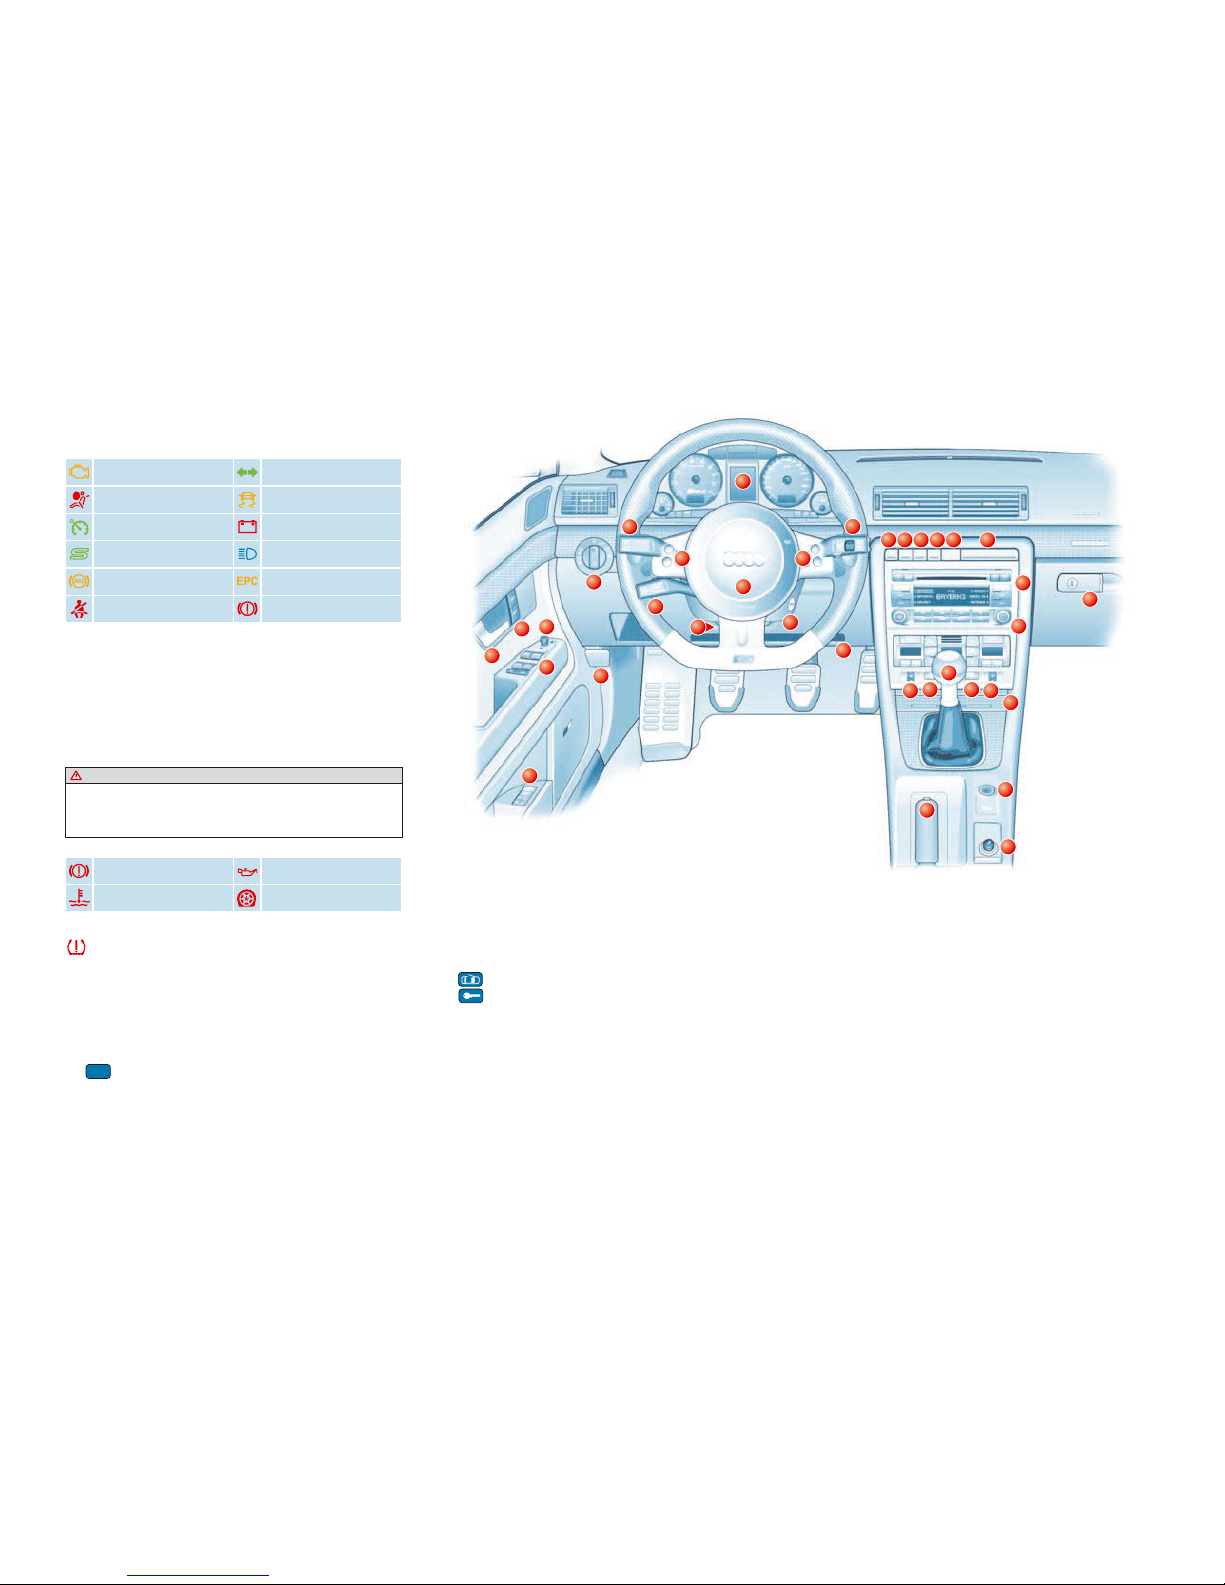
Warning and indicator lamps
Emission control system1) Turn signals,
hazard warning lights
Airbag system1) Electronic Stabilisation
Program (ESP)
Cruise control system Alternator1)
Sport mode Main beam headlights
Anti-lock brake system1) Engine management1)
Seat belt warning lamp Fault in brake system
or
handbrake engaged
Fault in brake system Engine oil pressure too low
Fault in cooling system Tyre pressure too low
Instruments and
controls
1 .....Electric windows
Press or lift the switch as far as the first stop
and hold it until the window has moved to the
desired position.
"One-touch" function:
Press/pull the switch briefly to the second stop.
2 .....Door handle
3 .....Central locking switch
Press the appropriate symbol to unlock or lock
the vehicle from the inside:
To unlock
To lock
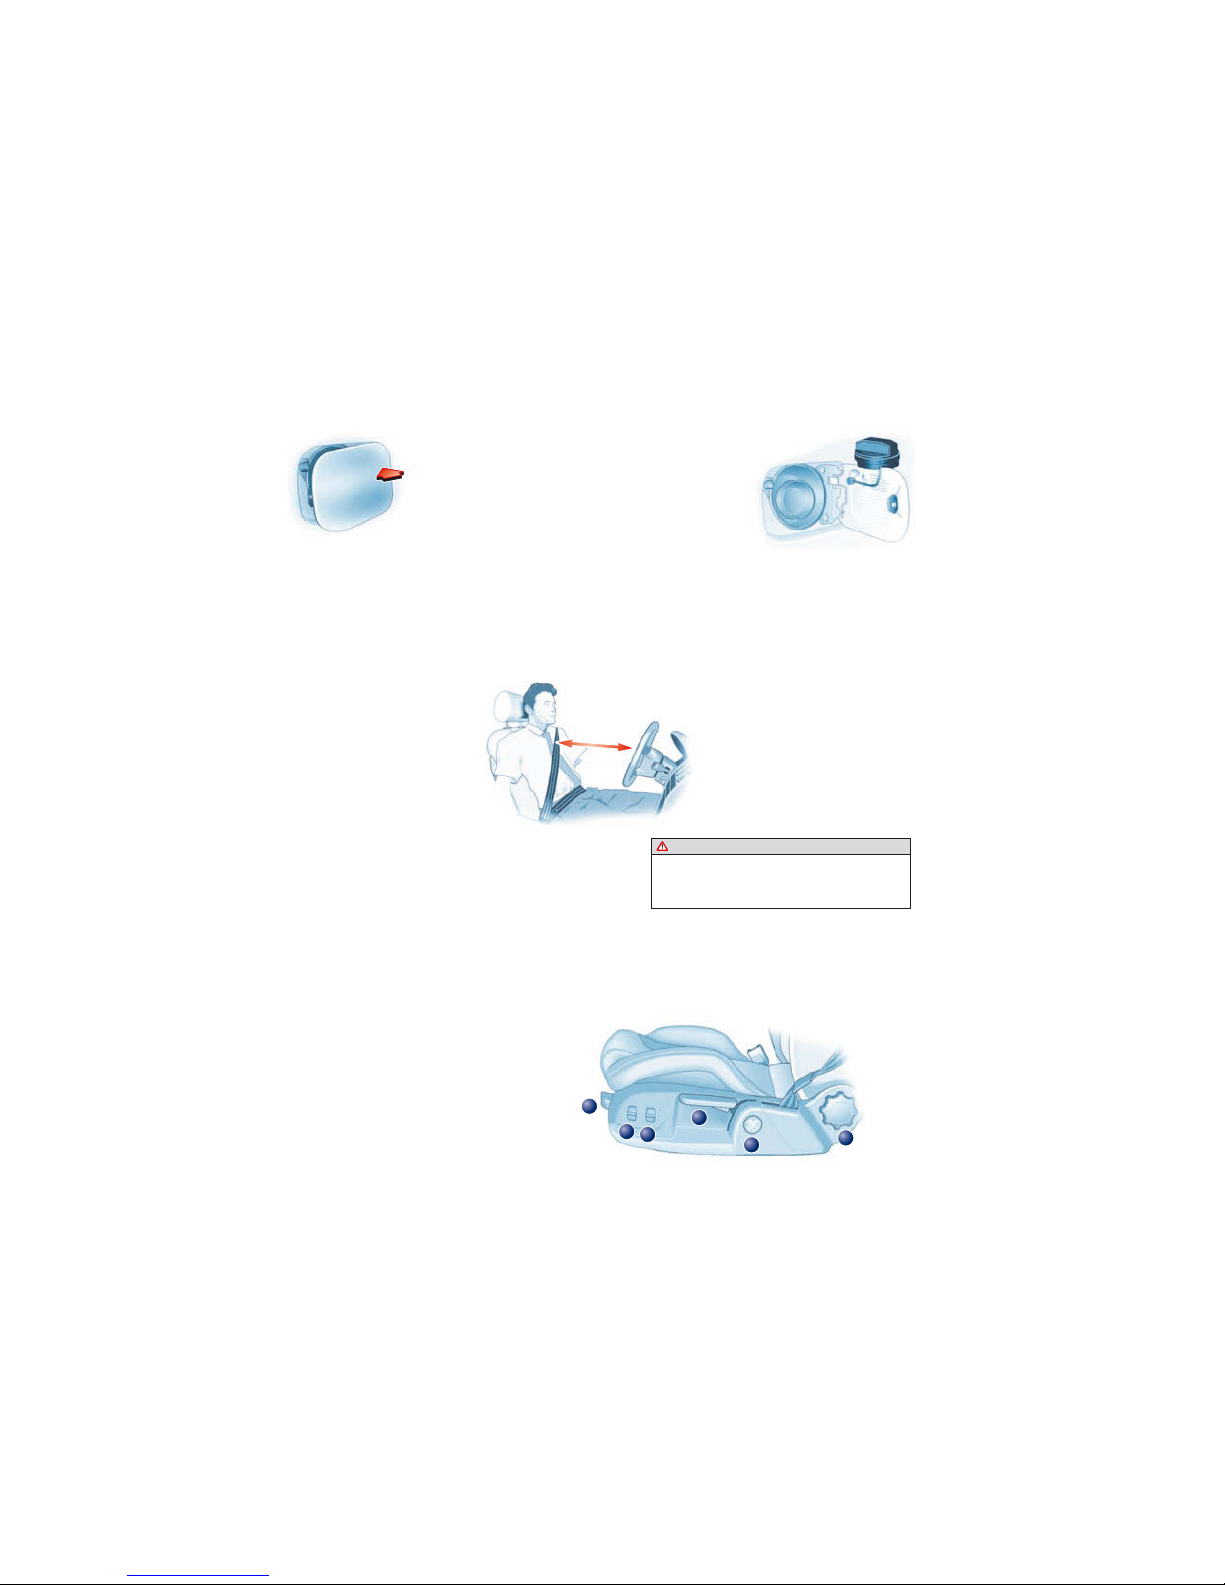
4 .....Electric adjuster for exterior mirrors
Turn the adjuster to the position for the left or
right exterior mirror. Press the adjuster to move
the mirror surface in the desired direction.
Note: At low outside temperatures, the
mirrors are heated automatically when the
rear window heating is switched on.
5 .....Light switch ,
6 .....Control lever for cruise
control system ,
7 .....Lever for turn signals and
main beam headlights ,
8 .....Controls on steering wheel ,
9 .....Horn
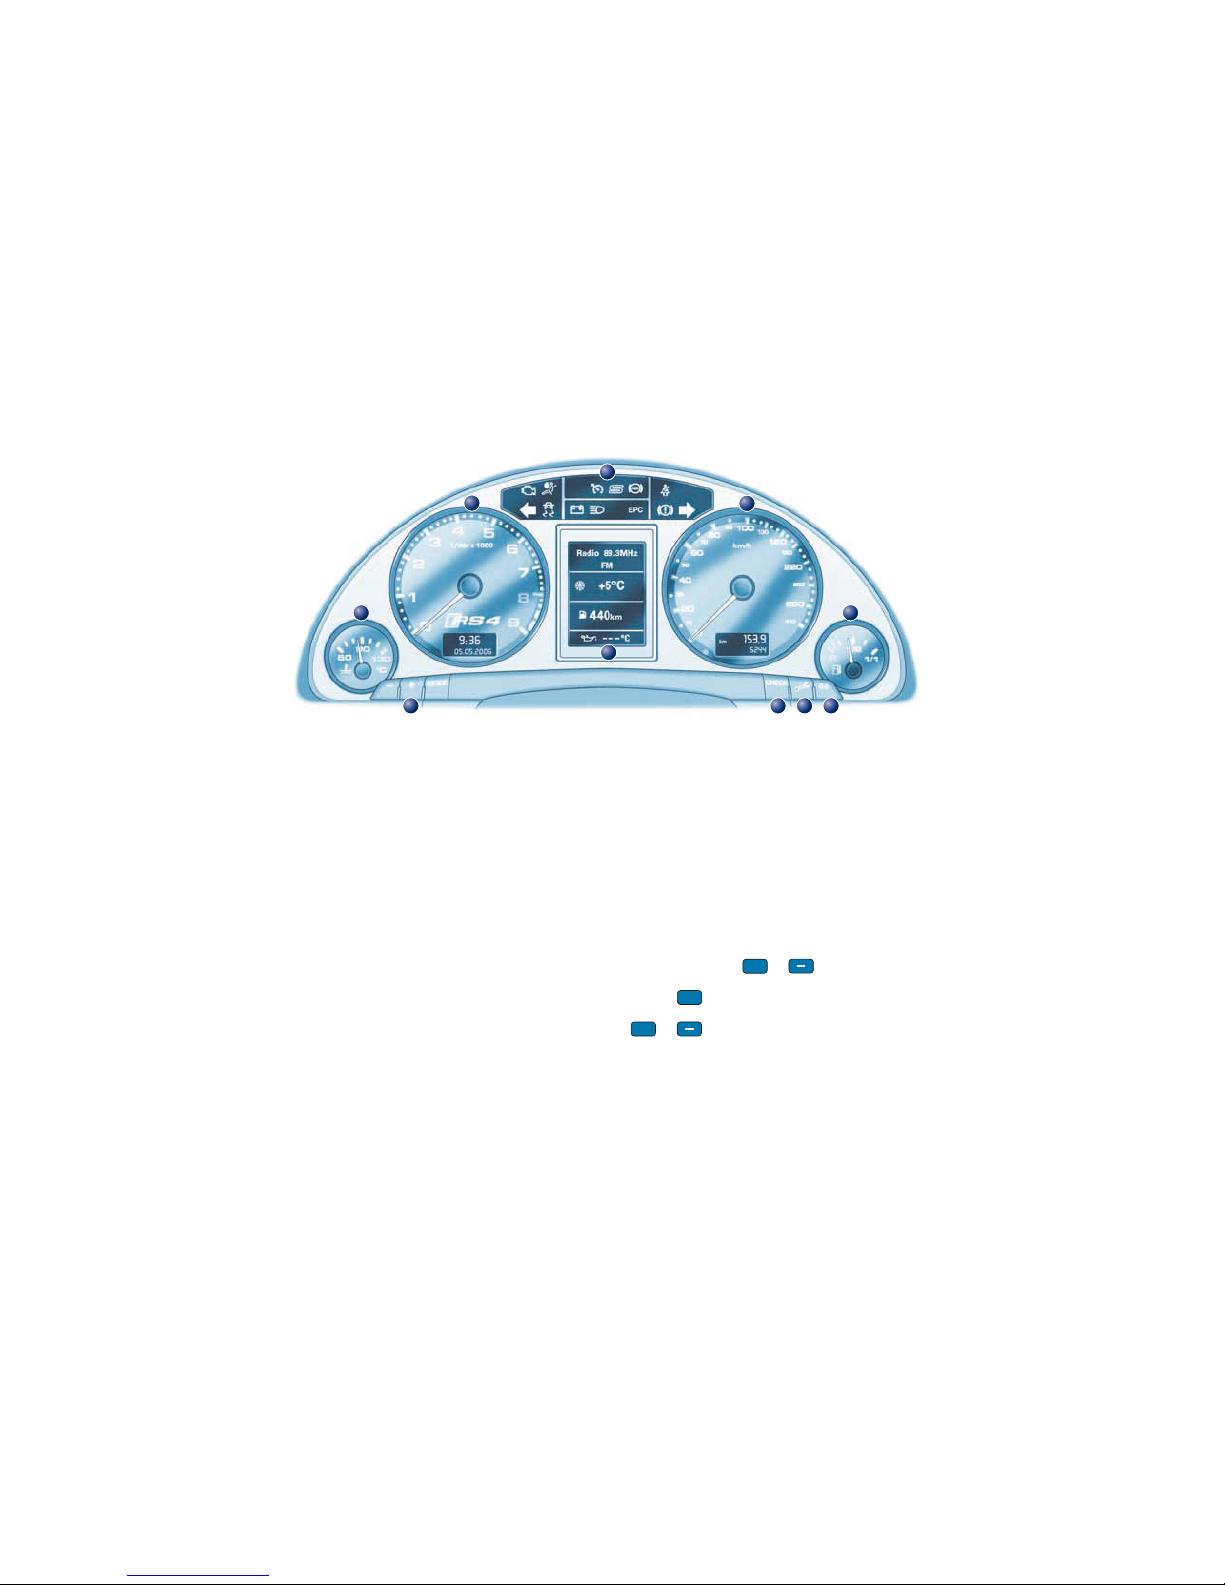
10 ...Instruments and warning/
indicator lamps
11 ...Control lever for windscreen
wipers/washer and on-board
computer ,
12 ...Switch for Electronic Stabilisation
Program (ESP)
13 ...Switch for sun blind (only on saloon)
14 ...Warning lamp for deactivated
passenger's airbag
15 ...Switch for acoustic parking system
16 ...Switch for hazard warning lights
17 ...Cup holder
18 ...Glove box
19 ...Navigation System Plus
(sound system, navigation, TV/video)
20 ...Switches for air conditioner ,
21 ...Thumbwheel for seat heating
(front right seat)
22 ...Switch for rear window heating
23 ...Switch for windscreen heating
24 ...Thumbwheel for seat heating
(front left seat)
25 ...Gear lever
26 ...Ashtray
27 ...START button ,
28 ...Cigarette lighter/socket
29 ...Handbrake
30 ...Service Wallet compartment
31 ...Ignition lock
32 ...Lever for adjustable steering column ,
33 ...Bonnet release lever
Please read Owner’s Manual.
34 ...Memory buttons for driver's seat
Please read Owner’s Manual.
Warning symbols and auto-check control
Any faults which may occur are indicated by red or yellow symbols in
the instrument cluster display.
WARNING!
If one of the red symbols lights up while you are driving, stop the car
as soon as it is safe to do so, switch off the engine and refer to the
Owner’s Manual.
1) Should one of these warning symbols or warning lamps light up when driving, please
contact a qualified workshop without delay.
1Warning and indicator lamps 5Instruments and controls
The yellow symbols are not explained in this Quick reference guide,
as some symbols are automatically accompanied by a corresponding
message, which is shown in the display for about 5 seconds. Please
refer to the Owner’s Manual for an explanation of the symbols for
which no message appears in the display.
Note:
If required, you can call up a message again by briefly pressing
the button.