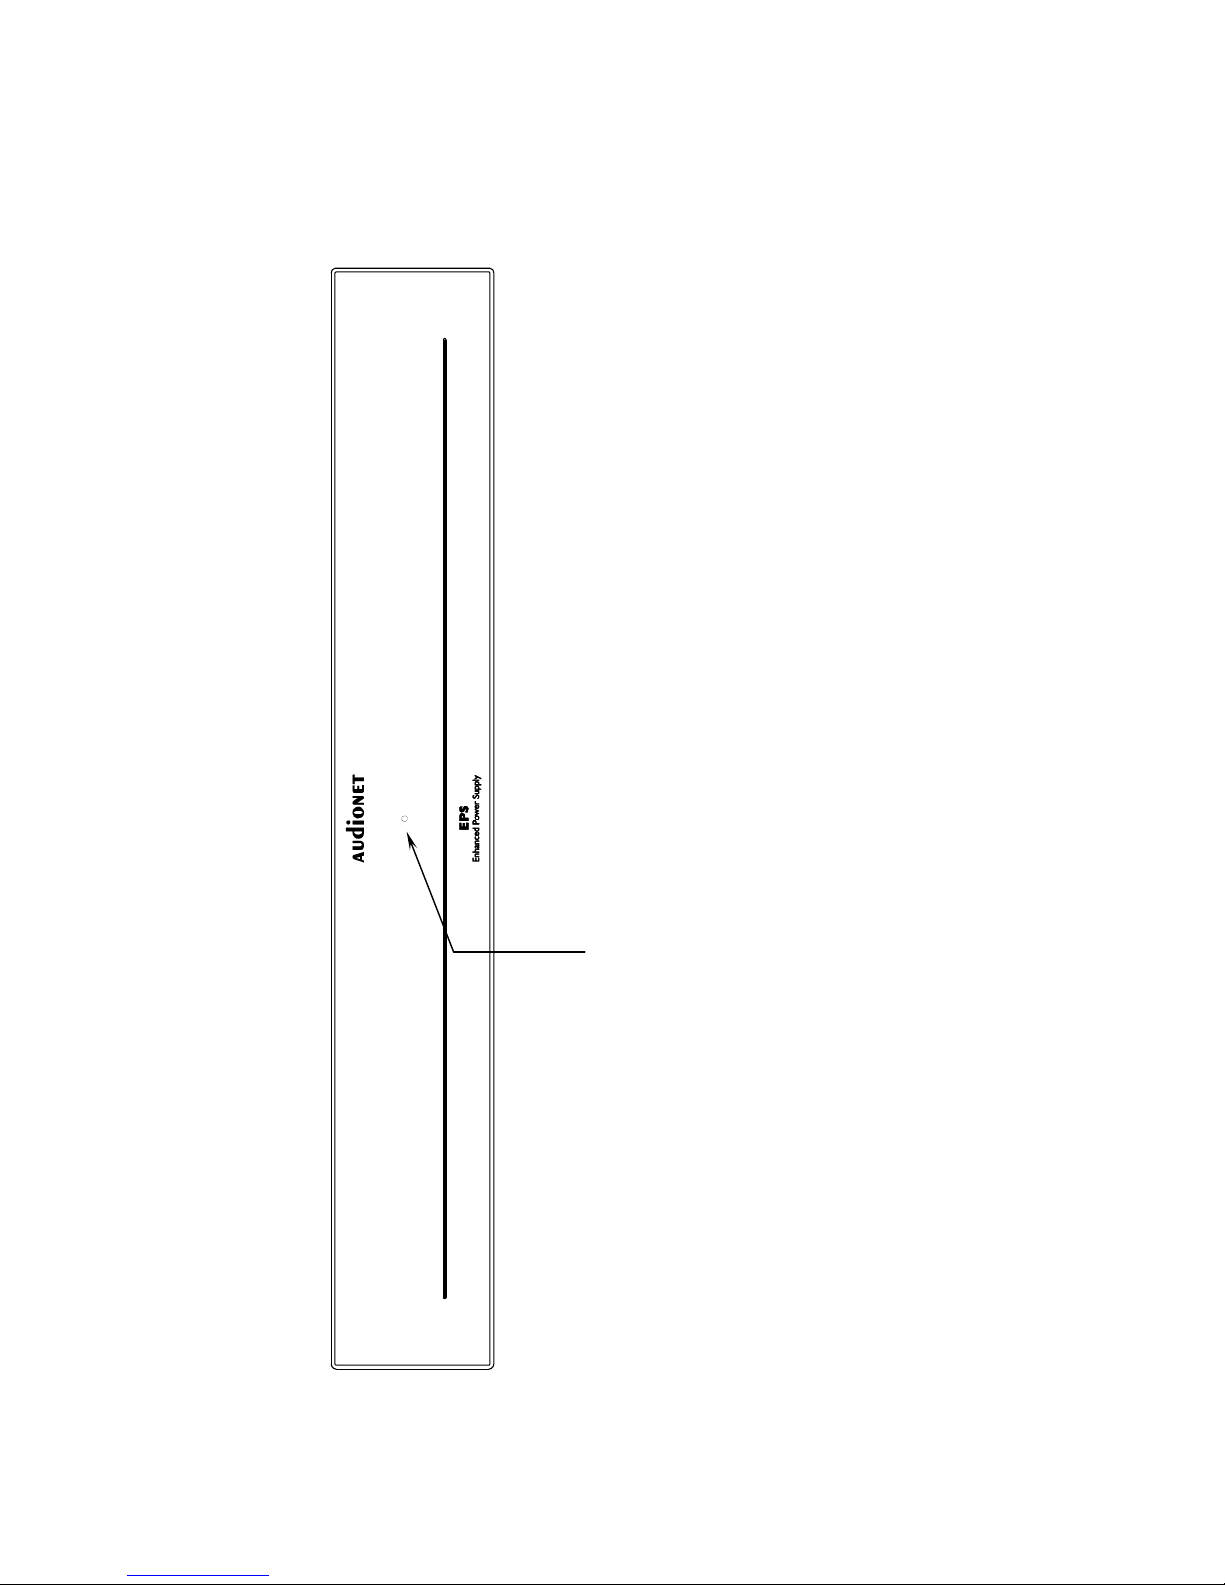
Audionet EPS User manual

1
EnhancedPower Supply
User'sManual

2

3
Contents
1Preface..........................................................................................4
1.1 Included.........................................................................................5
1.2 Transport.......................................................................................5
2Overview front panel..................................................................6
3Overview backpanel...................................................................7
4Installation and connection........................................................8
4.1 Placement......................................................................................8
4.2 Mainsconnection..........................................................................8
4.3 Connectingthe mother unit...........................................................9
5Usage..........................................................................................10
5.1 Powering up................................................................................10
5.2 Switching on/off..........................................................................10
6Technical Information..............................................................11
7Security advice...........................................................................12
8Technical data...........................................................................13

4
1 Preface
The Audionet-Team would like to congratulate you for purchasing the
Audionet EPS! Surelyyou are asatisfied owner of anAudionet device.
With the external power supplyEPS you have the possibility to give all
connected unitsa more sophisticated fundament.
Pleasereadthismanual before firstuseto make sure that you are able to
useallprovided functionsof your new unit. In caseof occurring ques-
tions,pleasedo not hesitate to contact your local Audionet dealeror our
factory directly.

5
1.1Included
Included you will find the following items:
·the Enhanced Power Supply EPS
·the user'smanual (that you are currently reading)
·one EPS connection cable
·one standard mainscord*
1.2Transport
Important
·Please transport the EPS only in the included package.
·Alwaysuse the plastic bag to prevent scratcheson the casing.
·Pleaseallowthe EPSto adapt tothe climatic conditionsin your lis-
tening room before you switchon the unit for the firsttime after
transport.
*If the mother unit has a 5-pinEPS socket

6
2 Overview frontpanel
LED
(power indicator)

7
3 Overview back panel
1
Mains switch
2
Mains input
3
Marking mains phase
4
7-pin connector
1 43
2

8
4 Installation and connection
Important
·For connecting or removing theEPSto the mother unit, the EPS
and the mother unitmustbe switched offto prevent damageto
both devices.
·Pleasemakesure that all cablesare in absolute bestconditions!
Broken shieldsor shorted cablescould damage bothdevices.
4.1Placement
Important
·Place the EPS right beside or at least20 cm above/below of the
mother unit.
·It isrecommended to place the EPS into ahigh quality rack or onto a
stable table.
·Do not expose the unitto direct sunlight.
·Do not cover the ventilation slots.
·Do not place the EPS in close range to heat sourceslike radiators.
·Do not place the EPS on top of other units,especiallynot on top of
power amplifiers,pre amplifiersor similar that produce heat. Both
unitscould suffer damage from thermal overload.
·Do not usethe unit in placeswhere it isexposed to vibrations.
·Do not place theunitcloseto loudspeakersor into the corner of a
room where it isexposed to highlevelsof sonic energy, which might
reduce the sound quality of the unit.
4.2Mains connection
The mainsinput 2 *ison the backpanel of the EPS.Toconnect the unit
to the mainsusetheincluded mainscord respectively the mainscord of
your mother unit with7-pin connector (except MAP, MAP V2, MAP I),
see section 'Connecting the motherunit'on page 9.
If you preferto useadifferent power cord make surethatit meetsthespeci-
ficationsfor your home country
*see numbers in section 'Overview back panel' on page 8.

9
Important
·The electrical specificationsof your home country mustmeet the
electrical specificationsprinted onto the back panel.
·The EPS isaClassI unit and mustbe earthed. Pleaseensure astable
earth connection. The Phase('hot'pin) ismarked 'PHASE'6 on the
back panel for the mainsinput.
·Never pull the mainsplug while the EPS isswitched on! Before you
pull the mainscord off the socket, power down the unit to stand-by
mode.
Only in casesof extended absence–like vacations–or if massive trouble
on the mainspower isto be expected you should switchoff the EPS from
the mainsusing the mainsswitch 1 .Todisconnect the unit completely
from mainspull the mainsplug.
4.3Connecting the mother unit
For the connection of the mother unit an EPS-cord with 5-pinor 7-pin
connector isneeded. An overview can be found in the following table.
EPS-cord with
5-pin connector
EPS-cord with
7-pin connector
Image of the
connector
Motherunit
PRE 1 G3
VIP, VIP G2, VIP G3
ART, ART V2,
ART G2, ART G3
PRE 1, PRE 1 G2
CAT
PAM, PAM V2,
PAM G2
MAP, MAP V2
MAP 1
Mains connection of
the motherunit needed not needed needed
Important
·Do not connect motherdevicesequipped with 7-pin connectors(ex-
cept MAP,MAP V2, MAP I) to mains!Thiswould compromisethe
quality of audio performance. Use only one mainscord to connect the
EPS to mains. Therefore no mainscord isincluded in these cases.

10
5 Usage
5.1Powering up
Firstof all,pleasemake sure your EPS isconnectedcorrectly to the
mother unitand the mains(see section 'Mainsconnection'on page8and
'Connecting the motherunit'on page 9).
The EPSisastand by unit. Pleaseoperatethe mainsswitch 1 on the
back panel to put the EPS in stand by mode.
Only in casesof extended absence (like vacations)or if massivetrouble
on the mainspoweristo beexpected (e.g. thunder storms)it isrecom-
mended todisconnectthe EPS from the mains.Todisconnectthe EPS
from mainscompletely, you have to pull the mainscord off the mains
jack 2 .
Important
·Neverpull the mainscord while the EPSor the mother unit is
switched on! Beforeyou pull the mainsplug, power downthe
mother unit to stand-by mode and switch off the EPSon the back
panel.
5.2Switching on/off
Pleaseoperate the mainsswitch 1 on the back panelto put the EPS in
stand by mode.
The position of mainsswitchof mother devicesthat need noadditional
mainsconnection (seesection 'Connecting the motherunit' on page 9) is
negligible. All other mother devicesmust be switched on.
Now operate the mother device asusual, all functionsare the same.If the
mother device isswitched on, the LEDon the EPS front panel isacti-
vated.
If you switch off the mother device, the power LED of the EPS turnsoff.
Note
·For furtherinformation on starting up amother device with 5-pin
connector incombination with anEPS pleaseconsultthe user'sman-
ual of the mother device.

11
6 Technical Information
Your EPSprovidesthe mother unit with ideal operating conditions.The
popular usage of accumulatorsshowsthe following seriousdis-
advantage:
The outputvoltage isnot short term stable: The inner resistanceis10
timesasbad astheone of your EPS causing a10 timeshigheroutput
voltage ripple at the same load fluctuations.
The output voltage isnot long term stable: The output voltage of anaccu-
mulator ishighly dependent from itsstate of charge and usage his-tory,
typically ranging from23 to 28 Volts(The EPS alwaysprovides24.00V)
The usage of accumulatorsisquestionable regarding to environ-mental
concerns.
Lastnot leastyou areable to listen to your music withhigh-end quality
using the EPS whenever you like not being forced to wait for ac-
cumulatorsbeing charged.

12
7 Security advice
Important
·Avoid packaging material, especially plastic bags,coming into chil-
dren'shands!
·Store and operate theunit in adry room at areasonable room tem-
perature only!
·Avoid moisture, any liquids,dirtor small objectsgetting into the
unit!
·Set up the unit in a sufficiently ventilated environment!
·Do not cover the unit!
·Do not open the unit. Unauthorised opening will void warranty!
·Use dry cloth for cleaning!

13
8 Technical data
Type ultra low noise, highly stable and constant power supply
forAudionetunits
Power supply two encapsulated 100VA toroidal transformersand
260.000 mF capacity
Circuitry
reference voltage sources forpos. and neg. analog
voltages using discrete Audionet voltage regulators
(MOS)
Connections 7-pin socket forconnecting the motherunit
Outputvoltage ±24.00 V foranalog sections,
approx. +5V fordigital and control sections
Stability ±0.01 V at 0.5 A
Noise -144 dB or1.5 mVeff at 0 Hz to 22 kHz
Mains 230 V, 50..60 Hz
Power consumption Stand-by < 0.5W,max. 40 Watt
Dimensions
Width: 430 mm
Height: 70 mm
Depth: 310 mm
Weight 9 kg
Finish Front: , 10mm brushed aluminium,black anodised
white print or, 10mm aluminium'nature', anodised,
black print
Cover: aluminium, black anodised,2 mm
Chassis: steel, black coated, 2 mm
Errors and omissions excepted. Specifications and design are subject to changes without prior notice.
audionet is a trademark of Idektron GmbH & Co KG
Engineeredand produced by:
Idektron GmbH & Co. KG, Herner Str.299, Gebäude 6, 44809 Bochum, Germany
www.audionet.de
contact@audionet.de
Other manuals for EPS
1
Table of contents
Other Audionet Power Supply manuals