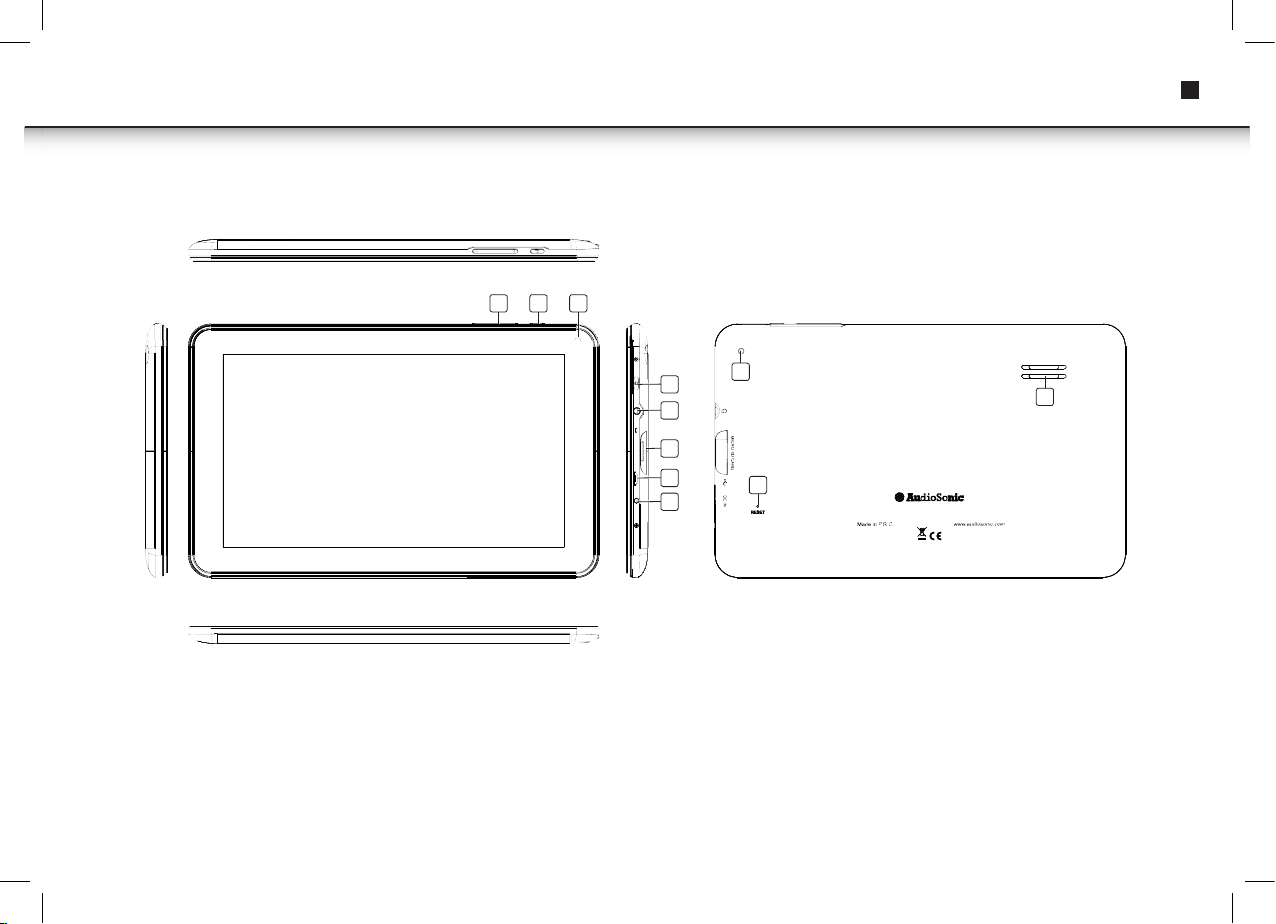
8
Gebruiksaanwijzing
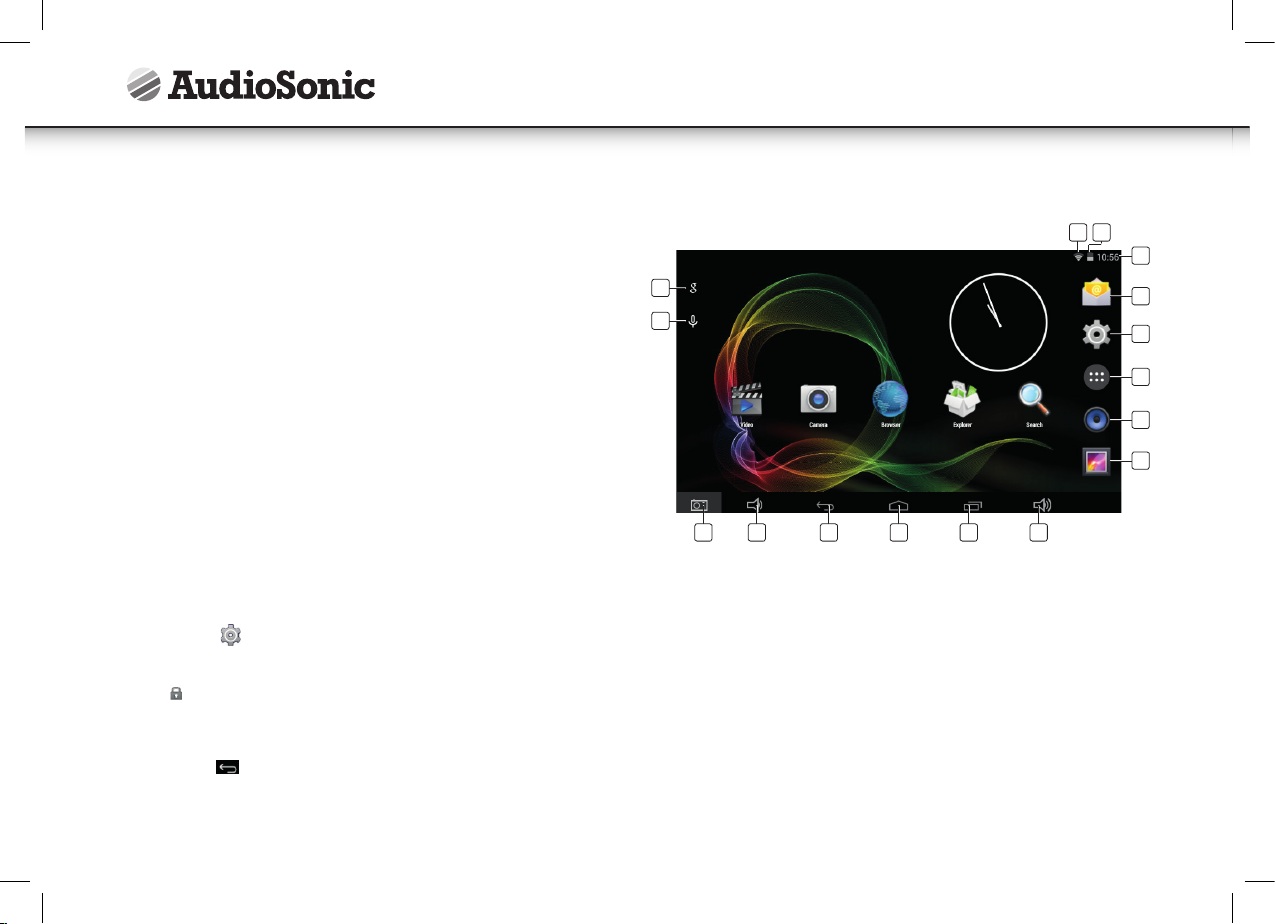
APP MARKT
De App markt kent veel toepassingen die u snel en eenvoudig kunt downloaden en
op uw tablet kunt installeren.
Toepassingen downloaden
Ga als volgt te werk om een bestaand Google-account aan uw apparaat toe te voe-
gen of maak een nieuw Google-account aan om aan uw apparaat toe te voegen.
Tik op de“ Google Play Store ”-app vanuit uw toepassingenscherm.
• Als u geen account aan uw apparaat hebt toegevoegd, zal u worden gevraagd om
een Google-account toe te voegen.
• Volg de instructies op het apparaat, die u door het aanmelden van een bestaand
Google-account of het aanmaken van een nieuw Google-account zullen helpen.
• Eenmaal ingelogd kunt u tussen de verschillende tabbladen en categorieën Apps
selecteren of met behulp van de zoekfunctie specifieke Apps zoeken op naam.
• Tik op een App om meer gedetailleerde informatie te zien en, indien gewenst, op
de installatieknop om tot het downloaden en installeren van de App over te gaan.
De instructies op het apparaat zullen u verder door het installatieproces gidsen.
• Na voltooiing zal in de rechter benedenhoek een melding verschijnen en een
snelkoppeling om de toepassing te lanceren zal op uw bureaublad worden geplaatst.
• De installatie is nu voltooid en de toepassing is klaar voor gebruik.
BELANGRIJKE VEILIGHEIDSMAATREGELEN
Volg altijd deze basis veiligheidsmaatregelen op bij het gebruik van uw tablet. Dit
vermindert het risico van brand, elektrische schokken en letsel.
• Stel het product niet aan regen of vocht bloot.
• Houd het apparaat uit de buurt van direct zonlicht en warmtebronnen.
• Bescherm het netsnoer. Leg netsnoeren zodanig dat er niet overheen kan worden
gelopen en niet door voorwerpen worden afgekneld die er op of tegenaan liggen.
Besteed bijzondere aandacht aan het punt waar het snoer aan het apparaat is
gekoppeld.
• Gebruik alleen de AC-adapter meegeleverd met het apparaat. Het gebruik van een
andere voedingsadapter maakt uw garantie ongeldig.
• Verwijder niet de afdekking. Er zijn geen door de gebruiker te repareren
onderdelen binnenin het apparaat aanwezig.
Uw apparaat schoonmaken
Behandel het scherm voorzichtig. Om vingerafdrukken of stof op het scherm te
reinigen, adviseren wij om een zachte, niet-schurende doek, zoals een lensdoek voor
de camera, te gebruiken.