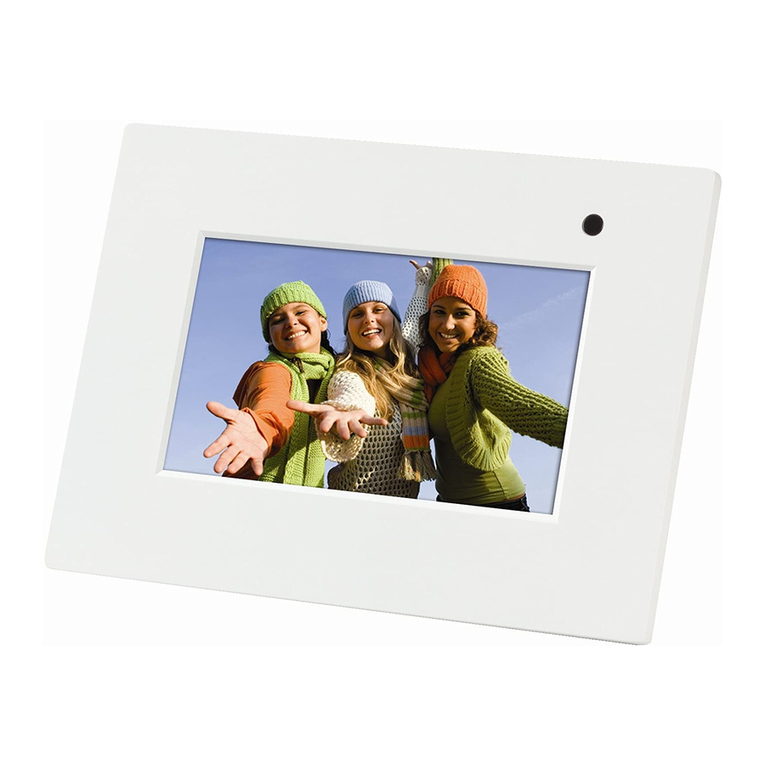
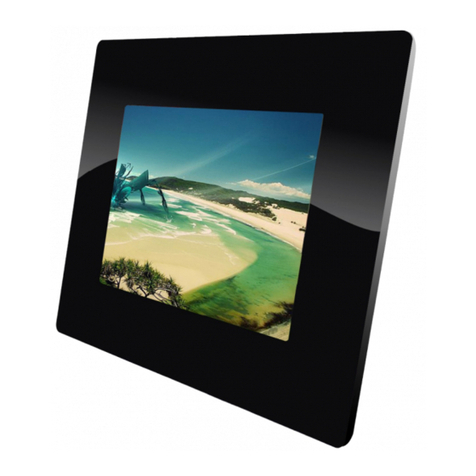
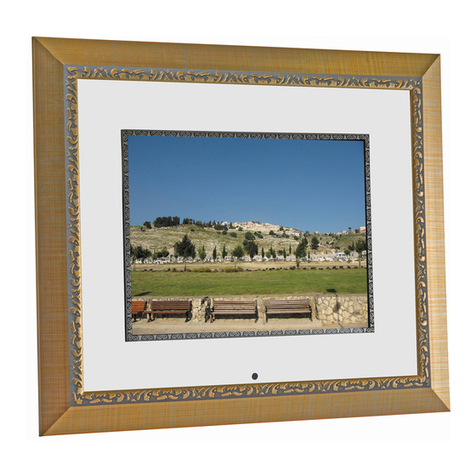
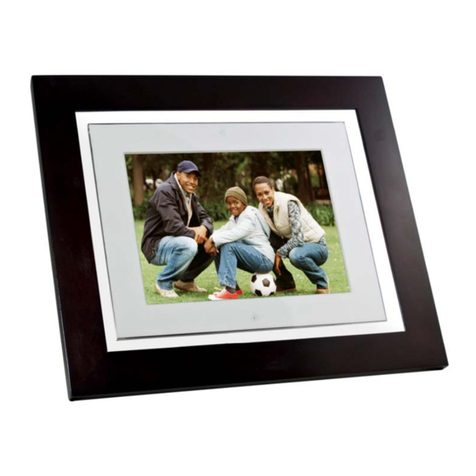
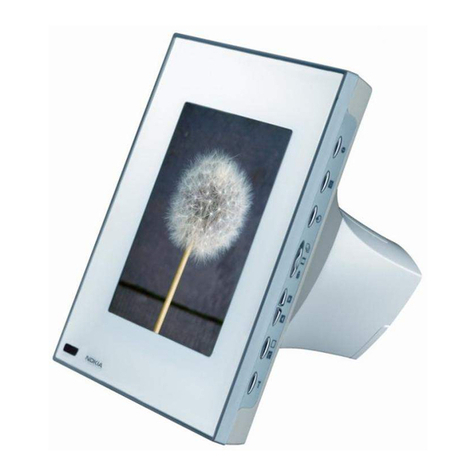
Audiovox DPF702 - Digital Photo Frame User manual

OWNER SMANUAL
DPF702
Digital PhotoFrame
PDFcreated withpdfFactoryProtrialversion www.pdffactory.com

2
ImportantSafetyInstructions
Someofthe following information maynotapplytoyourparticularproduct;
however,aswithanyelectronicproduct,precautionsshouldbe observed
duringhandlinganduse.
lRead theseinstructions.
lKeeptheseinstructions.
lHeedallwarnings.
lFollowall instructions.
lDonotusethisapparatusnearwater.
lClean onlywithdrycloth.
lDonotblock anyventilationopenings.Install inaccordancewiththe
manufacturer sinstructions.
lDonotinstall nearanyheatsourcessuchasradiators,heat
registers,stoves, orotherapparatus(includingamplifiers)thatpro-
duceheat.
lDonotdefeatthesafetypurposeofthepolarizedorgrounding-type
plug.Apolarizedplughastwobladeswithonewiderthanthe other.
Agroundingtypeplughastwobladesandathirdgroundingprong.
Thewidebladeorthethirdprongisprovidedforyoursafety.Ifthe
providedplugdoesnot fitintoyouroutlet, consult anelectricianfor
replacementofthe obsoleteoutlet.
lProtect thepowercordfrombeingwalked on orpinched particu-
larlyatplugs,conveniencereceptacles, and thepointwherethey
exitfromtheapparatus.
lOnlyuseattachments/accessoriesspecified bythe manufacturer.
lUseonlywiththecart, stand,tripod,
bracket, ortablespecifiedbythe
manufacturer,orsoldwiththeapparatus.
Whenacart isused,usecaution when
moving the cart/apparatuscombinationto
avoidinjuryfromtip-over.
lUnplug thisapparatusduringlightningstormsorwhen unused for
long periodsoftime.
lReferall servicing toqualified servicepersonnel.Servicing isre-
quired when theapparatushasbeen damagedinanyway,suchas
power-supplycordorplug isdamaged, liquidhasbeen spilled or
objectshavefallenintotheapparatus,theapparatushasbeenex-
posed torainormoisture, doesnotoperatenormally,orhasbeen
dropped.
]
PDFcreated withpdfFactoryProtrialversion www.pdffactory.com

3
Additional SafetyInformation
lApparatusshall notbe exposed todrippingorsplashing and no
objectsfilledwithliquids,suchasvases,shallbeplacedonthe
apparatus.
lAlwaysleavesufficientspacearound theproductforventilation.Do
notplaceproductinoronabed, rug,inabookcaseorcabinetthat
maypreventairflowthroughvent openings.
lDonotplacelightedcandles,cigarettes,cigars,etc.ontheproduct.
lConnect powercordonlytoACpowersourceasmarked on the
product.
lCareshouldbetaken sothatobjectsdonotfallintothe product.
lDonot attempttodisassemblethecabinet. Thisproductdoesnot
containcustomerserviceablecomponents.
lDonot usetheunitimmediatelyaftertransportation fromacold
placetoawarm place;condensation problemsmayresult. Wait
foraboutonehourtillthe moistureevaporatesbeforeoperating
theunit.
PDFcreated withpdfFactoryProtrialversion www.pdffactory.com

4
WARNING: TOPREVENTFIREORELECTRICALSHOCKHAZARD,DONOT
EXPOSETHISPRODUCTTORAINORMOISTURE.
FCC Information
Thisdevicecomplieswithpart15oftheFCCrules. Operation issubject
tothe following twoconditions: (1)Thisdevicemaynot causeharmful
interference,and(2)Thisdevicemustacceptanyinterferencereceived,
including interferencewhichmaycauseundesired operation.
Thisequipmenthasbeentestedandfound tocomplywiththelimitsfora
ClassBdigitaldevice,pursuant toPart 15oftheFCCRules.These
limitsaredesignedtoprovidereasonableprotectionagainstharmful
interferenceinaresidentialinstallation.Thisequipmentgenerates,uses
andcan radiateradiofrequency energyand, ifnotinstalled andused in
accordancewiththe instructions,maycauseharmfulinterferencetoradio
communications. However,thereisno guarantee that interferencewill
not occurinaparticularinstallation.
Ifthisequipment doescauseharmfulinterferencetoradioortelevision
reception,whichcanbedeterminedbyturning theequipmentoff andon,
theuserisencouraged totrytocorrect theinterferencebyone ormore
ofthe followingmeasures:
-Reorientorrelocatethe receiving antenna.
-Increasethe separationbetween theequipmentand receiver.
CAUTION
PDFcreated withpdfFactoryProtrialversion www.pdffactory.com

5
Service Information
Thisproductshouldbeservicedonlybythosespeciallytrainedinappro-
priateservicing techniques.Forinstructionson howtoobtainservice,
refertothewarrantyincluded inthisusermanual.
Manufacturer/ResponsibleParty
AudiovoxElectronics Corp.,
150MarcusBlvd., Hauppauge,NY11788
ForYourRecords
Keep yoursalesreceipt forproofofpurchasetoobtainwarrantyparts
and service.
Intheeventthatserviceshouldbe required,you mayneedboththemodel
numberandthe serialnumber.Inthe spacebelow,recordthedateand
placeofpurchase,and theserialnumber:
ModelNo.
DateofPurchase
PlaceofPurchase
SerialNo.
-Connectthe equipmentintoanoutleton acircuitdifferentfromthat to
whichthe receiverisconnected.
-Consultthe dealeroranexperiencedradio/TVtechnicianforhelp.
InaccordancewithFCCrequirements,changesormodificationsnot
expresslyapproved bymanufacturercouldvoidthe user sauthorityto
operatethisproduct.
ThisclassBdigitalapparatuscomplieswithCanadianICES-003.
Cet appareil numériquede laclasseBestconforme àlanorme
NMB-003duCanada.
PDFcreated withpdfFactoryProtrialversion www.pdffactory.com

6
PackageContents
1xDigitalPhotoFrame
1xRemoteControl
1xAC/DC PowerAdaptor
(+9V,1A,Support100/240VAC50-60Hz)
1xUserManual
1xeMusicCard
1xProductRegistration Card
GettingStarted
1.ConnecttheACpoweradapterintothedigitalphotoframeandplug
itintoapoweroutlet.
2. Insertyourmemorycardwithphotosormusic intothe memory
slot(MultiMediaCardTM/SecureDigitalTM/CompactFlashTM/xD
MemoryCardTM/MemoryStickTM)orUSBstorage deviceintothe
USB port. (Note:Ifno memorycardisavailable, therearesome
demoimagespreloaded inthe internalmemory*)
*Todeletepreloadedimages, pleaserefertothe DeletePhotos
fromInternalMemory”section.d
3.Adjustthedigitalphotoframestandtoitsextendedpositionand
pushthe POWERbutton located on top.
4.Rotatethe standtosupport theframeineitherhorizontalorvertical
position. Pleaseensurethe stand isrotated toaposition that the
indicatorsonthestand andframe aligned toensurestability.(Note:
The pictureonthe framewon’trotateaccording tothe position of
the frame.)
PDFcreated withpdfFactoryProtrialversion www.pdffactory.com

7
PhotoFrameControlsandIndicatorsFunctions
TopView
PLAY/PAUSE/SELECTbutton
UP/COPY/DELETEbutton
POWERbutton
MENU button
DOWN/ROTATEbutton
NEXTbutton
PREV.button
POWERLED
Left View RightView
Volume
Control
CFMemory
Slot
SD/MMC/xD/
MSCardSlot
USB Port
PowerInput
PDFcreated withpdfFactoryProtrialversion www.pdffactory.com

8
Remote ControlFunctions
Pull plastictabfromremotecontrolto
activate.(Note:replacementbattery
model#CR2025)
CLOCK:Presstocyclethrough clock,calendarandslideshow.
REPEAT: Press toswitchbetweendifferent repeatmodesforaudioplay-
back. NOTE: Controlof the repeat function isunavailable inslideshow
withMP3mode. The slideshowwithMP3issettothe defaultmode
Repeatall.
MENU:Presstoaccessmenu.
ZOOM: Press toenlarge photodisplayinpausemode.
UPorCOPY/DEL:Presstogobacktothe previouspagewheninthumb-
nail mode,moveupwhen settingoptionsorpanupin zoommode.
Press tocopy/deletepictureinPausemode.
LEFT/PREV:Presstomoveleft whensetting options,orreturntoprevious
screeninslideshow mode.
PLAY/PAUSEORSELECT: Presstoplayorpausephoto,ormusicfiles.
Press tomakeselectionsinmenu orsetting mode.
RIGHT/NEXT: Presstomoverightwhensettingoptions, ormovetonext
screeninslideshow mode.
SOURCE: PresstoselectwhichexternalmemorycardorUSBstorage
device,whichwillbe usedtoretrievedatafortheDPF.
NOTE:Internal memory can onlybe accessedbyremoving all external
memorysources!
DOWNorROTATE:Presstoadvancetothenextpage wheninthumbnail
mode,movedown whensetting optionsorpandownin zoommode.Press
torotatepictureinslideshoworpausemode.
PDFcreated withpdfFactoryProtrialversion www.pdffactory.com

9
Changing Settings
Press the MENUbuttontoaccessthemainmenu screen shownbelow.
Press theLEFTorRIGHTARROWkeystohighlightthe SETTINGS”
icon.Press the SELECTbutton toaccess the GENERALSETUPPAGE”
shownbelow.
BRIGHTNESS: Press the SELECTbuttontoentertheadjustmentmode.
The BRIGHTNESS”setting will nowbe highlightedasshownbelow.
PresstheSELECTbuttontoselect the BRIGHTNESS”adjustment.
Press the LEFTorRIGHTARROWkeystoadjust thebrightness tothe
desired setting.PresstheSELECTbuttontoexitandsaveyour
selection.
PDFcreated withpdfFactoryProtrialversion www.pdffactory.com

10
SLIDESHOWTIME: Allowsthe usertoselecthowlong an image is
displayedinslideshowmode. UsetheUPorDOWNARROWkeysto
positionthehighlightoverSLIDESHOWTIME.PresstheSELECTbutton
toenterthe selectionmode. UsetheUPorDOWNARROWkeystohigh-
light the desired time. Pressthe SELECTbutton tosaveyourselection.
Press theLEFT ARROW/PREV buttontoexitand saveyourselection.
Note:The realslide showtimemayvaryforpictureswithhighresolution.
OSDLANGUAGE: AllowstheusertoselectwhatOSDLANGUAGE
willbedisplayed. UsetheUPorDOWNARROWkeystoposition the
highlightoverOSDLANGUAGE. PresstheSELECTbuttontoenterthe
selection mode.Usethe UPorDOWNARROWkeys toselectthe de-
siredlanguage.Pressthe SELECTbuttontostorethedesired language.
Press the LEFTARROW/PREV button toexitthelanguagesetupmenu.
SLIDEWITHMP3: ControlswhetherMP3musicwillplayduringthe
slideshow.Option isonlyavailableforusewithexternalmemory
devices. Usethe arrowkeystopositionthehighlightoverSLIDEWITH
MP3.Press SELECTtoenterthe selectionmode. UseUPorDOWN
ARROWkeys tohighlightthedesired setting,press SELECTtoexit
andsaveyourselection.
PDFcreated withpdfFactoryProtrialversion www.pdffactory.com

11
PHOTO MODE: Select normalmode todisplaythe photoinitsnative
formatorwidescreenmodetofitphotostothe fullwidthofthe screen.
Option isonlyavailableforusewithexternalmemorydevices.
Note: Inwidescreen mode,aportionofthephotomaybe cropped.
Usethe arrowkeys toposition thehighlightoverPHOTOMODE.Press
SELECTtoenterthe selectionmode.Press theUPorDOWNARROW
keystoselect thedesired photomode.Press theSELECTbuttonto
saveyourselection. Press the LEFTARROWkeytoexit the PHOTO
MODEselectionmenuand returntothe GENERALSETUPMENU.
MATTING: Thisfeatureletsyouplaceadecorativeborderaroundthe
photodisplayed duringslideshow.Usethe arrowkeystoposition the
highlight overMATTING.Press SELECTtoenterthe selectionmode.
PresstheUPorDOWNARROWkeystoselectthe desired mattingand
thenpressSELECTtosaveyourselection. Pressthe LEFTARROW
keytoexit the matting selection menu and returntothe generalsetup
page.
MattingThemeoptions:
Mode1=Balloon
Mode2=BeachTheme
Mode 3=PartyCake
Mode 4=MerryChristmas
Mode 5=Valentines sDay
PDFcreated withpdfFactoryProtrialversion www.pdffactory.com

12
DEFAULT: Usethearrowkeys toposition the highlightoverDEFAULT
and press SELECTtwicetorestorefactorydefaults.
ClockSetup Page
Press the MENUbuttonandusetheLEFTorRIGHTARROWkeys
tohighlightthe “SETTINGS”icon.PresstheSELECTbuttontobring
uptheGENERALSETUPPAGE.Then press theRIGHTARROWkey
tohighlight theclockicon andpress SELECTtoentertheadjustment
mode.
ClockMode: Clockmodeallowstheoperatortoselect whetherthe
timewill be displayed in12 or24 hourmode. Toenteryourselection
usethe arrowkeystoposition the highlight overCLOCKMODEand
press theSELECTkey.Followbyusing the arrowkeystoselectthe
desired setting andthen press theSELECTkeytoexit and saveyour
choice.
ClockSetting: Thisoption providesthe operatorwiththemeansfor
setting the time.UsetheDOWNorUPARROWkeystopositionthe
highlight overCLOCKSETTING and press the SELECTkeytoenter
thecurrenttime.Usethe Up/Downarrowkeys tochangethetimeand
usethe Left/Right keys toselectwhichparameteryou will set. Once
thedesiredtimeisentered press SELECTkeytosaveyourchoice.
Pressthe LEFTARROWkeytoexit.
PDFcreated withpdfFactoryProtrialversion www.pdffactory.com

13
AUTO POWERON/OFF: Set desired timefordigitalphotoframeto
automaticallypoweronoroff.Todisablethisfunction,returnto AUTO
POWERON”, then usethe UPorDOWNarrowkeystoselect ”-:-:-”.
Repeatabovestepstodisablethe AUTO POWEROFF”function.
When the unitturnsonit will be atthe Menuscreen.
ALARMSETTING: Usethe arrowkeystosettheAlarm Mode ON”.
Then highlightALARMSETTINGand enterdesiredalarmturnon time.
Note: Thephotoframemust be powered ON”forthe alarm towork.
Whenthealarm triggerspressanykeytoturnoffalarm.
ALARMMODE: Setthealarm onoroff.
PDFcreated withpdfFactoryProtrialversion www.pdffactory.com

14
Viewingphotos
PressMENUandusethe arrowkeys tohighlight “PHOTO”onthemain
menu.PressSELECTfortheslideshowtobegin.Duringtheslideshow,
press SELECTtopausethe slideshow, press SELECTagaintoenter
thethumbnailmode.
DATESETTING: UsethearrowkeystohighlightDATESETTINGthen
pressSELECTtoentertheadjustmentmode.UsetheUp/Downarrow
keystosetthedate. Usethe Left/ Right arrowkeys toselect which
parameteryou willadjust. OncecompletepresstheSELECTkeyto
exitandsaveyourselection.
Todisplaydesired photoinfullscreenmode, usethe arrowkeys to
highlightthe photoandpressSELECTtostart theslideshowfromthe
selectedphoto.
Note:Thepicturesinthe internalmemorycan not be displayed in
thumbnail mode.
PDFcreated withpdfFactoryProtrialversion www.pdffactory.com

15
COPYPHOTOINTOINTERNALMEMORY: PresstheUpArrowin
Pausemodeand followthe on-screen instructions.
Note: Function isonlyavailableforcopyingaphotointothe internal
memory,not forAUDIO.
DELETEPHOTOSFROMINTERNALMEMORY: Pressthe Up
ArrowinPausemodeand followtheon-screen instructions.
Note: Function isonlyavailablefordeleting photosfromthe internal
memory.Beforedeleting, detachthememorycardandUSBflashfrom
theplayer.
ZOOMIN: Inthepausemodeofthephoto, pressZOOMbuttonto
enlarge the photoby133%, 150%or200%timesofthe normalsize.
When the imageisenlarged, you can usetheArrowkeys toviewthe
blockedpartsofthephoto.
ROTATEPHOTO: Rotatesthe photo90degreestothe righteach
timetheDownArrowispressed.
Note:TheZOOMandROTATEfunctionareinvalidforinternalmemorys
photo.
VIEWING CALENDAR/CLOCK
Thisoptionprovidestheoperatorwiththe capabilityofselectingwhether
theCalendarorClockwillbedisplayed onthescreen.At theMenu
screenusethearrowkeystohighlightthe CALENDARortheCLOCK
icon and then press the SELECTbutton. The Screen will displaythe
operator sselection.
InSide showmodeiftheSLIDEWITHMP3functionissettoon anda
externaldevicethatcontainsMP3songsisconnected thenwhen the
slide showbeginsthe firstMP3song foundonthedevicewillstart
playing.
PDFcreated withpdfFactoryProtrialversion www.pdffactory.com

16
MUSICPLAYBACK
Press MENUtoaccessthe Menu Screen,usethe arrowkeysto
highlighttheAUDIO icon.Thenpress SELECT.The displaywill listthe
musicoraudiofilesthatreside on the externalmemorysourceas
illustrated below:
Usearrowkeys toselect the desiredaudiofileand press SELECTto
startplayback.Usethe “volume”controlontheleft side toadjustvolume.
Press REPEATatanytimetochange repeatmode.
Modeoptions:REPEAT-ALL(playall songscontinuously),REPEAT-ONE
(Repeatthe sametrack),REPEAT-OFF (Playuntiltheend oflasttrack
andstop)and RANDOM(Playtracks inashufflemode).
TIPSFORCLEANING ANDCARE
Pleasepoweroff the DigitalPhotoFramebeforecleaning.
Donotsprayorpourliquidcleaningagentsdirectlyon thescreenor
frame.
Donot useammonia,alcohol, orabrasivedetergent cleaning agents.
Cleaning thescreen:
1.Wipescreen withaclean,soft, lint-freeclothtoremovedustandloose
particles.
2.Iffurthercleaningisrequired,applyan appropriatecleaningagent(ap-
provedforLCDdisplays)toaclean, soft , lint-free clothandwipe the
screen.
Note:Donotapplytoo muchpressureon the screen toavoid
damagingit.
PDFcreated withpdfFactoryProtrialversion www.pdffactory.com

17
Specifications
Size
Aspectratio
Resolution
ExternalPowerAdapter
Audio
Internalspeakers
Storage
Internalmemory
Memorydevicesupported
Memorycardsslot1
Memorycardsslot2
USB Port
MediaFilesSupported
Photofileformats
Audiofileformats
UserInterface/Control
ButtonsattheTopofdigital
photoframe
Remotecontrol
Calendar&Clock
7”
16:9
480*234Pixels
+9v,1A,Support100/240Vac
Stereo
15photosMAX
SD/MMC/MS/xD
CF
STDUSB 2.0Host
JPEG
MP3
Yes
Yes
Yes
Designand Specificationsaresubjecttochangeforproduct
improvementwithoutnotice.
PDFcreated withpdfFactoryProtrialversion www.pdffactory.com

18
Troubleshooting
Solution
Yourdigitalpictureframe
won tturnon
Theadapterisnotsecurelyconnected
toyourpictureframeorthepower
switchisnoton.
Amemorycardisinserted
inyourdigitalpictureframe
butyou cannotviewyour
photos.
*Makesurethat the memorycard
containsJPEGfiles. (ProgressiveJPEG
arenotsupported).
*Turnyourdigitalpictureframeoffand
makesurethat the memorycardis
inserted all the wayintothecardslot
andisinserted correctly.Then turnthe
frameon again.
*Thisdevicedoesnotsupportflash
cardslargerthan 4GB.
*Ifsomecardscan notbe read.Youcan
trytoformatitfirst.
*Note:Somedigitalcamerassave
imagesinformatsotherthan JPEG.
Refertoyourcamera smanualifyour
photosarenotJPEGfiles.
The framedisplays some
picturesslowerand some
picturesfaster.
Higherresolutionpicturesload more
slowly.Tryusing lowerresolution pic-
turesordownsamplingyourimages.
Seeyourcamera soperatingmanualfor
detailson downsamplingyourphotos.
Problem
The Remotecontrolwill
notfunction.
1)makesurethe plasticshipping tab
hasbeen removed fromtheremote s
batterycompartment. See page8.
2)Makesureyou areaimtheremoteat
thedigitalpictureframesI/Rsensor
located intheupperrighthandcorner
oftheframe.
3)Check orreplacethe batteryinthe
remote.
PDFcreated withpdfFactoryProtrialversion www.pdffactory.com

19
AudiovoxElectronicsCorporation,150MarcusBlvd.,Hauppauge,NewYork11788
AUDIOVOXELECTRONICSCORP. (theCompany)warrantstothe originalretail purchaserof
thisproductthatshould thisproductoranypartthereof,undernormal useandconditions,
beprovendefectivein material orworkmanship within ninety(90)daysfromthedateoforiginal
purchase,suchdefect(s)will berepairedorreplacedwithreconditionedproduct(atthe
Company'soption)withoutcharge forpartsandrepairlabor. Agamecontroller,if supplied,
issimilarlywarrantedforninety(90)days.
Toobtain repairorreplacementwithin thetermsofthisWarranty, theproductistobe delivered
withproofofwarrantycoverage (e.g.dated billofsale),specificationofdefect(s),
transportationprepaid,totheCompanyattheaddress shownbelow.
ThisWarrantydoesnotextendtothe eliminationof externallygeneratedstaticornoise,to
correctionofantennaproblems, tocostsincurredforinstallation, removal orreinstallation of
the product, ortodamage todigitalmemory/mediadevices,gamingdevices,discs,speakers,
accessories,orelectricalsystems.
ThisWarrantydoesnotapplytoanyproductorpartthereofwhich,in theopinionofthe
Company,hassufferedorbeendamaged throughalteration,improperinstallation,mishan-
dling,misuse,neglect, accident,orbyremovalordefacementofthe factoryserialnumber/
barcode label(s).THEEXTENTOFTHECOMPANY'SLIABILITYUNDERTHISWARRANTYIS
LIMITEDTOTHEREPAIRORREPLACEMENTPROVIDEDABOVEAND,INNOEVENT,SHALL
THECOMPANY'SLIABILITYEXCEEDTHEPURCHASEPRICEPAIDBYPURCHASERFORTHE
PRODUCT.
ThisWarrantyisin lieuofallotherexpress warrantiesorliabilities.ANYIMPLIEDWARRAN-
TIES,INCLUDINGANYIMPLIEDWARRANTYOFMERCHANTABILITY,SHALLBELIMITEDTO
THEDURATIONOFTHISWRITTENWARRANTY. ANYACTIONFORBREACHOF ANY
WARRANTYHEREUNDERINCLUDINGANYIMPLIEDWARRANTYOFMERCHANTABILITY
MUST BEBROUGHTWITHINAPERIODOF12MONTHSFROMDATEOFORIGINAL
PURCHASE.INNOCASESHALLTHECOMPANYBE LIABLEFORANYCONSEQUENTIALOR
INCIDENTALDAMAGESFORBREACHOFTHISORANYOTHERWARRANTY.Nopersonor
representativeisauthorizedtoassumefortheCompanyanyliabilityotherthanexpressed
hereininconnectionwiththesaleofthisproduct.
Somestatesdo notallowlimitationson howlonganimplied warrantylastsortheexclusion
orlimitationofincidental orconsequentialdamagesotheabovelimitationsorexclusionsmay
notapplytoyou.ThisWarrantygivesyou specificlegalrightsandyoumayalsohaveother
rightswhichvaryfromstatetostate.
90 DAYLIMITEDWARRANTY
AppliestoAudiovoxVideoProducts
128-5556G
PDFcreated withpdfFactoryProtrialversion www.pdffactory.com

AudiovoxElectronicsCorporation
150 MarcusBoulevard
Hauppauge,NY11788
www.audiovox.com
128-8596(V1.0)
PrintedinChina
PDFcreated withpdfFactoryProtrialversion www.pdffactory.com
Table of contents
Other Audiovox Digital Photo Frame manuals

Audiovox
Audiovox DPF700 - Digital Photo Frame User manual

Audiovox
Audiovox DPF908 - Digital Photo Frame User manual

Audiovox
Audiovox DPF701 User manual

Audiovox
Audiovox HOME BASE DPF711K User manual

Audiovox
Audiovox DPF800 - Digital Photo Frame User manual

Audiovox
Audiovox DPF7407WH User manual

Audiovox
Audiovox DPF708 - Digital Photo Frame User manual

Audiovox
Audiovox DPF508 - Digital Photo Frame User manual
Audiovox
Audiovox DPF700 - Digital Photo Frame User manual

Audiovox
Audiovox DPF1000 User manual