Audiovox Pursuit Series User manual

Model PRO 9842B
Owner's Manual
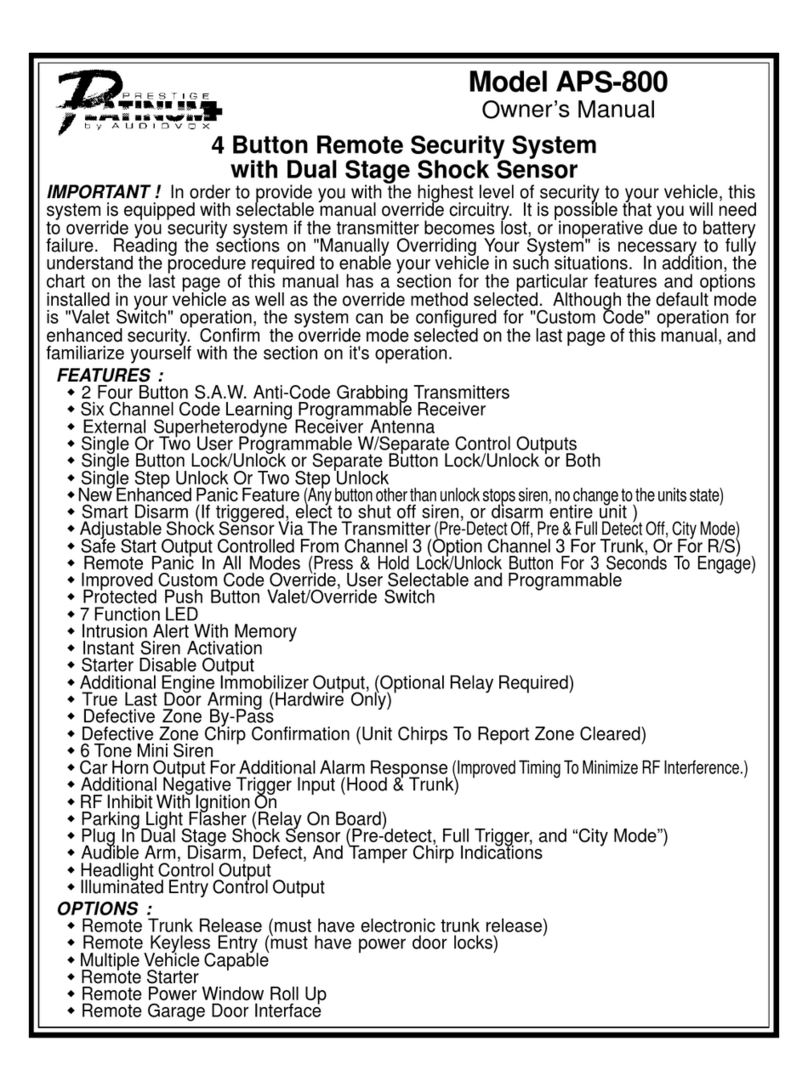
FEATURES:
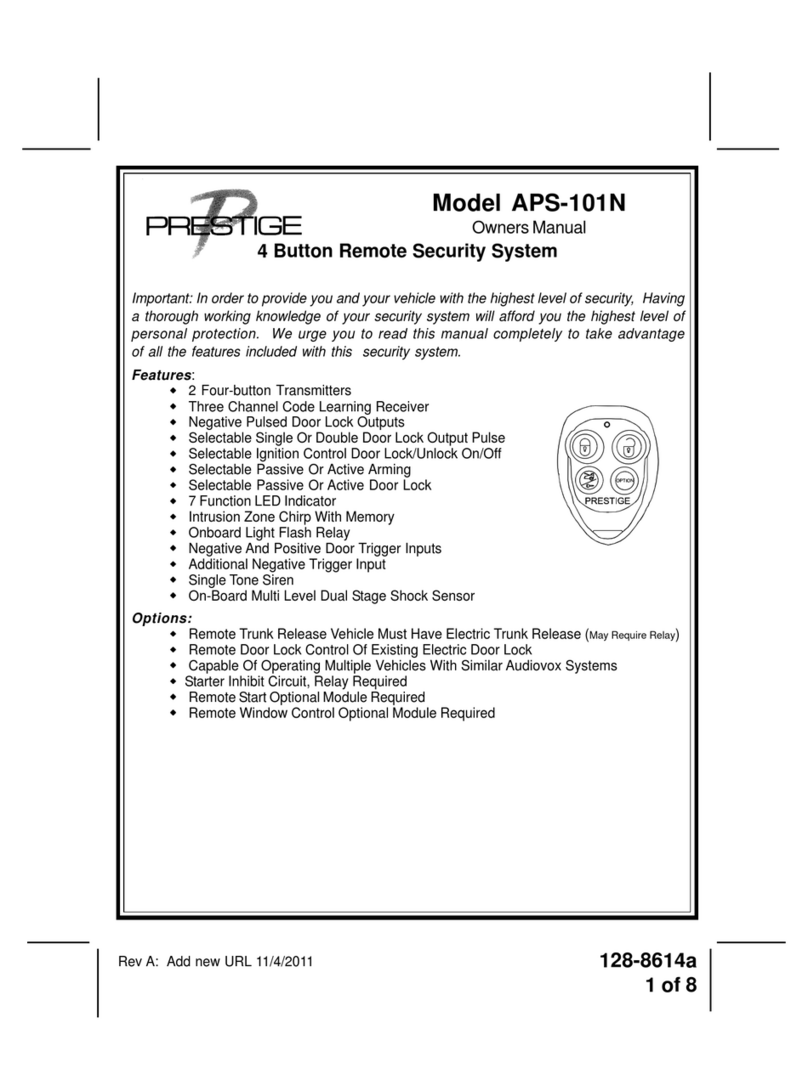
2 Three Button RF Transmitters
Three Channel Code Learning Receiver
Remote Panic In All Modes
Built-InParkingLightOutput
LED Status Indicator
IgnitionDoorLocking/Unlocking
Electronic Siren Output
True Last Door Arming
Channel2AuxiliaryOutput
OPTIONS:
Remote Trunk Release
Remote Power Window Control
Remote Garage Door Interface
Remote Engine Starter
Single or Dual Zone Shock Sensor
StarterInterrupt
Page 1
3 Button Vehicle Alarm System
With Auxiliary Output

Your PRO 9842B VehicleAlarm System has many features and available options some of
whichmust beselectedattime of installation. For your reference, the list on the back page
of this manual shows what features and options have been installed with this particular
system. Consultyour installing dealer for options that may have been installed and are not
listed.
ARMING THE SYSTEM - ACTIVE
1.Turn the engine off,exitthe vehicle and closealldoors.
2.Press andreleasethe lockbuttonof yourkeychain transmitterone time.
Theparkinglightswill flashonce,thesiren willchirponceand thedashmountedLED willbegin
toflashslowly confirmingthesystem isarmed. Ifyou havetheoptional doorlock/unlockcircuit
installed,the doors willalso lock.
SILENT ARMING - ACTIVE
1. Turn the engine off, exit the vehicle, and close all doors.
2.Press and hold the lock button of your keychain transmitter for two seconds.
Theparkinglights willflash onceandthe dashmounted LEDwill begintoflash slowlyconfirm-
ing the system is armed. The siren will not chirp. If you have the optional door lock/unlock
circuitinstalled, the doorswill lock.
ARMING THE SYSTEM - PASSIVE (AUTOMATIC)
If the passive arming feature has been selected:
Turn the engine off, exit the vehicle, and close all doors.
The dash mounted LED will immediately begin to flash rapidly indicating that the 30 second
passive arming timer has begun. If the LED does not begin to flash rapidly, then you have
left a door, hood, or trunk ajar. Closing this entry point will allow the arming cycle will
begin. If any entry point is opened during the 30 second arming cycle, arming will be
suspended. When all entry points are closed, the arming cycle will begin again. At the
endof the30 seconds,the parkinglights willflash once,the sirenwillchirp onceand thedash
mounted LED will begin to flash slowly confirming the system is armed. If the siren did not
sound when arming, then the chirps have been turned off. Please refer to the sectiontitled
"EliminatingtheArm/Disarm Chirps"later inthis manual. Passive doorlocking is a selectable
feature. Ifyou have the optional doorlock/unlock circuit installed, the doorsmay or may not
lockpassively dependentupon thesetup duringinstallation.
PROTECTION WHILE THE SYSTEM IS ARMED:
Whenever the system is armed, opening any protected entry point, (i.e.; hood, trunk, or
doors), will cause the alarm to trigger immediately. The siren will sound and the parking
lights will flash for 30 seconds, then stop and reset to continue to monitor all protected
entry points. If the thief happened to leave the entry point open, the system will sound for
six consecutive 30 second cycles then shut down and reset, isolating the triggered zone,
whilecontinuing tomonitor and protectall other zones.
Whenever the system is armed, the dash mounted LED will slowly flash. This serves as a
visualdeterrent toa potentialthief. This LED isa verylow current lightemitting diodeand will
notcause the battery to draineven if left unattended for longperiods of time.
Page 2
Page 3
Ifthe
optional
singlestage shocksensoris installed,anystrongimpactto thevehiclewill cause
the shock detector to trigger the alarm when armed. If the
optional
2-stage shock sensor is
installed,anylesser impactwill causethepre-detect stageof theshock sensortoemit aseries
of short warning tones from the siren when armed.
If the optional stater interrupt is installed the vehicle starter circuit is disabled, even with the
ignitionkey thevehicle willnot start.Should an attemptbe madeto startthe engine, while the
SYSTEMis armed, thestarter circuitwill remaininterrupted.
DISARMING THE SYSTEM
Asyouapproach thevehicle, pressand releasethe unlockbutton onthe keychaintransmitter.
Theparkinglights willflash twotimes,the sirenwill chirptwice,and thedash mountedLEDwill
turnoff. If you have theoptional door lock/unlock circuitinstalled, the doors willunlock.
Note: Ifthe passive arming modewas selected at thetime of installation, thedash mounted
LED will start flashing rapidly indicating that the system is rearming. Opening any door will
suspend the automatic arming.
If the parking lights flashed three times, and the siren chirps four times, this indicates that
the alarm system had been triggered in your absence. Before turning on the ignition key,
examinethedash mountedLED's flashpattern. Thenumber offlashes identifiesthe triggered
zone. Foradditionalinformation, referto INTRUSIONWARNING SIGNALSfoundlater inthis
manual.
If the siren did not sound upon disarm, then the chirps have been turned off. Refer to the
section titled ELIMINATING THE ARM/DISARM CHIRPS.
SILENT DISARMING
1. Asyouapproachthevehicle, pressand holdtheunlock buttonofyour keychaintransmitter
for two seconds, or until the system responds.
The parking lights will flash twice, and the dash mounted LED will turn off, confirming that
thesystemisdisarmed. Thesirenwillnot chirp. Ifyouhave theoptionaldoorlock/unlock circuit
installed,the doorswill unlock.
Note: If the passive arming mode was selected at time of installation, the dash mounted
LED will start flashing rapidly indicating that the system is rearming. Opening any door will
suspend the automatic arming.
Ifthe parking lights flashedthree times and the sirenchirps four times, this indicatesthat the
alarmsystem hadbeen triggered inyour absence.
VALET/PROGRAM/MANUAL OVERRIDE SWITCH
Thevaletswitch allowsyou totemporarily preventthe UNITfrom arming,eliminating theneed
to hand your keychain transmitter to parking attendants or garage mechanics. When the
system is in the valet mode, all alarm functions are by-passed, however the remote panic
featureandthe optionalremote doorlock/unlock willremain operational.
To enter the valet mode:
1. Start with the valet switch in the "off" position
2.Turn the ignitionswitch to the "on"position.
3.Within 10 seconds of step 2, flip the valet switch tothe "on" position.

Page 4
Thedashmounted LEDwill turnon solidindicating thatthe valetmodehas successfullybeen
entered.
To return to the normal, (alarm mode), operation,move the valet switch to the "off" position
any time the ignition switch is in the on position.
Note: In the event that you lose your keychain transmitter or the transmitter fails to oper-
ate the alarm system, the valet switch can be used to disarm the alarm. This is referred to
as the "Manual Override". To disarm the alarm:
1. Open the door with the vehicle door key. (The siren will sound)
2. Turn the ignition switch to the "on" position.
3. Flip the valet/override switch to the "on" position.
The system will disarm and the siren will stop sounding, allowing the engine to be started,
and the vehicle to be operated normally. Always remember to move the valet switch back
to the "off" position to allow the passive arming and optional starter interrupt features to be
operable the next time you park the vehicle.
INTRUSION WARNING SIGNAL
This system will inform you if an intrusion attempt has occurred while you were away from
the vehicle. Upon disarm, the siren will chirp 4 times and the parking lights will flash 3
times. Enter the vehicle and
before
turning on the ignition switch, observe the LED flash
pattern.
If the LED flashes two times...pause, two times...pause etc., then an intrusion attempt was
made to open the hood or trunk, or an impact or a strong vibration was applied that the
optional shock sensor detected. Check the vehicle for indications of forced entry to these
openings, or signs of glass breakage or body damage.
If the LED flashes three times...pause, three times...pause etc., then an intrusion attempt
was made to the vehicle doors. Check all doors for indications of forced entry.
Note: The LED intrusion warning indications are stored in the system's memory and will
be erased when the ignition switch is turned on.
ELIMINATING THE ARM/DISARM CHIRPS
You can selectively eliminate the normal arm & disarm chirps by holding the transmitter
button slightly longer when arming and disarming. This will prevent the siren chirps for
one arm or disarm cycle. If you find this inconvenient and wish to eliminate these chirps
permanently,
1. Start with the valet switch in the "off" position.
2. Turn the ignition switch "on" then "off".
3. Within 10 seconds of turning off the ignition, flip the valet switch "on", "off", "on", "off",
"on", "off".
4. If the chirps were on before you started, the siren will emit 2 short chirps indicating that
the chirps are now off. If the chirps were off before you started, the siren will emit one
short chirp indicating that the chirps are now on.

Page 5
REMOTEPANICOPERATION
Thelock or unlock buttonof your keychain transmitteralso serves as apanicswitch and will
causethesirento soundondemand.Tousethepanicfeature, youmustbewithin thesystem's
maximumoperatingrange. Inanemergency situation,tousethepanic feature,pressandhold
eitherthe lockor unlockbutton ofyour keychain transmitterfor 3seconds. Thiswill causethe
lightstoflash, thesirento sound. Thepanic modewillcontinue for30seconds andthen reset.
Todisengage the panicfeature beforethe 30 seconds areup,press and hold eitherthe lock
orunlock button of your keychaintransmitter for 3 seconds.
While the panic mode is engaged, the doors can be remotely locked and unlocked via the
transmitterby pressing theeither button respectively.
ADDITIONALREMOTEFUNCTIONCHANNEL2
The system has an additional feature, (Channel 2) , that can be connected to a number of
differentoptional accessories. Some ofthe more common usesfor this channel are:
!RemoteTrunkRelease
!RemoteWindowClose
!RemoteGarageDoor Interface
To operate the accessory associated with Channel 2, press and
hold
the option button of
yourkeychain transmitter for threeseconds.
NOTE: YoumayaccesstheChannel 2commandregardlessofwhether thesystemis"armed"
or "disarmed", but not when the ignition switch is in the on position. This is to prevent the
outputfrom accidentallyopening the vehicle'strunk when thevehicle isin motion.
IGNITIONDOORLOCKING/UNLOCKING
When connected to a vehicle's power door lock system the UNIT is capable of being pro-
grammedfor the addedsafety and securityof ignition controlleddoor locking andunlocking.
Thesefeaturesareseparate,so theSYSTEMmaybe programmedforone, orboth,orneither.
Thesefeatures can onlybe used if theoptional door lock/unlock circuit isinstalled.
Whenthe ignitiondoor lockingfeature isprogrammed, the systemwill causealldoor locksto
lock whenever the ignition switch is turned from the "off" to "on" position, (providing that all
doorsare closed atthat time). All doorswill lock approximately 2seconds after thevehicle's
ignition switch is turned on. This is a nice feature for maintaining the personal safety of the
occupantsof the vehicle,in an effortlessand automatic manner.
Whenthe ignitiondoor unlockingfeature isprogrammed,the system willcause alldoor locks
tounlock whenever the ignition switch is turned from the"on"to "off" position. All doors will
unlockimmediately after thevehicle's ignition switchis turned off.
As stated these features are programmed separately, so you may chose to use one, both,
or neither. Please consult with your dealer to consider your options.

PRO9842B
SYSTEMFUNCTIONSATAGLANCE
ALARM LED INDICATORS:
RAPID FLASHING = PASSIVE ARMING
SLOW FLASHING = ARMED
OFF = DISARMED
ON SOLID = VALET MODE
2 FLASH...PAUSE = HOOD/TRUNK/SHOCK INTRUSION
3 FLASH...PAUSE = DOOR INTRUSION
SIREN CHIRP INDICATION:
1 CHIRP = ARM
2 CHIRPS = DISARMED
3 CHIRPS = ARMING WITH ENTRY POINT OPENED
4 CHIRPS = DISARM AFTER INTRUSION
CONTINUOUS = TRIGGERED/PANIC MODE
ALARM PARKING LAMP INDICATIONS:
1 FLASH = ARM
2 FLASHES = DISARM
3 FLASHES = DISARM AFTER INTRUSION
CONTINUOUSFLASH = PANICMODE
SELECTABLEFEATURES:
"PASSIVEARMING
"ACTIVEARMING
"IGNITIONCONTROLLEDDOORLOCK
"IGNITIONCONTROLLEDDOORUNLOCK
"PASSIVEDOORLOCKING
"CHIRPSON
"CHIRPSOFF
Page 6
© 2003 Audiovox Electronics Corp. 128-6188B
Other manuals for Pursuit Series
5
This manual suits for next models
1
Table of contents
Other Audiovox Security System manuals

Audiovox
Audiovox AXT-800 User manual

Audiovox
Audiovox Pursuit PRO-9649N User manual

Audiovox
Audiovox PRO-9342FT3 User manual

Audiovox
Audiovox AA-930 User manual

Audiovox
Audiovox Prestige Platinum Plus APS-510C User manual

Audiovox
Audiovox Prestige 128 -5264A User manual

Audiovox
Audiovox Prestige Platinum Plus APS-786T User manual

Audiovox
Audiovox PRO-9642a Pursuit Series User manual

Audiovox
Audiovox Prestige 128-8614 User manual

Audiovox
Audiovox PRO-9342FT3WOS2 User manual