Augmented Vision Labs S5 Inserter User manual
1©2023 Augmented Vision Labs, LLC
For Scleral and Hybrid Lenses
1. Safety precautions (Please read before use) .……….………… Page 2
2. Warranty information ………………………………………………...…Page 2
3. A message from our founder ..………………………………….……. Page 3
4. Device description …………………………………………………………. Page 3
5. Device maintenance (Please read before use) ..…….……….. Page 4
6. Instructions for lens insertion ……………….……………………….. Page 5
7. Demonstration video ………………….…………………………………. Page 15
8. Join our online community …………………………………………….. Page 16

2©2023 Augmented Vision Labs, LLC
Submit Warranty Registration
SAFETY PRECAUTIONS
1. Please consult with your eyecare provider for instructions on how to clean and
maintain your lenses. Your doctor will recommend the appropriate lens cleaning
and maintenance products that you should use with your lenses.
2. If you experience pain or a decrease in the quality of your vision after using the
S5 Inserter™stop using the device and contact your eyecare provider
immediately.
3. Lens Holder:
a. Please read the insert provided with the lens holder before using it.
b. ALLERGY NOTICE: The lens holder provided with the S5 Inserter™(known
as the DMV® Vented Scleral Cup™SynergEyes® Model) contains latex.
c. The lens holder provided with the S5 Inserter™is only intended for use in
lens insertion. Do not use the provided lens holder during lens removal.
d. CHOKING HAZARD: Please keep the lens holder out of the reach of
children.
WARRANTY INFORMATION
Your S5 Inserter™comes with a 1-year warranty which covers the replacement of any
components that fail to operate as expected due to a manufacturer defect. For a limited
time, receive a $50 credit towards any future purchase by completing your warranty
registration within 14 days of receiving your device. Register your device at
https://augmentedvisionlabs.com/warranty/ or by clicking the button below.

3©2023 Augmented Vision Labs, LLC
AMESSAGE FROM OUR FOUNDER
Thank you for purchasing the S5 Inserter™. I developed this device to eliminate the
frustration that my patients faced with inserting their scleral and hybrid lenses. My goal
is that it will do the same for you. To ensure that this happens, I’m making myself
available 7 days a week to help you learn how to insert your lenses safely and efficiently.
Please reach out to me if you are not successful with inserting your lenses on the first
day of using your S5 Inserter™. I will work with you to find the root cause of the
challenges that you are experiencing. I will then share specific tips that will help you
overcome those challenges. We are proud of the fact that 100% of S5 Inserter™users
who have reached out to us are now able to successfully insert their lenses. I wish you
great success as you begin using your device.
Best wishes,
Dr. Fayiz Mahgoub, OD
Founder, Augmented Vision Labs, LLC
Email: support@augmentedvisionlabs.com
Cell: +1-970-402-5789
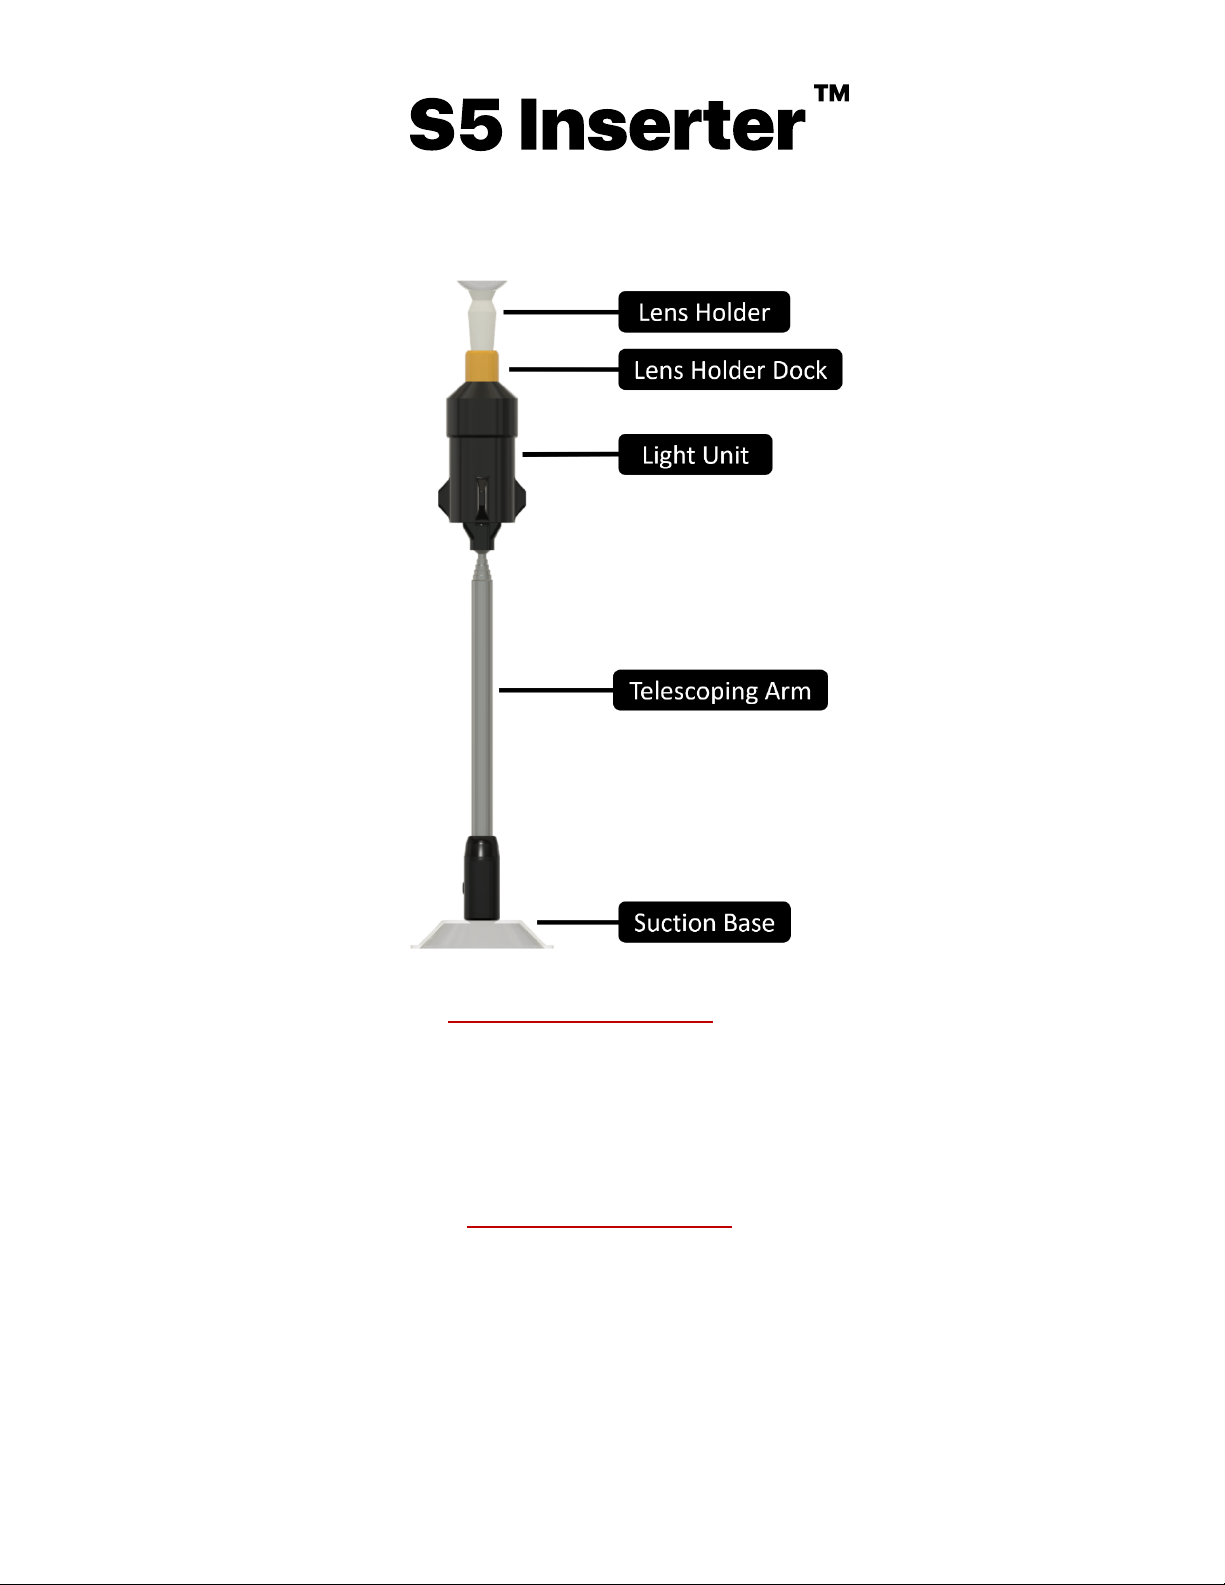
DEVICE DESCRIPTION
The S5 Inserter™was designed to make struggling with scleral and hybrid lens insertion
a thing of the past. By holding your lens in place, your device allows you to have two
hands available to hold your eyelids open. This will allow you to counter the human
blink reflex which is often triggered when the lens is on or near the eye. The LED light
will help you accurately align your eye with the center of your lens during insertion. This
will help reduce accidental spilling of the saline solution due to misalignment between
your eye and the lens. As a result, you will be able to insert your lenses in fewer
attempts, with fewer air bubbles and less frustration.

4©2023 Augmented Vision Labs, LLC
DEVICE MAINTENANCE
1. Please clean the rubber lens holder with an alcohol wipe before every use and
allow it to dry completely before placing a lens on it. The lens holder should be
replaced at least once every 3 months.
2. Immediately after inserting your lenses, please take a moment to remove any
liquid that may have spilled onto your device. Do not disconnect the light unit
from the telescoping arm until after you have dried the outside of the light unit
with a paper towel. This will help prevent water from getting into the electronic
components of your device.
3. Please make sure that the storage case for your device is completely dry before
storing the device in it. If you store containers that hold liquids (ex. contact lens
cases) in your case, please ensure that they are securely closed to prevent liquid
damage to your device.
a. We recommend cleaning the outside of your device as well as the inside of
your storage case at least once per week with alcohol wipes. After
cleaning, make sure that all parts are completely dry before storing them.
4. The bottom of the suction base should be cleaned periodically with an alcohol
wipe to ensure maximum suction.
5. Charging the light unit:
a. When you notice the light becoming dim, it’s time to charge the light unit.

5©2023 Augmented Vision Labs, LLC
i. Locate the USB port on the bottom of the light unit.
ii. Connect the female end of the provided USB extension cable to the
bottom of the light unit.
iii. Connect the male end of the cable to a desktop or laptop
computer.
b. The light unit will reach a full charge after 1 hour of being plugged in.
INSTRUCTIONS FOR USE
BEFORE LENS INSERTION
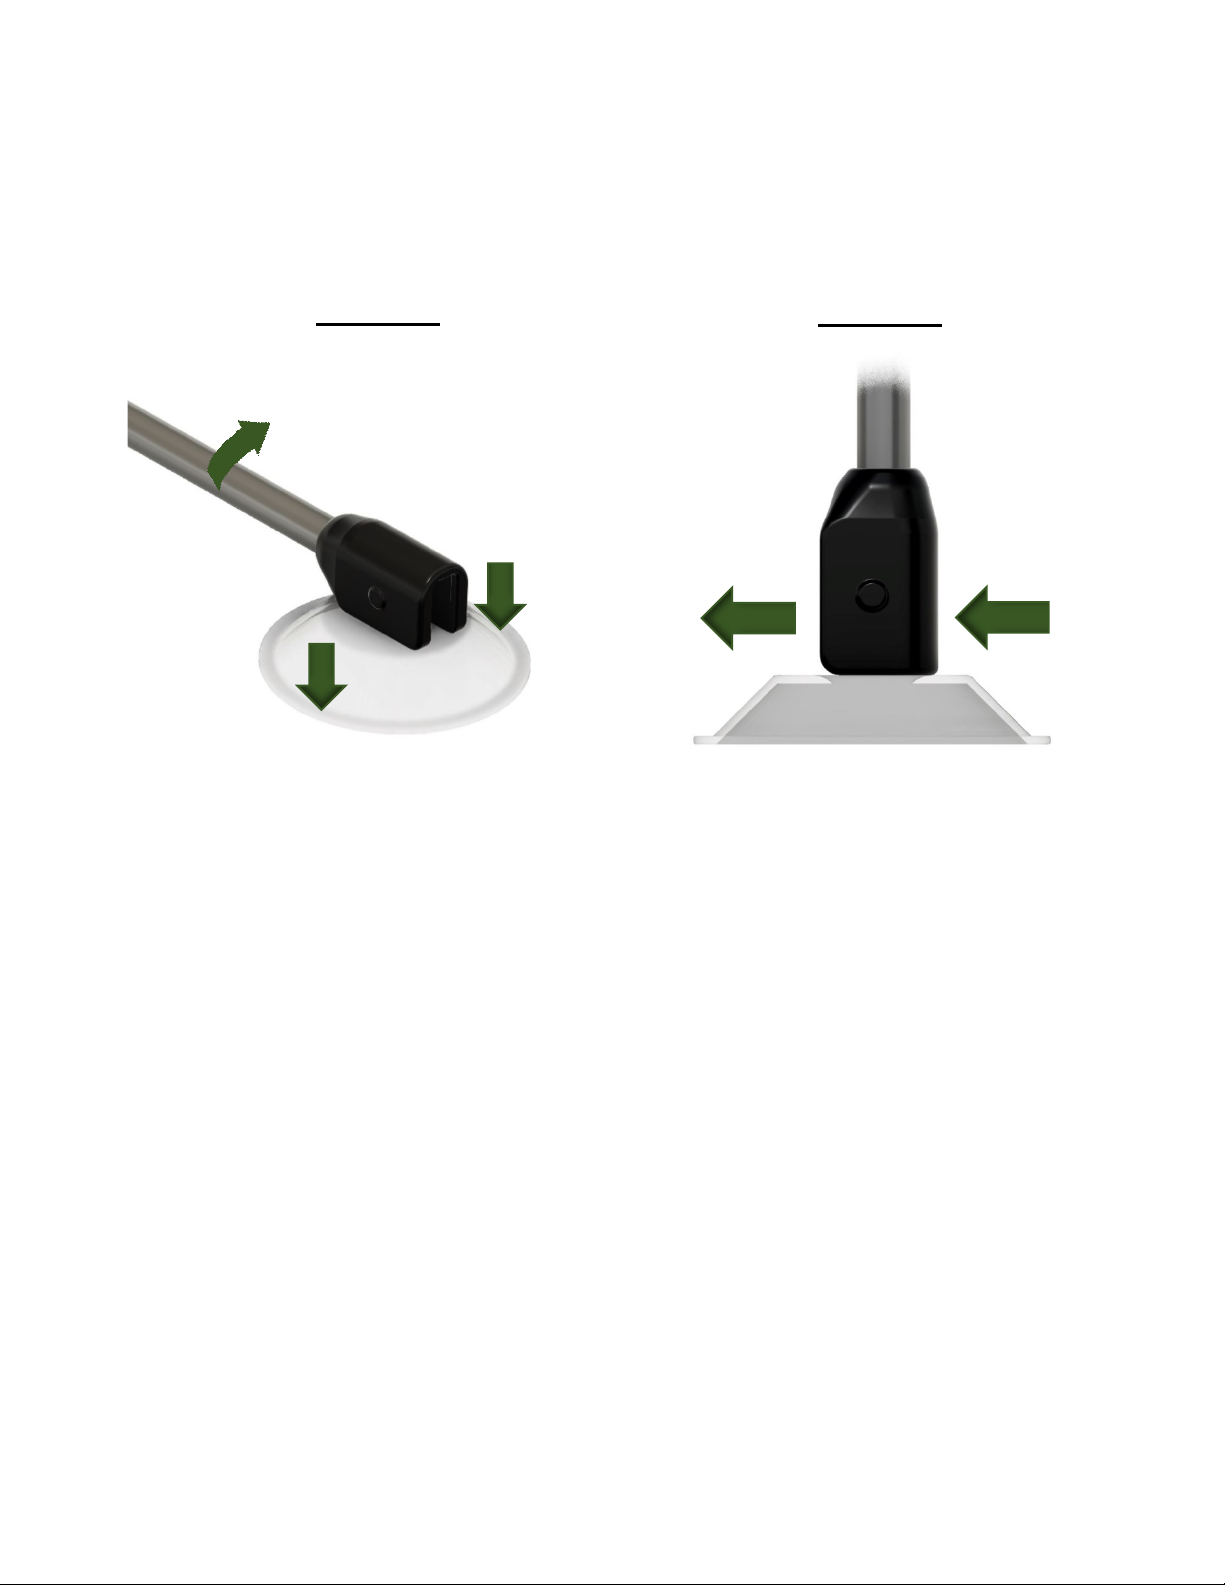
1. Place the suction base on a smooth, flat surface. Ensure that both the bottom of
the suction base and the surface are clean and dry.
2. Hold down the outer edge of the suction base while pulling metal telescoping
arm upward until it locks into place in the vertical position. This will engage the
suction of the base.
6©2023 Augmented Vision Labs, LLC
3. Once the telescoping arm is in the vertical position, slide the base of the arm
forward for increased stability (see picture below).
4. Extend the telescoping arm to the desired height.
a. We recommend that you keep the height as low as possible when you
are first learning to use the device to reduce the chance of your lens
being accidentally bumped off the lens holder and falling from a high
distance. This could cause the lens to become lost or damaged. When
you become confident in your ability to consistently insert the lens
without it falling, you can increase the height to your preferred height
for lens insertion.
5. Connect the light unit to the top of the telescoping arm.
Step 2
Step 3

7©2023 Augmented Vision Labs, LLC
6. Connect the rubber lens holder to the top of the light unit.
7. Wash your hands with a scent-free, moisturizer-free soap for 20 seconds and dry
them with a lint-free towel.
8. Clean the rubber lens holder with a disinfecting alcohol wipe.
a. Allow the lens holder to dry completely before placing your contact lens
on it.
Step 5
Step 6

8©2023 Augmented Vision Labs, LLC
9. Clean the upper segment of the light unit (the part that twists) with a disinfecting
alcohol wipe.
a. You can use the same wipe that you previously used to clean the lens
holder.
10.Twist the top half of the light unit counterclockwise to activate the light.
11. Inspect your lens to make sure it is clean and free of damage then place it on the
rubber lens holder.
a. It is recommended to rinse your lens with preservative free saline if it was
previously stored in a multi-purpose cleaning solution.
b. If your lens has a black dot that is used for positioning your lens, please
make sure that the dot is placed at the position recommended by your
doctor (example: place the black dot at the 6 o’clock position).
12. Fill the lens bowl with a preservative-free saline solution that is approved by
your doctor.
a. Add saline until the level rises above the edge of the lens.
LENS INSERTION
1. Place your head directly over the lens, making sure that your head is level with
the surface that your device was placed on. Your chin should be tucked in toward
your chest.

9©2023 Augmented Vision Labs, LLC
2. Use both hands to firmly hold your upper and lower eyelids open.
a. Tip #1: Place your fingers as close as possible to your eyelashes (without
touching your eyelashes) to get the best grip on your eyelids.
b. Tip #2: Pull your upper lid upward and pin it against your brow bone by
pressing your finger in towards your face. Pull your lower lid down and pin
it against your cheek bone by pressing your finger in towards your face.
See the picture below for an example of what this should look like.
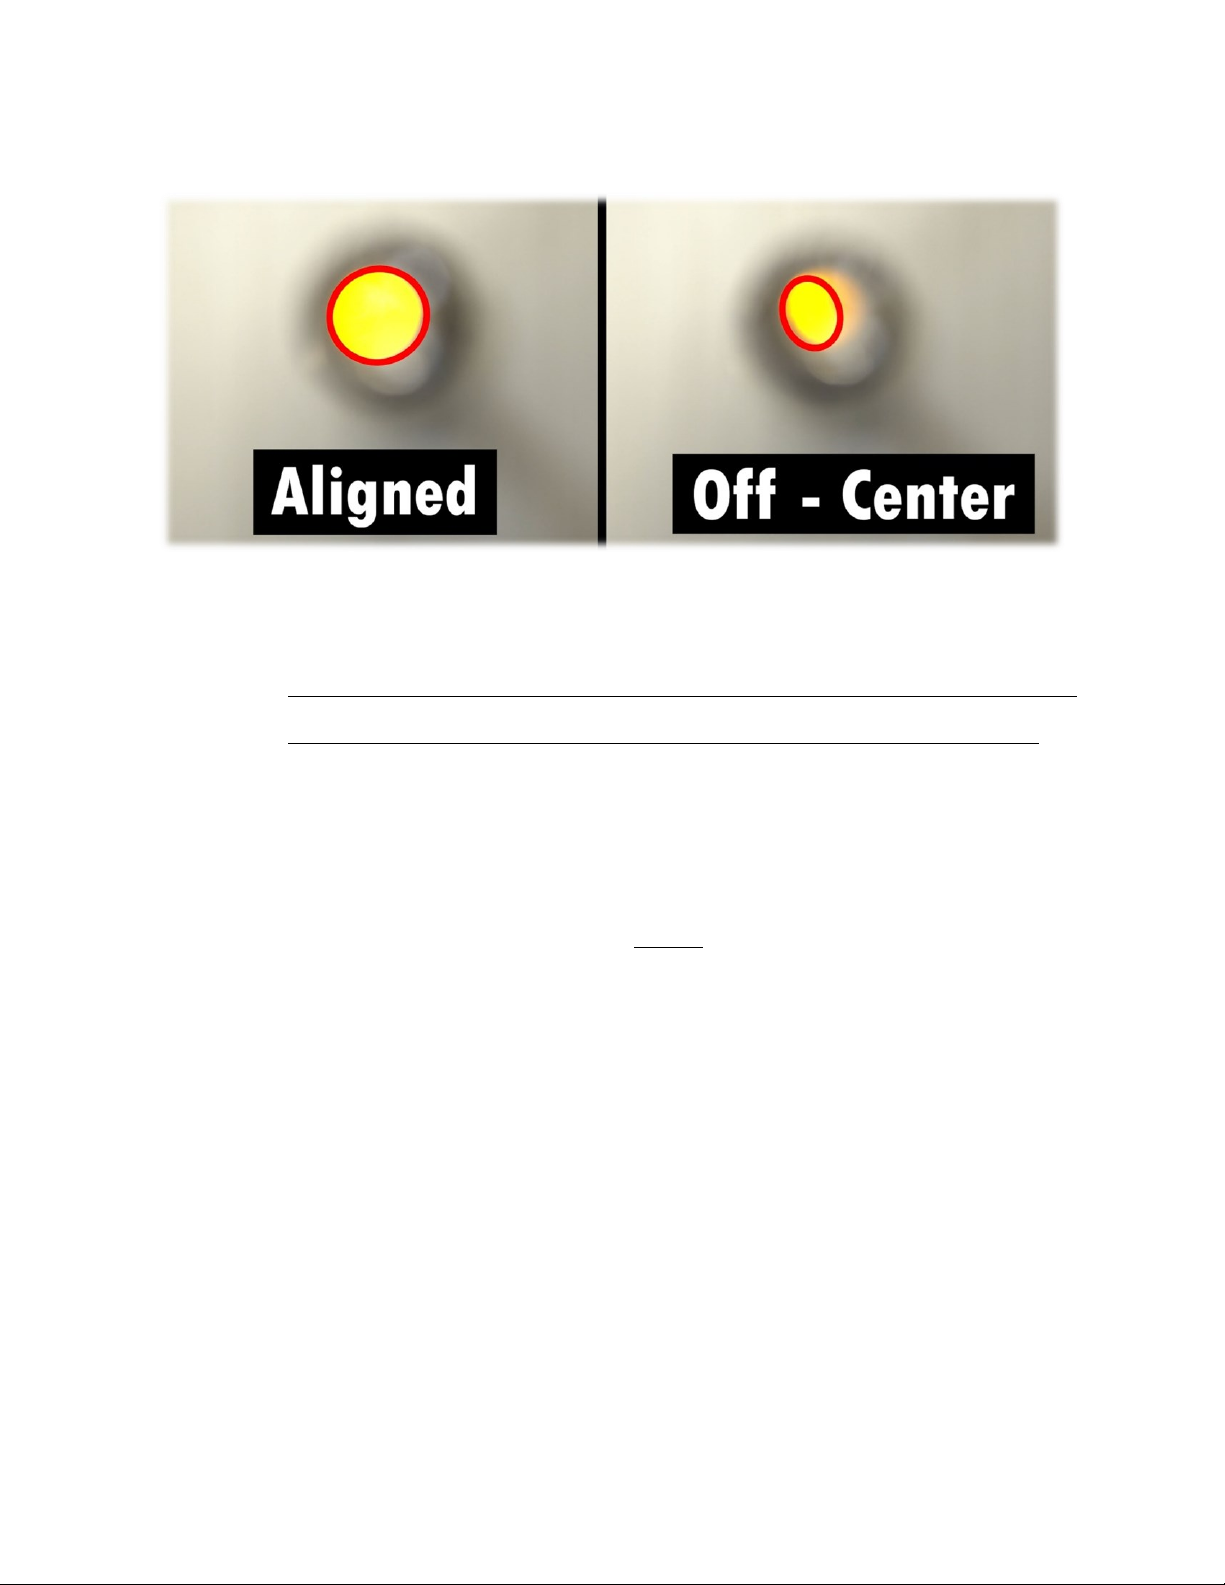
3. Keep both eyes open and slowly move your head down toward the lens until
your eye makes contact with the lens.
a. Tip #1:Focus on the light as you move closer to the lens. The light will look
perfectly round if you are lined up with the center of the lens. If the light
does not look round, you will need to adjust the position of your head
until it becomes round.
Press lower eyelid
against cheek bone.
Press upper eyelid
against brow bone.
10 ©2023 Augmented Vision Labs, LLC
b. Tip #2: The first thing you will feel is your eye touching the saline solution.
Do not slow down when you feel the saline. Keep going at the same pace
until you feel the pressure of the lens being pressed against your eye. It
is normal for saline to spill out of the lens bowl during this process.
4. Once you feel the pressure of the lens being pressed onto your eye, move your
head up and away from the device and slowly release your eyelids.
5. Twist the top half of the light unit clockwise to turn the light off.
6. For your second eye:
a. Repeat steps 10 through 12 in the “Before Lens Insertion” section to
prepare your second lens for insertion.

11 ©2023 Augmented Vision Labs, LLC
b. Repeat steps 1 through 5 in the “Lens Insertion” section to insert your
second lens.
7. After inserting your lenses, please take a moment to check for air bubbles.
a. Cover one eye at a time to see if you can notice any air bubbles in your line
of sight.
b. You can also use a mirror to inspect the lens on your eye and check for air
bubbles. Shining a flashlight on your face will help provide better lighting.
c. If air bubbles are present, you must remove the lens and re-insert it.

12 ©2023 Augmented Vision Labs, LLC
Please contact us! We will work
with you to discover the root
cause of the challenges that you
are experiencing. We will then
share personalized tips to help
you overcome those challenges.
100% of S5 Inserter users who
contacted us have learned to
insert their lenses successfully.
Congratulations! You can expect
lens insertion to get easier and
faster as you continue to practice.
Please contact us if you find that
you are no longer making
progress. We are happy to share
personalized tips that will help
you insert your lenses in less time
and with fewer attempts.
Call/Text us at: +1-970-402-5789
Email us at: support@augmentedvisionlabs.com
We are available to help you 7 days a week!
I successfully inserted
my lenses
I cannot insert
my lenses

13 ©2023 Augmented Vision Labs, LLC
AFTER LENS INSERTION
1. Remove the rubber lens holder from the light unit.
2. Keep the light unit connected to the telescoping arm and dry off the outside
of the light unit with a paper towel.
3. Disconnect the light unit from the telescoping arm.
4. Additional drying for the light unit:
a. Turn the light unit upside down to get rid of any liquid that has built up
inside the orange lens holder dock. Use a paper towel or a q-tip to soak
up any liquid remaining in the lens holder dock after draining.
b. If you see liquid on or near the USB port of the light unit, soak it up
with a paper towel or a q-tip. If there is no liquid on the USB port, then
please avoid touching it.
5. Detach the base:
a. Collapse the telescoping arm down to its shortest height.
Please carefully follow the instructions below to keep liquid away
from the electronics of your device. Following these instructions will
extend the operational life of your device.

14 ©2023 Augmented Vision Labs, LLC
b. Push the telescoping arm to the horizontal position to break the
suction of the base.
i. If the suction doesn’t release right away, it may be necessary to
use a fingernail or a plastic card to separate the edge of the base
from the surface that it is suctioned to.
6. Drying the telescoping arm and base:
a. Turn the telescoping arm upside down and shake well to remove any
liquid that is trapped between the segments.
b. Extend the telescoping arm to its full length and use a dry paper towel
to remove all remaining moisture on the telescoping arm and the
suction base.
7. Please ensure that the storage case used to store the device is completely
dry before using it to store your device. This is important for reducing the
growth of microbes in the storage case as well as reducing the chance of
moisture causing damage to the electronics of your device.
a. It is recommended that you use alcohol or another disinfecting solution
to clean the inside and outside of your storage case at least once per
week. After cleaning, make sure that the case dries completely before
using it to store your device and lens accessories.
15 ©2023 Augmented Vision Labs, LLC
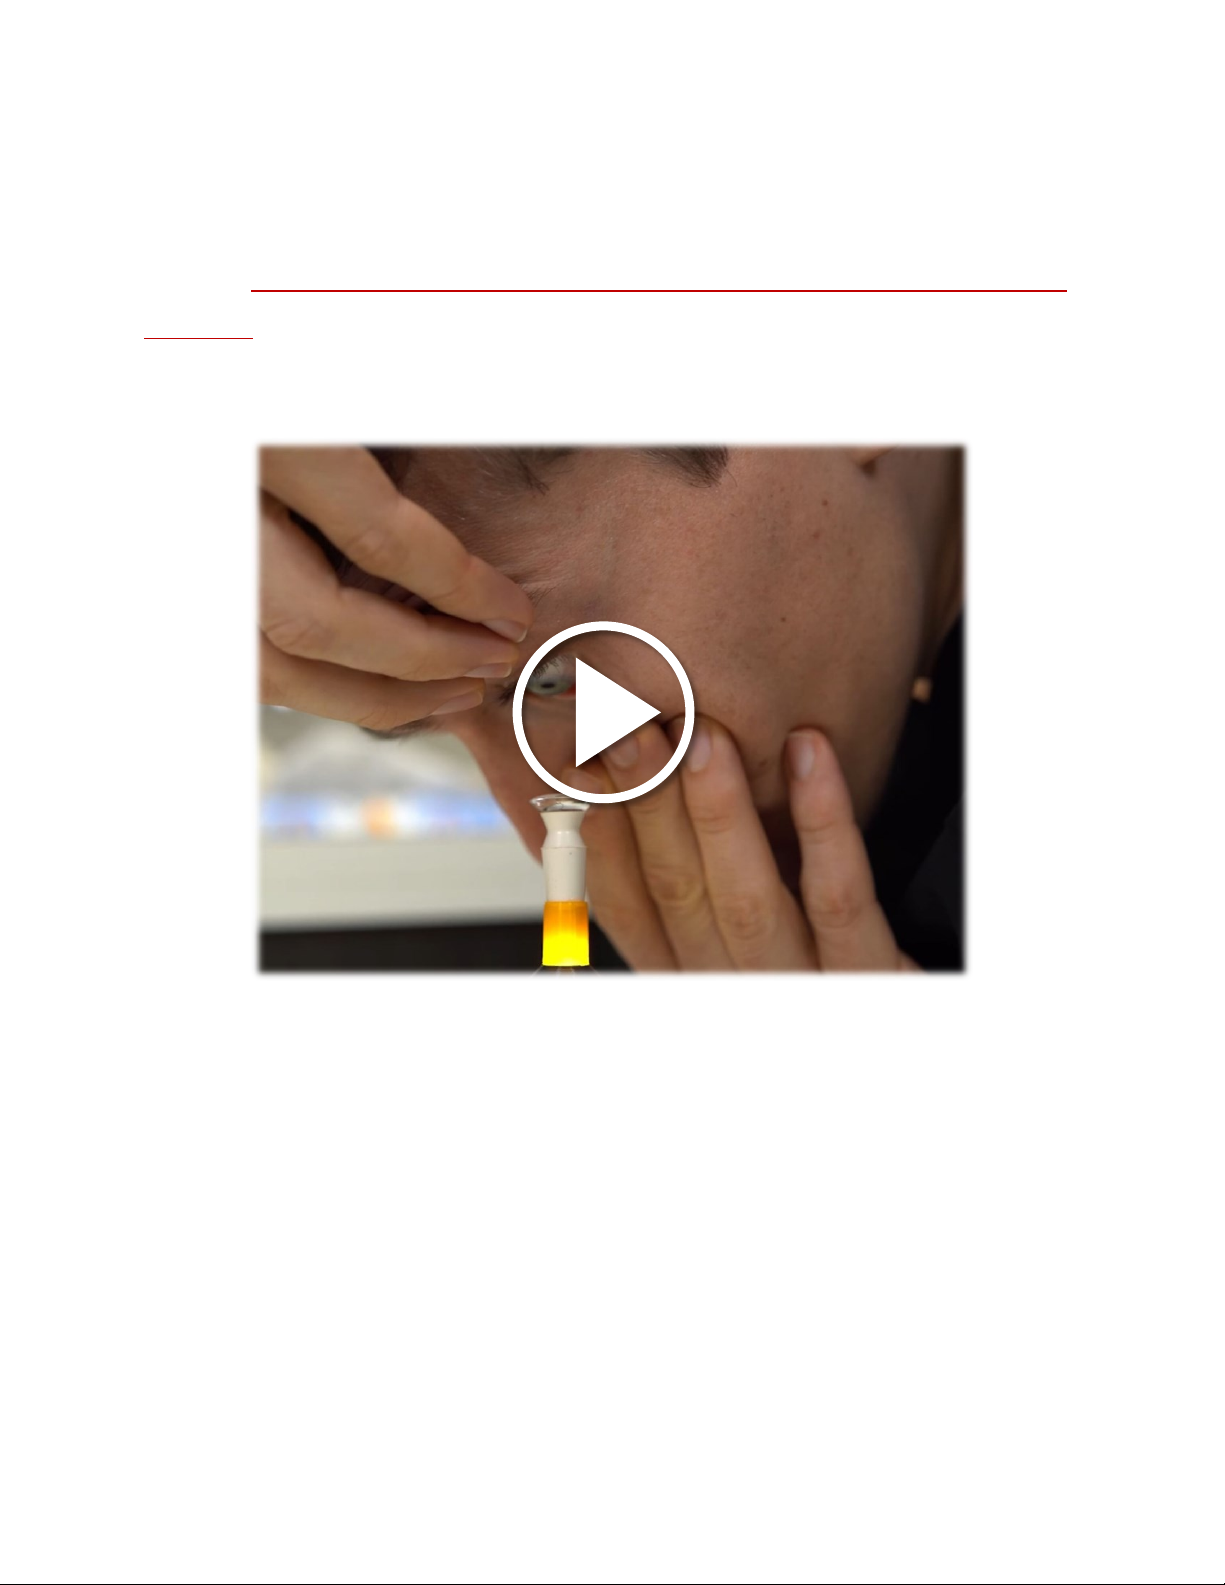
DEMONSTRATION VIDEO
We created this video to give you a visual demonstration of good techniques for lens
insertion. Please read the complete set of instructions in this manual before watching
the video. This manual contains important tips for lens insertion and device
maintenance that are not included in the video.

Other manuals for S5 Inserter
3
Table of contents
Other Augmented Vision Labs Medical Equipment manuals


