Aukey DR02 J User manual

4K Dashboard Camera
User Manual

Contents
English 01 - 08
Italiano 33 - 40
Deutsch 09 - 16
Français 17 - 24
Español 25 - 32
日本語 41 - 48

- 01 -
Thank you for purchasing the AUKEY DR02 J 4K Dashboard Camera. Please read this user
manual carefully and keep it for future reference. If you need any assistance, please
contact our support team with your product model number and Amazon order number.
Package Contents
4K Dashboard Camera
Dual-Port USB Car Charger
USB Mini-B Cable
Sticker Mount
Two 3M Stickers
Six Cable Clips
User Manual
Warranty Card
Optional Accessory: The AUKEY External GPS Antenna provides accurate position and
speed data to the DR02 J that is saved and displayed on recorded videos. This extended
information may support your case in any driving disputes or incidents.
Note: Please use a Class 10 micro SD memory card (Max 128GB) for reliable recording
and performance. Format the micro SD card before first use

- 02 -
Product Diagram
Screen
Control Buttons
LED Indicator
USB Mini-B Port
GPSInput
Mount Locking Clip
Lens
Microphone
MicroSDCardSlot
Reset Button

- 03 -
Specifications
Model
Image Sensor
CPU
Screen
Wide-Angle Lens
Material
Recording Resolutions
Image Format
Sound Recording
Gravity Sensor Sensitivity
Recording Modes
Exposure Value
Micro SD Card
Operating Temperature
Input
Size
DR02 J
AR0521
NT96660
1.5" LCD
157°
ABS, Glass
2160p (24 fps), 1440p (30 fps), 1296p (30 fps),
1080p (60 fps), 1080p (30 fps), 720p (120 fps),
720p (60 fps), 720p (30 fps), WVGA, VGA
JPEG
On / Off
Low / Medium / High
Loop, Motion Detection, Time-Lapse,
Emergency Recording
-1.0, -2/3, -1/3, +0.0, +1/3, +2/3, +1.0
128GB support (Max), Class 10
-30°C – 75°C (-22°F – 167°F)
DC 5V 1A–2A
77 x 51 x 37mm / 3" x 2" x 1.45"
LED and Screen Indicators
There are three indicators: an LED indicator that facesoutside (to let othersknow you
have acamera active), an LED indicator that faces inside, and an on-screen indicator.
The outward LED indicator can be switchedoff if you want the dashboard camerato
be even less visible to people outside. Go to Setup> Detect Led> select Off > press OK.

- 04 -
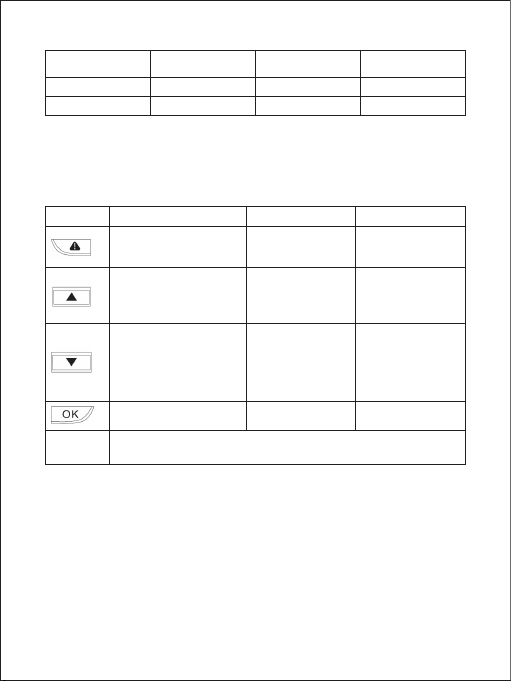
Control Buttons
Recording Mode
Enter Emergency
Recording mode
View playlist (short press)
Turn on/off Audio
Recording (long press)
Open Setup menu
(short press)
Take a snapshot
(long press)
Turn on/off the screen
Playlist & Setup Menu
Return to
previous menu
Move up
Move down
Enter/Confirm
Playback Mode
Return to
playlist / Stop
Delete/Rewind
Lock & Unlock
/ Fast-Forward
Play/Pause
Button
Reset Button Short press to restart the device (this won’t affect saved files)
Notes
●There is a short pause to save the current recording before entering the playlist or Setupmenu
●When dash camera is poweredon, press the OK button to switch off the screen (recording
continues). ‘Screen Saver’ setting can also be used to automatically switch off the screen
after 1 or 3 minutes
Note: In Motion Detection mode, only the inward LED indicator will be on in standby.
Once motion is detected, all indicators will operate the same as normal recording
Outward LED
Status Indicator
Solid Green
Flashing Green
Inward LED
Status Indicator
Solid Green
Flashing Green
Screen Indicator
Off
Flashing Red
Meaning
On; not recording
On; recording

- 05 -
Caution:
We are not responsible for any damage
caused to or by the air bag due to
incorrect placement of the device
or its cable.
Best mounting
location
Windshield
Using a Micro SD Card
The camera doesn’t include internal storage and requires a micro SD card (Class 10+
recommended and 128GB Max supported) to function. A 128GB micro SD card should
store over 10 hours of 4K recordings or 16 hours of 1080p recordings. Use a high-quality,
branded card for maximum reliability. Insert a micro SD card into the camera micro SD
card slot. Later, when the camera is powered on, format it (‘Format’ option in Dashboard
Camera ‘Setup’) to prepare the card for first use in the dash camera. Formatting will
permanently erase any data on the micro SD card. For best performance, format
periodically (after backing up any important files). ‘Format Warning’ in ‘Settings’ can be
switched on to remind you to do this.
Installation & Powering On/Off
For optimal performance, install the AUKEY DR02 J in the top-center of your windshield
facing directly ahead. Lens direction can be adjusted up and down. Use the cable clips
to help fix the power cable conveniently and safely like in the picture below.
To power on, insert the car charger into your car’s 12V socket, then connect the included
cable to the car charger and to the USB mini-B port of the DR02 J. After powering on
each time, the system will start recording automatically. To power off, disconnect the USB
mini-B cable.
Note: Use the included cable to ensure optimum performance of AUKEY DR02 J

- 06 -
Video Recording
●LoopRecording: Recording will begin automatically after powering on with amicro
SD card in the device. Each recorded file is upto ten minutes long, with old footage
being replaced when micro SD card storage is full.
●Motion Detection Recording: Switch on motion detection in ‘Setup.’ This function will
start recording video when the dash camera detectsmotion in front and stoprecording
when motion is no longer detected.
●Time-Lapse Recording: Switch on time-lapse recording in ‘Setup.’ This function will
capture a picture per secondto make a video played at the same number of frames
per second as the current recording resolution setting.
Emergency Recording
●Manual File Backup
Press to back upthe current file so that it will not be overwritten. A icon will
appear in the top left of the LCD screen to indicate a protectedemergencyrecording
is in progress.
●Auto File Backup
Once the G-sensor is activated by a sudden impact, the device will automatically
make arecording and protect it from being overwritten. Adjust G-sensor sensitivity in
the ‘Setup’ menu.
Snapshot
●Hold down for 3 seconds to take a snapshot while in recording mode
●The snapshot files are located in the \ AUKEY\PHOTO folder on the micro SD card
●The icon will be shown after you take a snapshot. This will not interrupt the video
recording
Audio Recording
Turn on/off audio recording by long-pressing when in recording mode (or by
adjusting in ‘Setup’ menu). When audio recording is on, in-car audio will be recorded
during video recording. Voicing details of possible hazards that may develop,
especially when off-camera, may provide useful information. You can even use it to
record car license plate numbers that may not be captured on the video.

USB File Transfer
1. Connect the Dash Cam (with card inside) to your computer using your own USB
mini-B data cable (the included cable is for power only). It should be recognized as a
removable device (with a USB connector image displayed on-screen)
2. Find the video recording files located in the \AUKEY\MOVIE folder (or\AUKEY\PHOTO
for snapshots)
3. Copy the files to your computer
Micro SD Card File Transfer
1. Shut down the device (by disconnecting the power cable) and eject the micro SD card.
2. Insert the micro SD card into acomputer micro SD card slot or reader and your computer
will automatically detect the micro SD card
3. Find the video recording files located in the \AUKEY\MOVIE folder (or \AUKEY\PHOTO for
snapshots)
4. Copy the files to your computer
Viewing Photos and Videos
1. Press to enter the playlist
2. View photos or videos by choosing either ‘Photo File’ or ‘Video File’
3. Select the file you want to view and press .
4. For videos, press again to begin playback
Deleting and Locking/Unlocking Photos and Videos
●Press to delete or to lock/unlock a photo or video file after selecting
it from the playlist. If a video is being played, press to stop it and then press
to delete or to lock/unlock
●Once deleted, photos and videos cannot be recovered
●If you lock a photo or video, it will be protected and not overwritten
Product Care
●Ensure camera and mount are firmly fixed in-place before use to avoid falls
●Keep away from liquids, extreme heat, and strong magnetic fields
●Avoid touching the lens surface. It may be cleaned with acotton swab or lenscleaning
paper. If any dirt is difficult to remove, anon-abrasive glasses lenscleaner may be used.
Don't use corrosive solutions
- 07 -

- 08 -
●Keep important videos and photos backedupelsewhere to protect against file
corruption or loss caused by any SD card issues
Warranty & Customer Support
For questions, support, or warranty claims, please contact us at the address below that
corresponds with your region. Please include your Amazon order number and product
model number.
*Please note, AUKEY can only provide after sales service for products purchased directly from AUKEY. If you
have purchased from a different seller, please contact them directly for service or warranty issues.

- 09 -
Vielen Dank für Ihren Kauf von AUKEY DR02 J Dashcam. Lesen Sie bitte diese Bedienungsanleitung
sorgfältig durch und bewahren Sie sie für zukünftige Referenz auf. Sollten Sie jegliche
Unterstützung brauchen, kontaktieren Sie bitte unser Support-Team mit Ihrer Produktmodell-
nummer und Amazon-Bestellnummer.
Lieferumfang
4K Dashcam
Dual-Port USB Kfz-Ladegerät
USB Mini-B Kabel
Aufkleber-Halterung
Zwei 3M Aufkleber
Sechs Kabelklemmen
Bedienungsanleitung
Garantiekarte
Optionales Zubehör: Die AUKEY Externe GPS-Antenneliefert genaue Positions- und
Geschwindigkeitsdaten für DR02 J, und die Daten wird gespeichert und auf aufgezeichneten
Videos angezeigt. Diese erweiterten Informationen können Ihren Fall bei allen Streitigkeiten
oder Zwischenfällen unterstützen.
Hinweis:Verwenden Sie bitte eine Class 10+ microSD-Speicherkarte (max. 128G) für
zuverlässige Aufnahme und Leistung. Formatieren Sie die MicroSD-Karte vor dem
ersten Gebrauch

- 10 -
Produkt-Diagramm
Display
Steuertasten
LED-Anzeige
USB Mini-B Port
GPS-Eingang
Befestigungsclip
Objektiv
Mikrofon
MicroSD-Karte-Slot
Zurücksetzen-Taste

- 11 -
Spezifikationen
Modell
Bildsensor
CPU
Display
Weitwinkel-Objektiv
Material
Aufnahme-Auflösungen
Bildformat
Sound-Aufnahme
Sensitivität des G-Sensors
Aufnahmemodi
Belichtungswert
MicroSD-Karte
Betriebstemperatur
Eingang
Abmessungen
DR02 J
AR0521
NT96660
1,5" LCD
157°
ABS, Glas
2160p (24 fps), 1440p (30 fps), 1296p (30 fps),
1080p (60 fps), 1080p (30 fps), 720p (120 fps),
720p (60 fps), 720p (30 fps), WVGA, VGA
JPEG
Ein / Aus
Niedrig / Mittel / Höhe
Loop, Bewegungserkennung,
Zeitraffer, Notaufnahme
-1,0, -2/3, -1/3, +0,0, +1/3, +2/3, +1,0
128GB unterstützt (Max). Class 10
-30°C–75°C (-22°F–167°F)
DC 5V 1A–2A
77 x 51 x 37mm / 3" x 2" x 1,45"
LED- und Screen-Anzeigen
Es gibt drei Anzeigen: eine LED-Anzeige, die nach außen zeigt (um andere wissen zu lassen,
dass eine Kamera aktiv ist), eine LED-Anzeige, die nach innen zeigt, undeine On-Screen-
Anzeige. Die LED-Anzeige nach außen kann ausgeschaltet werden, wenn Sie möchten,
dass die Dashcam für Außenstehende noch weniger sichtbar ist. Im Setup> Detect Led>
wählen Sie Aus > drücken Sie OK.
- 12 -
Steuertasten
Aufnahmemodus
In den Notaufnahme
-Modus gehen
Playlist ansehen(kurz drücken)
Audio-Aufnahme ein/
ausschalten (lang drücken)
Setup-Menü öffnen
(kurz drücken)
Snapshot erstellen
lang drücken)
Display ein/ausschalten
Playlist & Setup-Menü
Zurück zum
vorherigen Menü
Nach oben
Nach unten
Enter/Bestätigen
Wiedergabe-Modus
Zurück zum
Playlist / Stop
Löschen/Rücklauf
Sperren & Entsperren
/ Schnell-Vorlauf
Play/Pause
Taste
Zurücksetzen
-Taste
Drücken diese Taste kurz, um das Gerät zurückzusetzen (Dies hat keine
Auswirkungen auf gespeicherte Dateien)
Hinweise
●Bevor zum Playlist oder Einstellungsmenü eintreten, gibt eseine kurze Pause, um aktuelle
Aufnahme zu speichern
●Wenn die Dashcam eingeschaltet ist, drücken Sie die OK-Taste, um den Bildschirm
auszuschalten (Aufnahme wird fortgesetzt). Die Einstellung von “Screen Saver” kann
auch verwendet werden, um den Bildschirm nach 1oder 3Minuten automatisch
auszuschalten
Hinweis: Im Bewegungserkennung-Modus ist nur die inner LED im Standby. Sobald die
Bewegung erkannt wird, funktionieren alle Indikatoren wie die normale Aufnahme
Äußere LED-
Statusanzeige
Stetig grün
Grün blinkt
Innere LED-
Statusanzeige
Stetig grün
Grün blinkt
Screen-Anzeige
Aus
Rot blinkt
Bedeutung
An ; nicht aufnehmen
An ; aufnehmen

- 13 -
Benutzung der microSD-Karte
Die Kameraerhält keinen internen Speicher underfordert eine microSD-Karte (Class 10+ wird
empfohlen, und bis zu max. 128GB unterstützt)zum Funktionieren. Eine 128GB microSD-Karte
kann 5 Stunden für 4K Aufnahmen oder 16 Stunden für 1080p Aufnahmen speichern.
Verwenden Sie bitte eine hochwertige undMarken-Karte für maximale Zuverlässigkeit.
Stecken Sie die microSD-Karte in den microSD-Karte-Slot von Frontkameraein. Als die Kamera
eingeschaltet wird, formatieren Sie die Karte (“Format” Option in “Einstellungen” der Dashcam)
um die Karte für den ersten Gebrauch in der Dashcam vorzubereiten. Die Formatierung
löscht permanent alle Daten auf der microSD-Karte. Für die beste Leistung formatieren
Sie bitte regelmäßig die Karte (nachdem Sie alle wichtige Dateien sichern). “Format-Warnung”
in “Einstellungen” wird Sie erinnern, um dies zu tun.
Installation & Ein/Ausschalten
Für optimale Leistung, installieren Sie die AUKEY DR02 J an der oberen Mitte der Windschutzscheibe.
Die Richtung des Objektivs kann nach oben undunten angepasst werden. Befestigen Sie
das Netzkabel mithilfe von Kabelklemmen bequem und sicher, wie in der folgenden Abbildung.
Achtung:
Wir übernehmen keine Haftung für
Schäden, die aufgrund von dem
Airbag oder von falscher Platzierung
des Geräts oder dessen Kabel
Beste
Montagelage
auf
Windschutzscheibe
Windschutzscheibe
Verbindung
zum KFZ-Ladegerät
Zum Einschalten, stecken das Kfz-Ladegerät in die 12V-Buchse IhresFahrzeugsein, dann
schließen das mitgelieferte Kabel an das Kfz-Ladegerät und den USB Mini-B Port von
DR02 J an.
Nach jedem Einschalten wird das System
sich die Aufnahme automatisch starten.
Zum Ausschalten, trennen Sie das USB Mini-B Kabel
Hinweis: Verwenden Sie bitte das mitgelieferte Kabel, um die Leistung der AUKEY DR02 J
zu gewährleisten

- 14 -
Video aufnehmen
●Loop-Aufnahme: Die Aufnahme wird sich nach dem Einschalten mit einer
microSD-Karte im Gerät automatisch starten. Jede Aufnahmedaten ist bis zu zehn
Minuten lang, alte Aufnahme wird ersetzt, wenn der microSD-Kartenspeicher voll ist
●Bewegungserkennung-Aufnahme: Schalten die Bewegungserkennung in “Setup”
ein. Die Kamera wird die Video-Aufnahme starten, wenn die Dashcam die Bewegung
in der Front detektiert, und die Aufnahme wird stoppen, wenn keine Bewegung mehr
detektiert wird
●Zeitraffer-Aufnahme: Schalten die Zeitraffer-Aufnahme in “Setup” ein. Die Kamera
wird ein Bild per Sekunde erfassen, um ein Video bei die gleiche Anzahl von Bildern
pro Sekunde wie die aktuelle Einstellung für die Auflösungsauflösung abzuspielen
Notaufnahme
●Daten manuell Backup
Drücken , um die aktuelle Daten zu backup, sodass esnicht überschrieben wird.
Das Symbol wird auf der oberen linken Ecke des LCD-Displays erscheinen, um
anzuzeigen, dass eine geschützte Notfall-Aufnahme ausgeführt wird.
●Daten Auto-Backup
Sobald der G-Sensor durch einen plötzlichen Stoß aktiviert wird, wird das Gerät die Aufnahme
automatisch starten und vor Überschreiben schützen. Stellen die Sensitivität des
G-Sensors im “Setup” Menü ein.
Snapshot
●Halten für 3 Sekunden lang gedrückt, um ein Snaphot beim Aufnahmemodus
zu erstellen
●Die Snapshot-Daten befinden sich im Ordner \AUKEY\PHOTO auf der microSD-Karte
●Das Symbol wird erscheinen, nachdem Sie ein Snapshot erstellen. Es wird die
Videoaufnahme nicht unterbrechen
Audio aufnehmen
Halten beim Aufnahmemodus (oder bei der Einstellung im “Setup” Menü) gedrückt, um
die Audio-Aufnahme ein/auszuschalten. Wenn die Audio-Aufnahme eingeschaltet ist,
wird die In-Car-Audio während der Video-Aufnahme aufgenommen. Ton-Details der möglichen
Gefahren, die Ihnen helfen könnten, vor allem beim Ausschalten der Kamera, es könnte
nützliche Informationen versorgen. Sie können sogar mit dem das Auto-Nummernschild
aufzeichnen, das möglicherweise nicht im Video aufgenommen werden kann.

USB-Dateiübertragung
1.
Verbinden Sie die Dashcam (mit Karte innen)mit Ihrem Computer durch Ihren eigenen
USB-Mini-B Datenkabel (das mitgelieferte Kabel ist nur für Stromversorgung). Es wird als
ein abnehmbares Gerät erkannt (mit einem USB-Anschlussbild auf dem Bildschirm angezeigt)
2. Finden die Videoaufnahme-Daten, die befinden sich im Ordner \AUKEY\MOVIE
(oder \ AUKEY\PHOTO für Snapshots)
3. Kopieren die Daten auf Ihren Computer
Daten aus MicroSD-Karte übertragen
1. Schalten das Gerät(das Stromkabel trennen) aus und entnehmen die microSD-Karte
2. Stecken die microSD-Karte in einen Computer-microSD-Karte-Slot oder Leser, und Ihr
Computer wird die microSD-Karte automatisch erkennen
3. Finden die Videoaufnahme-Daten, die befinden sich im Ordner \AUKEY\MOVIE
(oder \AUKEY\PHOTO für Snapshots)
4. Kopieren die Daten auf Ihren Computer
Photos und Video ansehen
1. Drücken , um in das Playlist zu gehen.
2. Photosoder Videos durch das Auswählen von “Photo File” oder “Video File” ansehen
3. Wählen eine File aus, die Sie ansehen möchten und drücken
4. Für Videos, drücken nochmal zum Starten der Wiedergabe
Photos und Videos löschen und sperren/entsperren
●Nach der Auswahl im Playlist, drücken zum Löschen oder zum Sperren
/Entsperren den Photo-oder Video-Daten. Wenn eine Video abgespielt wird, drücken
zum Aufhören, und dann drücken zum Löschen oder zum Sperren
/ Entsperren
●Sobald gelöscht, können Fotos und Videos nicht wiederhergestellt werden
●Wenn Sie ein Photo oder Video sperren, wird es geschützt und nicht überschrieben
- 15 -

- 16 -
Produktpflege
●Stellen Sie vor der Verwendung sicher, dass die Kameraund Halterung im Ort fest
montiert sind, um das Ausfallen zu vermeiden
●Halten von Flüssigkeiten, extremer Hitze, und starken magnetischen Feldern fern
●Berühren Sie nicht die Oberfläche des Objektivs. Es kann mit Wattestäbchen oder
Objektiv-Reinigungspapier reinigt werden. Wenn der Schmutz nur schwer zu entfernen ist,
kann ein abriebfester Gläser-Objektivreiniger verwendet werden. Verwenden Sie
keine ätzenden Lösungen
●Sichern Sie wichtige VideosundFotos an einem anderen Ort, um sie vor Beschädigung
oder Verlust von Dateien zu schützen, die durch Probleme mit der SD-Karte verursacht werden
Garantie & Kundenservice
Bei Fragen, Problemen oder Garantieansprüchen kontaktieren Sie uns bitte unter der
jeweiligen Adresse, die Ihrer Region entspricht. Bitte geben Sie Ihre Amazon-Bestellnum-
mer und die Produktmodellnummer an.
Bestellungen über Amazon Europa: support.eu@aukey.com
* Wichtiger Hinweis: AUKEY bietet nur für die Produkte einen Kundenservice an, die direkt bei AUKEY erworben
wurden. Sollten Sie Ihr Produkt bei einem anderen Händler gekauft haben, kontaktieren Sie bitte dessen
Kundendienst bezüglich Fragen oder Garantieansprüchen.

- 17 -
Merci d’avoir acheté AUKEY DR02 J Caméra de Voiture. Veuillez lire attentivement ce mode
d’emplois et le conserver pour référence future. Si vous avez besoin des aides, veuillez
contacter notre équipe de service client avec le numéro du modèle et votre numéro
de commande Amazon.
Contenu de l’Emballage
4K Caméra de Voiture
Chargeur de Voiture avec Double Port USB
Mini Câble USB
Support Autocollant
Deux Autocollants 3M
Six Clips de Câble
Mode d’Emploi
Carte de Garantie
Accessoire Optionnel: AUKEY Antenne Externe GPS fournit la position précise et des données de
vitesse aux vidéos enregistrées par DR02 J. Cette information étendue peut soutenir votre cas
dans tous les conflits de conduite ou incidents.
Remarque:Utilisez une carte mémoire micro SD de classe 10 (Max 128 GB) pour un enregistrement
et des performances fiables. Formatez la carte micro SD avant la première utilisation

- 18 -
Diagramme du Produit
Écran
Boutons de Contrôle
Indicateur LED
Port USB Mini-B
Entrée GPS
Clip de verrouillage Mont
Lentille
Microphone
Fente de Carte MicroSD
Bouton de Réinitialisation
Table of contents
Languages:
Other Aukey Dashcam manuals


