manuals.online logo
Brands
  1. Home
  2. •
  3. Brands
  4. •
  5. Auralex Acoustics
  6. •
  7. Indoor Furnishing
  8. •
  9. Auralex Acoustics Modular Acoustical Environment MAX-Wall User manual

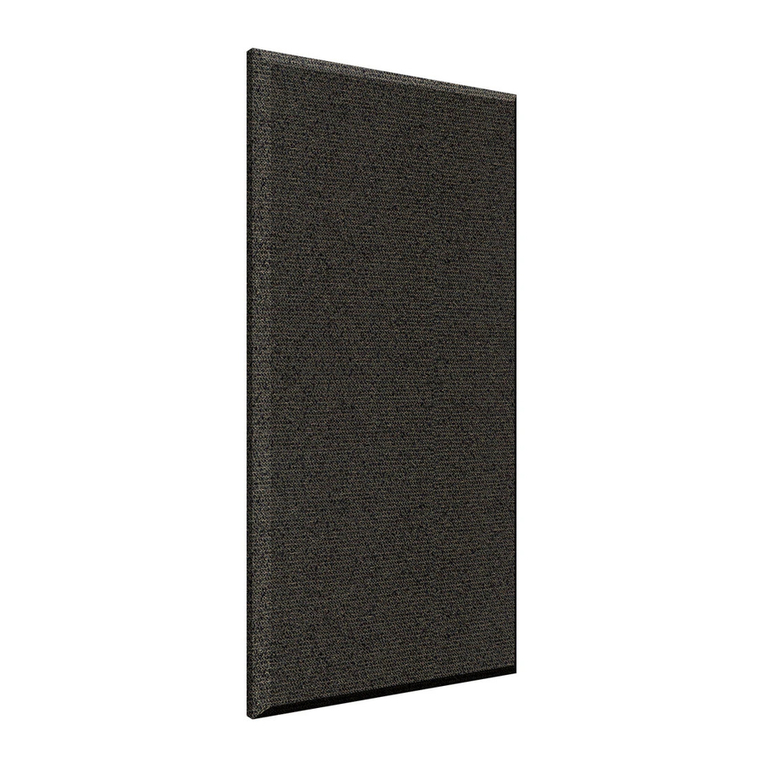
Auralex Acoustics Modular Acoustical Environment MAX-Wall User manual

Congratulations! You now have a higher quality recording and listening environment.
Thank you for purchasing the Auralex Acoustics MAX-Wall™ Modular Acoustical Environment
Clutch
Position A
Position B
Second. Decide how you want it setup, then follow these
easy steps:
1. Setup the MAX-Wall stand to the desired height. Fully
extended if the top panel is to
be above 5’4”.
2. Remove the foam core from
the hole in the center of each
MAX-Wall panel (photo A).
3. Insert stand into hole in
MAX-Wall panel and push down to
desired height. Use the MAX-Wall
SuperGRIP Spring clamps to secure
the bottom panel (photo B). Con-
tinue adding MAX-Wall panels until
the desired height is achieved.
4. If the desired height is above the clutch, place a
SuperGRIP spring clamp on the smaller part of the
stand using position “b”. If the panels are below the
clutch, then friction will likely hold the panels in posi-
tion. We suggest you place the clamp underneath the
panel (position “a”) to insure no slipping or sagging
over time.
Thank you for purchasing your MAX-Wall™ Modular Acoustical Environment. This modular,
absorptive, expandable acoustical kit is ideal for situations where you cannot permanently place
Studiofoam™ on your room surfaces. It’s also great when you need to be able to quickly and
easily change your recording/listening environment for a variety of situations. The MAX-Wall offers
you a great deal of exibility, is easy to setup, and can be easily expanded. Be sure to check out
the complete line of Auralex products such as Stand-Mounted LENRD bass traps, our complete
line of Studiofoam and family of diffusors, as well as all of our construction-related materials @
www.auralex.com.
Thank you for buying a product that is revolutionizing acoustical treatment in studios across the country!
4'
7' 8"
1'8"
3'4"
figure 1
3 panels = 5'
The MAX-Wall Instruction Sheet
First. Decide how you want to layout your new MAX-Wall:
(Keep in mind that there is no specific top, bottom, left or right sides to
these panels. They can be setup any way you choose. Make sure the
wedged surface faces the source of the
sound to be absorbed.)
1. What Width - Number of panels (see figure 1).
a. 1 single panel = 4’
b. 2 interlocked panels = 7’8”
c. 3 interlocked panels = 11’4” (not pictured)
2. How Tall - Number of panels (see figure 1).
a. 1 single panel = 20” (1’8”)
b. 2 stacked panels = 40” (3’4”)
c. 3 stacked panels = 60” (5’) (not pictured)
3. Starting height from the floor?
A
B
Serving Suggestions:
Stand-mounted
LENRD™
Third. Locking panels together:
The ends of each panel are designed to “peel”
away (see figure 2), allowing the panels to be
locked together. This creates a continuous
acoustical wall. Panels can then be hinged
up to 60°. When removing these pieces, we
suggest labeling both the panel and the end
cap in a location that will be concealed once
connected. This will allow you to replace the
end caps without them being mismatched.
Our cutting tolerance can vary slightly; end
caps that are mismatched with panels may
not exactly match, and thus may not be a perfect t (too
loose). Decide which set of panels are to be interconnected
and remove the adjacent end pieces. Must be male to female
for this to work. If you need to, just ip the MAX-Wall panel
over so the panels
correctly connect
male to female
(figure 3).
If ends of panels
are adjacent, but
hinged greater
than 60° (actually
120° for you math-
ematicians), leave the end caps on and connect the panels
together with long pins (clothing, t-pins, etc.) or purchase
our optional MAX-Wall Corner Couplers. If the ends of the
panels are at the end of your setup, we suggest leaving them
on for appearance reasons!
Optional Accessories:
1. Window Unit: 20” x 48” MAX-Wall panel with an 18”
x 12” Plexiglass window (” thick). The MAX-Wall
support stand can be adjusted so you can attach a
microphone gooseneck (as pictured).
2. MAX-Wall Corner Couplers
Designed to allow panels to
be attached at a 90° (80° to
100°) angle.
MAX-Wall Tips:
End Cap
Serving Suggestions:
Figure 2
1. Some panels may show a slight
variation in color/shade. This is due to the
direction of the cut from our production saw.
Pull all of the panels out of the box(es) and
mix/match the best combinations. We suggest
the closest matches be used on the same stand
for color consistency.
2. If you need to extend the height of the MAX-Wall
beyond the capabilities of the MAX-Wall support
stand, 5/8” PVC pipe can be placed over the smaller
diameter top of the stand and cut to a height to sup-
port panels above normal height.
3. A more “curved” environment (figure 4). If you desire
the MAX-Wall to “surround” you beyond the normal
hinging of the panels, you can “fracture” the hole
lock in the center of the panel, creating a 45° with
an individual panel. Be aware that the hole lock
can be restored, but may not
be as strong or attractive
as before. The “frac-
tured” panels are
best used when the
ends are interlocked
with other panels to
prevent sagging.
4. Keep the shipping
box(es) for storage if
the MAX-Wall will be
moved around or used intermittently.
Figure 4
Male Female
Figure 3
LENRD™ Bass Trap
• An Auralex exclusive!
• Signicantly reduces
problematic low-end
bass nodes
• Extremely effective when
placed in vertical corners or at
wall/ceiling junctions
• A fast and inexpensive way to minimize bass
build-up and modal distortion
• Mr. Physics says “A must for every studio!”
VENUS™ Bass Trap
• The king of bass traps!
• Perfect for larger spaces such as gyms,
churches, or studios that need “mega” low
frequency absorption!
• Like the
LENRD, it
too is
extremely
effective
when
placed in
vertical
corners
or at
wall/ceiling
junctions.
2” Studiofoam™ Pyramids
• Seamless installation and a high-
tech appearance!
• Great for applications where
panels need to be cut to t specic
spaces.
4” Studiofoam™ Pyramids
• Seamless installation like
2” Pyramids.
• Great look when combined with
2” Pyramids, T-Fusors™, or
MiniFusors™.
Stand-Mounted LENRD™
• Our incredibly popular LENRD in a 4’ stand-
mounted version!
• Terric when used in conjunction with our
MAX-Wall™ system. (see back page)
• Great for applications where permanent
installation is not possible.
• Easy mobility allows you to “tune”
the room for different uses.
Auralex Family of Diffusion
• 3 styles and levels of performance.
• “Shatters” sound waves to prevent harsh reections.
• Creates “warmth” and a 3D sense of openness.
• T-Fusor™ offers world-class diffusion that is affordable,
with unmatched performance at any price.
1” Studiofoam™
Wedges
3” Studiofoam™
Wedges
4” Studiofoam™
Wedges
Auralex Metro™ Family
• A great look preferred by architects,
schools, and churches.
•Consistent, high-tech prole
for acoustic panels,
diffusors, and bass
traps!
2” Studiofoam™
Wedges
• They’re the
workhorse of the
industry & the most
popular method to
eliminate annoying
standing waves for
truer sound.
• Studiofoam controls
unwanted utter
echoes &
reverberation
up to 60% better than
other brands!
• Essential for accurate
monitoring &
recording.
• Industry-leading
design, exibility &
appearance
• Superior longevity -
doesn’t crumble!
www.auralex.com

This manual suits for next models

1

Other Auralex Acoustics Indoor Furnishing manuals

Auralex Acoustics Roominators Designer Series Instruction Manual

Auralex Acoustics

Auralex Acoustics Roominators Designer Series Instruction Manual

Auralex Acoustics Roominators-DST Kit D36 Instruction Manual

Auralex Acoustics

Auralex Acoustics Roominators-DST Kit D36 Instruction Manual

Auralex Acoustics AudioTile ShockWave Instruction sheet

Auralex Acoustics

Auralex Acoustics AudioTile ShockWave Instruction sheet

Auralex Acoustics SonoFlat System SFS-112 Instruction sheet

Auralex Acoustics

Auralex Acoustics SonoFlat System SFS-112 Instruction sheet

Auralex Acoustics Roominator D240xi-DST Instruction Manual

Auralex Acoustics

Auralex Acoustics Roominator D240xi-DST Instruction Manual

Auralex Acoustics Elite Pro Systems EPS-168T Instruction sheet

Auralex Acoustics

Auralex Acoustics Elite Pro Systems EPS-168T Instruction sheet

Auralex Acoustics H8SSL-i Instruction sheet

Auralex Acoustics

Auralex Acoustics H8SSL-i Instruction sheet

Auralex Acoustics Auralex PlatFoam none Instruction Manual

Auralex Acoustics

Auralex Acoustics Auralex PlatFoam none Instruction Manual

Auralex Acoustics Multi-Room Audio System D108L Instruction Manual

Auralex Acoustics

Auralex Acoustics Multi-Room Audio System D108L Instruction Manual

Auralex Acoustics Elite Pro System EPS-112T Instruction sheet

Auralex Acoustics

Auralex Acoustics Elite Pro System EPS-112T Instruction sheet

Auralex Acoustics ELiTE ProPanel Panels User manual

Auralex Acoustics

Auralex Acoustics ELiTE ProPanel Panels User manual

Auralex Acoustics Roominators Performance Series Instruction Manual

Auralex Acoustics

Auralex Acoustics Roominators Performance Series Instruction Manual

Auralex Acoustics SonoFlat System SFS-184 Instruction sheet

Auralex Acoustics

Auralex Acoustics SonoFlat System SFS-184 Instruction sheet

Popular Indoor Furnishing manuals by other brands

Micasa INSIDER 4017.434 Instructions of installation

Micasa

Micasa INSIDER 4017.434 Instructions of installation

Next 688548 Assembly instructions

Next

Next 688548 Assembly instructions

World Market Caspian 608271 Assembly instructions

World Market

World Market Caspian 608271 Assembly instructions

BDI Corridor 8172 instruction manual

BDI

BDI Corridor 8172 instruction manual

Coaster 130078 Assembly instructions

Coaster

Coaster 130078 Assembly instructions

JWA ALCOY 68425 Assembly instruction

JWA

JWA ALCOY 68425 Assembly instruction

Whittier Wood 7137GDRC Assembly instructions

Whittier Wood

Whittier Wood 7137GDRC Assembly instructions

Whitewood Furniture S-132SW Assembly instructions

Whitewood Furniture

Whitewood Furniture S-132SW Assembly instructions

Monarch I 2103 Assembly instructions

Monarch

Monarch I 2103 Assembly instructions

Emmezeta ALICANTE ATCK01 Assembling instructions

Emmezeta

Emmezeta ALICANTE ATCK01 Assembling instructions

Emmezeta TORINO BOOKCASE 6 CUBES Assembling instructions

Emmezeta

Emmezeta TORINO BOOKCASE 6 CUBES Assembling instructions

Republic Design House Kahuna Assembly instructions

Republic Design House

Republic Design House Kahuna Assembly instructions

PawHut D06-111 Assembly & instruction manual

PawHut

PawHut D06-111 Assembly & instruction manual

IKEA NEBODA 3 DRAWER CHEST 32X39" instructions

IKEA

IKEA NEBODA 3 DRAWER CHEST 32X39" instructions

Grand River SW-B12 Assembly instructions

Grand River

Grand River SW-B12 Assembly instructions

Allseating THERAPOD Disassembly instructions

Allseating

Allseating THERAPOD Disassembly instructions

VEVOR T10570 user manual

VEVOR

VEVOR T10570 user manual

Home Decorators Collection ATAVT6122 Use and care guide

Home Decorators Collection

Home Decorators Collection ATAVT6122 Use and care guide

manuals.online logo
manuals.online logoBrands
  • About & Mission
  • Contact us
  • Privacy Policy
  • Terms and Conditions

Copyright 2025 Manuals.Online. All Rights Reserved.