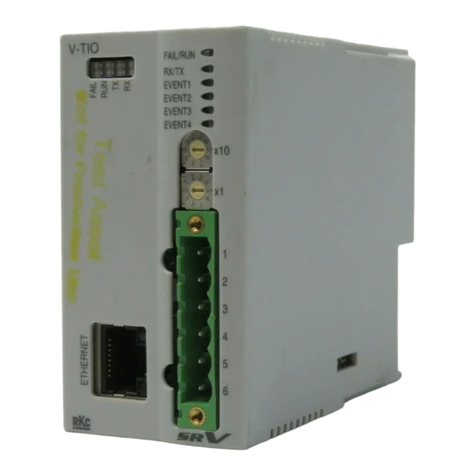
AURATON 200 RT User manual

OWNER’S MANUAL
EN
www.auraton.pl
200 RT

2
Thank you for purchasing the modern temperature controller based on an advanced
microprocessor:
Operaon under the load of up to 16A/10A
The AURATON RT receiver is equipped with a relay capable of operang with the
load of up to 16A/10A. Its low-sparking technique of switching mains voltage
contributes to the low wear of relay contacts.
AURATON H-1
Window handle (sold separately)
AURATON T-2
Thermometer (sold separately)
AURATON 200 RT
Opcjonalne elementy systemu
16A
A window handle, equipped with a posion sensor and a transmier, is an oponal
element of the system. This way the handle provides informaon about the state of the
window. The handle also dierenates between 4 widow posions: opened, closed,
pivoted and trickle venlated (micro-venlaon). The handle transmits informaon to the
RT receiver that controls the relay, e.g. switching o a heater in the event of opening the
window or lowering the temperature down to 3°C to conserve energy. One RT receiver
operates with max 25 handles.
An oponal element of the system allowing for controlling temperature in a room other
than that with the AURATON 200 RT regulator.
FrostGuard funcon
Protects the interior from freezing.
Enables cyclic reducon of set temperature
by 3°C for 6 hours.
Backlit LCD display
The backlit display enables device control even
in dark rooms.
LCD

3
AURATON 200 RT temperature
controller explained
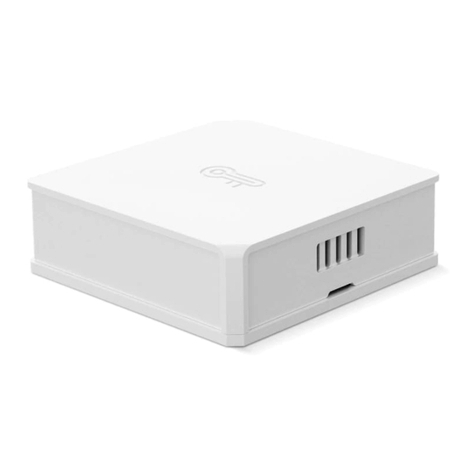
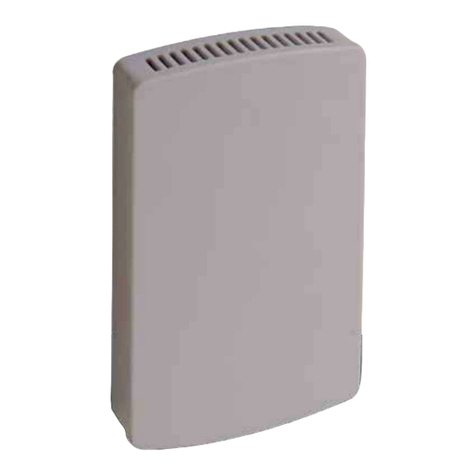
The AURATON RT receiver works with the wireless AURATON 200 RT controller. The
received is installed near the heang or air condioning device and may work with the
load of 16A/10A.
mounng hole
detachable 230V power
supply connecon
terminals
detachable control
connecon terminals
mounng hole
power buon
power supply
diode
buon for unpairing devices
diode indicang that
the actuator device has
been switched on
diode indicang that
the actuator device has
been switched o
buon for pairing
devices with the
RT receiver
Legend – description of LED signalling
The LED light’s green – the output device is o
(the contacts COM and NC are closed).
The LED light’s red – the output device is on
(the contacts COM and NO are closed).
The LED ashes green – the RT receiver awaits the device to be paired
(chapter: “Pairing the AURATON 200 RT wireless regulator and the RT
receiver”).
The LED ashes red – the RT receiver awaits the device to be
deregistered (chapter: “Deregistering the regulator from the RT
receiver”).
Green power supply diode – the RT receiver is switched on.
The LED ashes alternang red and green:
ALARM - the RT receiver has lost connecon with one of the paired
devices (chapter “Special situaons”).
RESET - receiver deregisters all previously paired devices
(chapter “Deregistering all devices paired with the RT receiver”).

4
AURATON 200 RT temperature
controller explained
The front of the enclosure has a backlit LCD display and three funcon buons.
LCD display
acknowledge
or on/o key
temperature
decrease key
• hold – controller on/o ( )
• short press – zacknowledge temperature seng ( )
temperature
increase key
temporary temperature decrease
mode keys

5
1. Temperature
In normal operang mode, the controller displays the temperature of the room it is
installed in.
2. Temperature unit ( )
Indicates temperature displayed in cengrade.
3. Temporary temperature decrease mode indicator ( )
Appears when the temporary temperature decrease program is acve.
4. Temporary temperature decrease mode programming indicator ( )
WIndicates the temporary temperature decrease mode planned by the user.
Displayed when the mode is not executed but the funcon of the temporary temper-
ature decrease is acve (refer to “Temporary temperature decrease seng” secon
for more details).
5. Transmission symbol ( )
Indicates communicaon with the receiver.
6. Baery exhausted ( )
Displayed when the baery voltage drops below the allowed limit. Replace the bat-
tery as soon as possible.
Display screen AURATON 200 RT

6
Selecting proper location for AURATON 200 RT
temperature controller
Controller location largely
affects its proper operation.
When located in a place
without air circulation or
exposed to direct sunlight,
the controller may not control
the temperature properly. The
controller should be located on
an internal wall of a building
(paron wall) in a place with
free air circulaon.
Avoid locations near sources
of heat (TV set, heater,
refrigerator) or places exposed to direct sunlight. Locaon near doors and the resultant
vibraon may cause the controller to funcon improperly.
Battery installation / replacement
Baery sockets are located inside the controller on both sides of the display. To install the
baeries, remove the controller enclosure as shown in the gure.
Place two AAA 1.5 V baeries in the baery socket observing the correct polarity.
NOTE: We recommend using alkaline batteries to supply AURATON controllers.
Rechargeable baeries should not be used because their rated voltage is too low.

7
Fixing the AURATON 200 RT controller to the wall
Alternative xing methods
To x the AURATON 200 RT controller to the wall:
1. Remove the enclosure (as described on the “Baery installaon/replacement” secon).
2. Drill 2 holes diameter 6 mm in the wall (use the back of the controller enclosure to set
the right spacing of the holes).
3. Place plasc plugs in the drilled holes.
4. Screw the back of the controller enclosure to the wall with the two screws provided.
5. Install the baeries and replace the controller enclosure.
NOTE: No expansion bolts are needed for wooden walls. Just drill holes diameter 2.7 mm
(instead of 6 mm) and screw the screws directly into the wood.
The controller can be mounted to a smooth surface with e.g. two-sided adhesive tape.
The controller can also be placed in any locaon on an even surface on a support at the
back of the enclosure.
hole for
a mounng screw
hole for
a mounng screw

8
Installation of the AURATON RT receiver
CAUTION! The cables delivered
in a set together with the controller are
suitable for maximum loads equal to 2.5 A.
If devices with higher power are
connected, the cables should be replaced with
ones of appropriate cross-secons.
!
1
23
4
NOTE: When installing an AURATON RT receiver,
make sure that the power supply is switched o.
The receiver should be installed by a professional.
cable e
clamp
mounng plug NOTE: In the permanent system of the building
there must be a switch and an overcurrent pro-
tecon.
NOTE: In order to facilitate installaon, the ter-
minals are ed with extendable clamps. Before
cable connecons are made, they can be discon-
nected from the controllers. The cables may be
routed from the boom of the receiver by bre-
aking out holes in the mounng cover or from
the back of the receiver if the cables are exten-
ded from the wall. In order to connect the cables
from the back, the cover must be broken out.
1. Take off the cover of the front part of the
AURATON 200 RT receiver by unscrewing the
screws half way out.
2. Connect the heang device to the terminals of
the control connecon of the AURATON 200 RT
receiver. Follow the service instrucon of the
heang device. The COM (common) and NO
(normally opened) terminals are used the most
oen.
3. Connect the power supply cables to the ter-
minals of the power supply connecon of the
AURATON RT receiver, in observance of safety
rules.
4. After the cables are connected, they must
be fixed with the “cable fastening holder”
and the covers must be screwed back to the
AURATON 200 RT receiver.

9
Fastening the AURATON 200 RT receiver to a wall
In order to fasten the AURATON 200 RT receiver on a wall:
1. Take off the covers from the front part of the controller
(see chapter “Installaon of the AURATON RT receiver”).
2. Mark the locaon of the holes for the fastening screws on the wall.
3. In the marked locaons, drill holes with diameters appropriate for the diameters
of the enclosed wall plugs (5 mm).
4. Put the wall plugs in the drilled holes.
5. Fasten the AURATON RT receiver to the wall using screws so that the receiver is well
fastened.
NOTE: If the wall is wooden, there is no need to use wall plugs. In such a case, drill two
holes 2.7 mm in diameter instead of 5 mm, and screw the screws directly into the wood.
NOTE: The RT receiver cannot be placed in metal containers (e.g. an assembly box,
a metal enclosure of a heater) in order to not to interfere with its operaon.

10
Pairing of the wireless AURATON 200 RT
controller with the AURATON RT receiver
Unpairing of the controller and the RT receiver
Aer the receiver is connected to the network, the receiver must be switched on by
quickly pressing the power buon ( ). If the device is switched on, the green power
supply diode becomes illuminated and a single sound signal is emied. In order to switch
o the receiver, e.g. outside of the heang season, press the power buon and hold it
for 3 seconds unl a double sound signal is audible and the green power supply diode is
switched o and, consequently, the heang device is switched o.
In the event of a pairing error, steps 1 and 2 must be repeated. If more errors occur, all
devices must be unpaired by RESETTING the AURATON RT receiver (see „RESET - Unpairing
all devices paired with the AURATON RT receiver”) and then an aempt must be made to
pair the devices again.
NOTE: Only 1 temperature controller may be paired with one receiver.
NOTE: If the wireless controller AURATON 200 RT is sold together with the AURATON RT
receiver, the two devices are factory-paired. Devices purchased separately must
be paired.
1. Pairing of the AURATON 200 RT controller with the AURATON RT receiver is iniated
by pressing the right pairing buon ( ) – a single sound signal is emied - on the
AURATON RT receiver and by holding it pressed for at least 3 s unl the LED diode starts
blinking with green light (double sound signal) - then the buon must be released.
The AURATON RT receiver waits for pairing for 120 seconds. Aer this period, it auto-
macally returns to normal operaon.
2. On the AURATON 200 RT regulator, press and hold the buons or for
6 seconds unl the transmission symbol ( ) appears on the display. Release the
buon - the regulator transmits the pairing signal for 5 seconds.
3. Successful end of pairing is indicated by the LED diode on the AURATON RT receiver
o longer blinking green, emission of a single sound signal, and the receiver switching
to normal operaon.
1. Unpairing of the AURATON 200 RT controller from the AURATON RT receiver is iniated
by pressing the le unpairing buon ( ) on the receiver and holding it for at least 3
seconds unl the LED diode starts blinking red - then the buon must be released. The
sound signal works in the same way as during pairing, i.e. when a buon is pressed,
a short sound is emied and another short sound signal aer 3 seconds.

11
RESET – Deregistering all devices paired
with the RT receiver
Signalling operation and reception
of data packet
In order to deregister all devices paired with the RT receiver, simultaneously press both
the pairing and the deregistering buon ( and ) and hold them for at least 5 seconds
unl the LED ashes alternang red and green. Then release both buons.
A properly completed process of deregistering all devices is signalled aer approx.
2 seconds by the LED colour changing to green and then switching it o for a short period
of me.
Each radio transmission received by the AURATON RT receiver from the paired device is
signalled by a temporary change of LED colour to orange. Switching on the relay is signalled
by the LED lit red, whereas switching it o is signalled by the LED lit green.
In the event of an error during the deregistering process, repeat steps 1 and 2. Should more
errors occur, deregister all paired devices (see “RESET – Deregistering all devices paired
with the RT receiver”) and aempt to pair the device again.
NOTE: If aer execung the RESET funcon the RT receiver is disconnected from power
supply and then connected again, the receiver will automacally enter “pairing”
mode for 120 seconds. A newly purchased RT receiver without any factory-paired
devices (i.e. not the one bundled with the regulator) will behave the same way.
NOTE: When any buon is pressed, a short sound signal is emied.
The AURATON RT receiver waits for unpairing of the device for 120 seconds. Aer this
period, it automacally returns to normal operaon.
2. On the AURATON 200 RT regulator, press and hold the buons or for 6 sec-
onds unl the transmission symbol ( ) appears on the display. Release the buon
– the regulator transmits the pairing signal for 5 seconds.
3. A properly completed deregistering process is signalled by the LED on the AURATON
RT receiver no longer ashing red and the receiver reverng back to normal operaon.

12
Starting the AURATON 200 RT
controller for the rst time
Temperature setting
FrostGuard function
Aer correct installaon on baeries, the LCD will display, for
a second, all segments (display test) followed by the rmware
version number.
Aer a while, the current temperature in the room will be
displayed. The controller is ready to use.
To set the desired temperature in normal operang mode:
1. Press the or key. The segment displaying temperature will
switch to edit mode and start blinking.
2. With the and keys, set the desired temperature with the
accuracy of up to 0.2°C.
3. Press the key to acknowledge selecon.
AURATON 200 RT controller features the special FrostGuard funcon to protect the room
from possible freezing.
The funcon is acvated when the controller is switched o.
With the controller switched o, when the room temperature drops to 2°C, the Fr ( )
symbols will appear and signal will be sent to the receiver to start heang. When the
temperature raises to 2.2°C, the display will turn o again and signal will be sent to the
receiver to turn the heang o.
NOTE: When pressing any funcon key for the rst me, the backlight is turned on and
then the key funcon is acvated.

13
Setting the temporary
temperature decrease mode
Switching off the temporary
temperature decrease
If, for some reasons, you would like to decrease temperature in the room,
everyday and at the same me, by 3°C, temporary reducon for 6 hours is
possible. To do so:
1. Press and hold for 3 seconds both keys. The moon symbol will be displayed ( ).
2. The controller is switched to the temporary temperature decrease mode and every-
day at the same me will decrease the set temperature in a normal mode by 3°C for
6 hours.
NOTE: Aer 6 hours, the controller will return to the main temperature seng. Instead
of the moon symbol ( ), the sun ( ) symbol will be displayed.
NOTE: The temporary temperature decrease mode always starts when the funcon
is turned on. This means that the possible temporary temperature decrease has to
be set at the me you want it to take place.
Press and hold the keys again to switch o the temporary temperature decrease
mode.
The moon ( ) or sun ( ) symbol will disappear and only the room temperature will be
displayed. The controller returns to the normal operang mode.

14
Changing hysteresis
Hysteresis prevents the device from switching on too often due to insignificant
temperature uctuaon.
E.g. with HI2 hysteresis and temperature seng of 20°C, the boiler switches on at 19.8°C
and switches o at 20.2°C. With HI4 hysteresis and temperature seng of 20°C, the boiler
switches on at 19,6°C and switches o at 20.4°C.
To change hysteresis, press , and simultaneously
and hold for 3 seconds. When hysteresis change mode is
acve, message HI is displayed.
Use and to change hysteresis sengs.
HI 2 – ±0,2°C (factory seng)
HI 4 – ±0,4°C
HI P – PWM mode (see chapter “PWM mode”).
Press to conrm your selecon.
The controller resumes normal operaon.
With these values determined, the controller switches the heang device on and o
in cycles that enable maintaining temperature as close to the setpoint as possible.
CAUTION: In PWM mode, the controller can switch on the heang device even though
the temperature in the room is higher than preset temperature. This is because the PWM
algorithm tries to maintain the preset temperature and stays ahead of the heang system
behaviour.
Pulse-Width Modulation mode (PWM)
When changing hysteresis sengs, you
can enable PWM mode. In PWM mode,
the controller switches on the heang
device in cycles to minimize temperature
uctuaons. The controller monitors the
temperature rise and drop me.
Temperature
Time
Preset
temperature
Room
temperature

15
Cooperation of the RT
receiver with a heating device
Basic conguraon of devices
Receiver connected
to the heang device
Wireless thermometer
(sold separately)
Window handle
(sold separately)
Wireless temperature
regulator
heang device
Uproszczony schemat połączenia AURATON RT
z urządzeniem grzewczym
AURATON RT AURATON T-2 AURATON H-1AURATON 200 RT
Addional system
devices

16
Cooperation of the AURATON RT receiver with
the AURATON 200 RT regulator and/or
the AURATON T-2 thermometer
The operaon of temperature regulaon in the receiver is based on the binary algorithm
(on/o) using one or two sensor elements.
• The AURATON 200 RT regulator allows for seng and/or monitoring
the temperature.
• The AURATON T-2 thermometer provides informaon about the current temperature
only, without the capability of changing it manually.
A) The manual setpoint – pairing the AURATON 200 RT regulator with the RT receiver
allows for seng the temperature manually and controlling it in the locaon of the
fastening of the 200 RT regulator.
B) The remote setpoint – if the T-2 thermometer is addionally paired with the RT receiver,
the AURATON 200 RT regulator retains the capability of temperature seng, however
its control is performed with the paired T-2 thermometer only. This feature allows for
regulang the temperature in a room other than the one where the AURATON 200 RT
regulator is placed.
An example: you want the temperature in the “children’s room” to be always at 22 °C,
however you do not want children to be able to change it - in that room, you install the
T-2 thermometer, and the AURATON 200 RT regulator in e.g. the kitchen. This way the
temperature in the “children’s room” will always be at 22 °C regardless of temperature
uctuaons in the kitchen.
C) The factory setpoint (20 °C) – if the T-2 thermometer is the only device paired with
the RT receiver, it is not possible to set the temperature manually, and the RT receiver
maintains the factory temperature setpoint of 20 °C.
NOTE!
1. The sequence of pairing the AURATON 200 RT regulator and the T-2 thermometer
is very important. If you want to maintain the remote setpoint, you must rst pair the
AURATON 200 RT with the RT receiver, and then the T-2 thermometer. Reversing the
pairing sequence will cause automac deregistering of the previously paired T-2 ther-
mometer and entering the mode of operaon described in item A.
2. The RT receiver can operate with one AURATON 200 RT regulator and/or one T-2 ther-
mometer only. Pairing a new regulator causes deregistering the previously paired reg-
ulator and the T-2 thermometer. Pairing a new T-2 thermometer causes deregistering
the previously paired T-2 thermometer only.
3. The 200 RT regulator and/or the T-2 thermometer can operate with an unlimited num-
ber of receivers, e.g. one regulator can simultaneously control two independent heang
devices.
4. In the case of the AURATON 200 RT regulator with the T-2 thermometer, the opera-
on indicator on the 200 RT controller’s display does not reect the operaon of the
heang device.

17
Cooperation with the AURATON 200 RT regulator
and/or the AURATON T-2 thermometer as well as
the AURATON H-1 handles
By default, the AURATON RT receiver does not have any AURATON H-1 handle or AURATON
W-1 window posion sensor paired, therefore the relay is controlled by the paired
AURATON 200 RT regulator and/or the AURATON T-2 thermometer. When at least one
H-1 handle is paired with the RT receiver, the relay is controlled in the following manner:
A) The window is closed or trickle-venlated (micro-venlaon).
When the H-1 window handles is paired with the receiver, and all windows are closed or
trickle-venlated, the relay sll maintains the setpoint from the paired AURATON 200 RT
regulator and/or the T-2 thermometer.
B) The window is pivoted.
If at least one window is pivoted, the temperature set in the AURATON 200 RT regulator
is lowered in AURATON RT receiver down to 3 °C. This state will be maintained unl
closing. This state will last unl all windows are closed or trickle-venlated.
C) The window is opened.
When you open a window equipped with the H-1 handle paired for longer than 30 sec-
onds, the relay in the AURATON RT receiver is switched o, as is the connected heang
device. If all the assigned windows are again in a state other than “opened”, the RT
receiver returns to normal cooperaon with the AURATON 200 RT regulator and/or the
T-2 thermometer no earlier than 90 seconds aer switching o the relay. The purpose of
this delay is to prevent too rapid transions of the connected heang devices between
the ON and OFF states. However, if the temperature in the room drops below 7 °C, the
relay inside the receiver is switched on regardless of the posions of windows in order
to prevent the room from freezing..
D) The signal is lost.
When the RT receiver has lost the signal from the H-1 handle paired (3 consecuve
transmissions are lost), it changes the status if this window to “closed”. When the
transmission is restored, the H-1 handle is again properly read o by the RT receiver.

18
Special situations
• When 3 consecuve transmissions (aer 15 minutes) from the AURATON 200 RT
regulator and/or the T-2 thermometer are lost, an error is signalled on the RT receiver
(LED ashing connuously red and green). The RT receiver starts execung the ON - OFF
cycle memorised during the last 24 hours of operaon unl the problem is removed.
• When both signals return (from the AURATON 200 RT regulator and the T-2 thermometer),
the error is cancelled and the receiver enters its normal mode of operaon.
• When only the T-2 thermometer signal returns, the receiver uses the last memorised
setpoint value and maintains it while signalling the error.
• When the H-1 handles, the T-2 thermometer and the AURATON 200 RT regulator (the
temperature is measured with the T-2 thermometer) are paired with the receiver, then
maintaining the work cycle from the last 24 hours occurs only aer losing the signal
from the T-2 thermometer. When only the signal from the AURATON 200 RT is missing,
the RT receiver automacally maintains the last memorised setpoint from the AURATON
2025 RT regulator and also signals an error.
• When you have only the H-1 handles and the T-2 thermometer paired with the RT
receiver without the AURATON 200 RT regulator, the RT receiver maintains a constant,
factory-dened temperature of 20 °C. If you pivot any window equipped with the H-1
handle paired with the receiver, a temperature of 17 °C is maintained. If you open any
window equipped with the H-1 handle paired with the RT receiver, the receiver switches
o the heang device, but will switch it back on when the temperature falls below 7 °C.
Unique features of AURATON 200 RT
• Switching the relay is synchronised with the wave of the 230 V mains voltage in order to
ensure that closing and opening contacts of the relay occurs around the zero-crossing
point. This prevents the occurrence of an electric arc, signicantly extending the relay
service me.
• The AURATON RT receiver is equipped with a unique algorithm for analysing the
ON-OFF cycles. The enre heang cycle from the last 24 hours is recorded in the memory
of the RT receiver. In the event of losing communicaon with the AURATON 200 RT
regulator and/or the T-2 thermometer, the RT receiver automacally executes the
ON-OFF cycle memorised during the last 24 hours. This provides me for restoring
transmission (removing interferences) or xing the 200 RT regulator and/or the T-2
thermometer without a signicant deterioraon of thermal comfort condions in the
controlled spaces.
• Cooperaon with oponal devices (the AURATON T-2 thermometer, the AURATON H-1
window handle).

19
Additional information and notes
• The AURATON 200 RT regulator and/or the T-2 thermometer must be installed at least
1 metre from the RT receiver (too strong a signal from the transmiers can cause
interference).
• At least 30 seconds must elapse between switching the relay o and on.
• Data transmission from the AURATON 200 RT regulator to the receiver occurs upon
each change of 0.2 °C of the surrounding temperature. When the temperature is stable,
the regulator sends heart-beat data every 5 minutes (which is signalled with the LED
blinking orange on the RT receiver).
• In the event of a power outage, the RT receiver will switch o. When power is restored,
the heang device is switched on automacally, and the RT receiver awaits a signal from
the paired transmiers (this signal should be received within 5 minutes of restoring
power). Aer receiving the signal, the RT receiver enters the normal mode of operaon.
• The RT receiver cannot be placed in metal containers (e.g. an assembly box, a metal
enclosure of a heater) in order to not to interfere with its operaon.
• The controller can be switched on or o at any me by holding the key pressed for
a while.
• Pressing any funcon key for the rst me always starts the backlight rst, and then
the key funcon is performed.
• While programming any funcon, if no key is pressed for 10 seconds, this
• will be interpreted as pressing the key.
Cleaning and maintenance
• Clean the outside of the device with a dry cloth. Do not use from solvents
(such as benzene, thinner or alcohol).
• Do not touch the device with wet hands. It may cause electric shock or serious
damage to the device.
• Do not expose the device to excessive smoke or dust.
• Do not touch the screen with a sharp object.
• Avoid contact of the device with liquids or moisture.

20
The AURATON RT receiver connection schematics
CONTROL
PROTECTIVE
HEATING
DEVICE
e.g. a gas furnace
~230V AC
~230V AC
MAX ~230V 16A
ELECTRIC
HEATING
DEVICE
Table of contents
Other AURATON Temperature Controllers manuals


