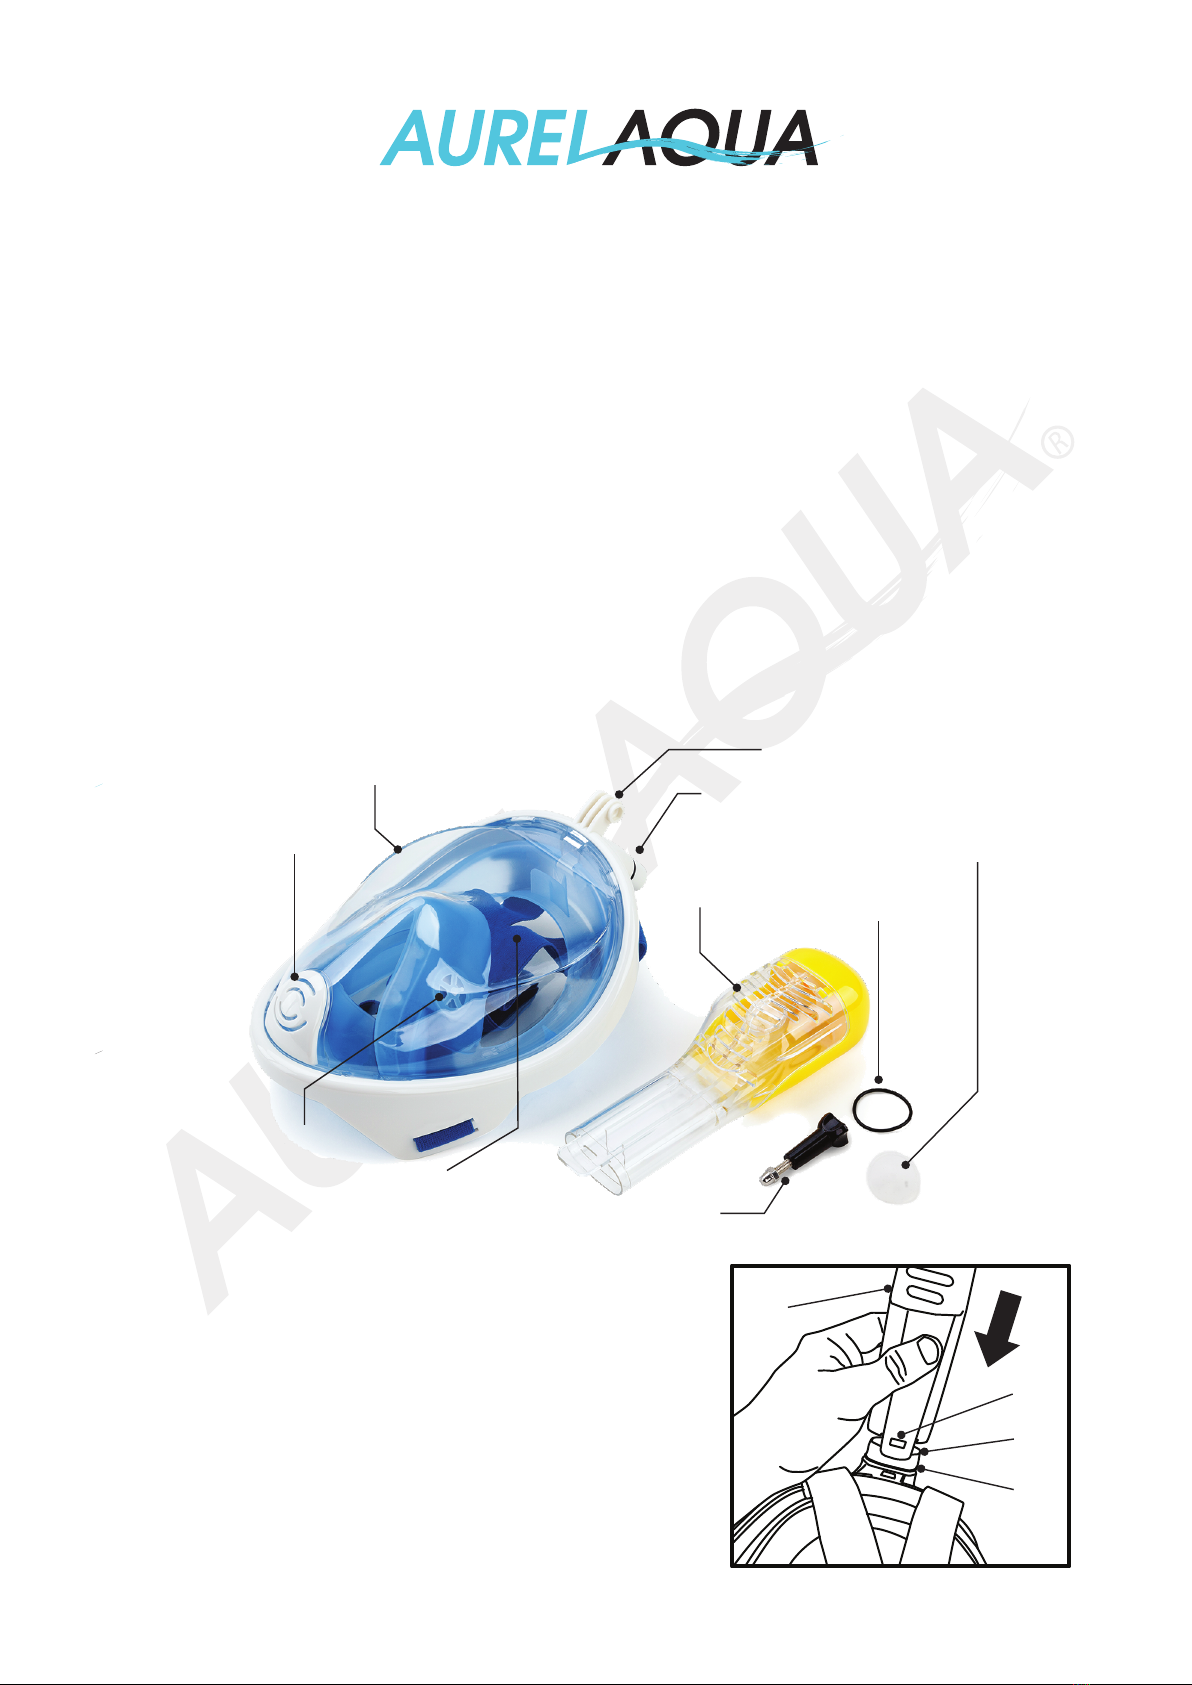
Assembly and Use
Before assembly, check that all parts are included and are in good
condition. It is recommended to clean all parts before use.
Place the breathing tube (A) on to the mounting at the top of the
mask (B), then push it down so that the clip (C) engages. Ensure
that the seal (D) is not distorted or out of its locating groove.
Care and Maintenance
• Always thoroughly clean the device after each use. Remove the breather tube before cleaning by lifting
its locating tab slightly, then pulling the tube off. Clean with warm (not hot) water and mild detergent such
as washing up liquid, then rinse and allow to dry. Do not expose the device to very hot water or clean in a
dishwasher, or clean using salt water.
• Ensure the device is dry before storing, and store it in its bag in a cool, dry place out of direct sunlight.
• Avoid prolonged exposure of the device to direct sunlight or excessive heat.
• Ideal water temperatures for use is approximately 18 to 45°C.
Changing Seals
The device comes with a spare breather tube seal and breathing valve. These are to be used only if the original
seal/valve is no longer providing an adequate seal. To change the breather tube seal:
1. Remove the breather tube from the device by lifting its locating tab slightly, then pulling the tube off.
2. Use your finger nail to lift the seal from its locating groove at the top of the mask, then remove the seal.
3. Ensure that the groove is clean and has no traces of salt, sand etc in it.
4. Place the new seal (ensure it is clean) in position and ensure that it correctly located in the groove.
To change breathing valves:
Be sure to take note of which direction the valve must be
inserted before removing it - if a valve is installed
incorrectly, the mask may allow water in or fog up easily •
For the exthaust valve, carefully insert a thin, hard object such as the tip
of a small screwdriver, between the top of the valve cover and the mask.
Gently lever out the top of the cover until it unclips from the mask, then
remove. To re-install the cover, place it in position so that the tabs at the
bottom of the cover are in the slots in the mask, then push the top of the
cover against the mask until it clips into position.
1. Hold the valve (not the stem), and pull the valve out from the mask.
2. Ensure that the part of the mask where the valve sits is clean.
3. Insert the stem of the new valve (ensure it is clean) into its hole and gently pull it fully into position from
the opposite side.
1 2 3
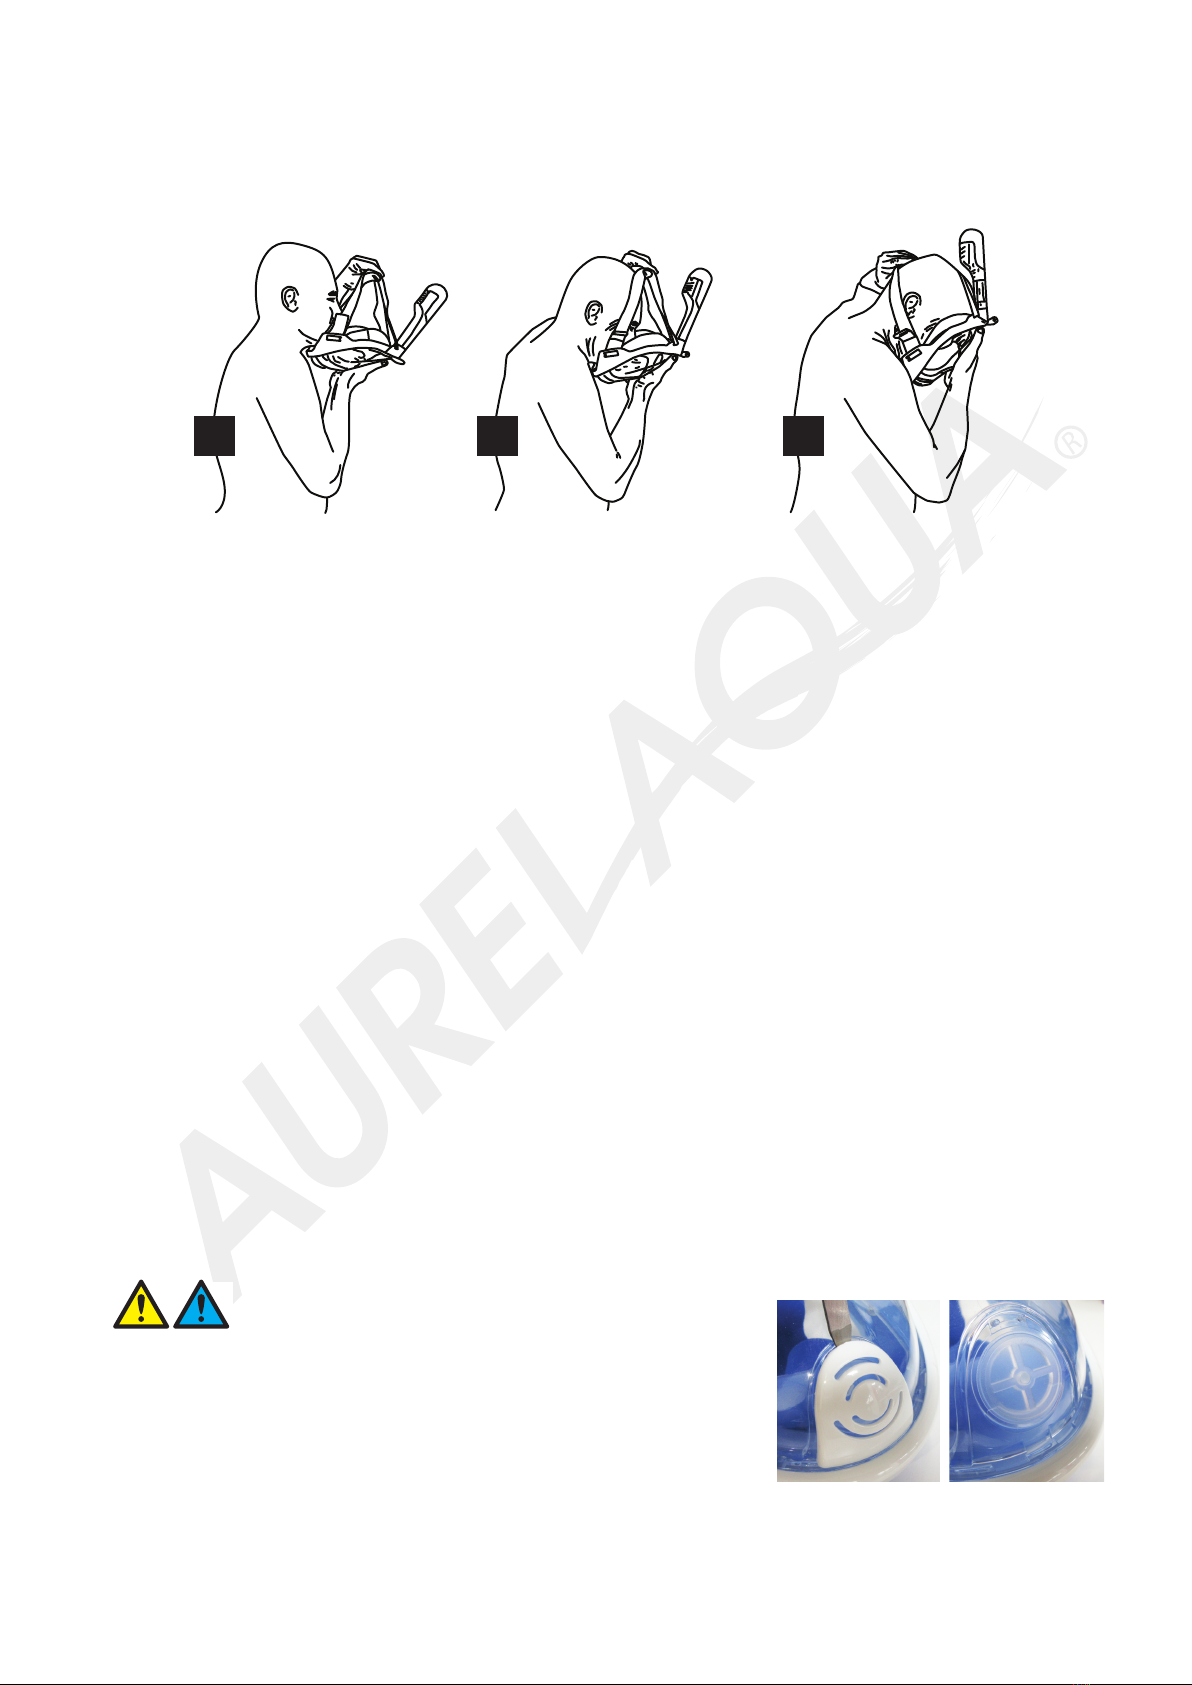
To put the mask on:
1. Hold the mask near the breathing tube with one hand, and the straps with the other hand.
2. Bring the mask up to your face and place your chin into the lower part of the mask.
3. Hold the mask against your chin, then pull the straps over your head and allow the mask to sit against
your face - you should feel the edges of the seal pressing against your face.
If necessary, adjust the straps so that the mask seals, however, is not uncomfortably tight against your face.
Ensure that both straps are adjusted equally so that the mask places even pressure on your face. Ensure that
no hair is caught between the mask and your skin. For men, it may be necessary to be clean shaven in order to
achieve the best possible seal.
To use the camera mounting, place a suitable water-proof camera (not supplied) onto the mounting bracket at
the top of the mask, then use the supplied thumb-screw and nut to secure it.
Checking Mask Sealing
To check whether the mask is sealing well, remove the breather tube by lifting its locating tab slightly, then
pulling the tube off. Put the mask on, then use your fingertips to cover the holes where the breather tube
connects. Inhale slowly - you should not be able to breathe freely and should feel the mask pressing harder
against your face - if this is the case, the mask is adequately sealing against your face.