AURES SMP 58 User manual

All specifications are subject to change without notice
MOBILE PRINTER
SMP 58 Rev. A 08/18
www.aures.com
MODEL : SMP 58
Wi-Fi & Bluetooth
1
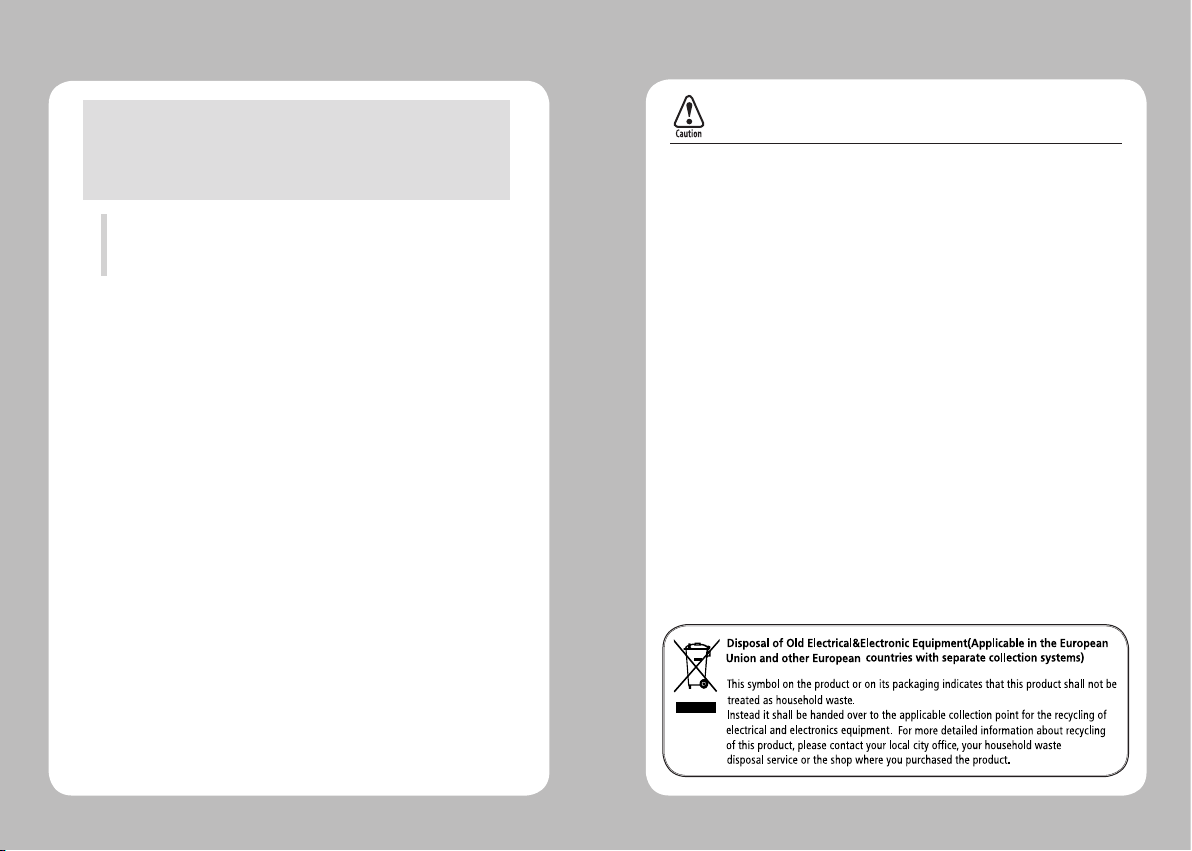
Risk of explosion if battery is replaced by an incorrectly type.
Dispose of used battery according to the local disposal instructions.
This device complies with part 15 of the FCC Rules.
Operation is subject to the following two conditions.
1) This device may not cause harmful interference, and
2) This device must accept any interference received,
including interference that may cause undesired operation.
Aures USA
Jeff Burroughs
15042 Parkway Loop, Building D,Tustin, CA 92780 | USA
+714.669.3111

23
Table of Contents
1. Safety Precautions
4
2.
Unpacking
6
3. Product Overview
7
4. Usage and Installation 8
4-1. Control Panel Usage
8
4-2. Battery Installation
9
4-3. Battery Removal
10
4-4. Battery Charging
11
4-4-1. Charging Usage
11
4-4-2. Charging Cradle
12
4-5. Set Cradle Usage
13
4-6. Belt Strap+Bracket Usage
14
4-7. Paper Installation
16
4-8. Self Test
17
5. Peripheral Connection
19
5-1. Bluetooth Connection (Optional)
19
5-1-1. NFC Connection (Optional)
20
5-2. Wi-Fi Connection (Optional)
21
5-3. Interface Cable Connection
22
6. Roll Media Specication
23
7.
Black Mark 24
8. Cleaning the Printer
25
9.
Printer Specication 26

45
For better safety and reliability, adhere to the following precautionary measures.
Read and follow the instructions carefully before operation of the product.
1. Safety Precautions
WARNING
Failure to follow these instructions could result in re, electric shock, other
injuries, or property damage.
Indication
Prohibition
(Potential risk of electric shock or re)
(Potential risk of electric shock or re)
(Potential risk of electric shock or re)
(Potential risk of electric shock or re)
Must follow
Do not disassemble Unplug the power from the
outlet
Grounding to prevent electric
shock
Do not handle the product
with wet hands
Do not pull or touch the power plug with
wet hands.
Do not bend the wire and do not allow the
wire to be pinched or crushed by heavy
objects.
If a power plug is broken or a plug is cut or
worn, do not use it.
Do not overload an electrical outlet.
WARNING
Failure to follow these instructions could result in re, electric shock, other
injuries, or property damage.
Failure to follow these instructions could result in re, electric shock,
other injuries, or property damage.
(Turn off the power using the power button)
(Potential risk of re or property damage)
(Potential risk of electric shock or damage)
(Potential risk of malfunction, electric shock,
or re. When the product needs to be repaired,
please contact your reseller)
Do not unplug the power cable to turn off
the product.
(Potential risk of re or unit malfunction)
Dealer
If the product needs to be repaired,
please contact your reseller.
Avoid excessive shock or drops.
Keep product away from the water and
other material.
Do not disassemble, repair or modify the
product.
CAUTION
67
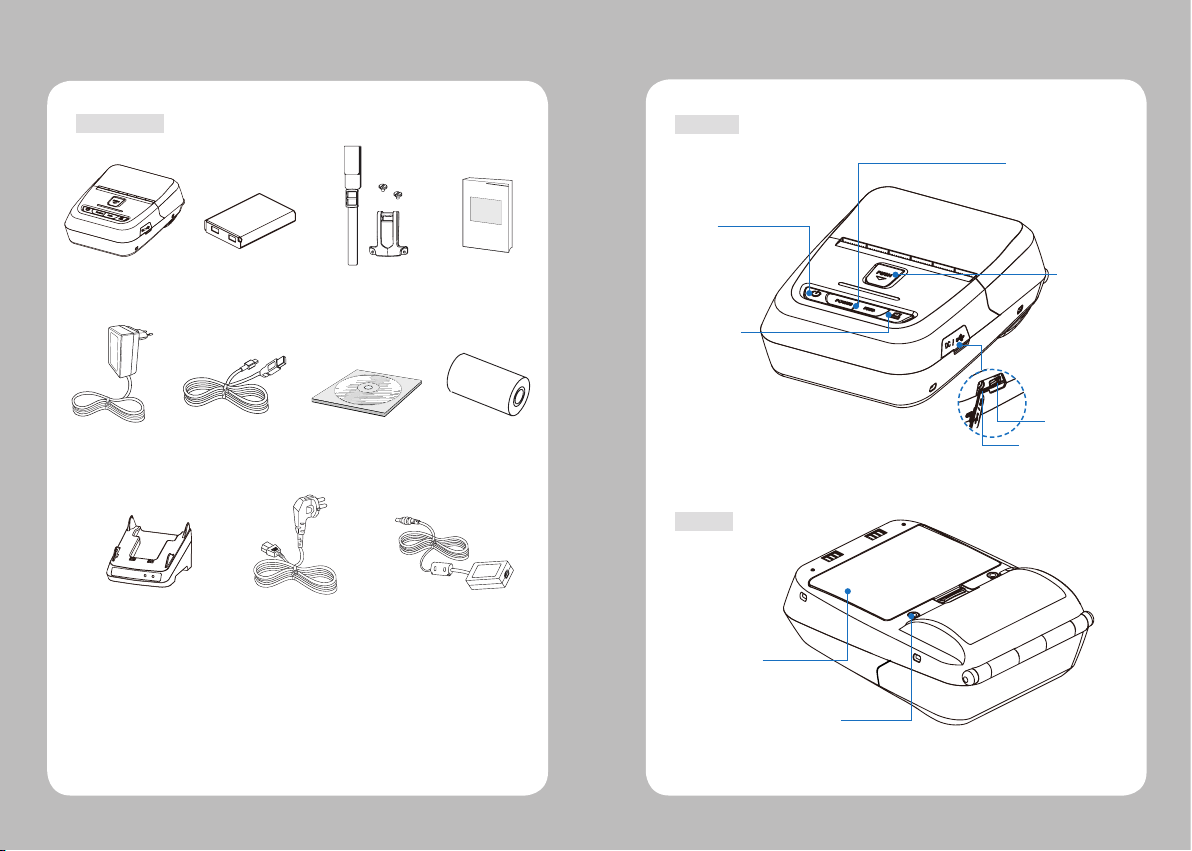
2. Unpacking
Printer Battery
AC Cord
Roll paper
Belt Strap+Bracket
USB Cable
Charger CD (Manual)
Quick Manual
Set Cradle
(Charging Cradle) Adaptor
Standard
3. Product Overview
Paper feed
Button
Open Button
Power
Button
Control
Panel
DC Power
USB
Belt clip hole
Battery
Front
Rear
89
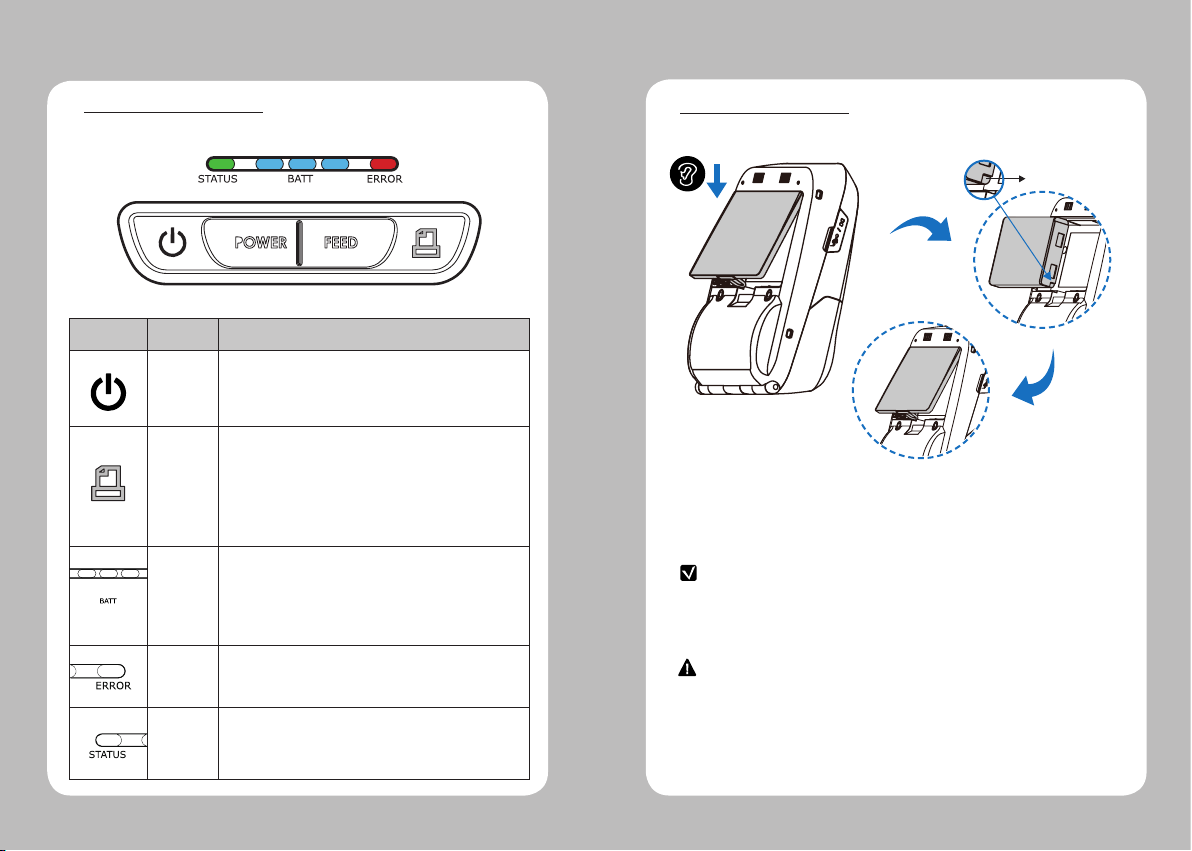
Button
Name
function
Power
Button
This button is used to turn the printer on and off.
When the printer is off,press this button for approximately 3 seconds
and the printer will power on.When you press this button while the
printer is powered on, the printer will turn off.
Paper
Feed
Button
This button can be used to manually feed the paper.
Additionally, this button is also used to initiate self-tests and
Hexadecimal Dumping.
1. Refer to the Self Test section of this manual for information
regarding self-tests.
2. Refer to the Note in Self Test section of this manual for information
regarding Hexadecimal Dumping.
Battery
Status
Lamp
1. If the Batt LED is lit, the battery is fully charged.
2. If you can hear a beeping sound and LED light is turned off, the
battery is at the lowest level.
3. If the battery is not charged at all, the printer turns off
automatically.
Error
Lamp If the red light is turned on, there is no paper or the
paper cover is open.
LINK/
Power
Light
- LINK: LED BLINK
- POWER ON:GREEN LED ON
- POWER OFF:LED OFF
4. Usage and Installation
4-1 Control Panel Usage
1. Align battery hook as shown in the picture
2. Push the battery into the printer until it locks in place.
NOTE
As the battery is not charged at the time of your purchase, charge the
battery prior to using the printer
(Battery charger or Cradle can be used to charge)
Hook
4-2 Battery Installation
CAUTION
Risk of explosion if the battery is replaced by an incorrect type.
Dispose of used batteries according to local regulations.
10 11
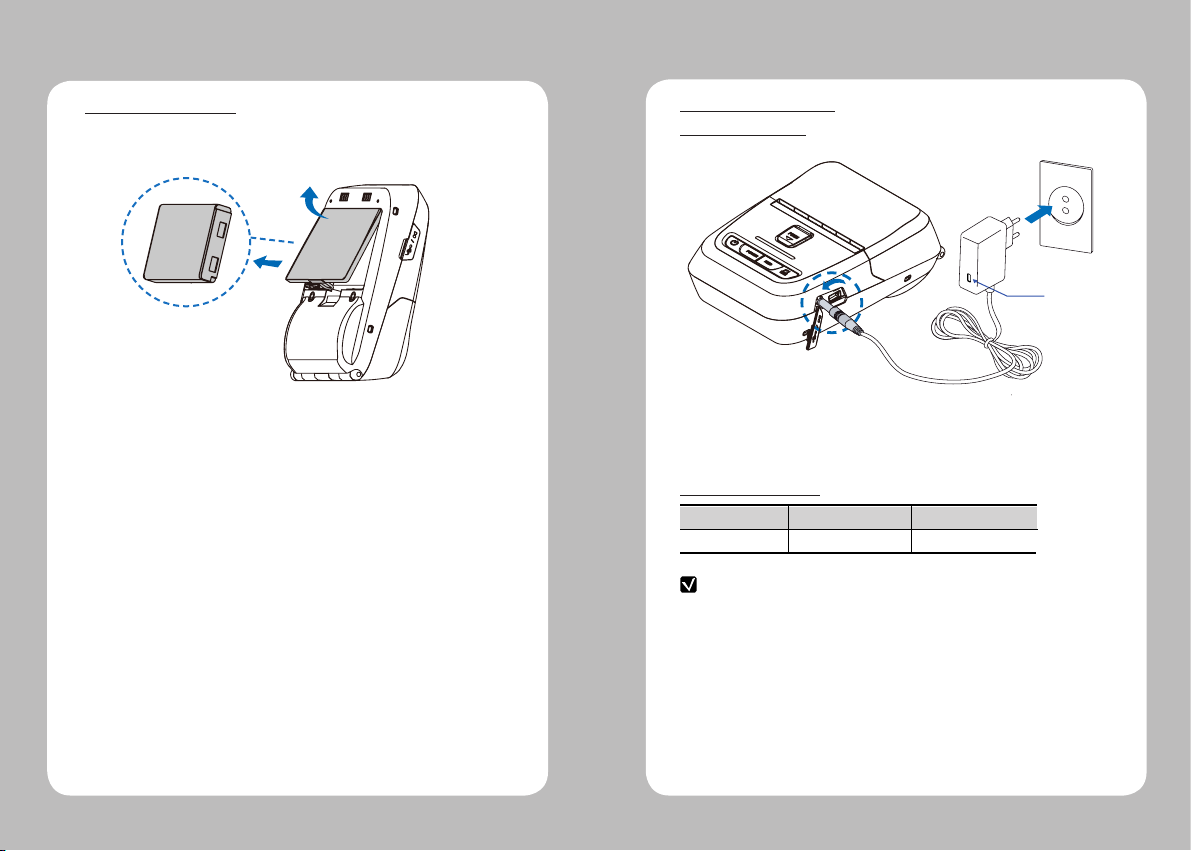
4-3 Battery Removal
NOTE
1. If the charger provided by the manufacturer is not used, the printer can be
damaged, and the manufacturer is not liable for the consequential damage.
2. Before removing the battery, make sure that power is turned o.
3. The printer does not work when only connected to the charger.
4. The battery needs to be installed to operate the printer.
5. While charging, do not turn on the power.
6. Do not operate the printer while charging the battery.
7. Do not connect the charger while the printer is operating.
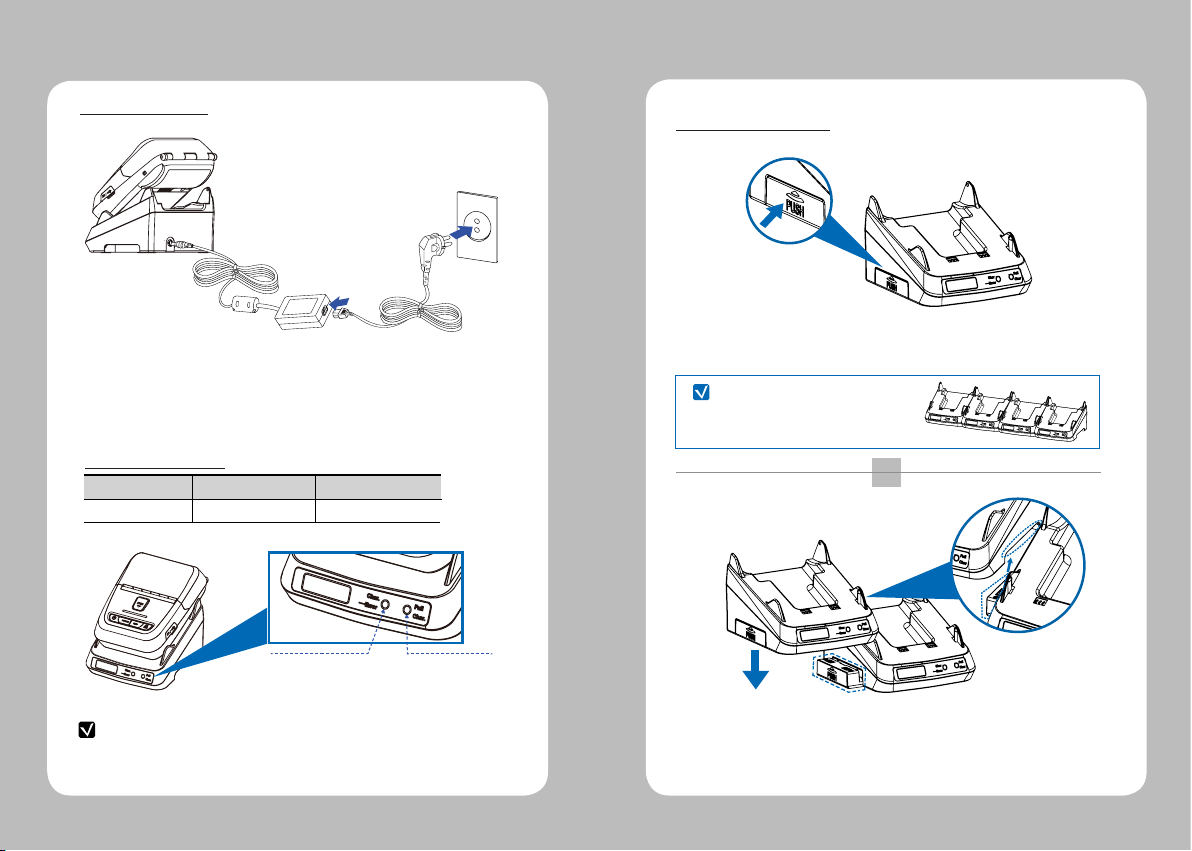
4-4 Battery Charging
1. Make sure the printer is turned o.
2. After opening the DC JACK cover, connect the DC JACK to the printer.
3. Plug the power cord into the electrical outlet.
Lamp
The charging status LED
Status charging charging complete
Charging Lamp Red
Green
Remove the battery as shown
OPEN
4-4-1 Charging Usage
12 13
4-4-2 Charging Cradle
Status charging charging complete
Charging Lamp Red
Green
NOTE
If the printer is not properly mounted on the charging cradle, the red lamp will blink.
Remove and reinsert the battery.
4-5 Set Cradle Usage
1. Place the printer into the charging cradle as shown above.
2. Connect the DC JACK to the charging cradle.
3. Plug the power cord into an electrical outlet.
4. Once the charging is completed, remove the printer from the charging cradle.
CHARGING (RED ON)
ERROR (RED Flicker)
CHARGING COMPLETE
(GREEN ON)
1
2
Press the PUSH button to pop out
the cradle connector.
Align the second cradle with the connector of the existing cradle,
and connect the cradles by pressing down.
(To disassemble, repeat these steps in reverse order)
The charging status LED
NOTE
1 Power supply can be charge up
to 4 cradles in a set

14 15
1 2
34
Prepare the belt strap,
bracket, and 2 screws.
Slide the strap into the loop on
the back side.
Put the strap into the hole on the
top of the belt bracket.
Make sure the strap is fastened
tight enough.
4-6 Belt Strap+Bracket Usage
5
6
After connecting the strap and bracket, insert the screws
into the bracket hole.
Use a screw driver to tighten
the bracket.
16 17
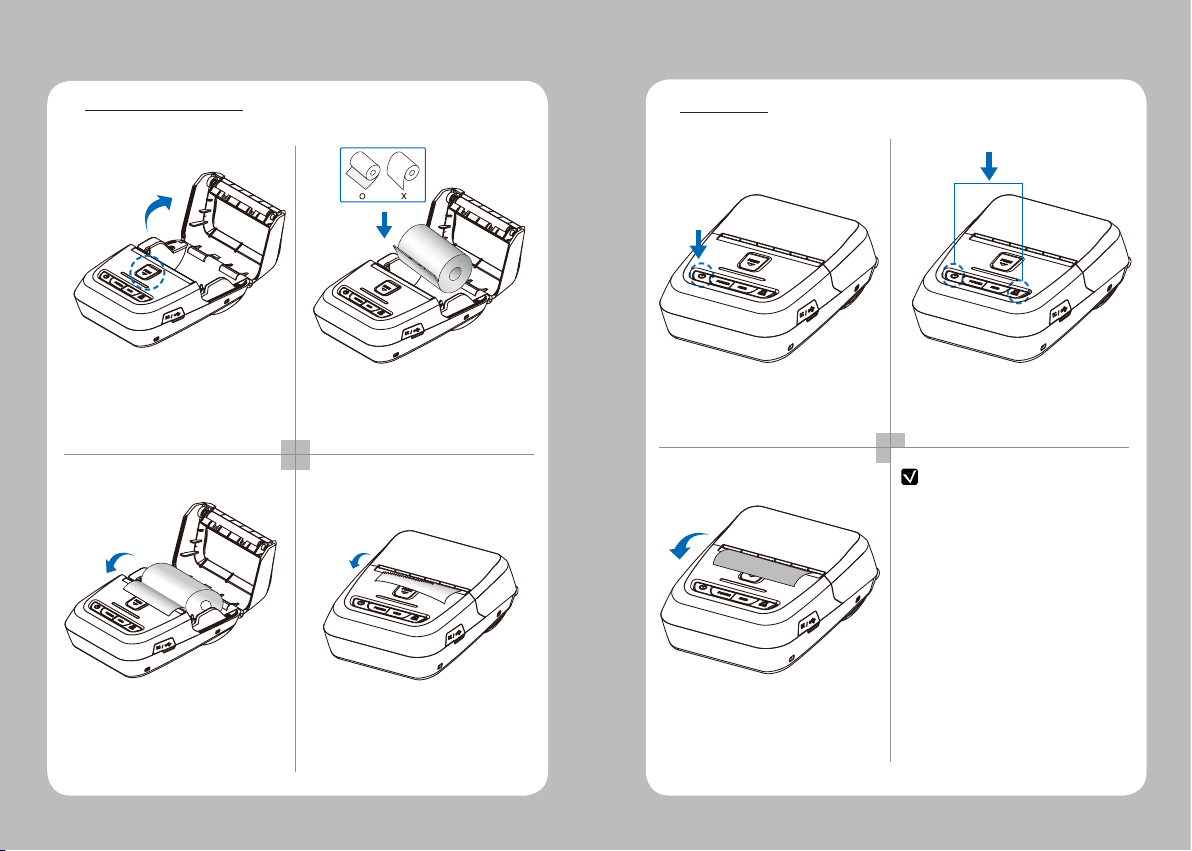
1 2
34
Press the PUSH button to open
the paper cover.
Pull a short length of paper out of
the printer and close the cover.
Insert the paper in the correct
direction. See the image above.
Tear o the additional paper using
tear bar.
4-7 Paper Installation
1 2
3
NOTE
Turn o the power by pressing
the power button for approximately
3 seconds.
The self-test will print.
While you are holding the FEED
button, press the power button.
4-8 Self Test
1. To enter hex dump mode, press the Feed
button once more
2. If the Feed button is not pressed,
the self-test will automatically nish
after 3 seconds.
Other manuals for SMP 58
1
Table of contents
Other AURES Printer manuals

AURES
AURES ODP 300 User manual

AURES
AURES TRP100-III User manual

AURES
AURES Posligne ODP-1000 User manual

AURES
AURES ODP 444 User manual

AURES
AURES ODP-200H-III User manual

AURES
AURES TRP100 User manual

AURES
AURES SLP 580 User manual

AURES
AURES ODP 333 User manual

AURES
AURES ODP 300 User manual

AURES
AURES SMP 58 Instruction sheet


