Aurora IPX series User manual

i
Manual Number: 170302
IPX Manager Version: 2.1.40 & above
IPX Server 2.8.3 & above
IPX FPGA Firmware: 2.11.3
IPX MCU Firmware: 2.1.10
USERS GUIDE
IPX Manager
IPX Series Windows Control Software

i
User Guide
SAFETY INSTRUCTIONS
Please review the following safety precautions. If this is the first time using this model, then read this manual
before installing or using the product. If the product is not functioning properly, please contact your local
dealer or Aurora for further instructions.
The lightning symbol in the triangle is used to alert you to the presence of dangerous voltage
inside the product that may be sufficient to constitute a risk of electric shock to anyone opening
the case. It is also used to indicate improper installation or handling of the product that could
damage the electrical system in the product or in other equipment attached to the product.
The exclamation point in the triangle is used to alert you to important operating and maintenance
instructions. Failure to follow these instructions could result in injury to you or damage to the
product.
Be careful with electricity:
Power outlet: To prevent electric shock, be sure the electrical plug used on the product power cord
matches the electrical outlet used to supply power to the Aurora product. Use only the power adapter
and power connection cables designed for this unit.
Power cord: Be sure the power cord is routed so that it will not be stepped on or pinched by heavy
items.
Lightning: For protection from lightning or when the product is left unattended for a long period,
disconnect it from the power source.
.
Also follow these precautions:
Ventilation: Do not block the ventilation slots if applicable on the product or place any heavy object on
top of it.
Blocking the air flow could cause damage. Arrange components so that air can flow freely. Ensure that
there is adequate ventilation if the product is placed in a stand or cabinet. Put the product in a properly
ventilated area, away from direct sunlight or any source of heat.
Overheating: Avoid stacking the Aurora product on top of a hot component such as a power amplifier.
Risk of Fire: Do not place unit on top of any easily combustible material, such as carpet or fabric.
Proper Connections: Be sure all cables and equipment are connected to the unit as described in this
manual.
Object Entry: To avoid electric shock, never stick anything in the slots on the case or remove the cover.
Water Exposure: To reduce the risk of fire or electric shock, do not expose to rain or moisture.
Cleaning: Do not use liquid or aerosol cleaners to clean this unit. Always unplug the power to the
device before cleaning.
ESD: Handle this unit with proper ESD care. Failure to do so can result in failure.
FCC
This device complies with Part 15 of the FCC Rules. Operation is subject to the following two conditions:
(1) This device may not cause harmful interference.
(2) This device must accept any interference received, including interference that may cause undesired
operation.
Trademarks
All trademarks in this document are the properties of their respective owners.

ii
User Guide
TABLE OF CONTENTS
INTRODUCTION........................................................................................................................1
About...............................................................................................................................................1
Features..........................................................................................................................................1
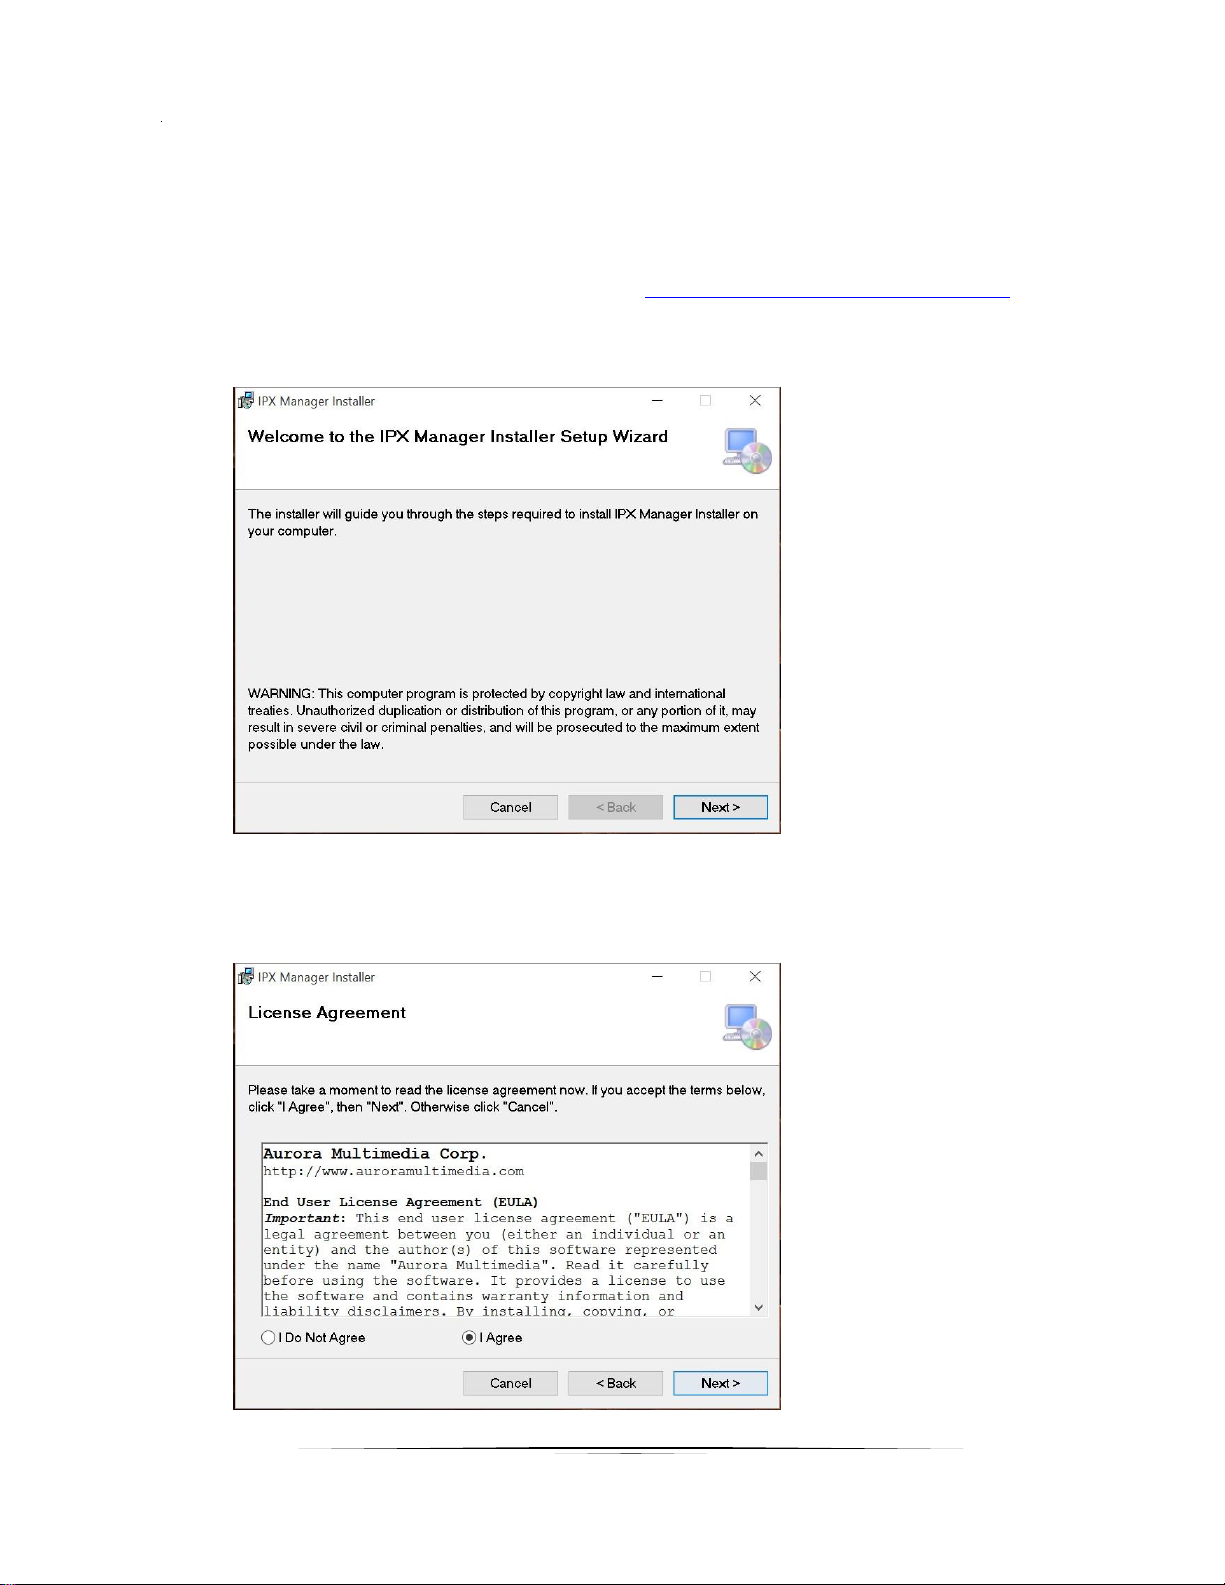
INSTALLATION .........................................................................................................................2
Cloning Installations.........................................................................................................................5
SOFTWARE OPERATION .........................................................................................................6
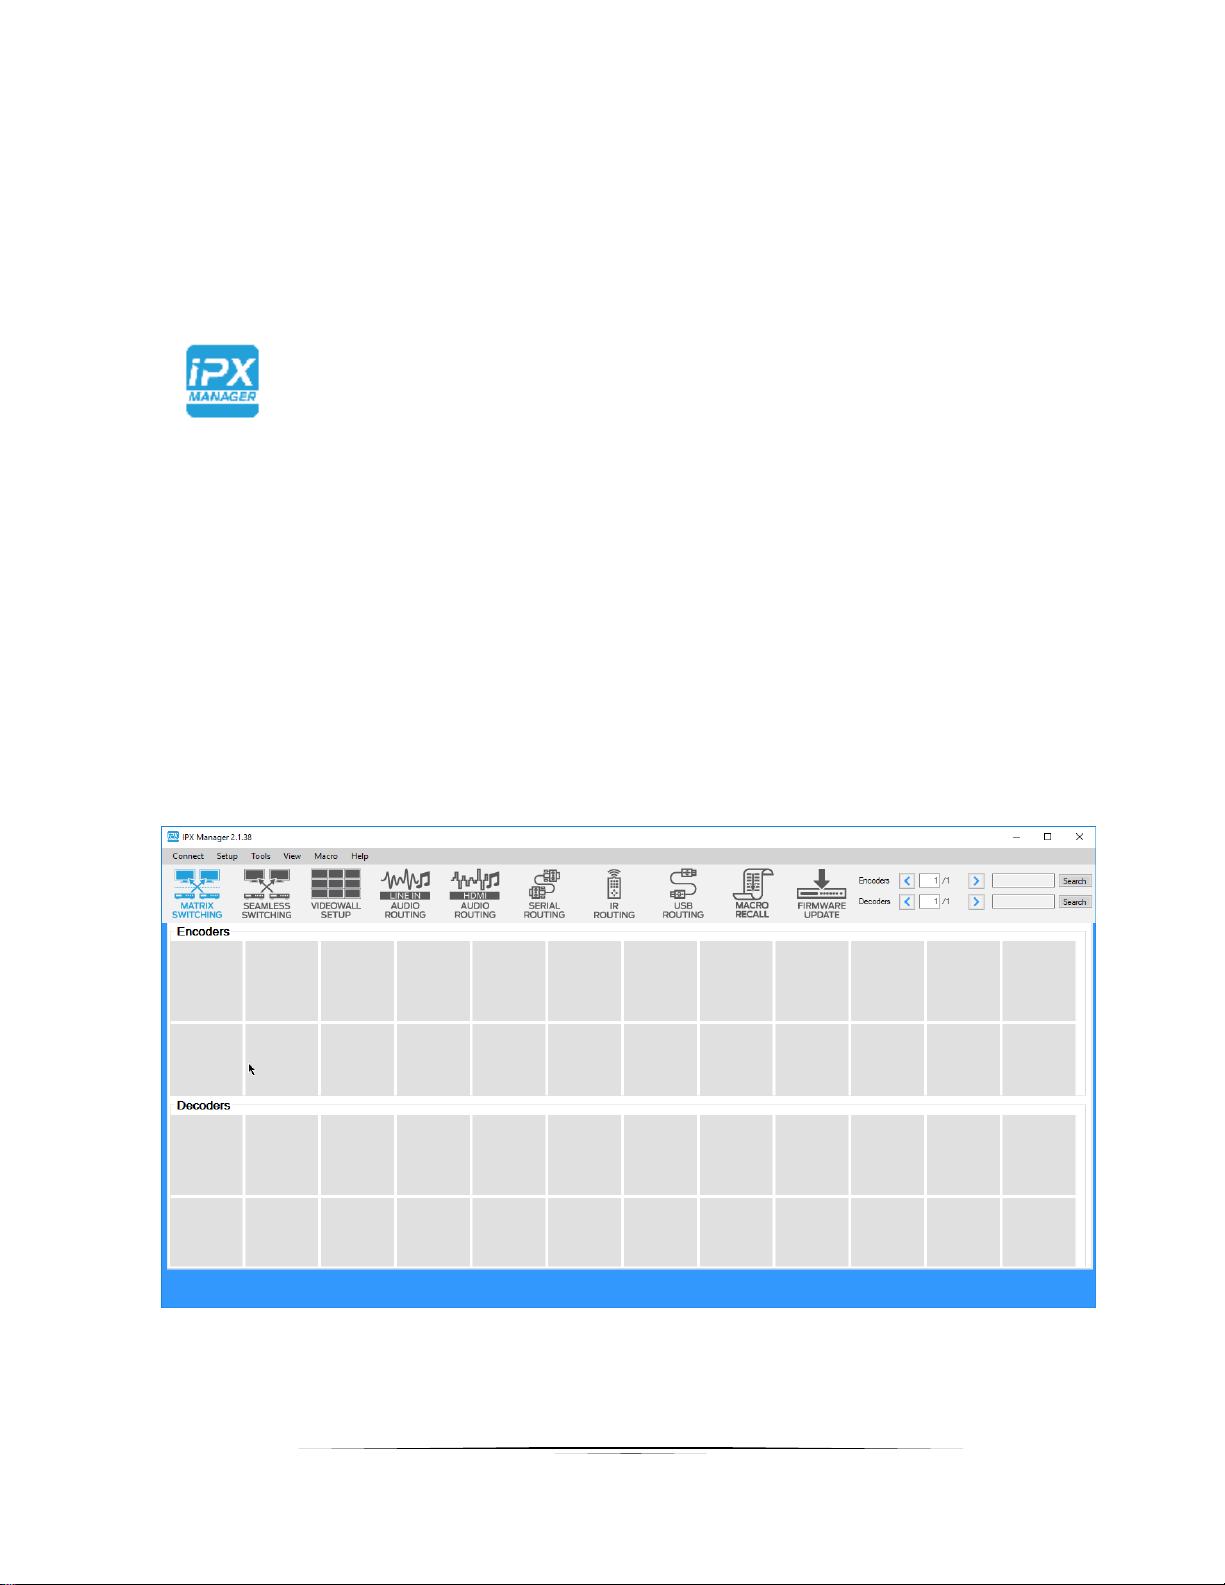
Launching IPX Manager ..................................................................................................................6
Connecting to QXP-2-IPX Server.....................................................................................................7
Matrix Switching ..............................................................................................................................9
Seamless Switching....................................................................................................................... 10
Video Wall ......................................................................................................................................11
Audio Switching............................................................................................................................. 13
RS-232 Routing and Control .......................................................................................................... 14
Infrared Routing............................................................................................................................. 15
USB Routing.................................................................................................................................. 16
Recalling & Saving Macros ............................................................................................................ 17
Help .............................................................................................................................................. 19
Setup............................................................................................................................................. 21
Tools.............................................................................................................................................. 22
View .............................................................................................................................................. 23
Encoder & Decoder Setup ............................................................................................................. 25
Device Settings.............................................................................................................................. 27
Search........................................................................................................................................... 33
EDID Setup and its Importance...................................................................................................... 34
Firmware Update........................................................................................................................... 36
APPENDIX 1 Troubleshooting...........................................................................................40
APPENDIX 2 Protocol ........................................................................................................41
APPENDIX 3 EULA.............................................................................................................42

1
User Guide
INTRODUCTION
About
The IPX Manager is a Windows® based software available at the Aurora customer portal on
www.auroramm.com
Always check from time to time for the latest firmware as it may have enhancements, new features, and
bug fixes.
IPX Manager allows a user to control the various capabilities of IPX series products on a network. While
the IPX manager is a client software, the IPX Server (QXP-2-IPX Server) handles all the communication
handling and is the target for all communication. This allows for centralized communications and the
ability to run many clients on a network seamlessly. In addition, 3rd party control systems can
communicate via Telnet to the Server.
Features
Matrix Switching
Seamless Matrix Switching for Progressive RGB/YCrCb 4:4:4
Video Wall Setup and Control
Audio Break-away Routing
RS-232 Routing & Control
IR (Infrared) Remote Control Routing
USB Routing
Horizontal and Vertical Viewing
Preset Store and Recall
Connection Manager
Advanced Debug Logging
Touch Screen Friendly Layout
Configuration File for Cloning Presets and Connections on Other PCs
Multi-Server connections

2
User Guide
INSTALLATION
1. Download the IPX Manager from the Aurora website customer portal. It will require a login. If
you do not have one you can register for one. http://portal.auroramultimedia.com/login
2. Unzip and launch the setup.exe
3. Read the EULA (Copy in back of manual under Appendix 4), select I agree, then Next to
continue.

3
User Guide
4. If accepted, click next for the default directory unless it is required to install in different location.
5. A prompt will appear to confirm the installation selection. Press Next if you still wish to continue.

4
User Guide
6. A progress bar will appear. Please note it will not start until Windows User Account Control
prompts for permission.
7. Once installation is finished a prompt will appear to confirm. Note at the bottom instructions to
check for any updates to the .net framework as IPX Manager uses it.

5
User Guide
Cloning Installations
The clone file IPX Manager.exe.config is located at C:\Program Files (x86)\IPX Manager\IPX Manager\. If there is an
existing installation with presets and other parameters, the clone file can be saved and used to copy over a new
installation config file. The new installation will have all the same settings.

6
User Guide
SOFTWARE OPERATION
Launching IPX Manager
With a properly installed IPX Manager there will be an Icon for the IPX Manager as shown below. Launch
the application by double clicking or single clicking (based on mouse settings).
The default starting position will appear which is in an unconnected state which is why no units will show
at this time. Note the IPX Manager firmware revision number will appear in the top header bar. The view
being shown is Horizontal view. Under the View tab it can be changed to Vertical view so objects can be
dragged left to right instead of top to bottom.
It is also important to note if it is planned to have a specific unit switch between Encoder and Decoder
mode the setup for the unit must be done once in both Encoder and Decoder mode so it is saved
accordingly.

7
User Guide
Connecting to QXP-2-IPX Server
Click on Connection at top and select Connection Manager if this is the first time setting up IPX Manager.
If there is already a connection created click on connect.
The Connection Manager has the ability to Add, Edit, Delete, and to Connect Servers.

8
User Guide
When adding a new connection, enter the Site Name it is to be referred by and the IP Address. The port
number is fixed at 6970. When done click on Save.
The Site Name will appear in the listing. To connect, click on the Connect icon to the right.

9
User Guide
Matrix Switching
Once connected, the Matrix page will show the Encoders and Decoders available on the network. The
matrix page is for genlocked routing which means there will be no latency. The switch is instant but takes
the time of the display to lock before the image will show. Usually this is about 3 seconds depending on
the brand and model of display. For faster switching refer to the Seamless switching but has certain
requirements and latency for the process to switch instant. Each box will show the Host Name, IP
Address of the IPBaseT Video Stream, resolution the unit is processing, color space it is processing,
stream status, and the firmware revision of the IPBaseT Video Engine. This information is very handy
especially when trying to understand what is going on in a system.
To make a route click and hold on the encoder which will highlight green and drag it to the desired
decoder, let go and the route will be made.
Right clicking on an Encoder or Decoder will bring up local device’s source selections, EDID management,
and setup features specific to the device. The Encoder source selections are HDMI1 and HDMI 2.
Decoder is HDMI1, HDMI2, and Stream. Refer to the setup section for me details on the individual device
setup.
Important: EDID must be setup for IPX units for proper operation. The EDID must be a common
denominator so the sources put out the proper resolution, audio, and color space that all displays are
capable of handling.

10
User Guide
Seamless Switching
Seamless switching routing is the same as the matrix switching except the image will change instantly
without going to black for 3 seconds. There are rules to using this feature with the IPX-TC1 and TCW-3.
1. When switching between sources they must be of the same resolution and refresh rate.
2. The source must be RGB or YCrCb 4:4:4. Other color spaces will no work properly.
3. Seamless switch adds a 16ms to 32ms delay (1 to 2 video frames). This will not be noticeable to
the human eye but it does add the latency due to the frame memory required to align the signals
the proper time to switch so it is undetectable.
The IPX manager will try to identify invalid signals for Seamless mode and do a standard Matrix switch.
This allows for interrupted operation but there will be the 3 second delay.

11
User Guide
Video Wall
The IPX-TC1 & IPX-TCW3 videowall mode has the ability to take in a 4K UHD signal and create a low
latency high quality videowall. It is important to note it does this without the use of the scaler as it relies
on the scaler and capabilities of the display. The way the mode works is by dividing the input resolution
by the amount of displays. For example, a 2x2 videowall will become four 1080p signals from a 4K UHD
signal. Please refer to the IPX User Guide when selecting the displays to be used with the IPX units.
The first step is to go to the Setup at the top and select Videowall Configuration. A box will appear to
enter a video wall up to 4x4. In addition, there are parameters for bezel compensation for a window pane
effect.
Once setup the Videowall page will show the available Encodes and Decoders. To the right will be the
representation of the Videowall. Drag each decoder to the right to its relative physical empty outline. This
allows the user to know where the physical box is located on the videowall. To make the route drag an
encoder to the decoder on the right. You can also drag an encoder below to the Wall Group or All
Displays for a more instant effect when it is one big image. There are also preset capabilities available
which make changing sources very easy.

12
User Guide
Image below is before the Decoders are dragged to the right.
Image below is after Decoders are starting to be dragged to the right.

13
User Guide
Audio Switching
The IPX Series has the ability to do break away audio routing. The example below shows the Encoders
and Decoders on the network for routing in the vertical view mode.

14
User Guide
RS-232 Routing and Control
The IPX Series has the ability to do RS-232 routing of one devices port to another. The example below
shows the Encoders and Decoders on the network for routing of the RS-232 in the vertical view mode.
If a third party control is being used it will send the RS-232 command right to the unit’s port without any
routing required.

15
User Guide
Infrared Routing
The IPX Series has the ability to do IR routing of one devices port to another. The example below shows
the Encoders and Decoders on the network for routing of the IR in the Horizontal view mode.

16
User Guide
USB Routing
The IPX Series has an optional USB 2.0 480Mbps feature for KVM and data transfer applications. If the
feature has been installed the Encoders and Decoders with the option installed will appear. Routing of the
USB is the same by using drag and drop technique. A very powerful feature of the USB is the ability to
choose if it is a Host or a Device on Encoders or Decoders. If setup as a Host, a PC or like device will be
connected. If setup as a Device, a peripheral like a USB stick, Keyboard, Mouse, Smartboard, etc. would
be connected.
Other manuals for IPX series
1
Table of contents
Other Aurora Transceiver manuals

Aurora
Aurora VLX-TC1-C User manual

Aurora
Aurora MLink Ultra User manual

Aurora
Aurora IVLX-TCW2V-C User manual

Aurora
Aurora IPX-TC3A Series User manual

Aurora
Aurora IPX-TC3 Series User manual

Aurora
Aurora IPX-TC1-F User manual

Aurora
Aurora VLX-TC1-CF User manual

Aurora
Aurora VLX-TC1-C User manual

Aurora
Aurora VLX-TCW2H-C User manual