▶Ajustes Settings
PLACA DE TECLADO ó TECLADO MINI (730165) KEYPAD PANEL or KEYPAD MINI (730 65)
IDIOMA - LANGUAGE
CASTELLANO
NUMERO DE PLACA
1
AUTOENCENDIDO si
¿ Co ificación e
pulsa ores ?
NUEVO COD ACCESO
CONFIG: 1
PLACA
INTERIOR
CODIGO APERT. 1
101010
TIEMPO APERT. 1
2 seg
Siguiente menú
Next menu
Validar_Cambiar
Validate_Change
Selección de idioma CASTELLANO_INGLÉS
Language SP NISH_ENGLISH
Información del código de placa conigurado en el switch binario
Panel code information conigured on the binary switch
La placa permite el auto-encendido desde viviendas, defecto SI
The panel allows the self-starting from lats, default YES
Permite modiicar el código que por defecto genera cada pulsador de llamada.
llows to modify the default code every call push-button generates.
▶Placa INTERIOR ▷INTERN L
▶Placa EXTERIOR ▷EXTERN L
NUEVO COD ACCESO CONFIG: 1 cambia el código de acceso al menú
coniguración
NEW CCESS CODE CONFIG: 1 changes the access code for the coniguration
menu
PLACA: interior (conigurada para llamar a viviendas)
PLACA: exterior (conigurada para llamar a SDL)
P NEL: internal (set to call lats)
P NEL: external (set to call SDL)
Código de apertura 1 (101010) ( 0, desactivado)
Código de apertura 2 (202020) ( 0, desactivado)
Código de apertura 3 (303030) ( 0, desactivado)
Código de apertura 4 (404040) ( 0, desactivado)
Opening code 1 (101010) ( 0, disabled)
Opening code 2 (202020) ( 0, disabled)
Opening code 3 (303030) ( 0, disabled)
Opening code 4 (404040) ( 0, disabled)
Tiempo de apertura 1 (2 seg) (apertura desde vivienda)
Tiempo de apertura 2 (5 seg) (apertura desde pulsador B+ y B-)
Opening time 1 (2 sec) (opening from lat)
Opening time 2 (5 sec) (opening from push-button B+ y B-)
Como activar apertura
How to activate the opening
cod. seleccionado
selected code
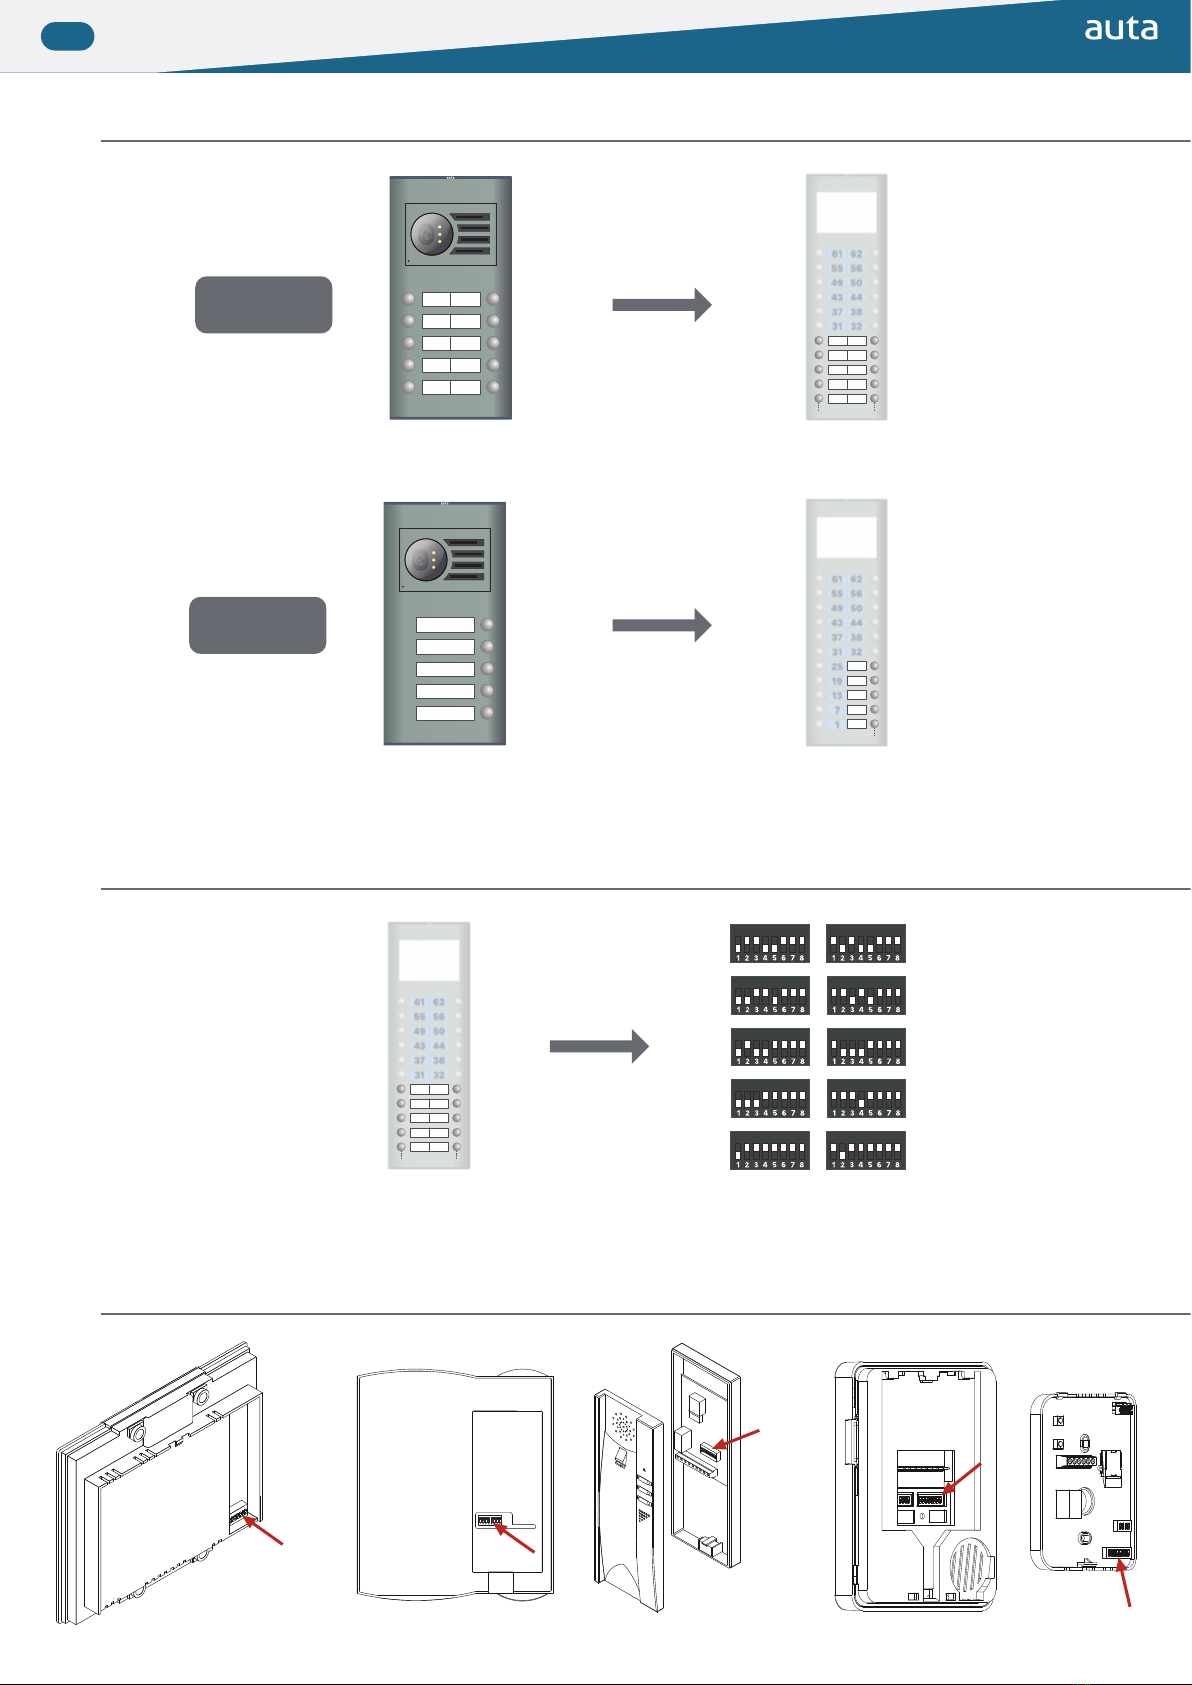
Pulsador 1 (tabla de pulsadores)
Código? : 1 (cod. binario que genera)
Push-button 1 (push-button table)
Code? : 1 (Binary code that generates)
Pulsador 1 (tabla de pulsadores)
SDL? : 1 (cod. binario que genera)
Código? : 1 (cod. binario que genera)
Push-button 1 (push-button table)
SDL? : 1 (Binary code that generates)
Code? : 1 (Binary code that generates)