Autarco 4G-STICK User manual
14G-STICK-D for Autarco Inverters
Installation Manual
Installation Manual IM.S2.4G-STICK-D-EN-V1.0
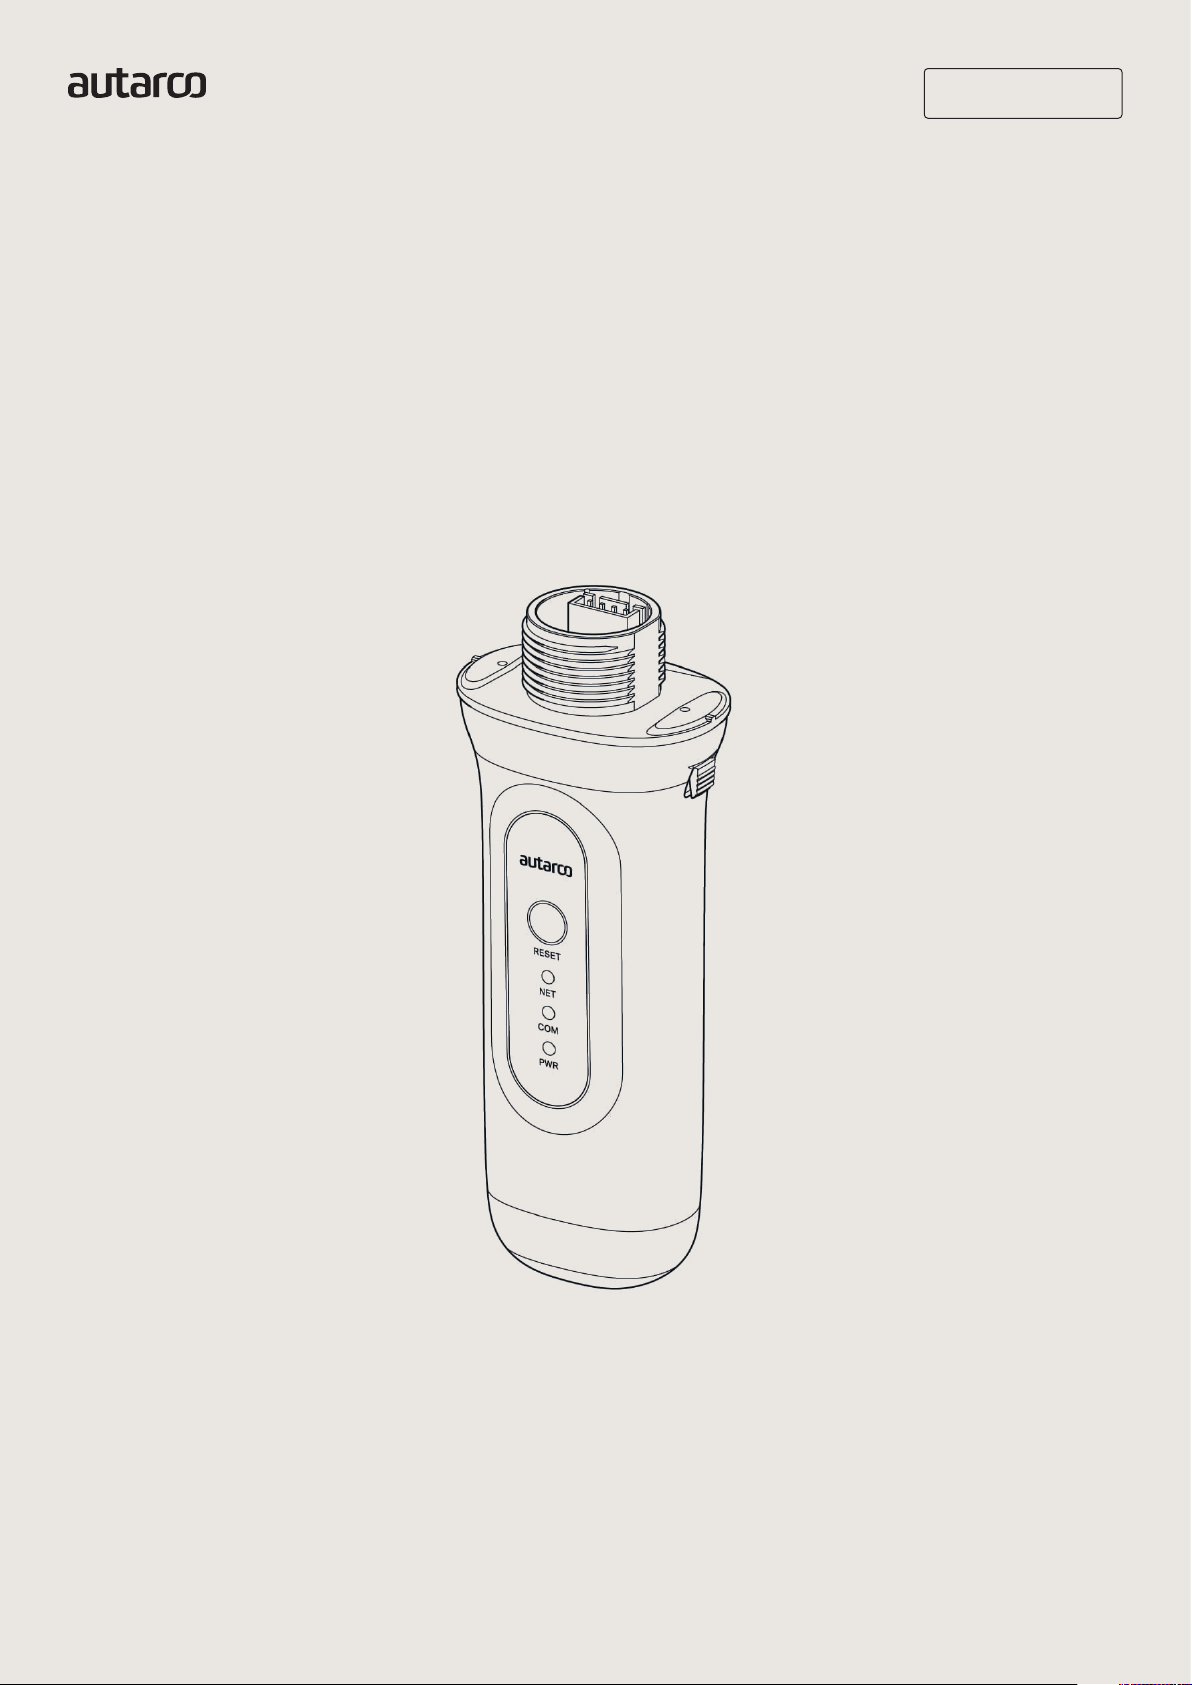
4G-STICK
Monitoring system
for Autarco Inverters

2
Installation Manual
4G-STICK-D for Autarco Inverters

3
Installation Manual
IM.S2.4G-STICK-D-EN-V1.03
Installation Manual
Information
Contact
www.autarco.com
Address
Torenallee 20
5617 BC Eindhoven
The Netherlands
This manual is an integral part of the unit. Please read the manual carefully
before installation, operation or maintenance. Keep this manual for future
reference.
Product information is subject to change without notice. All trademarks are
recognized as the property of their respective owners.
© Autarco Group B.V.
All rights reserved.
Installation Manual

44G-STICK-D for Autarco Inverters
Installation Manual
Tables of contents
1
1.1
1.2
2
2.1
2.2
3
3.1
3.2
3.3
3.3.1
3.3.2
3.4
3.5
3.6
3.7
3.7.1
3.7.2
3.8
4
4.1
5
5.1
5.2
5.3
5.4
5.4.1
5.4.2
6
7
8
17
18
Installation
Read this first
Important symbols
Connection structure for 4G monitoring
Topology overview
When do you choose a 4G stick?
Installation
What type of SIM card is required?
Which SIM card size is required?
SIM card security code override (unlock)
For Android
For iPhone
Inserting SIM card in the 4G-stick
Installing 4G stick in inverter
Connection with several inverters
Network configuration
Public mobile network (4G) configuration
Local WiFi network configuration
New stick’s IP address after installation
Control
Does the stick have a connection?
Helios & MyAutarco
Registering stick in Helios
Customer registration for MyAutarco
Access MyAutarco monitoring platform (installer)
Access MyAutarco monitoring platform (user)
After installation of the stick by the installer
After installation of the stick by the user
54G-STICK-D for Autarco Inverters
Installation Manual
Tables of contents
6
7.1
7.2
7.3
7.4
8
20
21
23
Resetting the stick
Troubleshooting
The stick has no power (red ‘PWR’ indicator is off)
The red ‘PWR’ light is on, but the orange ‘COM’ light is off
Signal quality
Local router settings
FCC Certification

64G-STICK-D for Autarco Inverters
Installation Manual
1
1.1 Read this first
The purpose of this user manual is to provide instructions and a detailed description of procedures
for installing, operating, maintaining and troubleshooting the Autarco 4G sticks. These 4G sticks
can be used with all Autarco inverters. They can operate on both a WiFi as well as a 4G SIM card.
Please keep this user manual available at all times.
Important symbols
WARNING! Indicates safety instruction, which if not correctly followed, can result in injury
or property damages.
Installation
1.2
74G-STICK-D for Autarco Inverters
Installation Manual
Topology overview
2
2.1
2.2
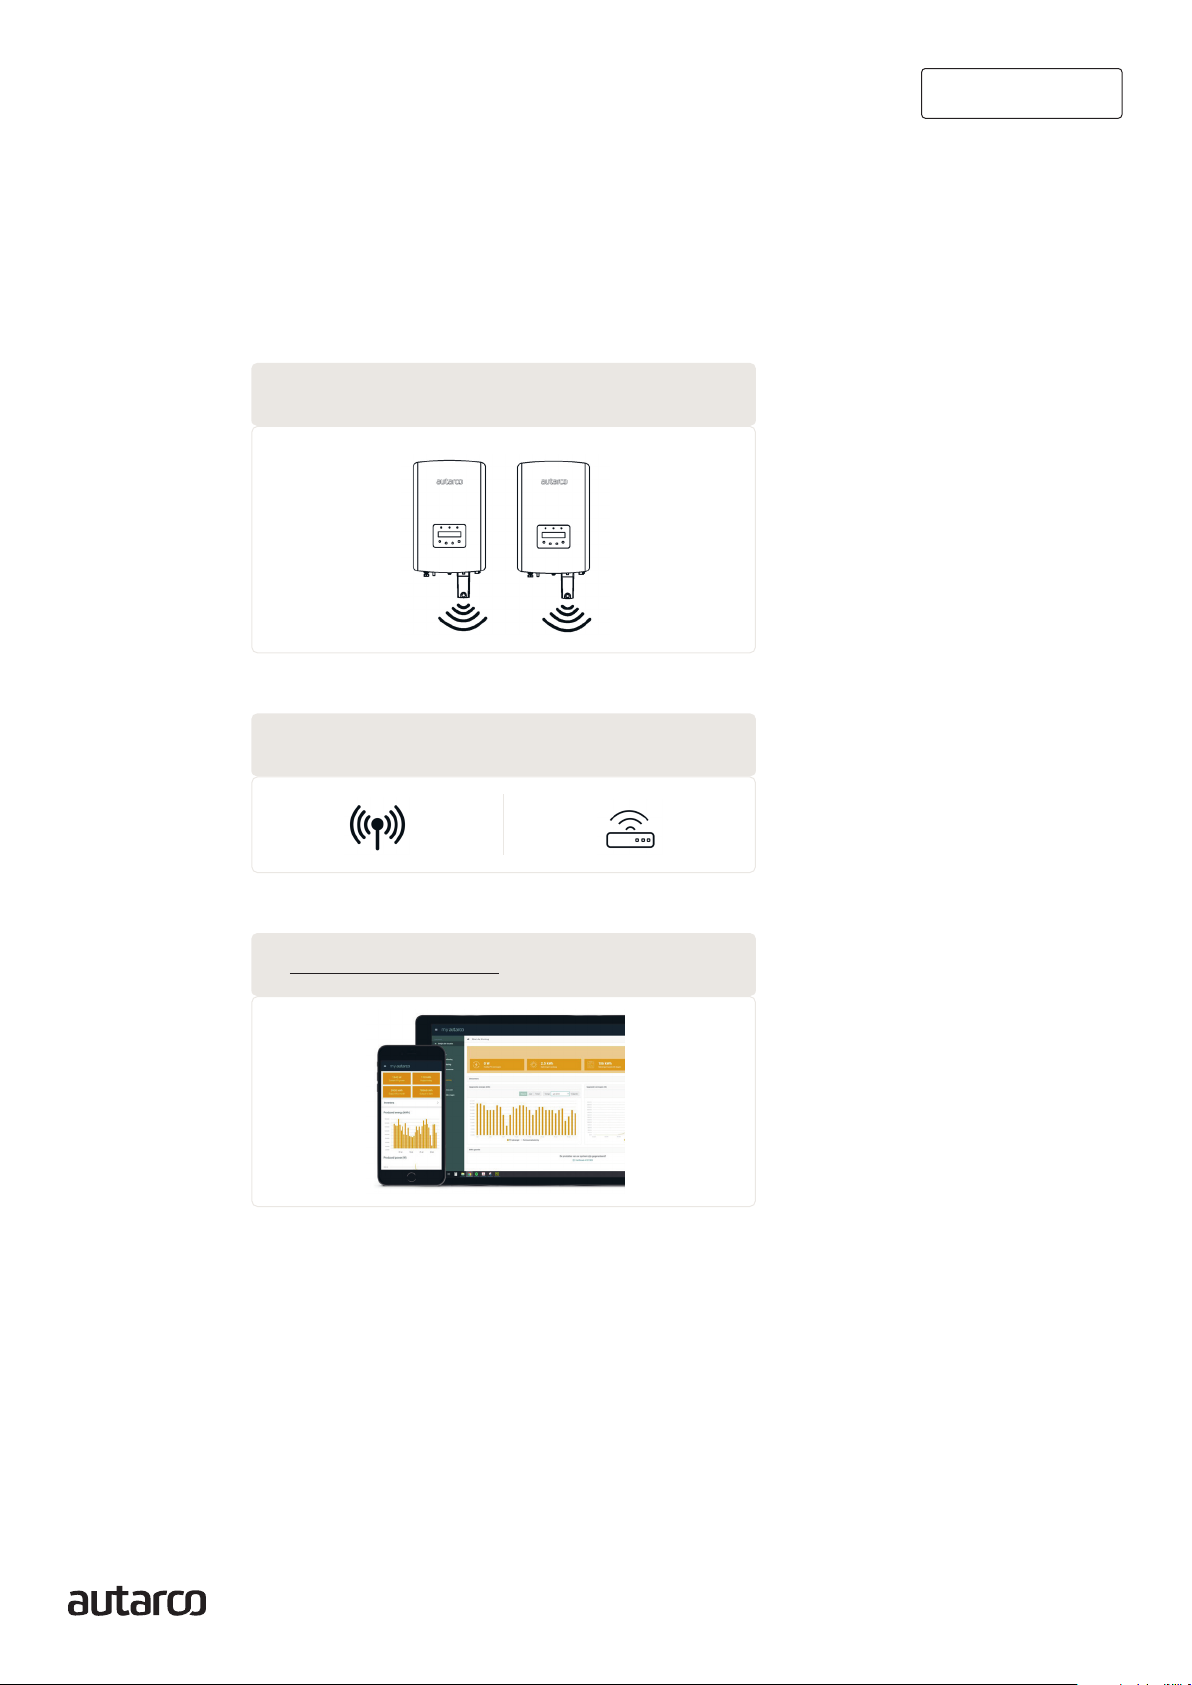
Connection structure for
4G monitoring
1. Inverter(s) with 4G-STICK-D
2. Public mobile network (4G) or Local router (WiFi)
3. https://my.autarco.com
Inverter(s) communicate via 4G-STICK-D with a public mobile network or via WiFi with local router
4G-STICK-D communicates via public mobile network or local router with the Autarco-server
Monitoring data becomes visible in MyAutarco platform
When do you choose a 4G stick?
The advantage of monitoring over a 4G network is that in places where there is no Ethernet or WiFi
(local network), an Autarco solar power system can still be monitored remotely.
NOTE: Monitoring with a 4G connection uses the public mobile network. This requires a (micro) SIM
card and in most cases a subscription with an external provider for which costs are associated.

84G-STICK-D for Autarco Inverters
Installation Manual
3
3.1
3.2
3.3
3.3.1
Installation
What type of SIM card is required?
To use the 4G stick you need an M2M or IoT SIM card. These cards have low monthly usage fees and
limited bandwidth. Some providers of these SIM cards also have a portal to manage multiple cards.
A SIM card uses approximately 10 KB per inverter per day.
Which SIM card size is required?
You need a micro SIM card to operate the 4G stick.
SIM card security code override (unlock)
If the SIM card has a PIN code, you must cancel or unlock it via a mobile phone. To unlock your SIM
card, please take the following steps:
For Android
WARNING! Most smartphones these days use a SIM card in the so-called nano format. Ensure the
SIM card size your phone uses before proceeding. You may need to have the SIM card cut to size
and fit on an adapter again after canceling the security code. This is to be able to place the SIM card
of the correct size back into the 4G stick.
1. Insert the SIM card into a phone (instead of your regular SIM card)
2. Go to ‘Settings’
3. Choose ‘Security’
4. Choose ‘Set up SIM Lock’
5. Choose ‘SIM card Lock’
6. Turn the ‘Lock SIM card’ option OFF
7. Choose ‘OK’
The SIM card is now no longer locked.
4. SIM card formats

94G-STICK-D for Autarco Inverters
Installation Manual
3.3.2
3.4
For iPhone
WARNING! Most iPhones use a SIM card in the so-called nano format. If you want to use an iPhone,
you will have to have the SIM card cut to size and fit on an adapter again after canceling the security
code. This is to be able to place the SIM card of the correct size back into the 4G stick.
1. Insert the SIM card into a phone (instead of your regular SIM card)
2. Go to ‘Settings’
3. Choose ‘Mobile network’
4. Choose ‘SIM PIN Code’
5. Turn OFF the ‘SIM PIN Code’ option
6. Enter the PI code to unlock the SIM card
7. Choose ‘OK’
The SIM card is now no longer locked.
*The SIM card PIN code is stated with your new SIM card. If the SIM card has not been set up before,
this PIN code is usually 0000.
Inserting SIM card in the 4G-stick
After canceling the security code of the SIM card, it can be placed in the 4G stick.
WARNING! You need to access sensitive electronics to insert the SIM card into the 4G-STICK-D.
Handle with care or you may damage the stick!
1. Push the two tabs on the side of the stick
2. Pull out the circuit board from the protective housing
3. Place the SIM card on the circuit board
4. Place the circuit board back into the housing till you hear a click of the tabs
5. Removing the protective housing
1
2
1
10 4G-STICK-D for Autarco Inverters
Installation Manual
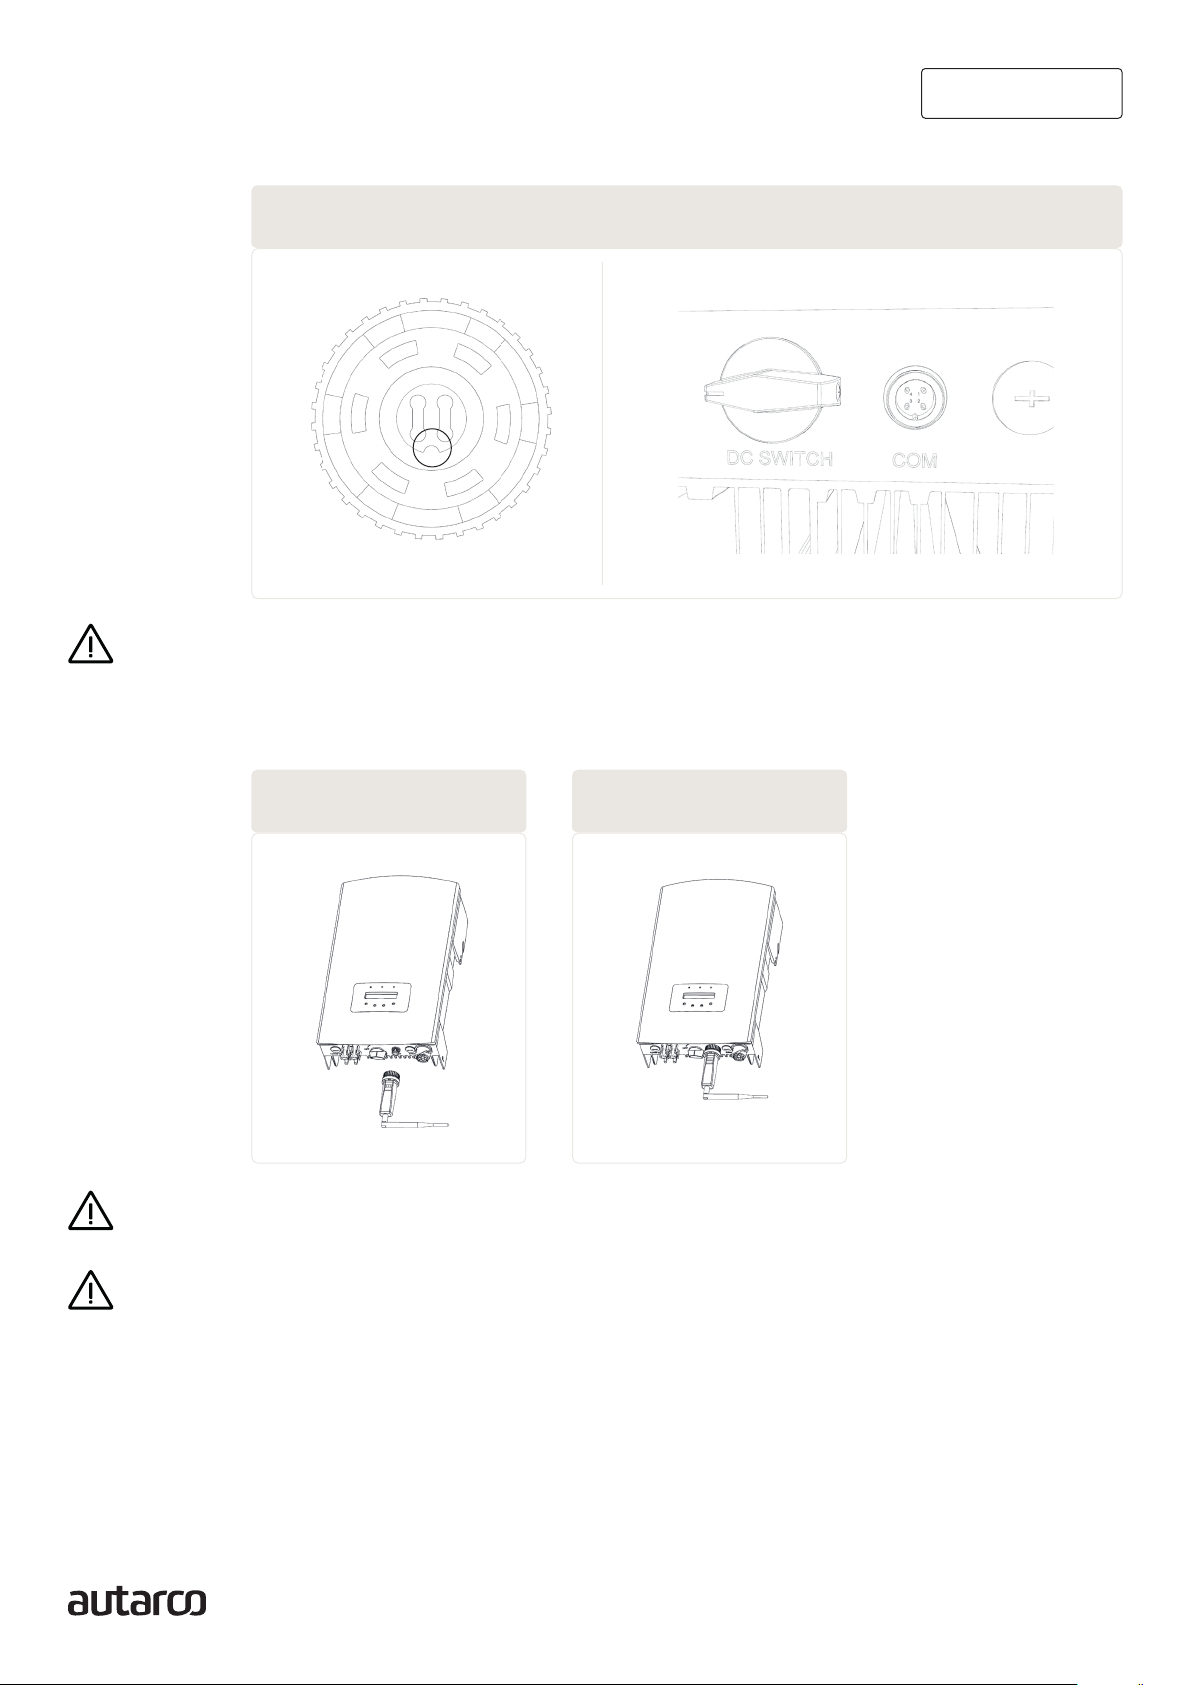
3.5 Installing 4G stick in inverter
1. Plug the 4G stick into the corresponding connection point of the inverter.
ATTENTION! Make sure that the position of the connecting piece of the stick is correct. Place the
small notch on the connection point correctly so that the numbering of the 4-pin connector matches
the numbering on the inverter.
2. Plug the 4G stick into the corresponding connection point of the inverter.
WARNING! To prevent damage, do not turn the black housing itself.
WARNING! Keep the 4G stick away from large metal objects and electrical appliances with magnetic
fields such as microwave, refrigerator, mobile phone, concrete walls, solar panels and metal walls
to ensure the quality of communication.
6. Connector Notch & COM port notch
7. Connection point & stick 8. Stick installation
11 4G-STICK-D for Autarco Inverters
Installation Manual
3.6
3.7
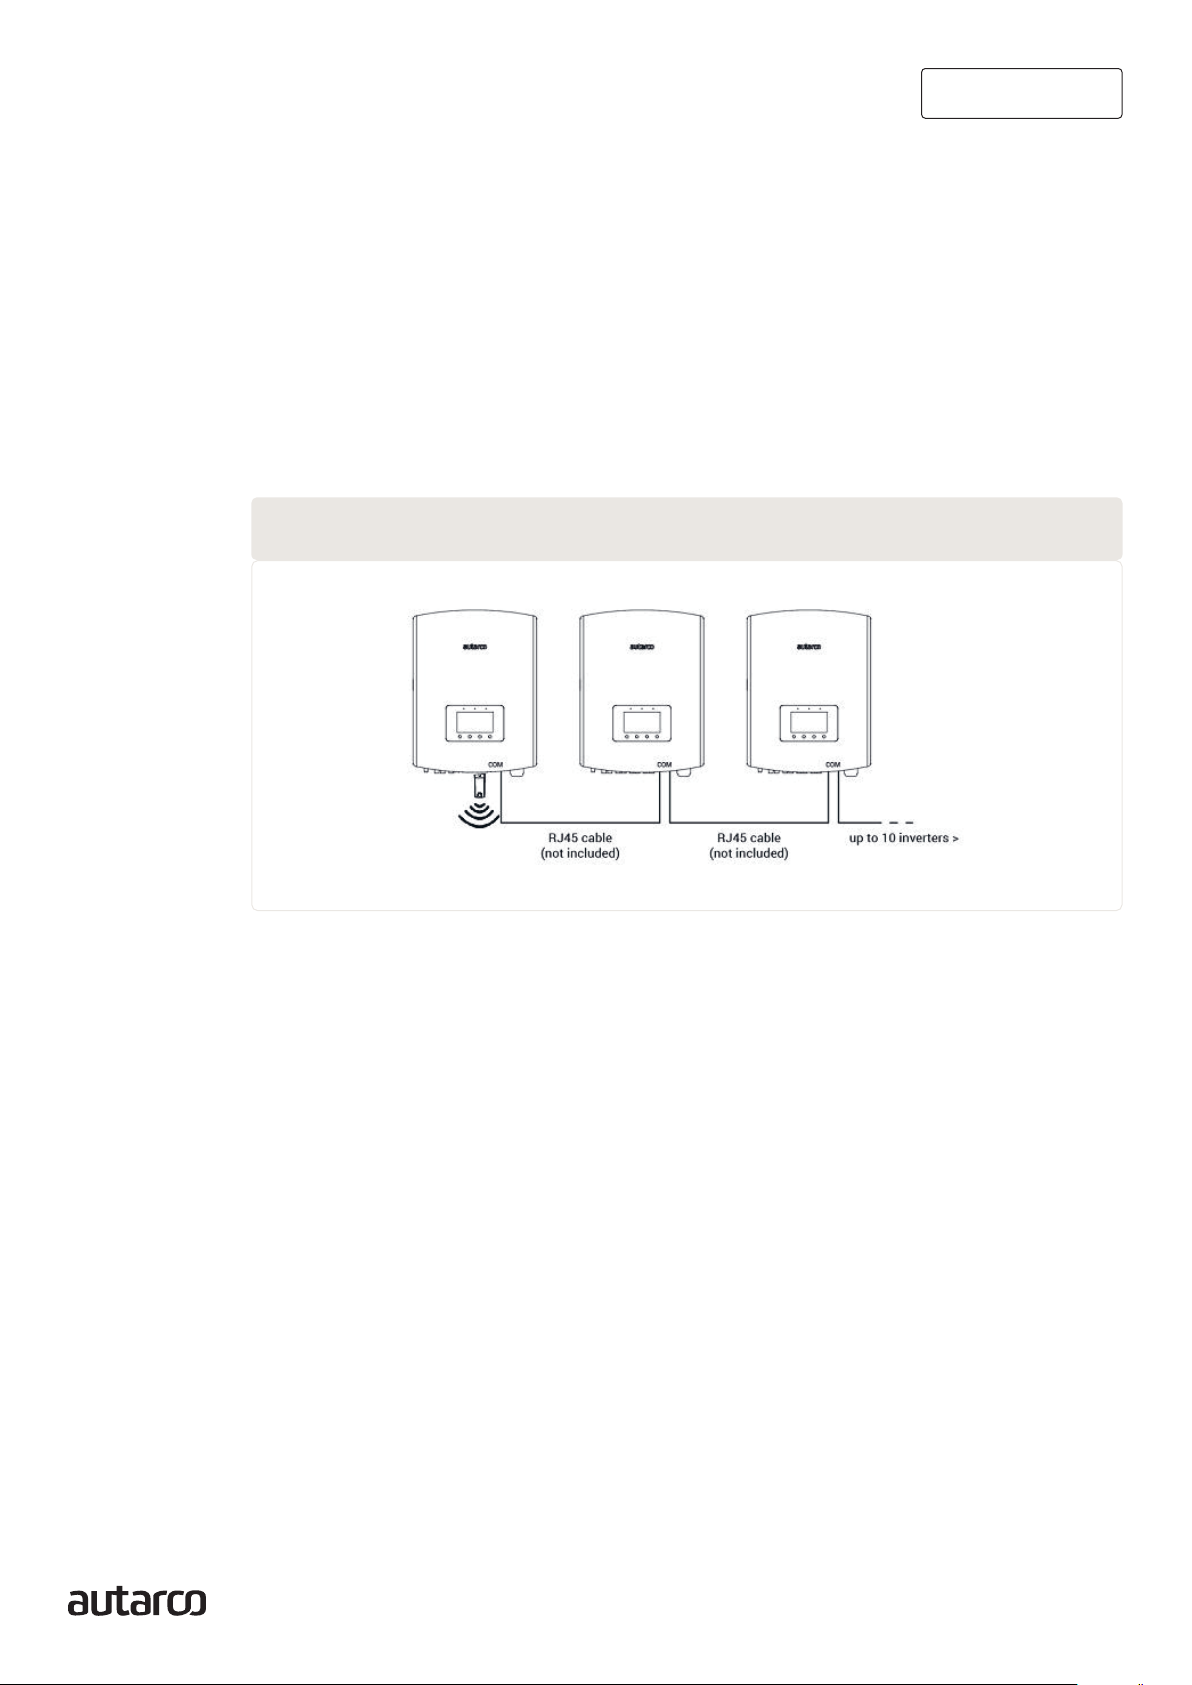
Connection with several inverters
The 4G-STICK-D can also be used to read out several inverters. To do this, the inverters must be
daisy-chained.
1. Connect multiple inverters in parallel with network cables.
2. Connect the 4G-STICK-D to the first inverter.
3.
Set different addresses for each inverter. For example, if three inverters are connected, the
address of the first inverter should be set to “01”, the second inverter to “02”, the third inverter
to “03” and so on.
a. On the inverter, press ENTER and then UP/DOWN to navigate to the SETTINGS.
b. Select SET ADDRESS
c. Use UP/DOWN to select the correct address and press ENTER to save.
d. See the inverter manual for more information.
Network configuration
The default network mode of the device is to prioritize WiFi mode. When there is no WiFi or weak
WiFi signal, the network mode will automatically switch to 4G communication (if the 4G signal is
weak, it will be reduced to 2G for communication). When the WiFi network is restored, the WiFi
communication will be automatically switched back.
The communication stick offers the following network operating modes:
1. 4G + WiFi mode (recommended)
If you need the device’s mode to switch between 4G and WiFi depending on the network conditions,
please refer to sections 3.7.1 and 3.7.2 simultaneously.
2. 4G mode only
If you only need to use the 4G mode to communicate, please refer to section 3.7.1.
3. WiFi mode only
If you only need to use the WiFi mode to communicate, please refer to section 3.7.2. proceed with
the next steps after both PWR and COM indicators are on.
9. Daisy-chaining multiple inverters
12 4G-STICK-D for Autarco Inverters
Installation Manual
Public mobile network (4G) configuration
Before configuring a public mobile network on the communication stick, you must purchase a (micro)
SIM card with an active 4G plan from your local carrier.
ATTENTION! Autarco does not supply SIM cards or Data packs.
Once a SIM card is inserted into the 4G-STICK-D, install the stick in the inverter (section 3.5) and
the communication stick should recognize the APN automatically.
When the stick is connected to a generating inverter, the red “PWR” indicator will turn on immediately.
The “COM” indicator will start to flash blue and then turn solid. The “NET” indicator should be flashing.
If the PWR and/or COM LED is blinking or does not light up, follow instructions in section 7.
Only proceed with the next steps after both PWR and COM indicators are on.
Local WiFi network configuration
When the stick is connected to a generating inverter successfully, the red “PWR” indicator will
turn on immediately. The orange “COM” indicator will start to flash and then turn solid. The “NET”
indicator should be flashing.
If the PWR and/or COM LED is blinking or does not lit, go to chapter 6. Only proceed with the next
steps after both PWR and COM indicators are on. You will now establish the connection between
the monitoring device and Autarco’s server by using the existing on-site WiFi network.
This is done in two steps:
A. Connecting to the local WiFi network of the stick.
B. Entitle the stick to connect to the router on site via the stick’s online interface.
The stick can then use the local internet connection to send monitoring data via your local router
to the Autarco server.
Proceed as follows:
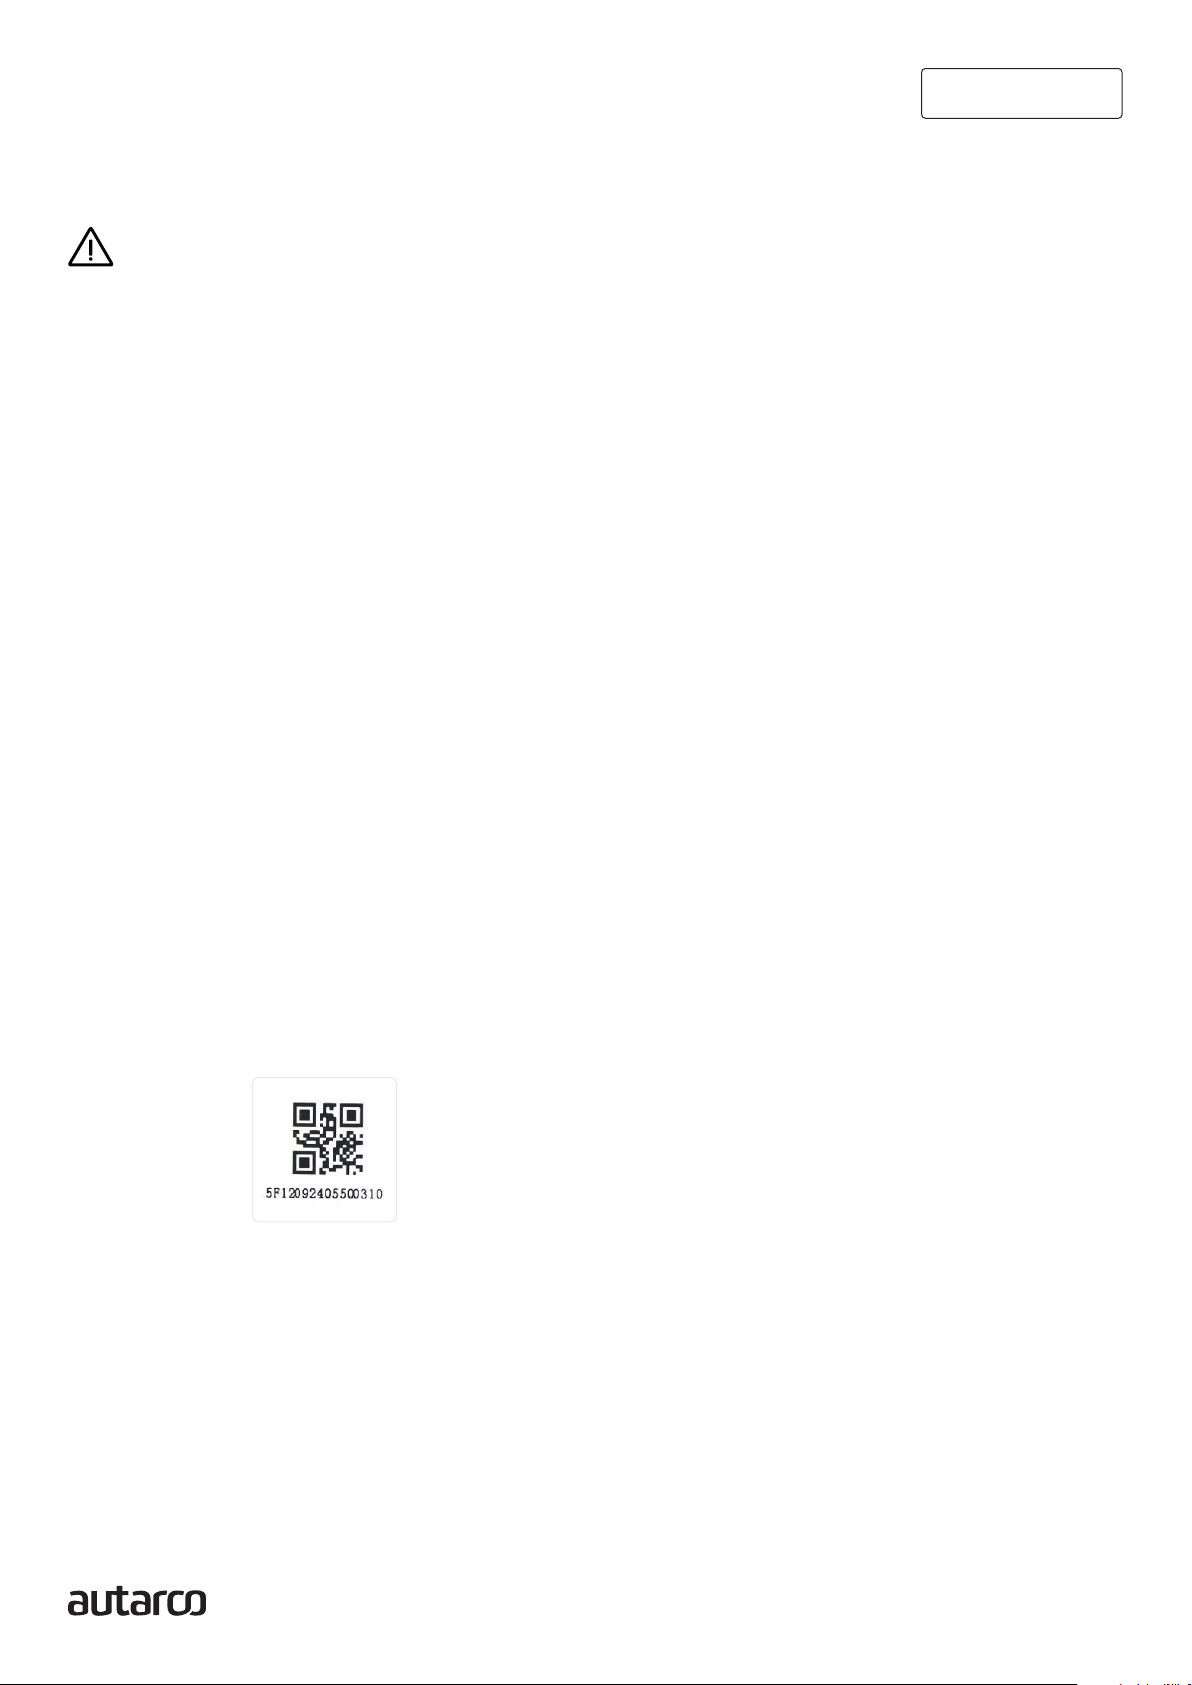
1. Find the serial number of the stick.
This is on a sticker on the front and back of the stick:
As an example we will use WiFi serial number 5F12092405500310.
Your stick will have a different number.
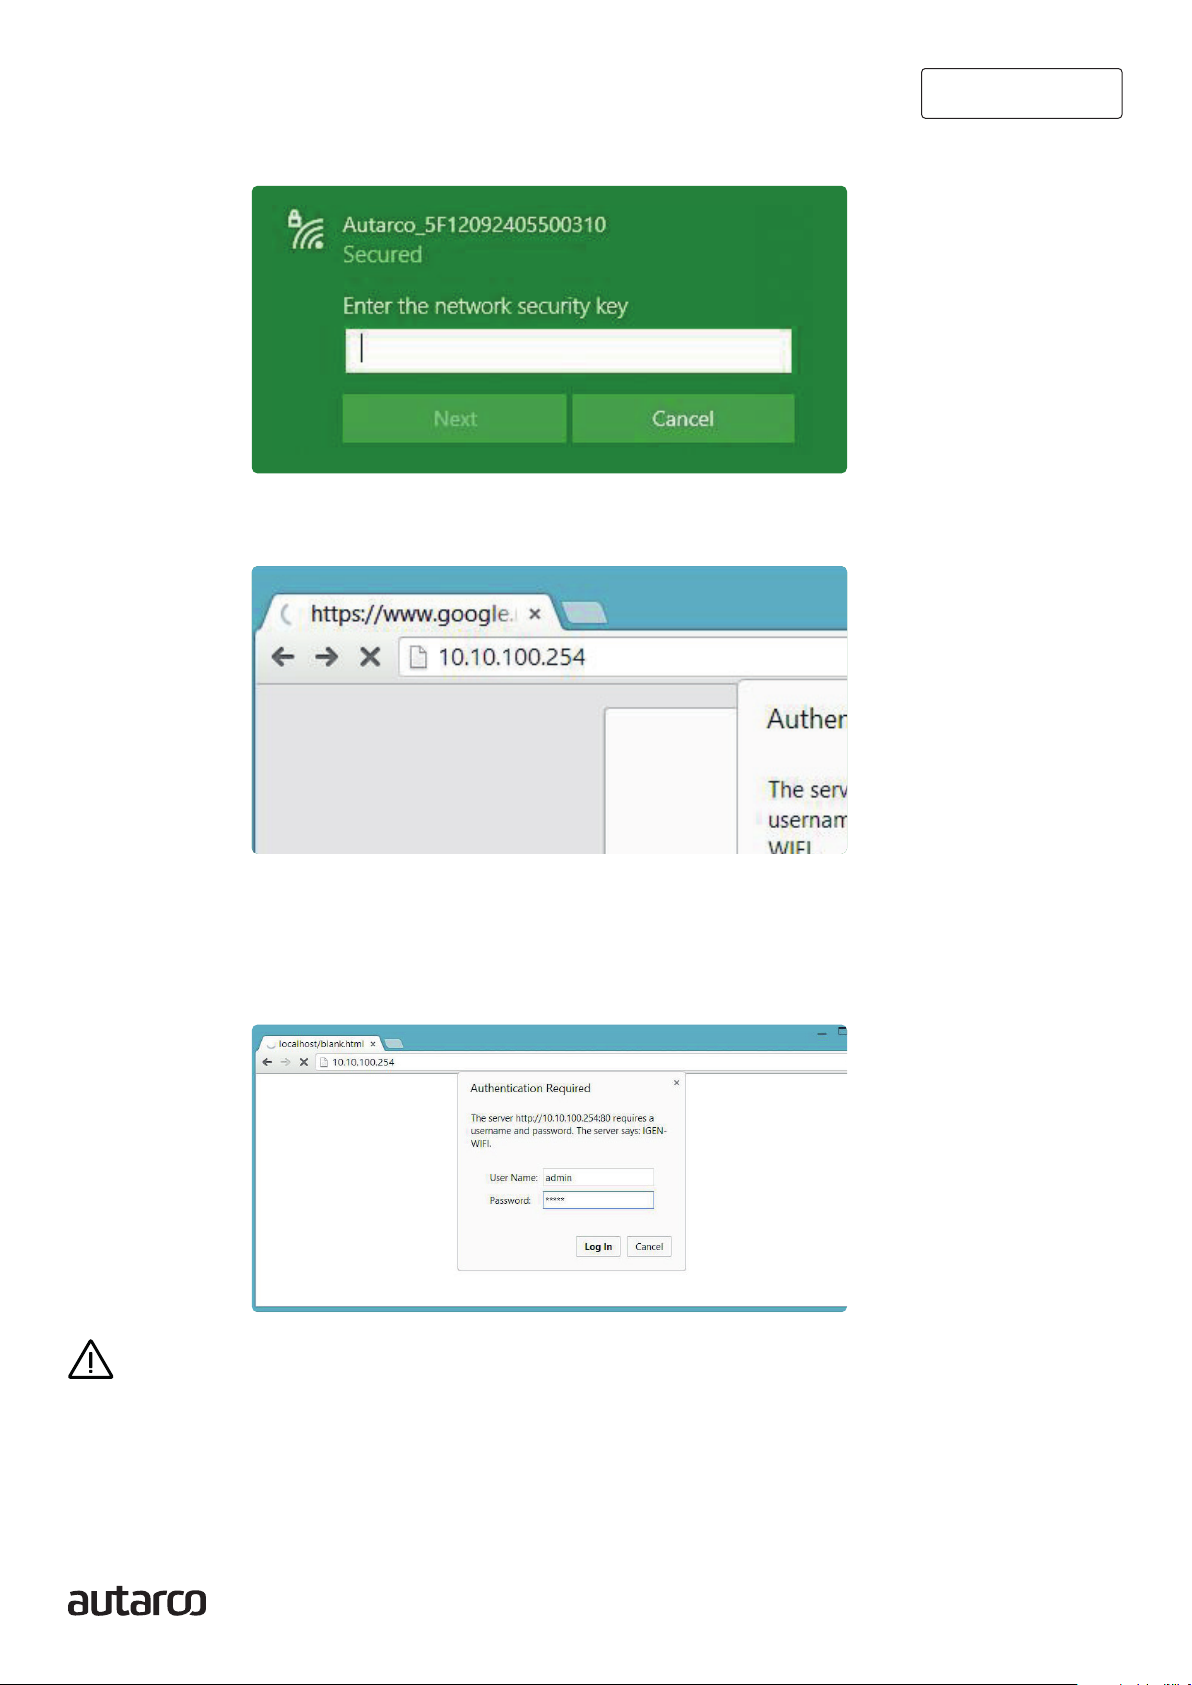
2. Each WiFi stick creates its own secured wireless network with a network name:
Autarco_<serial number> e.g. “Autarco_5F12092405500310”. Connect to this wireless network
with a computer, laptop, tablet or mobile phone and use the password below.
Password: 123456789
3.7.1
3.7. 2
13 4G-STICK-D for Autarco Inverters
Installation Manual
The figure shows an example of this screen in Windows:
3. After you are connected to this WiFi network, enter the IP address 10.10.100.254 in the address
bar of your web browser:
4. Access to the configuration interface of the WiFi stick is password protected. When prompted
for the username and password, use the following credentials:
Username: admin
Password: 123456789
WARNING! Passwords are case sensitive. If using an iPad, iPhone or other tablet device, pleaseensure
that the first character of the password hasn’t automatically become uppercase.
123456789

14 4G-STICK-D for Autarco Inverters
Installation Manual
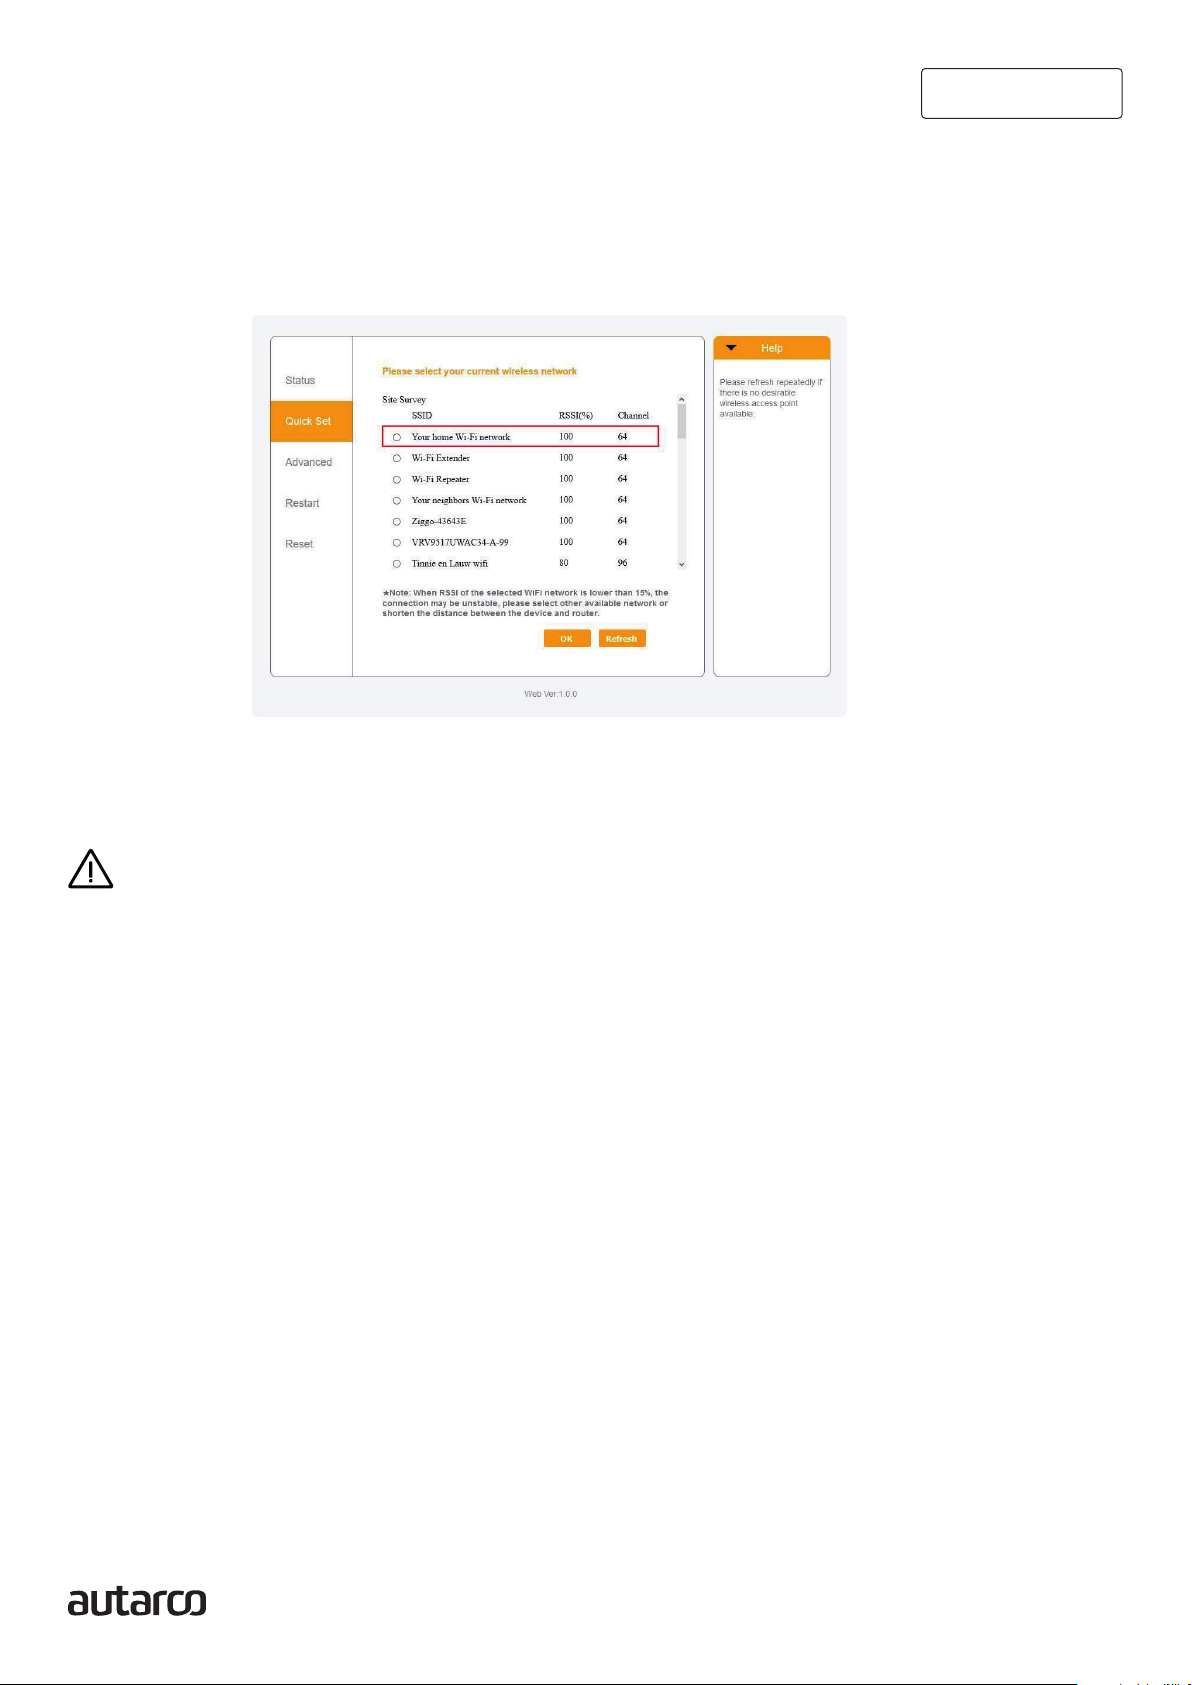
5. Click Quick Set from the main menu on the left.
*If the menu is in Chinese, press English in the top right corner.
6. Click SEARCH.
15 4G-STICK-D for Autarco Inverters
Installation Manual
8. Enter your local WiFi network password. You can click on the eye icon to make the password
visible. This is the same password that you use on other devices to connect to the Internet:
it may be on the back of your router.
WARNING! Passwords are case sensitive. If you’re using an iPad, iPhone, or other mobile device,
make sure the first character of the password isn’t automatically capitalized.
*Make sure the inverter is installed within range of your local WiFi network. If necessary, move your
router or use a WiFi extender or an extra Access Point.
7. A list of nearby WiFi networks will now appear. Find the WiFi signal of your own WiFi router and
select it by clicking on the dot. This is the same WiFi network that you connect to on your home
devices to use the internet. Click OK to continue. If your network is not listed, click Refresh and
make sure the signal is present at the inverter location. For example, check whether this is
the case on your phone. If the strength (RSSI) of the WiFi signal is lower than 30%, no or poor
connection* will be established with the inverter.
16 4G-STICK-D for Autarco Inverters
Installation Manual
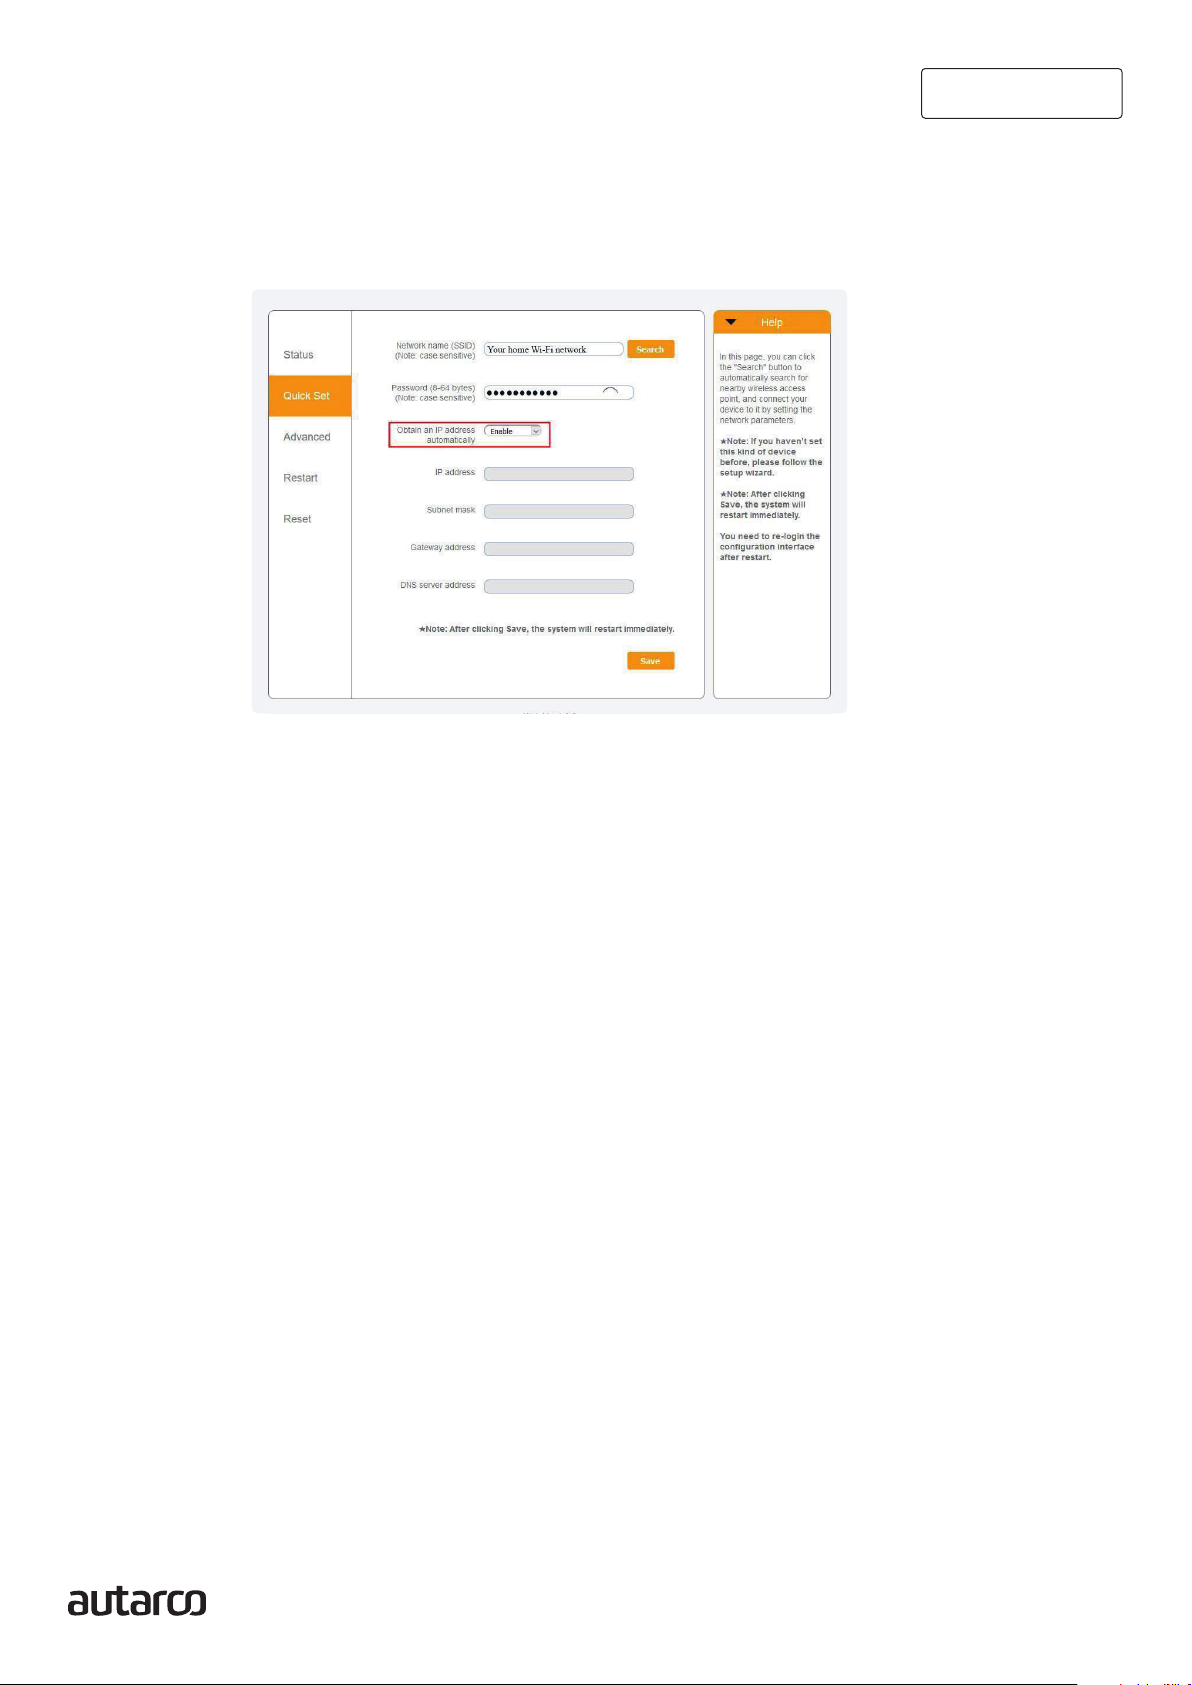
9. A) If your local WiFi router is set up to assign IP addresses automatically, click Save to complete
the installation. This is the most commonly used method.
B) If you have a corporate network, disable the “Obtain an IP address automatically” option by
Disable selecting, enter the next four fields and click Save to save.
After you click Save , the WiFi stick will restart and try to connect to your WiFi network. If this is
successful, the stick’s own WiFi signal will be disabled so that no one can log in to it. All three lights
will now be solid.
10. The installation is complete when all three LEDs are solid. The LEDs will blink occasionally
when the stick is transmitting data. The inverter is now connected to your local WiFi network
and transmits its monitoring data to our Autarco server.
If the green light is not solid, try the following:
• Reconnect to the stick’s WiFi network/AP (Autarco_<serial number>).
• If it doesn’t show up, press and hold the reset button on the stick for 15 seconds until the COM
light (orange) and NET light (green) go out. This will reset the stick and will enable AP mode again.
• Repeat steps 1 to 8
Note: Always make sure that your router’s WiFi channel is set to 1 to 11 (not 12 or 13).
New stick’s IP address after installation
After a successful connection, the stick’s IP address will change. To find out this IP address, log in
to the router to find the new IP address in the list of connected devices. Some routers require you
to switch off and on to refresh the list of connected devices.
3.8

17 4G-STICK-D for Autarco Inverters
Installation Manual
Control4
4.1 Does the stick have a connection?
There are three green LED indicator lights on the 4G stick. The PWR light, or power light, indicates
whether the stick is on (receives power). The COM light, or communication light, provides information
about the communication between the stick and the inverter. The NET light, or network light, provides
information about the communication between the stick and the Autarco server.
In the diagram on the next page you will find information about the meaning of the LED lights.
LED indicator Status Description
NET/Blue ON The stick is connected to the Autarco server via 4G.
The monitoring connection was successful.
Monitoring data is forwarded.
BLINKING The stick is trying to connect to the Autarco server.
OFF The stick does not connect to the Autarco server.
NET/Green ON The stick is connected to the Autarco server via WiFi.
The monitoring connection was successful.
Monitoring data is forwarded.
BLINKING The stick is trying to connect to the Autarco server.
OFF The stick does not connect to the Autarco server.
COM/Orange ON The stick can receive data from all connected inverters.
BLINKING A. The stick is processing data from an inverter, OR
B. The stick is performing a software upgrade (if the green
NET light is also flashing at the same time).
OFF The stick can not receive data from at least one of the connected inverters.
PWR/Red ON The stick is powered (the stick is on).
BLINKING The stick is not getting enough voltage.
OFF The stick is not powered (the stick if off).
10. Summary of LED information

18 4G-STICK-D for Autarco Inverters
Installation Manual
Helios & MyAutarco
Registering stick in Helios
1. Go to the Helios design environment of the relevant system (www.helios.autarco.com)
2. Click on the arrow next to ‘Asset management’ in the bottom menu
3. Click on ‘Monitoring setup’
4. Enter the serial number of the 4G stick
5. Click ‘Confirm’
Helios automatically checks whether monitoring messages are received. This can be found in the
‘Monitoring messages’ field.
Customer registration for MyAutarco
If monitoring messages are received after registration in Helios, the end customer will automatically
receive an email with login details for the MyAutarco environment. This is possible if the end customer
logs in at https://my.autarco.com/ or in the MyAutarco app to view the monitoring data.
If no monitoring messages are received after registration in Helios, you will be given two options:
a. You immediately send the login details to the end customer
b.
The login details are automatically sent to the end customer when the monitoring messages arrive
5
5.1
5.2

19 4G-STICK-D for Autarco Inverters
Installation Manual
Access MyAutarco monitoring
platform (installer)
Once the Autarco server successfully receives monitoring messages, you need to link the data
to the associated system (digital twin) in Helios and generate the MyAutarco login for the end user.
End users should contact their installer for this.
By registering and linking the serial numbers of the installed products the software of Autarco knows
to which system, inverter and string the received monitoring data must be linked.
Then we start displaying the data in MyAutarco for both the dealer and the end user.
NOTE TO THE INSTALLER
Before registering the system with Autarco, you must confirm the following from your customer
regarding the creation of their monitoring and kWh warranty certificates:
• First name
• Last name
• Email address
• Phone number
• Installation address
Access MyAutarco monitoring platform (user)
After installation of the stick by the installer
You will receive your login details by email after the installer has registered your system with Autarco.
You can access monitoring data on MyAutarco, via the website http://my.autarco.com or via the
MyAutarco app.
After installation of the stick by the user
If you, as the owner of the solar power system, have installed a stick or have replaced a stick, it is
necessary that the serial number is registered by your original installer. Only then will the monitoring
work on the website and in the MyAutarco app.
Only if your installer can no longer help you, you can send an email to suppor[email protected]. Then
we can register the serial number for you. For a quick processing, we need the following information:
• First name and last name
• Address (of installation)
• E-mail address
• Serial number of newly installed stick
• Serial number of inverter
• If applicable: serial number of removed stick
5.3
5.4
5.4.1
5.4.2
20 4G-STICK-D for Autarco Inverters
Installation Manual
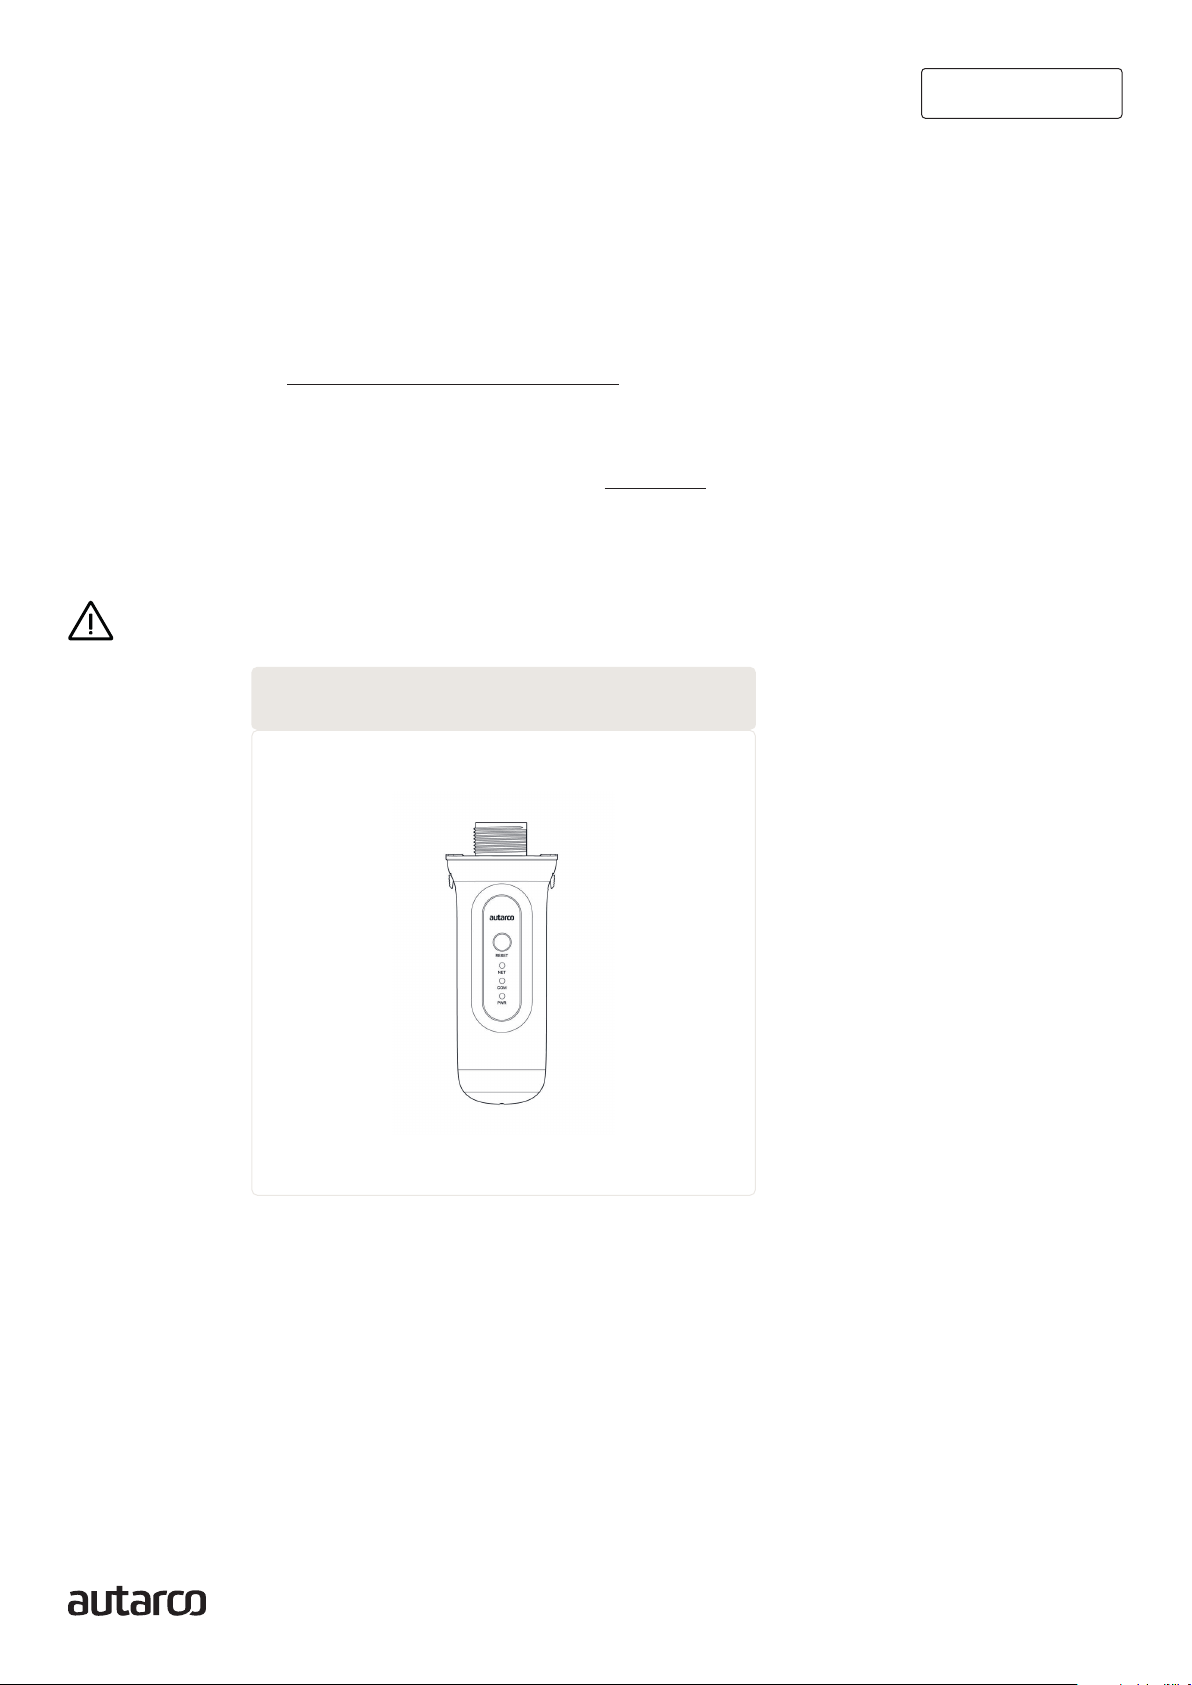
Resetting the stick
The reset button on the stick has two functions:
1. Force a message
Briefly press the reset button once to force a message that is immediately sent to the Autarco
server.
2. Perform reset
Press and hold the reset button for 15 seconds to reset the stick to factory settings. The COM
light (blue / orange) and NET light (green) turn off temporarily. This reset will then re-enable the
stick’s 4G / WiFi Access Point (stick’s 4G / WiFi network) so that you can redo the settings in
chapter 3.
WARNING! DO NOT remove the 4G-STICK-D from the inverter.
This is not necessary for reset.
6
11. Reset button on stick
Table of contents
Other Autarco Inverter manuals

Autarco
Autarco PELD10-MII User manual

Autarco
Autarco SX700 User manual

Autarco
Autarco MX3000 User manual

Autarco
Autarco XLX-MII Series User manual

Autarco
Autarco MX Mark III Series User manual

Autarco
Autarco LH Series User manual

Autarco
Autarco UX Series User manual

Autarco
Autarco OX Series User manual

Autarco
Autarco SX Mark III Series User manual

Autarco
Autarco XLX20000S User manual


