Auto Styling Luxury Tops Truckman User manual
www.autostylinguk.com
NISSAN
NAVARA D40 MK1-2
REVISION 4
LUXURY TOPS
LUXURY TOPSLUXURY TOPS
FITTING INSTRUCTIONS
LUXURY TOPS
/*44"/t/"7"3"%.,
2
Please read these instructions carefully. If you have any questions regarding
Failure to comply with these instructions may affect any warranty considerations
Call our experts on 0845 6444704
NEED ADVICE?
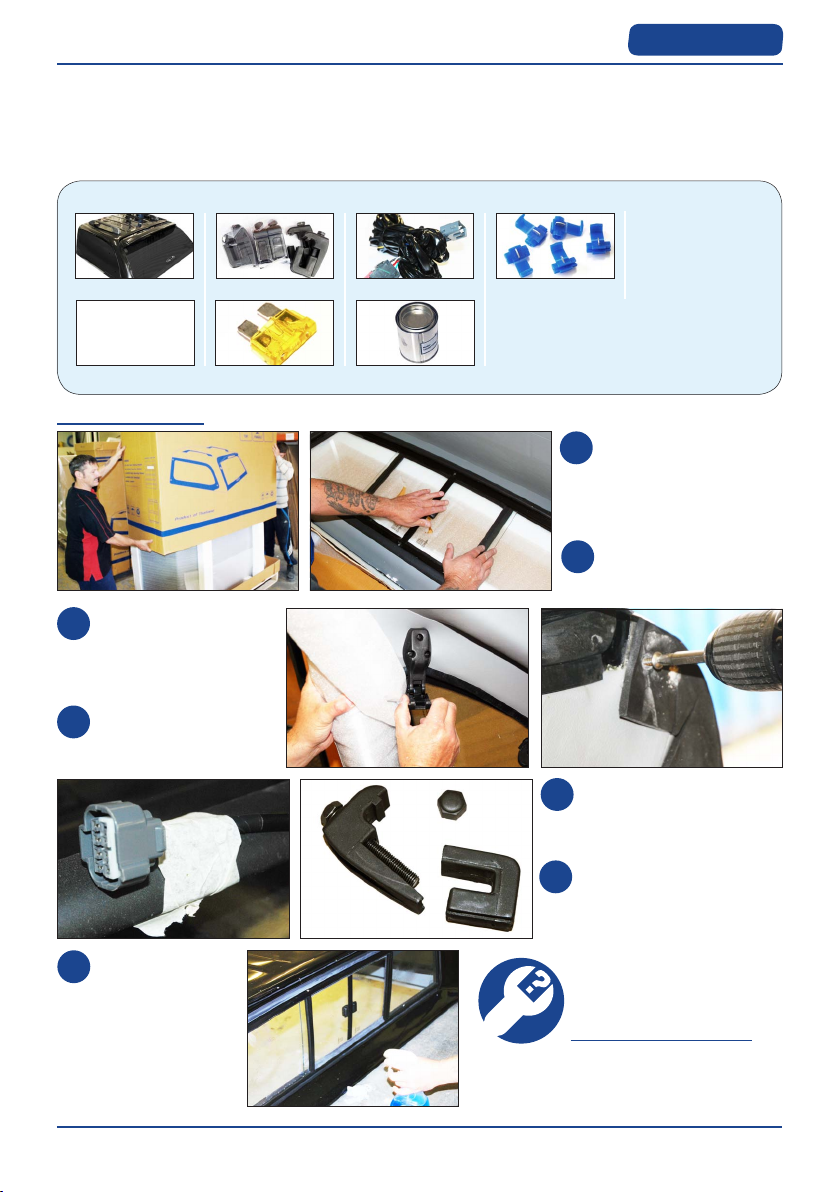
Tape the hardtop wire
temporarily to the roof bars.
In the fitting kit, remove
the bolt caps from the
clamp locks and completely
unscrew each of them.
5
6
Open the pop out
windows to remove the
foam protection. Then
close the windows.
Unscrew the screw at the
top of the rubber seals.
3
4
Thoroughly clean
the rear window
of the pickup and
the hardtop’s bulk-
head window.
7
Remove the cardboard
packaging from around
the top. Keep the pack-
aging intact.
Remove the fitting kit
and close the bulkhead
window.
1
2
Preparation
Kit Contents
1 x ASX Hardtop 6 x Clamp Locks 1 x Wiring Loom 5 x Scotch Locks
1” Double Sided Tape 1 x 20A Fuse 1 x Touch Up Paint
Tools Required
Medium Philips Screwdriver
17 mm Wrench / Socket
(Use a Torque Wrench if possible)
Silicon Sealant & Pump
Drill Driver
Pair of Pliers
Multimeter (Recommended)
3
/*44"/t/"7"3"%.,
Please read these instructions carefully. If you have any questions regarding
Failure to comply with these instructions may affect any warranty considerations
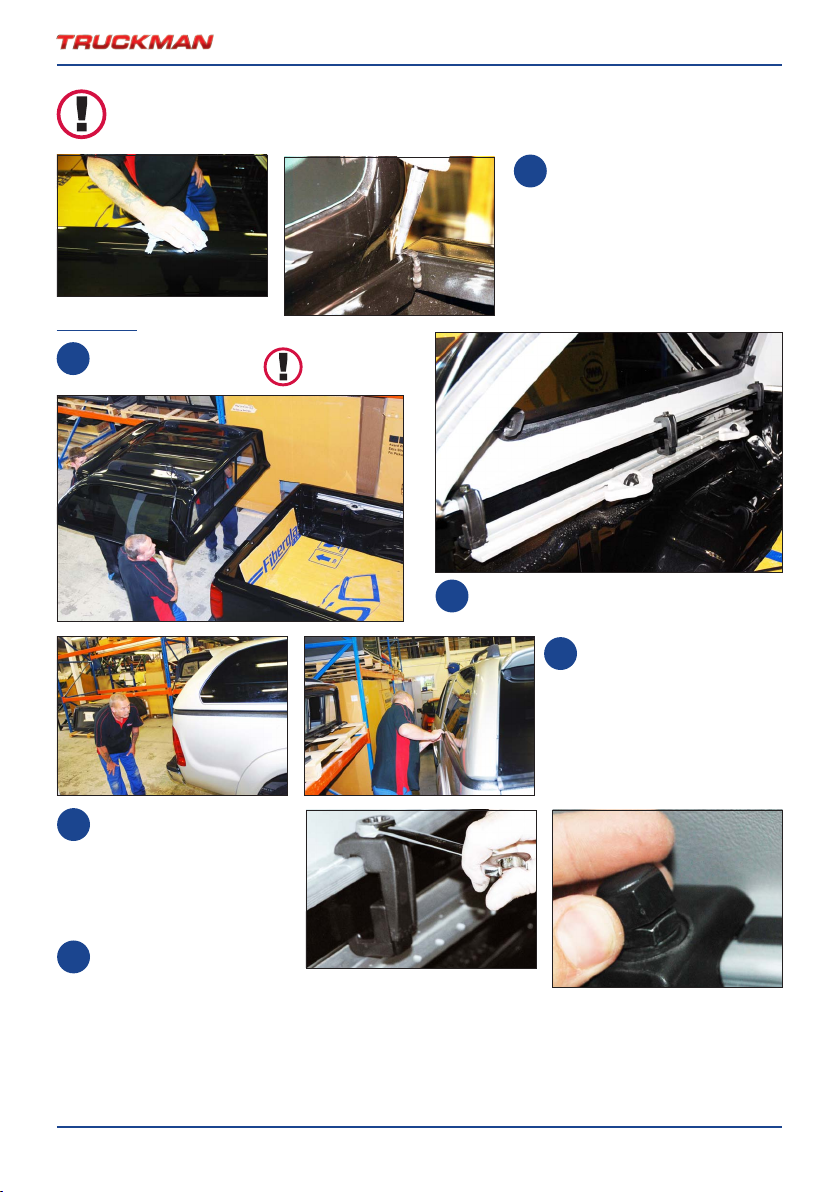
Fitting
Loosely fit the clamps, cutting gaps in the
black rubber strip.
2
Lift the hardtop
onto the bed.
1HEAVY LIFTING
At least 3 people
required for lifting
Wipe down the top of the
vehicle bed and seal the front
corners with silicon sealant.
Use clear or black, depending
on the vehicle colour.
8
OVERRAIL BEDLINERS can cause the hardtop to leak due to an uneven surface. Therefore Auto Styling highly
recommends converting to or replacing with an underrail bedliner.
For instructions, visit our website at www.autostylinguk.com/info/fitting-instructions/
Align the top centrally on
the bed. Ensure there is a
gap between the hardtop
and the vehicle cab, and
that the seal under the
hardtop door is just touch-
ing the tailgate or bedliner.
3
With the door shut,
tighten the clamps to
10Nm Torque using the
17mm wrench (Start with
the middle clamps).
Replace the bolt caps
onto the clamps.
4
5
(Just more than hand tight / 10Nm Torque)
LUXURY TOPS
/*44"/t/"7"3"%.,
4
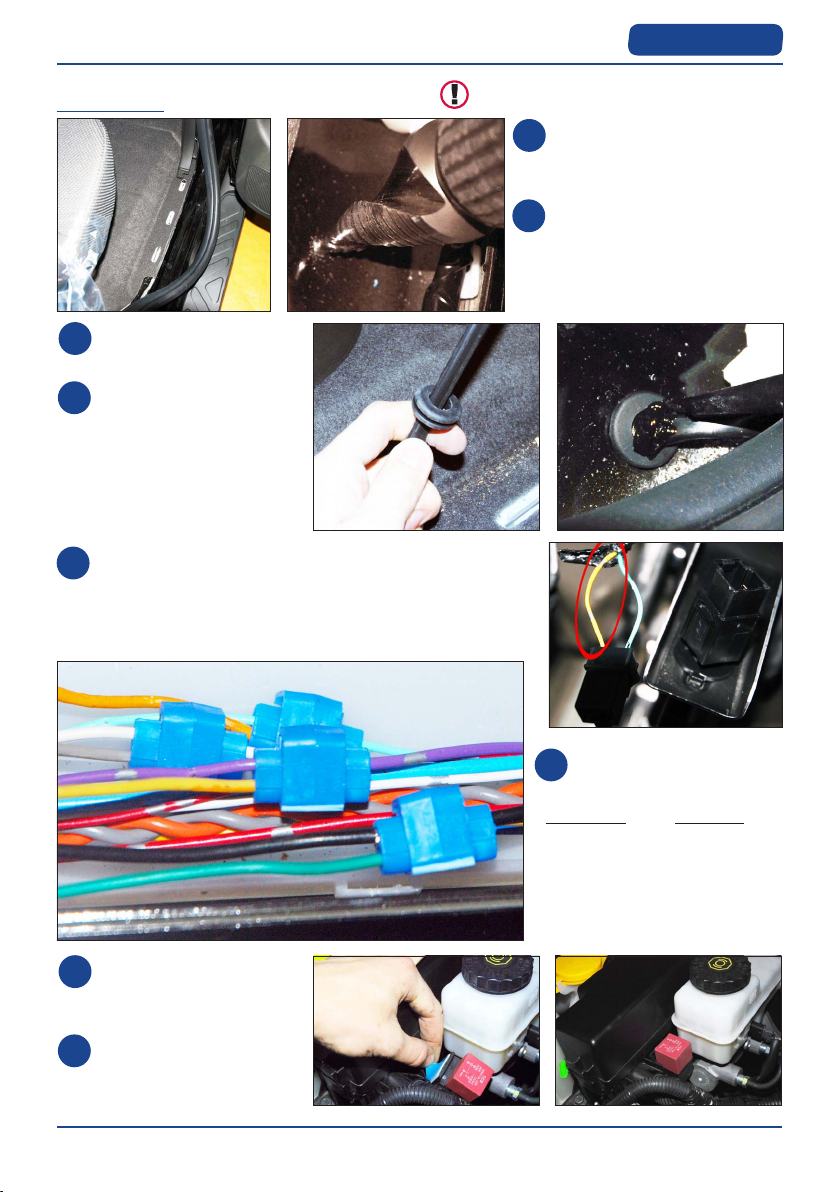
Ensure the ignition is off.
Remove door sill trim and kick
plate from the driver’s door.
D
rill a suitably sized hole in the
vehicle’s floor pan. We use a
bore hole drill bit. Connect the
wiring loom from the fitting kit
to the hardtop.
1
2
Electrics Vehicle wire colours are listed as a guide.
Please check with a multi-meter before fitting the harness.
Using the scotch locks, fix
the loom as shown.
HARDTOP
VEHICLE
YELLOW LOCKING
GREY UNLOCKING
GREEN HEATED SCREEN
BROWN DOOR SWITCH
BLUE BRAKE
6
In the driver’s door sill, expose the wires and locate the
central locking wires (PURPLE (lock) & WHITE (unlock)),
the heated rear screen wire (BLACK), the door switch wire
(TURQUOISE), and the brake wire (above brake pedal -
see left, YELLOW).
5
Bring the other leg of wires (in-
cluding relay) under the vehicle,
into the engine compartment.
Attach the relay to the side of
the vehicle’s fuse box using the
double sided sticky tape.
7
8
Pass the ‘5-wire’ leg through
the hole, into the cab.
Slide a grommet down the
wire and into the hole. Pass the
wire to the front and fill the
grommet with silicon
sealant.
Disconnect the hardtop.
3
4
!"#"$%&'()*
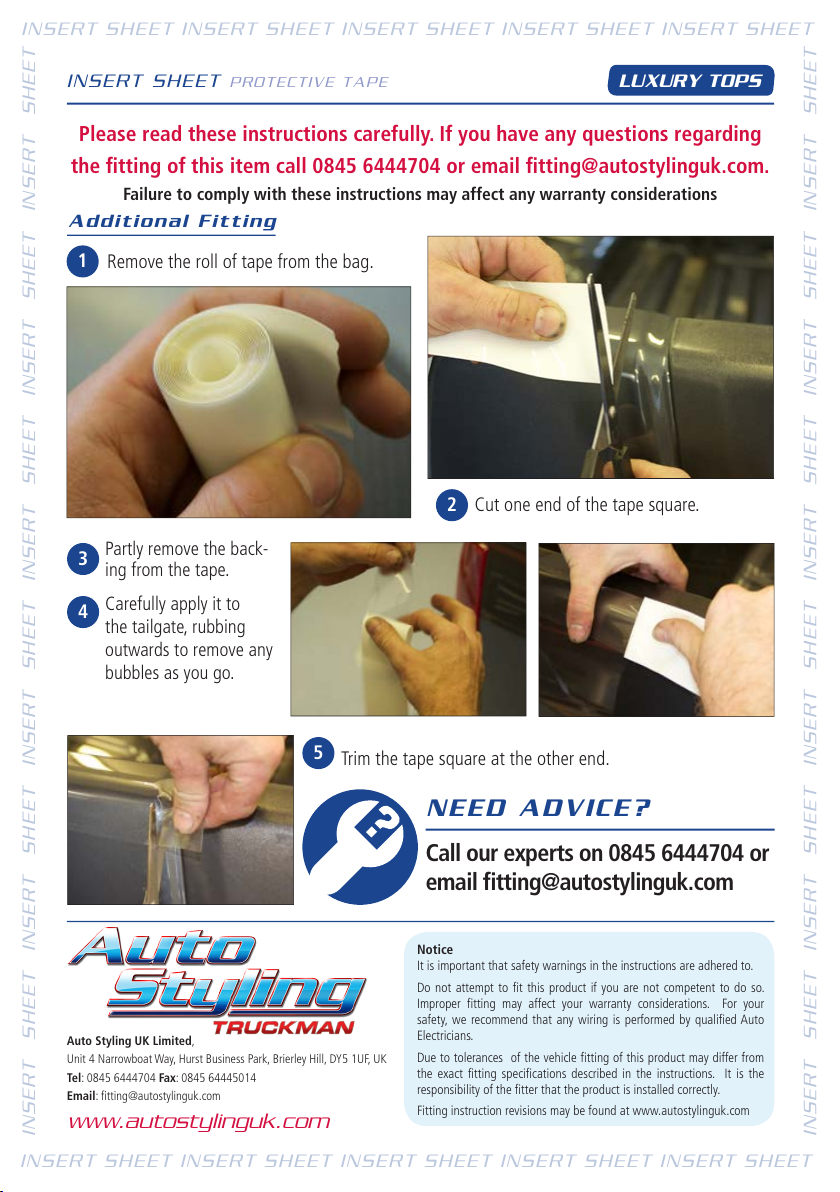
Insert sheet ProtectIve ta Pe
Please read these instructions carefully. If you have any questions regarding
Failure to comply with these instructions may affect any warranty considerations
+,,-.-/012&3-..-04
Cut one end of the tape square.
2
Remove the roll of tape from the bag.
1
Auto Styling UK Limited,
Unit 4 Narrowboat Way, Hurst Business Park, Brierley Hill, DY5 1UF, UK
Tel: 0845 6444704 Fax: 0845 64445014
Email: [email protected]
www.autostylinguk.com
Notice
It is important that safety warnings in the instructions are adhered to.
Do not attempt to fit this product if you are not competent to do so.
Improper fitting may affect your warranty considerations. For your
safety, we recommend that any wiring is performed by qualified Auto
Electricians.
Due to tolerances of the vehicle fitting of this product may differ from
the exact fitting specifications described in the instructions. It is the
responsibility of the fitter that the product is installed correctly.
Fitting instruction revisions may be found at www.autostylinguk.com
Trim the tape square at the other end.
5
Partly remove the back-
ing from the tape.
Carefully apply it to
the tailgate, rubbing
outwards to remove any
bubbles as you go.
3
4
Call our experts on 0845 6444704 or
5667&+789:6;
Insert sheet Insert sheet Insert sheet Insert sheet Insert sheet
Insert sheet Insert sheet Insert sheet Insert sheet Insert sheet
Insert sheet Insert sheet Insert sheet Insert sheet Insert sheet Insert sheet
Insert sheet Insert sheet Insert sheet Insert sheet Insert sheet Insert sheet
Table of contents
Other Auto Styling Automobile Accessories manuals


Popular Automobile Accessories manuals by other brands


ULTIMATE SPEED
ULTIMATE SPEED 279746 Assembly and Safety Advice

SSV Works
SSV Works DF-F65 manual

ULTIMATE SPEED
ULTIMATE SPEED CARBON Assembly and Safety Advice

Witter
Witter F174 Fitting instructions

WeatherTech
WeatherTech No-Drill installation instructions

TAUBENREUTHER
TAUBENREUTHER 1-336050 Installation instruction