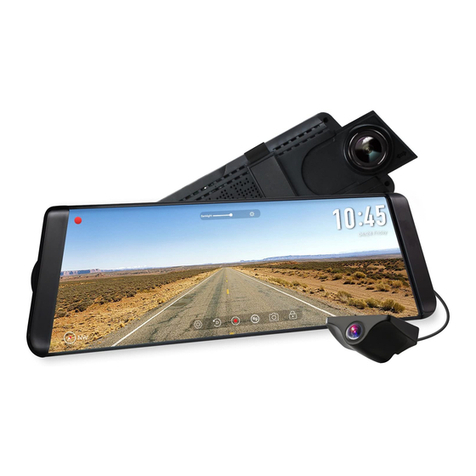
Auto Vox M8 User manual

Touch Screen Mirror Dash Camera
AUTO-VOX M8


Chapter 1
Precautions...............................................................
Warning....................................................................
Warranty...................................................................
Chapter 2
Main Features..........................................................
Touch Screen Dash Cam at a Glance.....................
Turning on the Touch Screen Dash Cam................
LCD Screen Saver Setting.......................................
Loop Recording Setting...........................................
Format Card.............................................................
Firmware Update.....................................................
Installing and Removing SD card............................
Menu Operations.....................................................
Backup Camera at a Glance....................................
1
1
1
2
2
3
4
4
4
4
5
5
15
Chapter 3
Wiring at a Glance..................................................
Installing Touch Screen Dash Cam........................
Installing Backup Camera......................................
Wire Connection Steps..........................................
Testing....................................................................
Wire Routing...........................................................
Chapter 4
Technical Specification..........................................
Chapter 5
Trouble Shooting....................................................
15
16
17
18
19
19
20
23
TABLE OF CONTENTS

Chapter 1
1
PRECAUTIONS
Please read this manual carefully before your operation and keep it for future reference. It will be helpful if you have any questions or
encounter any operational problems. We hope that this product will meet your needs.
WARNING
Do not expose this product to rain, moisture, or water under any circumstances. Doing so may result in the risk of electric shock or fire.
WARRANTY
This product is covered by one-year warranty period. During the warranty period, if the product was used under normal conditions, you
will be entitled to the repair of the product and replacement of parts free of charge arising from defects in the materials and workmanship.
AUTO-VOX reserves the right to amend the warranty content without prior notice.
Note:
1. AUTO-VOX shall not be liable for any damages of any kind resulting from the purchase or use of the product of arising from the breach
of the express warranty, including incidental, special or consequential damages, or loss of anticipated profits or benefits.
2. The warranty period shall be calculated from the date of purchase.

2
Chapter 2
MAIN FEATURES
• 1296P 6 glass lens front camera recording
• 180°horizontal super wide angle back up camera(without recording)
• With LDWS (lane departure warning system)
• Touch Screen and User's friendly menu interface
• 6.86" wide display view
TOUCH SCREEN DASH CAM AT A GLANCE
Lens
LCD Screen
Reset

TURNING ON AND OFF THE TOUCH SCREEN DASH CAM
1. Plug the car charger into cigarette lighter or power supply or press O/M button, mirror turns on automatically.
2. When you shut off your vehicle, it will turn off according to the time you set.
Note:The Touch Screen Mirror Dash Cam is powered by a rechargeable Li-ion battery, but it can only last around 5 minutes without an
external power supply.
Note: Functions for those button
Left: Press to lock the video in Emergency folder.
Press and hold for 3 sec to capture.
O/M button: Press O/M button, LCD screen will be off meanwhile the dash cam still records. Press O/M button again, LCD screen will
show meanwhile the dash cam still records.
Press and hold for seconds to turn on or turn off.
3
Mini USB Port Left
Micro-phone Right
O/M Button
Micro-SD Slot
AV-IN(to connect
rear view camera)
O/M

4
LCD SCREEN SAVER SETTING
Touch "menu""setting"-- find " LCD Power Save"
May select 15,30 sec and 1 min. Default is 30 sec.
If you don't need the screen to display when driving, please set it. Though the screen is off, the dash cam still records, and the screen will
be on automatically again when reversing.
LOOP RECORDING SETTING:
Touch "menu""setting"-- find " Movie Clip Time"
Select the duration of each video:1,2,3 minutes.
After setting it , the device will continue to record by overwriting the previously recorded video and replacing it with the new video.
FORMAT CARD
1. SD card will be formatted automatically when it is been inserted.
2. When recording, please stop by touch ("menu"), touch "Format" to select "YES"
3. Format the micro SD card on PC Take out the SD card and insert it to a car reader, and then connect to the PC to format.
Note: If you use a 64 GB SD card, please format it on PC to FAT32. We suggest to format each week.
FIRMWARE UPDATE

5
REC: Touch to start record
Motion:
• Select "on" to open this function. Then it can record automatically
if there's something moving within 3m even though you left the car.
• The precondition is that the device is in standby state able to get
power from fuse box. So it means you should buy a katallobar
hardwire to make it.
• Select "off" to close this function.
• Note: Please select "off" when driving.
Setting: Set up details
INSTALLING AND REMOVING THE MICRO SD CARD
Insert Micro SD (class 10 or higher with FAT 32) in to the card slot making sure to
follow correct orientation markings. Push the card until it clicks into place. Do not
remove or insert the memory card when dual dash cam M8 is powered on since it
may damage the card.
Memory card capacity should be at least 4G, but not over 64GB with class 10 and
FAT32. Please format the Micro SD card before the initial use to prevent some
abnormal problems.
MENU OPERATIONS

6
Movie Mode
• Select resolution: 1296P, 1080P, 720P
1/1
Movie Mode
1296P
1080P
720P
Movie Quality
• Select Super Fine or Fine
1/1
Movie Quality
Super Fine
Fine

7
1/1
Movie Clip Time
1 min
2 min
3 min
Movie Clip Time
• Select the duration of each video: 1, 2, 3 minutes.
• After setting it , the device will continue to record by overwriting the previously recorded video and replacing it with the new video.
1/2
Movie Off Time
0 min
5 sec
10 sec
30 sec
2/2
Movie Off Time
1 min
2 min
Movie Off Time
• Select recording time after car shut off: 0,5,10,30 sec. and 1,3 min.

8
Sound Record
on
off
Sound Record
• If you don't want to record sound ,please choose OFF.
Note: When play back video by dash cam, sound can be played. But couldn't play on PC, please use video player VLC.
Beep
on
off
Beep
• Select On or off.
• ON means when touch selections, you may hear audio cues that you touch it.
• Off means when you touch selections, couldn't hear audio cues.

9
Power Off
Never
1 min
5min
Power Off
• Select: Never, 1 min, 5min
• When the dash cam is powered by car battery, the dash cam will power off automatically after stopping recording.
Note: If parking monitoring function is on, it will not power off automatically even set 1 or 5 min.
Clock Settings
Clock Settings
• Set up year, date and time for dash cam.
2020 Y 03 M 11 D
21 : 42 :
OK
57
Back

10
Stamp
Date+Logo
Date
Logo
OFF
Select Stamp format
• Set up the stamp format in your videos and pictures.
1/1
Flicker
50 Hz
60 Hz
Flicker
• Select the right frequency from 50Hz or 60Hz.

11
1/1
LCD Power Save
Off
15 sec
30 sec
1 min
LCD Power Save
• May select 15,30 sec and 1 min. Default is 30 sec.
• If you don't need the screen to display when driving, please set it. Though the screen is off, the dash cam still records, and the screen will
be on automatically again when reversing.

12
1/2
Protect Level
Off
Level 0
Level 1
Level 2
2/2
Protect Level
Level 3
Level 4
Protect Level
• Select with off, Level 0,Level 1, Level 2, Level 3, Level 4
• Note: This function works when the road is bumpy and mirror is vibrating during recording, the video file will be locked in Emergency folder.
In those conditions, we recommend to set off. Generally we recommend you to set " Level 2 or Level 3".

13
Reset Setup
Reset Setup?
NOYES
Reset Setup
• If all setting need to be deleted, please touch "Yes".
Back
1/1
Parking Monitoring
Off
High
Middle
Low
Parking Monitoring
• Select Off, High, Middle, Low.
• When driving, please select Off.

14
Language
• Choose the language you need.
Backing-up Line
If you need guide line when reversing, please select On.
FW Version
• Touch this setting to find your newest firmware.
Browse (Playback)
Video Type: Normal, Parking, Emergency
1. Select the image or video you want to view, and then click the screen to play it.
2. Click the "Back" icon in the upper right corner.
Note: You can also choose to delete, lock or unlock the file you select.
Format:
We suggest to Format SD Card every 3-6 months.
Ews(LWDS)
If you select ON when driving, the device will alert you if you suddenly depart from your lane.It makes you be aware of danger in time,
especially for long fatigue driving or novice.

Chapter 3
15
To ground (iron part)
To reversing light +12V
Car Cigarette Lighter
Mini USB Port Micro-SD Slot
AV-IN(to connect
rear view camera)
BACKUP CAMERA AT A GLANCE
WIRING AT A GLANCE

1. Turn off the vehicle’s engine
2. Attach M8 dash cam on the original rear view mirror
3. Plug the car adapter into the cigarette lighter of your vehicle
4. Connect the car adapter’s ending to the mini-USB socket of M8mirror dash cam.
Extra power cables can be tucked in the edges of windshield when you rote the wire.
Note:
1. M8 dash cam working voltage: 5V 1.5A ; Please use standard car charger to supply
the power for M8, or it will cause damage to the device.
2. If M8 shakes slightly, you might try the next slot on the bands, mirror sizes vary a lot.
INSTALLING M8 TOUCH SCREEN DASH CAM
16

INSTALLING BACKUP CAMERA
Step1 Loose the screws on the license plate with wrench.
Step2 Install the camera bracket behind the license plate.
Step3 Tear off the film A of the 3M adhesive and fix it to the marked
location. Tear off the film B of the 3M adhesive then attach the license
plate. Then tighten the screws with wrench.
Step1 Take off the license plate with wrench.
Step2 Find a best location and make a mark.
Step3 Tear off the film A of the 3M adhesive and fix it to the marked
location. Tear off the film B of the 3 M adhesive then attach the license
plate. Then tighten the screws with wrench.
17
(1) (2)
ABC123 ABC123
ABC123 ABC123
Table of contents
Other Auto Vox Dashcam manuals
