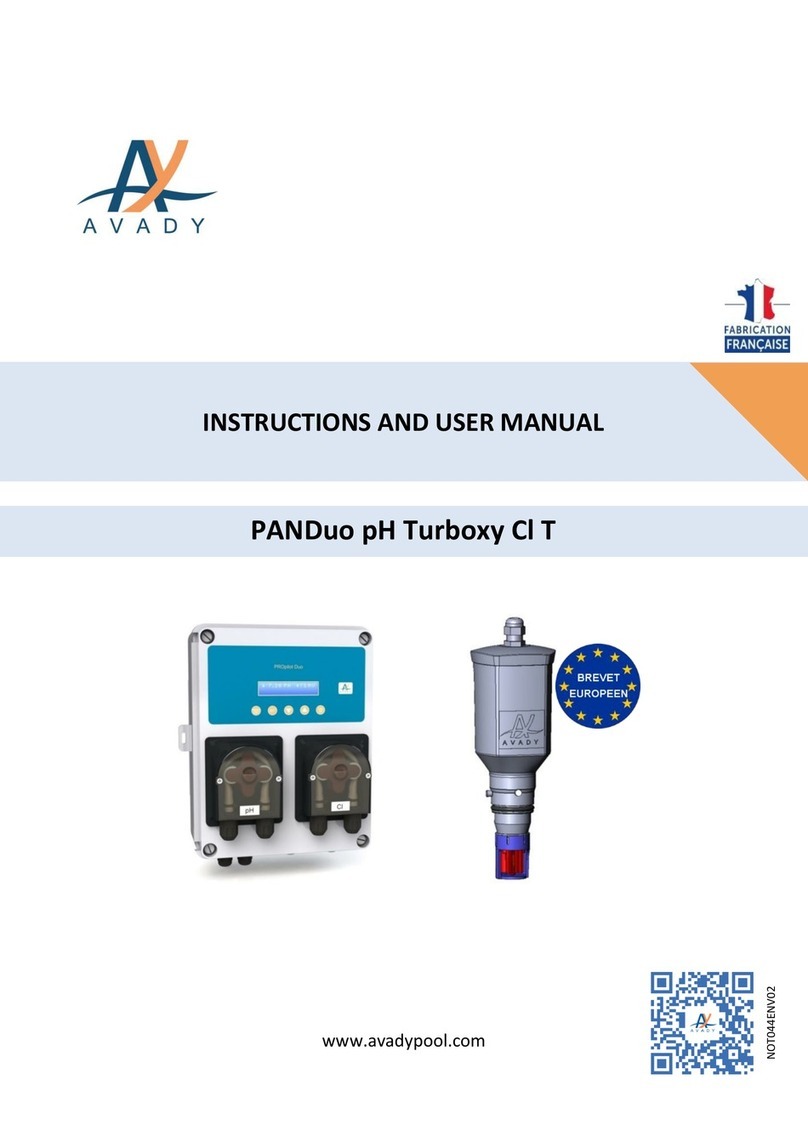
Avady ChloriProtect Rx Instruction Manual

www.avadypool.com
ChloriProtect Rx
NOT004ENV05
INSTRUCTIONS AND USER MANUAL

Instructions and user manual ChloriProtect NOT004ENV05
SUMMARY
1.0 - WARNINGS AND TIPS ................................................................................................................ 1
1.1 - GUARANTEE AND WARNING .......................................................................................1
1.2 - SHIPPING AND TRANSPORTING ...................................................................................1
1.3 - PROPER USE OF THE DEVICE ........................................................................................1
1.4 - RISKS...........................................................................................................................1
1.5 - TOXIC AND/OR DANGEROUS LIQUID DOSAGE..............................................................2
1.6 - ASSEMBLING AND DISMANTLING THE DEVICE .............................................................2
1.6.1 -ASSEMBLY...............................................................................................................................2
1.6.2 - DISMANTLEMENT..................................................................................................................2
2.0 DESCRIPTION OF THE DEVICE ............................................................................................................ 3
2.1 Parts description ..................................................................................................................3
2.2 Buttons description ..............................................................................................................3
3.0 INSTALLATION AND RECOMMENDATION .......................................................................................... 4
3.1 Installation of the fixing bracket ...........................................................................................4
3.2 Mounting of the clamp .........................................................................................................4
3.3 Mounting of the probe on the probe holder..........................................................................5
3.4 Electrical connection.............................................................................................................5
3.4.1 Connection of the device in the electric casket ......................................................................5
3.4.2 Connection of the cordon of supply of the electrolyser on the connector ............................6
4.0 COMMISSIONING AND OPERATION .................................................................................................. 6
4.1 Power-on .............................................................................................................................6
4.2 Turning ON and OFF the device.............................................................................................6
4.3 Operating principle...............................................................................................................7
4.4 Manual supplyof the electrolyser with salt............................................................................7

Instructions and user manual ChloriProtect NOT004ENV05
4.5 Adjustment of the set point ..................................................................................................7
5.0 ALARMS « ALR »............................................................................................................................... 7
6.0 MAINTENANCE................................................................................................................................. 8
6.1 Maintenance of the electrode...............................................................................................8
6.2 Electrode wintering ..............................................................................................................8
6.3 Calibration procedure...........................................................................................................8
7.0 AFTER SALES SERVICE ....................................................................................................................... 9
8.0 SPARE PARTS LIST........................................................................................................................... 10

Instructions and user manual ChloriProtect NOT004ENV05
1
1.0 - WARNINGS AND TIPS
Please read the warning notices very carefully because they provide important information regarding safety
in installation, maintenance and use of the device.
• Keep this manual in a safe place, so that it will always be available for further consultation.
• The device complies with EMC: 2004/108/EEC “electromagnetic compatibility” and LVD: 2006/95/EC “low
voltage” as also the subsequent modifications.
• The electrical installation is carried out in compliance with standard NF C15-100 (or equivalent for other
European countries)
N.B.: the device has been constructed in accordance with best practice. Both its life and its electrical and
mechanical reliability will be enhanced if it is correctly used and subjected to regular maintenance.
1.1 - GUARANTEE AND WARNING
The material is guaranteed 24 months parts and labor back in our workshop in:
AVADY POOL
9 Chaussée Jules César
Bât. 4 Hall 406
OSNY - 95520
The shipping costs to OSNY are charged of the customer. If the repair is carried out as part of the warranty,
return is supported by AVADY POOL. The wear parts excluded of the warranty are: pH or redox probe,
injection valve, foot filter and peristaltic hose.
WARNING: any intervention or repair to the internal parts of the device must be carried out by
qualified and authorized personnel. The manufacturers decline all responsibility for the
consequences of failure to respect this rule.
1.2 - SHIPPING AND TRANSPORTING
The device will always be moved in a vertical (and never in a horizontal) position. No matter what the means
of transport employed, delivery of the device, even when free to purchasers or the addressee’s domicile, is
always at the purchaser’s risk. Claim for any missing materials must be made within 10 days of arrival, while
claims for defective materials will be considered up to the 30th day following receipt. Return of device or
other materials to us or the authorized distributor must be agreed beforehand with the responsible
personnel. Material should be disassembled and packed with care. All parts in contact with the chemical
should be purged and rinsed for everyone’s safety. In the case of non-compliance with this guideline, we
reserve not to support the materials and to return it at your expense and any damage created by the
chemical on the material will undergo a repair quote.
1.3 - PROPER USE OF THE DEVICE
The device should be used only for the purpose for which it has been expressly designed namely the dosing
of liquids. Install the device in a dry place and well away from sources of heat, and in any case, at
environmental temperature not exceeding 40°C. Any different use is to be considered dangerous. The device
should not therefore be used for applications that were not allowed for in its design. In case of doubt please
contact our offices for further information about the characteristics of the device and it proper use. The
manufactures can not be held responsible for damage deriving for improper, erroneous or unreasonable use
of the device.
Please read carefully the followings:
• This appliance can be used by children aged from 8 years and above and persons with reduced physical,
sensory or mental capabilities or lack of experience and knowledge if they have been given supervision or
instruction concerning use of the appliance in a safe way and understand the hazards involved.
• Children shall not play with the appliance.
• Cleaning and user maintenance shall not be made by children without supervision
1.4 - RISKS
After unpacking the device, make sure that it is completely sound. In case of doubt, do not use the device
and contact qualified personnel. The packing materials (plastic bags, polystyrene, etc.) should be kept out of
the reach of children: they constitute potential sources of danger.
Before you connect the device make sure that the voltage ratings correspond to your particular voltage
supply. You will find this value on the rating plates attached to the device.

Instructions and user manual ChloriProtect NOT004ENV05
2
The electrical installation to which the device is connected must comply with the standards and good
practice rule in force in the country under consideration.
Use of electrical equipment always implies observance of some basic rules. In particular:
- Do not touch with wet or damp hands or feet.
- Do not operate the device with bare feet (typical place: swimming pool)
- Do not leave the equipment exposed to the atmospheric agents
- Do not allow the device to be used by children or unskilled individuals without supervision
• The device must be supplied through a circuit with a residual current differential device (RCD) rated
differential operating current not exceeding 30 mA
• The appliance must be placed in a place that can not be flooded.
• The appliance must be connected electrically via a means of disconnection to the supply network, the
opening of the contacts of all the poles ensuring a complete break under the conditions of overvoltage
category III.
• The power supply is protected by a thermal fuse T315 mA 250V.
• The auxiliary output is protected by a fuse F2: T 3.15 A 250V.
In case of breakdown or improper functioning of the device, switch off, but do not touch. Contact our
technical assistance for any necessary repairs and insist on the use of original spares. Failure to respect this
condition could render the device unsafe to use.
• For Australia and New Zeland Only, For stationary appliances permanently connected to the fixed wiring,
compliance with this requirement is considered to be met if the instruction considering disconnection
incorporated in the fixed wiring is in accordance with AS/NZS 3000.
• In case of damage of power supply cord please ask the repair to our technical assistance or qualified and
authorized personnel, to avoid any hazard.
When you decide to make no further of an installed device, make sure to disconnect it from the power
supply. Before carrying out any service on the item, check to disconnect the plug from the mains.
1.5 - TOXIC AND/OR DANGEROUS LIQUID DOSAGE
To avoid risk from contact with hazardous liquids or toxic fumes, always adhere to the notes in this
instruction manual:
• Follow the instructions of the dosing liquid manufacturer
• Use only the correct materials fir the tubing, valves and seals to suit the liquid to be dosed (if you use liquid
regulation): where possible shield the tubing with PVC conduit.
1.6 - ASSEMBLING AND DISMANTLING THE DEVICE
1.6.1 -ASSEMBLY
See paragraph 3.0 “INSTALLATION AND RECOMMENDATION”
1.6.2 - DISMANTLEMENT
Proceed as follows when you dismantle the device or before performing any operation on it:
1) Disconnect the plug from the mains.
2) See paragraph 1.2 “SHIPPING AND TRANSPORTING”

Instructions and user manual ChloriProtect NOT004ENV05
3
2.0 DESCRIPTION OF THE DEVICE
ChloriProtect allows to eliminate the excesses of chlorine in the water of the swimming pool. A redox probe
sends a signal giving the quantity of disinfectant in the water (display mV).
When the rate of disinfectant is sufficient (defined by default in 640 mV), ChloriProtect stops a salt
chlorinator. When the rate of disinfectant is insufficient, ChloriProtect starts a salt chlorinator.
2.1 Parts description
Here are the complete content of the package you received. All parts will be necessary for the proper
operation of your device.
A. Shutter
B. Buffer solution 475mV
C. Rx electrode
D. Probe holder
E. Auxiliary plug
F. Clamp DN50
G. Screws and peg for wall mounting x2
Fig. 1
2.2 Buttons description
Fig. 2
1-
Press
SET
to see and adjust the setpoint
2-
Press
CAL
allows the calibration of the Redox to 475mV, associated to the
SET
button to change
the value of the set point.
3-
640mV value of the Redox in water.
4-
ON/OFF
button to turn on the device and maintain more than 3 seconds, and, keep pressed,
start manually the salt chlorinator.
1
2
3
1
4

Instructions and user manual ChloriProtect NOT004ENV05
4
3.0 INSTALLATION AND RECOMMENDATION
Install the device in a dry place and well away from sources of heat, and at environmental
temperature not exceeding 40°C.
The device is to be located where flooding cannot occur.
Carefully observe the national wiring rules in force in the various countries as regards of electrical
installations. For Australia and New Zeland, the rules references are in accordance with AS/NZS 3000.
3.1 Installation of the fixing bracket
3.2 Mounting of the clamp
This assembly settles on the pipe, between the filter and the unit of electrolysis. Furthermore, if a regulator
pH is installed, this assembly must be installed upstream to the point of injection of " pH - ".
Next
Fig. 5
Drill the top wall of the pipe through the
clamp :
- Ø 14 mm for the probe.
O-ring
Fig. 4
Screw

Instructions and user manual ChloriProtect NOT004ENV05
5
3.3 Mounting of the probe on the probe holder
After removing the protective cap from the electrode and calibrate the probe (Cf 6.3), you need to insert all
the parts as shown in the fig.7. When all parts are engaged, tighten the nut without blocking it then push
slowly the electrode to the bottom of the hose and lift it about 2 cm so that the electrode tip is at the middle
of the hose. Connect the probe to the back of the device on the BNC (fig.8).
3.4 Electrical connection
3.4.1 Connection of the device in the electric casket
The power supply cable of ChloriProtect must be connected in the electric case of the swimming pool:
-Either on the borders of an auxiliary contact in the relay of the pump of filtration in the electric
casket
-Either on borders in parallel of the reel A1 A2 of the relay of the pump of filtration in the electric
casket
The tension to be applied to this cable is 230V-240V. So the device will be only fed when the pump of
filtration will be underway.
On no account the device will be connected in parallel on the borders of supply of the pump of filtration
in the electric casket
.
Fig. 6
Bracket
O-ring
Washer seat
Disk brake
A nut
Fig. 7
Plug the plug into the
bayonet socket
Rotate the plug ¼ turn to
close the connection
Fig. 8.1
Fig. 8.2

Instructions and user manual ChloriProtect NOT004ENV05
6
3.4.2 Connection of the cordon of supply of the electrolyser on the connector
The cordon of food of a salt chlorinator is connected to ChloriProtect thanks to the connector Esupplied in
the kit.
4.0 COMMISSIONING AND OPERATION
4.1 Power-on
In the switched on of the device or after the ignition of the device by support on the sideline "ON/OFF", a
wait of 15 min is programmed to wait for the stabilization of the measure. During this phase, the device
posts alternately the redox value mV and "OFF".
4.2 Turning ON and OFF the device
When the device is on, a quick press on the « ON/OFF » button
turns off the device.
Alike, when the device is off, « OFF » is displayed. A quick press
on the « ON/OFF » button turns on the device. The device will
start after 15 minutes.
-Remove the sheath from the cable on 30 mm
-Strip the 3 wires to obtain 7 mm of copper
-Insert the wires like on the left picture:
-Blue to the left (letter N)
-Yellow / green in the center
-Brown to the right (letter L)
Be sure to clear the central hole to avoid
pinching a wire when closing the connector
Fig. 9
Fig. 10
The auxiliary plug is connected to the connector on the
back of the unit to the dedicated socket.
Max power 700 W
Protected by fuse (5x20mm) F3.15 250V
The putting into service of ChloriProtect is ended, it is from now on ready to check the salt water
chlorinator
of your swimming pool.

Instructions and user manual ChloriProtect NOT004ENV05
7
4.3 Operating principle
When the rate of disinfectant is insufficient: redox value < Value records (30 mV of mini gap) then:
- The electrolyser with salt is fed
- The device shows the redox value there mV
When the rate of disinfectant is sufficient : redox value ≥ Value records then:
- The electrolyser with salt is not fed
For example, for a value record 640 mV:
- Measured value > 640 mV: STOP of the salt water chlorinator
- Measured value 610 mV: Switch on the salt water chlorinator
4.4 Manual supply of the electrolyser with salt
4.5 Adjustment of the set point
5.0 ALARMS « ALR »
The alarm bustles when the value redox is lower than 100 mV or superior to 900 mV: the device does not
feed the electrolyser with salt.
The screen alternates between “ALr”
and “the Redox value”.
When the device is on standby state (display on
« OFF »), press ON/OFF during 3 second. It starts the
water salt chlorinator.
To change the value of the set point, hold the SET key and
press CAL by pulse. Each pulse changes the Redox value of
10mV between 350 and 850mV.
When you press the SET button, the
value of the set point is displayed.

Instructions and user manual ChloriProtect NOT004ENV05
8
6.0 MAINTENANCE
We recommend you to change the electrode, if the measures aren’t good and to change the solution
standard if you have a doubt on its quality after several uses or after the expiry date. Note that the average
life cycle of an electrode varies from 6 to 18 months, according to the use. The TAC 100 mg / L reduces the
electrode’s life.
6.1 Maintenance of the electrode
Over time, in addition to the normal wear of the electrode, according to the use and water quality which is
more or less calcareous, measurement will deteriorate. A thin layer of limestone with other elements
present in the pool water will deposit on the sensing element of the probe. To overcome this problem, it is
advisable to use the cleaning solution for electrode pH and redox AYACSOLNET02 and to follow the
procedure on the bottle.
We recommend you to change the electrode, if the measures do not give good results any more or than the
quality shown after the calibration is lower than 50, and to change the buffer solution if you have a doubt on
its quality after several uses or after the expiry date.
6.2 Electrode wintering
During the wintering, the electrode must be removed of the installation and stored in non-freezing
conditions.
Clean the probe with the cleaning solution AYACSOLNET02.This allows to remove any
deposits formed during its use in pool water.
The sensor must be filled to 1/3 with AYACSOLSTK01 storage solution and the protective cap
placed on the sensor's extremity. This assembly must be stored away from freezing
conditions at ambient temperature.
6.3 Calibration procedure
This operation will be to make at the beginning of every season during the putting into service of the
swimming pool so that the reading of the rate of disinfectant stays the most correct possible.
Before carrying out the probe calibration, remember to:
Stop the filtration pump.
Close the isolation valves if existing.
Remove the probe of the probe holder.
Put the shutter (fig. 11) to plug the hole in the probe holder.
Open the isolation valves if existing.
Turn on the filtration pump
Carry out the probe calibration and repeat the previous
actions to put the electrode in place.
Fig. 11
A nut
Disk brake
Washer seat
Shutter
O-ring

Instructions and user manual ChloriProtect NOT004ENV05
9
1) Remove the protective
cap of the probe and keep it
for reuse at the time of
wintering.
2) During 20 minutes, let soak the
probe to rinse it. We suggest you
to start with this step.
3) Immerse the electrode in
the 475mV solution, stir and
leave it in the solution
without touching the
electrode or the cable
4) After waiting minimum one minute, the stabilized value is
displayed. Press CAL until the display shows CAL flashing then
release. Then the quality of the probe is briefly displayed.
7.0 AFTER SALES SERVICE
To contact our Technical Services (contact details on page 1), you will need the following informations:
Type of device
Serial number
Device code
For any return of the unit, thank you to please follow the instructions in "1.2 SHIPPING AND TRANSPORTING
"on page 1 of this manual.

Instructions and user manual ChloriProtect NOT004ENV05
AVADY POOL - 9, Chaussée Jules César, Bâtiment 4 Hall 406 - 95520 OSNY - France
Tél : +33 (0)1 34 48 16 03 Fax : +33 (0)1 78 76 73 95 Mail : con[email protected] Site : www.avadypool.com
Installation and operating instructions are included with the product when purchased new.
8.0 SPARE PARTS LIST
Fig. 12
Code
Description of parts
1
AYAC100167
Bracket
2
AYAC100021
BNC
3
AYAC100161
Auxiliary plug C13
4
AYAC100164C
Circuit board ChloriProtect
5
AYAC08BC05
Rx Gold electrode
6
AYAC09CF07
Probe holder
7
AYFA00003
Shutter
8
AYAC100007
Clamp DN50
9
AYAC02C004
Buffer solution 475mV
NOT PROVIDED
AYACSOLSTOCK
Storage liquid for probe pH-RX 100mL
NOT PROVIDED
AYACSOLNET01
Cleaning solution for probe pH-RX 250mL
7
9
8
6
5

Instructions and user manual ChloriProtect NOT004ENV05
AVADY POOL - 9, Chaussée Jules César, Bâtiment 4 Hall 406 - 95520 OSNY - France
Tél : +33 (0)1 34 48 16 03 Fax : +33 (0)1 78 76 73 95 Mail : con[email protected] Site : www.avadypool.com
Installation and operating instructions are included with the product when purchased new.
NOTES
Table of contents
Other Avady Laboratory Equipment manuals
Popular Laboratory Equipment manuals by other brands

tbs electronics
tbs electronics SHURCut 4500 Operator's manual

Thermo Scientific
Thermo Scientific S1 Instructions for use

Millipore
Millipore XX11 000 00 user guide

Tektronix
Tektronix RFA300A user manual

WLD-TEC
WLD-TEC SteriMax instruction manual

Agilent Technologies
Agilent Technologies Cary 8454 installation guide

ThermoFisher Scientific
ThermoFisher Scientific Fresco 17 Instructions for use

MO BIO Laboratories
MO BIO Laboratories PowerWater DNA instruction manual

ORiNG
ORiNG INJ-101GT++ Series Quick installation guide

Codonics
Codonics Horizon XL manual

RR Mechatronics
RR Mechatronics Interrliner XN1 FRL Instructions for use

EYELA
EYELA N-3010 manual