manuals.online logo
Brands
  1. Home
  2. •
  3. Brands
  4. •
  5. Avaya
  6. •
  7. IP Phone
  8. •
  9. Avaya IP Office 9608 User manual

Avaya IP Office 9608 User manual

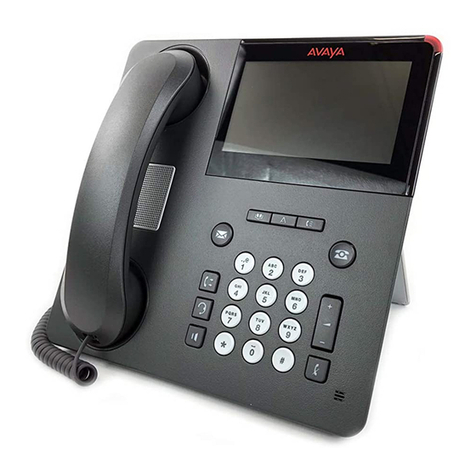
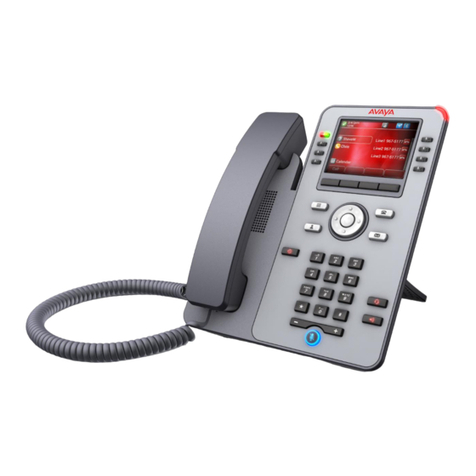
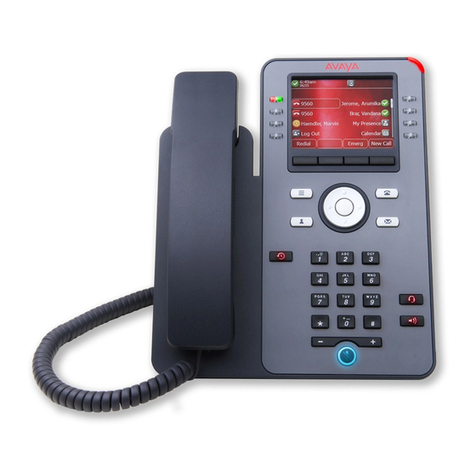
Avaya 9608/9608G/9611G IP
Deskphones H.323 Quick
Reference
Release 6.8.3
Issue 1
November 2019
© 2019, Avaya Inc.
All Rights Reserved.
Menu options
The following image shows the menu options that are
available to you to view the current settings and configure
the required parameters on the Avaya 9608 and 9611 IP
deskphones.
Options
&
Settings
Browser
Network
Information
VPN
Settings
Logout
About
Avaya IP
Deskphone
Call
Settings
Application
Settings
Screen &
Sound
Options
Advanced
Options
Automatic
Gain
Control
Headset
Equalization
Brightness
Personalized
Ringing
Button
Clicks
Error
Tones
Phone
Screen
Width
History
Log
Bridged
Calls
Personalized
Button
Labels
Restore
Default
Labels
Go to Phone
Screen On
Calling
Go To Phone
Screen On
Ringing
Go To Phone
Screen On
Answer
Display
Call Timer
Redial
Visual
Alerting
Audio
Path
Pair Contacts
To Calls
Home
Page
Edit Dialing
Headset
Signaling
Backup/
Restore
Guest
Login
Contrast
Language
Acoustic
Protection
Note:
Some of the options may not be displayed on your
deskphone if your administrator has not configured the
option for your extension.
Answering and making a call
Answering a call
Answer an incoming call in one of the following ways:
• If you are not on another call, lift the handset, or
press Speaker, OK, or Answer to answer the call
using the speakerphone, or press Headset to
answer using the headset, or you can press the
corresponding line key (LED) to answer the call.
• If you are on a call, and the phone displays the
incoming call, from the Phone screen scroll to the
line with the incoming call and press Ans Hold or
press the corresponding line key (LED) to
automatically put the first call on hold when you
answer the new call. Also, you can press Ans Drop
to automatically drop the first call when you answer
the new call.
• To quickly move to the top of your call appearance
list to answer an incoming call on your primary line,
from the Phone screen press the Phone button.
You can then press the line for the incoming call or
scroll to it.
• To automatically display the Phone screen when
you receive an incoming call, set the Phone
Screen on Ringing option to Yes.
Making a call
1. Lift the handset, or press Speaker or Headset (if
applicable) or a line button for an available line.
2. Dial the number you want to call.
If you are on a mute call, you can select an available
call line appearance by using Up or Down arrows.
Making a call using edit dialing
Ensure that the Edit Dialing feature is enabled on your
phone.
1. On the Phone screen, enter the number you want to
call.
2. To edit the number, press Bksp to erase one
character at a time.
3. To remove the entire number, press Clear
4. Press Call.
Putting a call on hold
1. Press Phone to view the main Phone screen, if
necessary.
2. Select the active line you want to put on hold.
3. Press Hold.
Note:
The phone might display a hold timer when you
put a call on hold.
4. Press Resume, OK button, or the line button of the
held call to retrieve the call.
Transferring a call
1. From the Phone screen, if the call to be transferred is
already not highlighted, press and select the call
appearance on which the call appears.
2. Press Transfer.
3. Dial the number if you know the number or call the
person from the contacts list or from the history list.
4. If your administrator configured unattended transfers
for your deskphone, you can hang up without
announcing the call.
Using the conference feature
Adding a person to an active call
You can add participants to an active call to set up a
conference call.
Start a call.
To make a call to a participant, do one of the following:
• Dial the phone extension by using the dial pad.
• Call the person from the Contacts list or the
Recents list.
Adding a person on hold to a
conference call
1. During an active call, press Hold.
2. Do one of the following:
• To make a new call, press New Call and dial the
extension of the second person.
• To make a new call, press new line key.
• To answer an incoming call, press Answer.
Note:
To toggle between the calls, press Swap.
• To answer an incoming call, press Answer .
Dropping a person from a conference
call
1. From the Phone screen, select your active conference
call.
2. Press Details.
Ensure that your administrator has configured the
Details softkey.
1
3. Select the person you want to drop.
4. Press Drop.
Contacts
Searching for a contact
1. Press Contacts.
2. Using the dial pad, start typing the name which you
want to search.
Press Call to call the person or press More > Edit to edit
contact information.
Calling a person from the Contacts list
1. Press Contacts.
2. Select the person or primary number that you want to
call.
3. (Optional) To call a non-primary number, select the
person, press Details, then select the desired
number.
4. Find the contact that you want to call by typing the
name of the person as listed.
For example, if you added John Smith to your
Contacts list as “Smith, John”, start typing the last
name rather than his first name. Each time you press
the dialpad, the list display shifts to match your input.
You can also scroll up or down to locate the contact.
5. Press Call.
Editing a contact
1. Press Contacts.
2. Search for and select the contact you want to edit.
3. Press More > Edit or Details > Edit.
4. Choose the field you want to edit.
5. Use the dial pad and softkeys to change the contact
information.
6. Press Save.
Call History
Release 6.4 onwards, call history also includes missed
calls when the phone was offline or the user was logged
out. If you are using the deskphone in shared control
mode or Road warrior and Telecommuter mode with One-
x Communicator, the call logs for the deskphone are now
synchronized with the call logs for the One-x
Communicator.
Calling a person from the call history
1. Press Recents.
2. Scroll to the left or right to view the list of all calls, or
separate lists of missed, answered or outgoing calls.
3. Scroll up or down to select the person or number you
want to call.
4. Select the person or number you want to call.
5. Press the Call softkey or the OK button or press the
corresponding line key.
Adding an entry from the call history to
your contacts list
1. Press Recents.
2. Select the number you want to add to your Contacts
list.
3. Press +Contact.
4. If necessary, edit the name and telephone number.
5. Press Save.
Changing the display language
1. Press Home.
2. Press Main menu.
3. Select Options & Settings or Phone Settings.
4. Press Select.
5. Select Screen & Sound Options.
6. Press Select.
7. Select Language.
8. Select a display language.
9. Press Select.
10. Press Yes to confirm the selected language.
Acoustic Protection
9600 Series IP Deskphones have the acoustic exposure
protection, to protect the user’s ears from the acoustic
shocks. This feature reduces the loud volume of the
conversations on the phone call to permissible acoustic
limit. The user can set the permissible acoustic limit to
dynamic or predefined static values. In dynamic setting,
the feature activates itself and gradually reduces the loud
volume of the phone conversations to prevent from
reaching the damaging decibel levels.
Acoustic exposure protection feature satisfies OSHA,
ETSI and employee health safety requirements.
Important:
Only L100 Series Headsets with RJ9 connector
supports acoustic exposure protection.
Configuring acoustic exposure
protection
Use this procedure to configure the acoustic exposure
protection for your headset.
Ensure to use L100 Series Headsets.
1. Press Main menu.
2. Scroll to Options & Settings, and press Select.
3. Scroll to Advanced Options, and press Select.
4. Scroll to Acoustic Protection..., and press Select.
5. Choose one of the following and press Select:
•Default: Sets the acoustic protection values to one
of the following options that your administrator sets:
Dynamic
8 hours
4 hours
Off
This configured value is the default setting for
acoustic protection that your administrator sets.
•Off: Sets the acoustic protection off.
•Dynamic: Sets the acoustic feature to Dynamic,
which activates itself and gradually reduces the
loud volume of the phone conversations to prevent
from reaching the damaging decibel levels.
•8 hours : Sets the acoustic protection for 8 hours.
•4 hours: Sets the acoustic protection for 4 hours.
6. Press Save.
For more information
Go to www.avaya.com/support for latest support
information, including the user guide, administrator guide,
installation and maintenance guide, interactive document,
and software downloads.
2
Other manuals for IP Office 9608

38

This manual suits for next models

2

Other Avaya IP Phone manuals

Avaya one-X 4610SW User manual

Avaya

Avaya one-X 4610SW User manual

Avaya 1150E User manual

Avaya

Avaya 1150E User manual

Avaya 9610 User manual

Avaya

Avaya 9610 User manual

Avaya one-X Deskphone Value Edition 1608 User manual

Avaya

Avaya one-X Deskphone Value Edition 1608 User manual

Avaya one-X 1603 Service manual

Avaya

Avaya one-X 1603 Service manual

Avaya 9640 Series User manual

Avaya

Avaya 9640 Series User manual

Avaya one-X 9611G User manual

Avaya

Avaya one-X 9611G User manual

Avaya 1110 User manual

Avaya

Avaya 1110 User manual

Avaya 7316 User manual

Avaya

Avaya 7316 User manual

Avaya IP Office 4.0 User manual

Avaya

Avaya IP Office 4.0 User manual

Avaya 1120E User manual

Avaya

Avaya 1120E User manual

Avaya GXV3240 Supplement

Avaya

Avaya GXV3240 Supplement

Avaya 9650 Deskphone Edition User manual

Avaya

Avaya 9650 Deskphone Edition User manual

Avaya IP OFFICE 2410 User manual

Avaya

Avaya IP OFFICE 2410 User manual

Avaya 1408 User manual

Avaya

Avaya 1408 User manual

Avaya 1600 Series Supplement

Avaya

Avaya 1600 Series Supplement

Avaya IP Office 5410 User manual

Avaya

Avaya IP Office 5410 User manual

Avaya i20 Datasheet

Avaya

Avaya i20 Datasheet

Avaya one-X Deskphone SIP 9620 User manual

Avaya

Avaya one-X Deskphone SIP 9620 User manual

Avaya IP Office 1416 User manual

Avaya

Avaya IP Office 1416 User manual

Avaya E129 Instructions for use

Avaya

Avaya E129 Instructions for use

Avaya one-X 4610SW User manual

Avaya

Avaya one-X 4610SW User manual

Avaya 1403 User manual

Avaya

Avaya 1403 User manual

Avaya IP Office 5420 User manual

Avaya

Avaya IP Office 5420 User manual

Popular IP Phone manuals by other brands

ooma HUB user guide

ooma

ooma HUB user guide

Polycom VVX 600 series quick start guide

Polycom

Polycom VVX 600 series quick start guide

Cisco 8832 user guide

Cisco

Cisco 8832 user guide

Yealink Yealink SIP-T28P user guide

Yealink

Yealink Yealink SIP-T28P user guide

IPitomy IP410 Quick reference guide

IPitomy

IPitomy IP410 Quick reference guide

Auerswald COMfortel 3200 Operation guide

Auerswald

Auerswald COMfortel 3200 Operation guide

Cisco 7800 Series quick start guide

Cisco

Cisco 7800 Series quick start guide

comfortel D-600 instructions

comfortel

comfortel D-600 instructions

Net2Phone MAX IP10 user guide

Net2Phone

Net2Phone MAX IP10 user guide

Tadiran Telecom T207M user guide

Tadiran Telecom

Tadiran Telecom T207M user guide

Inteltronic WL-USBP1K Spec sheet

Inteltronic

Inteltronic WL-USBP1K Spec sheet

Polycom SoundPoint 500 IP user guide

Polycom

Polycom SoundPoint 500 IP user guide

Polycom SoundStation IP 6000 Quick reference guide

Polycom

Polycom SoundStation IP 6000 Quick reference guide

Cisco UNIFIED 9971 Quick reference guide

Cisco

Cisco UNIFIED 9971 Quick reference guide

captel 800 How-to guide

captel

captel 800 How-to guide

Polycom SoundStation IP 7000 Quick reference guide

Polycom

Polycom SoundStation IP 7000 Quick reference guide

Miglia Dialog Plus Cordless Phone user guide

Miglia

Miglia Dialog Plus Cordless Phone user guide

Aastra 55I installation guide

Aastra

Aastra 55I installation guide

manuals.online logo
manuals.online logoBrands
  • About & Mission
  • Contact us
  • Privacy Policy
  • Terms and Conditions

Copyright 2025 Manuals.Online. All Rights Reserved.