manuals.online logo
Brands
  1. Home
  2. •
  3. Brands
  4. •
  5. Avaya
  6. •
  7. IP Phone
  8. •
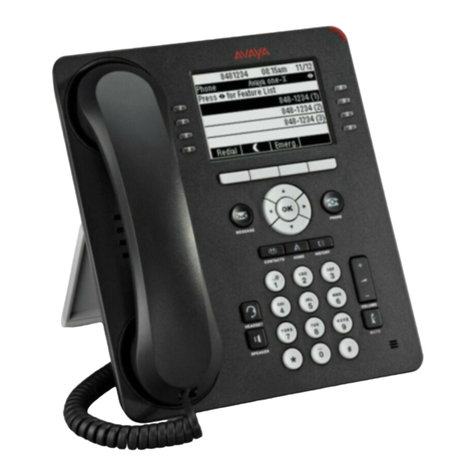
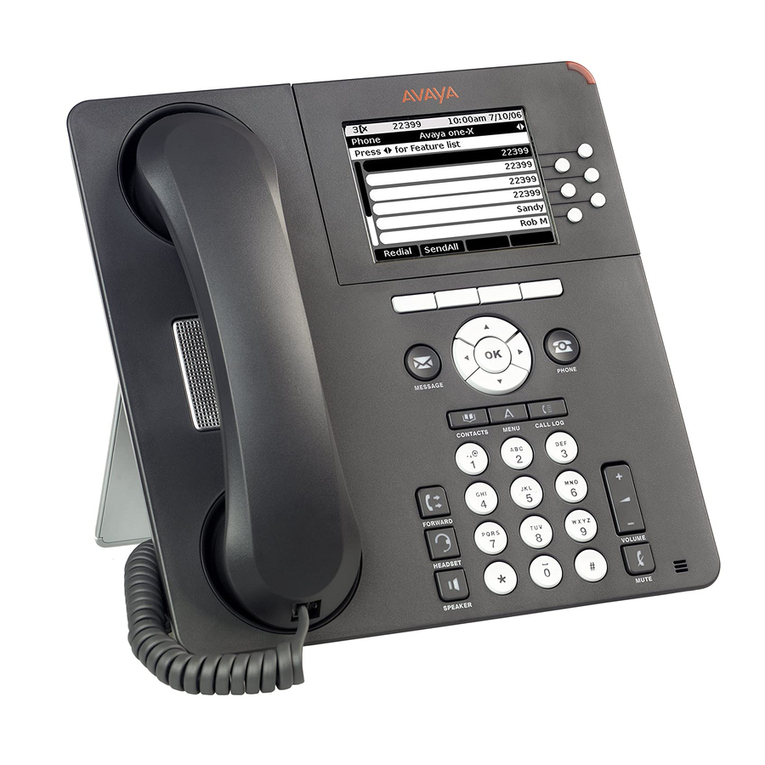
  9. Avaya IP Office 9608 User manual

Avaya IP Office 9608 User manual

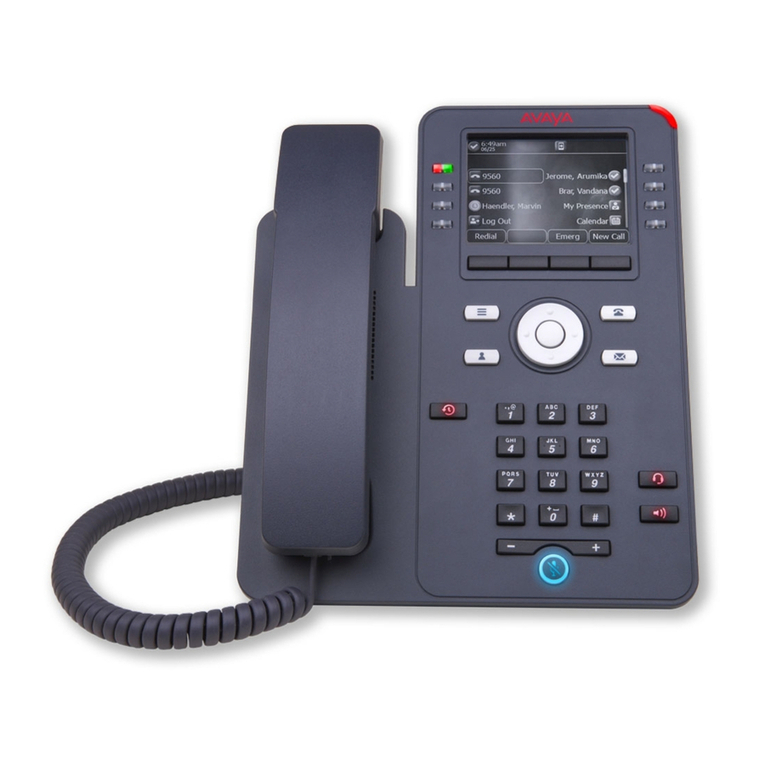
Avaya 9608/9611G IP Deskphones
SIP Quick Reference
Icons
General
Incoming call alert
Active call
Call on hold
Call forwarding
Call on mute
Active EC500 feature
Call history
Missed call
Incoming call that you answered
Outgoing call
Presence
Presence service not available
Contact not logged in
Contact available
Contact on another call
Contact is in a conference call
Contact busy and has Send All Calls active
Phone locked or screen saver on
Conference
Active conference
Conference on hold
Answering and calling
Switching to another deskphone during
an active call
Procedure
1. Answer the incoming call from your deskphone.
2. To switch to the other deskphone, press Bridge on that
deskphone.
Transferring a call
Procedure
1. Select the active call appearance line on which the call that you
want to transfer appears.
2. PressTransfer.
3. Dial the number or call the person from the contacts list or from
the history list.
4. If your administrator configured unattended transfers for your
deskphone, you can hang up without announcing the call.
Otherwise, pressComplete or press OK.
Note:
Unanswered transfers may be returned to your telephone as a
recalled transfer. In this case, you hear a priority ring and see
the display message Return next to the call.
Making an emergency call
Procedure
1. On the Phone screen,press,Emerg.
2. Press Yes when the deskphone displays a prompt.
3. To end the emergency call,press End Call or press Speaker.
Dialing an E.164 number
Procedure
1. Press asterisk (*) twice or press+ to display the plus sign (+).
If you are using the SPEAKER, the HEADSET, or the call
appearance line, the phone displays the plus (+) softkey on the
screen.
2. Dial the number that you want to call.
Call forwarding
Activating Send All Calls
Procedure
1. Gain access to the Features menu.
2. Scroll to choose Send All Calls.
3. Press Select or the corresponding line button to activate the
feature.
Activating call forwarding
Procedure
1. Gain access to the Features menu.
2. Scroll to choose Call Forward.
3. Press Select or the corresponding line button.
4. Enter the destination number to which you want to forward your
calls.
5. Press Enter.
After you enter the forwarding number, you hear a confirmation
tone.
Paging
Initiating a group page
Procedure
1. Dial the group pilot number.
The extensions in the group that you are calling auto answer the
page.
2. Wait for seven seconds before you speak .
3. Press End Call to stop paging.
Conferencing
Setting up a conference call
Procedure
1. From the Phone screen, select your active call.
2. Press Conf.
3. Dial the telephone number, or call the person from the contacts
list, or the History list.
4. Press Join when the person answers the call.
5. To add another person, press Add and repeat Steps 3 to 4.
Adding a person on hold to a conference
call
Procedure
1. From the Phone screen, select your active call.
2. Press Conf, or press Add if you are already in a conference.
3. Select the call on hold that you want to add to the conference.
4. Press Resume to take the call off hold.
5. Press Join to add the person to the conference call.
Options & Settings
Setting up speed dialing
Procedure
1. Press Home.
2. Press Select to select Options & Settings ➤ Assign Speed
Dial Entries.
3. Scroll and press Assign to select the required unassigned line.
4. Press Select to select the number that you want to assign.
Setting up favorites
Procedure
1. Press HOME.
2. Press Select to choose Options & Settings ➤ Assign
Favorite Entries.
3. Perform one of the following actions:
•To add a favorite contact, press Contacts.
•To add a favorite feature, press Features.
4. Press Select to choose the required contact or feature.
Features
Setting up automatic call back
Procedure
1. Gain access to the Features menu when you get a busy signal
from the extension that you called.
2. Scroll to Auto Callback .
3. Press OK or press the corresponding line button.
Activating EC500 for simultaneous
ringing on multiple phones
Procedure
1. From the Phone screen, gain access to the Features menu.
2. Scroll to EC500. and press OK.
Extending a call to your cell phone
(EC500)
Procedure
1. During an active call, gain access to the Features menu.
2. Scroll to Extend Call , and press OK to forward the call to your
mobile phone.
3. Answer the call on your cell phone.
The call remains active on your deskphone, so you can switch
back to your deskphone at any time.
Contacts
Adding a new contact
Procedure
1. PressContacts ➤ New.
2. Enter the first and last name using the dialpad.
3. Choose Yes in the Track Presence field to know the presence
information for this contact. If the presence information is
available for this person, the deskphone displays the presence
icon next to this name of the contact on the Phone screen or the
Contact screen.
4. Scroll to the next field.
5. Enter the number.
The contact number can include a-z, A-Z, 0-9, and the following
special symbols: comma (,), space, dash (-), dot (.), + , * , #, $,
&, !, ~, ?, +, =, |. A comma (,) inserts a pause during dialing.
6. Scroll to the next field and choose the type of number that you
entered : Work, Home, Mobile.
7. If you have another number for this contact, select the next field
and repeat Step 5 to Step 6.
You can add up to five additional numbers for this contact, but
you can designate only one number as primary.
8. Press Save or OK.
Searching for a contact
Procedure
1. Press CONTACTS.
2. Use the dialpad to type the name that you want to search.
If you set up your contacts in the Last Name and First Name
format, type the letters of the last name. If you have set up your
contacts using a different format, type the most likely letters that
matches the contact that you want to find.
3. When the deskphone displays the required match, you can
perform any of the following actions:
•To call the contact, press Call.
•To edit the contact information, press More ➤ Edit.
Accessing Exchange contacts
Procedure
1. Press CONTACTS.
2. Press More ➤ Exchange.
3. To copy a contact from the Exchange server to the contacts list,
press +Local.
4. On the Contact Edit screen, specify the name, telephone
numbers, and telephone types for the contact.
5. Press Save.
Call parking
Parking a call
Procedure
1. During an active call, gain access to the Features menu.
2. Press OK or the corresponding line button to choose Call Park.
After parking the call successfully, the deskphone provides a
confirmation tone.
Unparking a call
Procedure
1. From the Phone screen, gain access the Features menu.
2. Press OK or the corresponding line button to choose Call
Unpark.
3. Enter the original extension from which the call was parked.
4. Press Enter or OK to release the call.
Appointments
Reviewing your appointments
Procedure
1. On the Phone screen, scroll to choose Calendar.
The phone displays the appointments in the start-time order.
2. Perform one of the following actions:
•To move backward or forward from one appointment to
another, press Prev or Next.
•To call the person with whom you have the appointment,
press Call.
•To update the calendar with any new appointments that you
have set up on your calendar, press More ➤ Refresh.
•If you pressed More and want to re-display the previous set
of softkeys, press More again.
•To exit the calendar and return to the Phone screen, press
More ➤ Exit.
Headset profiles
Setting headset profile
Procedure
1. Press HOME.
2. Press Select to select Options & Settings ➤ Advanced
Options ➤ Headset Profile.
3. Press Change to select the profile that matches your headset.
For more information on headset profiles that Avaya supports,
see the document Avaya one-X® 96X1 Series IP Deskphone
Headset Profiles at the Avaya Support website.
4. Press Save.
Team button
Answering an active call on a monitored
extension
Procedure
1. Go to the Features screen.
2. Scroll to choose the monitored extension for which you want to
answer the incoming call.
3. Press Select or OK.
Bridged calls
Answering a call on a bridged line
Procedure
1. Select the bridged call that you want to answer.
The ringing line is selected automatically. If you are on another
call when a call comes in to a bridged line, you have to select
the ringing line.
2. PressAnswer.
Joining a call on a bridged line
Procedure
1. Select the bridged call in progress that you want to join.
2. Press Bridge.
Call pickup group
Answering a call for a call pickup group
member
Procedure
1. From the Phone screen, gain access to the Features menu.
2. Scroll to Call Pickup and press OK .
Issue 1
July 2013

Other manuals for IP Office 9608

38

This manual suits for next models

1

Other Avaya IP Phone manuals

Avaya one-X 9608G User manual

Avaya

Avaya one-X 9608G User manual

Avaya J129 User manual

Avaya

Avaya J129 User manual

Avaya 9500 User manual

Avaya

Avaya 9500 User manual

Avaya 4600 Series User manual

Avaya

Avaya 4600 Series User manual

Avaya 7316 Parts list manual

Avaya

Avaya 7316 Parts list manual

Avaya 1408 User manual

Avaya

Avaya 1408 User manual

Avaya 7316E User manual

Avaya

Avaya 7316E User manual

Avaya IP Office T7100 User manual

Avaya

Avaya IP Office T7100 User manual

Avaya J179 User manual

Avaya

Avaya J179 User manual

Avaya 4600 Series Installation instructions

Avaya

Avaya 4600 Series Installation instructions

Avaya 1220 User manual

Avaya

Avaya 1220 User manual

Avaya one-X 9600 Series User manual

Avaya

Avaya one-X 9600 Series User manual

Avaya 9650 Deskphone Edition User manual

Avaya

Avaya 9650 Deskphone Edition User manual

Avaya 1220 User manual

Avaya

Avaya 1220 User manual

Avaya 1403 User manual

Avaya

Avaya 1403 User manual

Avaya 9620 Deskphone Edition User manual

Avaya

Avaya 9620 Deskphone Edition User manual

Avaya IP500 V2 User manual

Avaya

Avaya IP500 V2 User manual

Avaya IP Office 2402 User manual

Avaya

Avaya IP Office 2402 User manual

Avaya one-X 9670G User manual

Avaya

Avaya one-X 9670G User manual

Avaya IP Office 5410 User manual

Avaya

Avaya IP Office 5410 User manual

Avaya 6400 Series User manual

Avaya

Avaya 6400 Series User manual

Avaya IP Office H.323 User manual

Avaya

Avaya IP Office H.323 User manual

Avaya IP Office 5621 User manual

Avaya

Avaya IP Office 5621 User manual

Avaya J139 User manual

Avaya

Avaya J139 User manual

Popular IP Phone manuals by other brands

EMORY 9608 Quick reference guide

EMORY

EMORY 9608 Quick reference guide

Grandstream Networks GXV3240 user guide

Grandstream Networks

Grandstream Networks GXV3240 user guide

Allnet ALL7960 user manual

Allnet

Allnet ALL7960 user manual

Siemens Gigaset S4 user guide

Siemens

Siemens Gigaset S4 user guide

Mitel 5201 user guide

Mitel

Mitel 5201 user guide

Allnet ALL7950 Quick user guide

Allnet

Allnet ALL7950 Quick user guide

Htek UC862 quick reference

Htek

Htek UC862 quick reference

apivio UT880 Admin manual

apivio

apivio UT880 Admin manual

Akuvox SP-R53P Quick installation guide

Akuvox

Akuvox SP-R53P Quick installation guide

Cisco Cisco Unified IP Phone 7960G user guide

Cisco

Cisco Cisco Unified IP Phone 7960G user guide

Nortel 1230 Quick reference card

Nortel

Nortel 1230 Quick reference card

ASCOM d41 DECT user manual

ASCOM

ASCOM d41 DECT user manual

TIPTEL IP 280 manual

TIPTEL

TIPTEL IP 280 manual

Epygi Swissvoice IP10S user guide

Epygi

Epygi Swissvoice IP10S user guide

Escene SayHi PS760-P user manual

Escene

Escene SayHi PS760-P user manual

Polycom SoundStation IP 6000 Quick user guide

Polycom

Polycom SoundStation IP 6000 Quick user guide

Polycom SoundPoint IP 450 user guide

Polycom

Polycom SoundPoint IP 450 user guide

Positron IP410G user manual

Positron

Positron IP410G user manual

manuals.online logo
manuals.online logoBrands
  • About & Mission
  • Contact us
  • Privacy Policy
  • Terms and Conditions

Copyright 2025 Manuals.Online. All Rights Reserved.