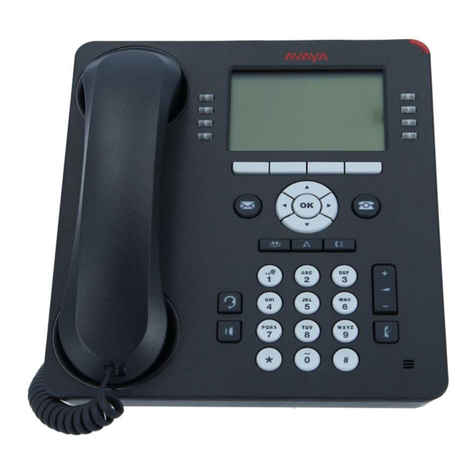
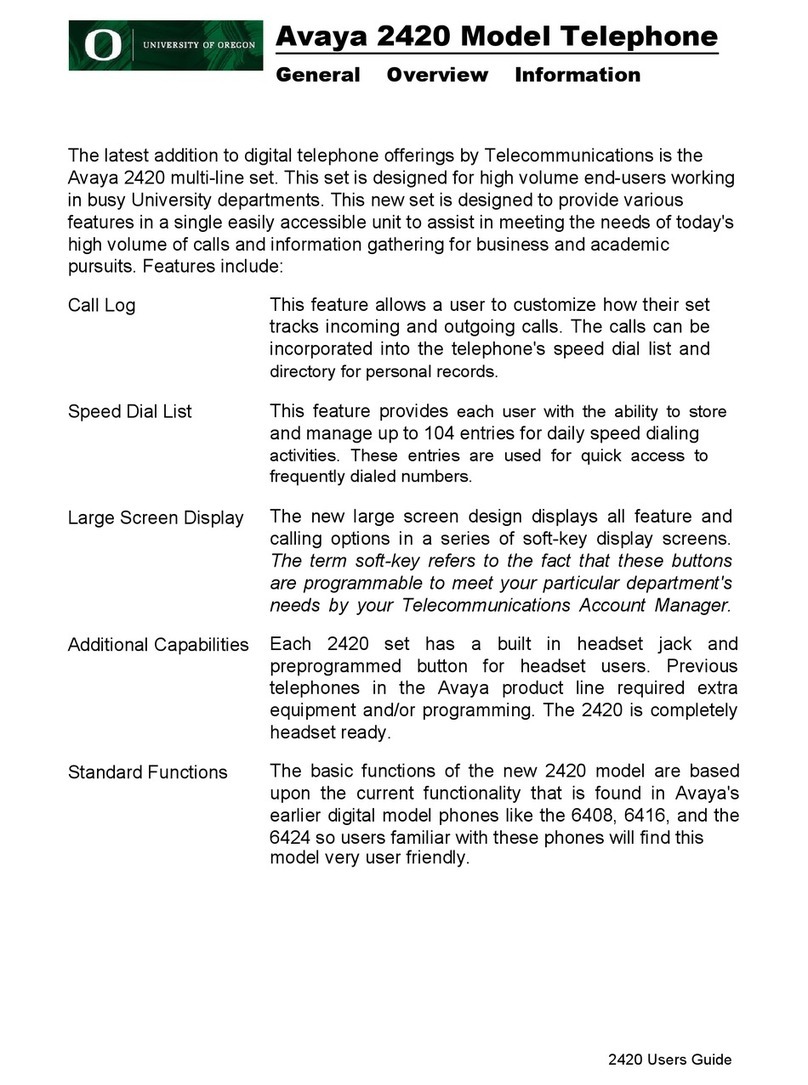
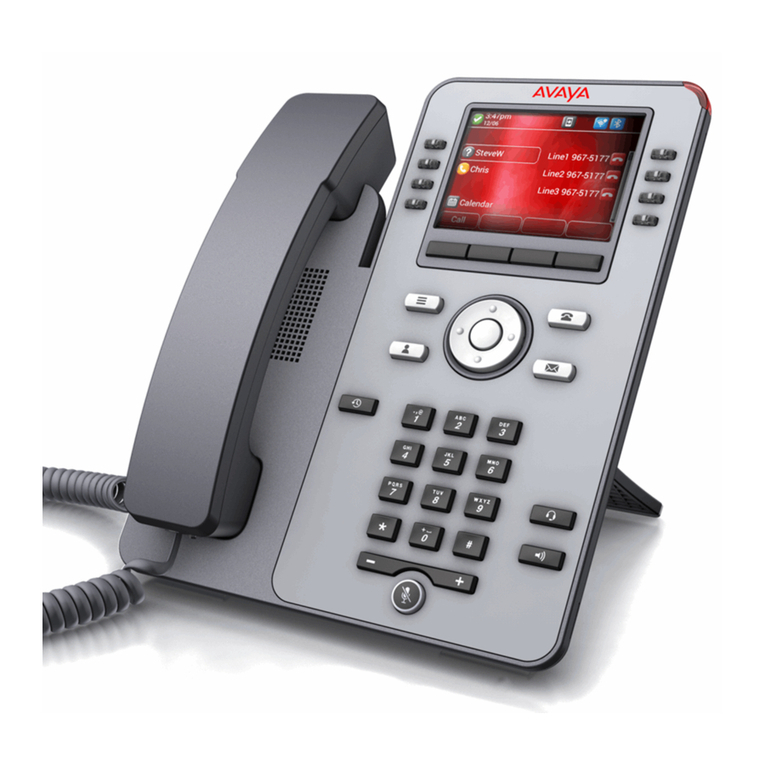
Avaya INDeX 9.1 User manual

INDeX 9.1
Standard Telephone
38DHB0002UKDJ Issue 2 (12/00)

Page 2 - Contents
INDeX 9.1 Standard Telephone 38DHB0002UKDJ Issue 2 (12/00)
Introduction..................................................................3
Telephone Features ....................................................4
Making Calls................................................................6
Speed Dials .................................................................8
PIN's & Account Codes ...............................................9
Busy or Unanswered.................................................10
Answering Calls.........................................................12
Transfer, Park & Hold Calls.......................................13
Diverting Calls ...........................................................15
Other Features ..........................................................17
Voice Manager ..........................................................19
Good Phone Usage...................................................21
Glossary ....................................................................22
Index..........................................................................23
Contents

Introduction – Page 3
38DHB0002UKDJ Issue 2 (12/00) INDeX 9.1 Standard Telephone
Introduction
Using this Guide
This guide covers the use of standard telephones on the INDeX
telephone system operating under Software Release 9.1. Your
System Manager will be able to tell which software release your
INDeX is using. The term 'standard telephones' means normal
domestic telephones (and similar devices such as fax and answer
machines). For full details of the types of phone you can use and in
which phone sockets see "Telephone Features" on page 4.
What Features Can I Use?
This guide details all the features that the system supports for
standard phones. However, your phone may not be able to use all
the features. Which it can use depends on the phone's type and
other settings.
Your phone may also have additional features provided by its
manufacturer (e.g. redial, stored numbers keys). This guide cannot
cover those features, instead you must refer to the phone
manufacturer's information.
•Network Features:
Your phone system may be part of a network linking several sites.
Where possible, it treats network calls as internal calls and offers
the same features. However, this depends on the type of network
link and type of system at the other end of the link. Some links
may be to non-INDeX telephone systems.
Further Help
In all instances, first seek help from your System Manager. They will
seek further assistance from your system's Maintainer if necessary.
•System Manager:
•on Extension:
This guide is also available in several computer formats (e.g.
Windows Help, Adobe Acrobat). Contact your System Manager to
obtain copies or download them from the Avaya Technolgies internet
site (http://www.sdxplc.com).
FT Mode Operation
Versions of INDeX software before Software Level 8.0 supported two
modes of operation, i.e. the sequences of key presses required for
different features.
Level 8.0+ INDeX software supports only one mode of operation
(equivalent to the DT mode in previous INDeX software).

Page 4 - Telephone Features
INDeX 9.1 Standard Telephone 38DHB0002UKDJ Issue 2 (12/00)
Telephone Features
Which Telephone Can You Use?
The standard phone must meet the requirements listed below. You
must also only use it in the phone socket indicated by your System
Manager. Standard phones will not work in INDeX feature phone
sockets and vice versa.
MF or LD Dialling
Phones use either LD or MF dialling. Each time you dial a number,
MF dialling sends a pair of tones whilst LD dialling sends a series of
clicks.
To enable you to use INDeX features, your Standard Telephone
must be set to MF. Standard Telephone set to MF have and #
keys, plus an Rkey (sometimes marked RECALL). These keys allow
you to use more of the system's features. MF dialling also provides
quicker dialling and call setup both on the system and on the public
phone network.
Many modern phones can switch to either mode. Refer to the phone
manufacturer's instruction for details of how to switch the phone
between LD and MF.
Time Break Recall
During a call, phones use a recall signal to indicate to the exchange
that they are about to send more digits. MF phones use either Time
Break Recall (TBR) or Earth Recall (ER). For an MF phone's Rkey
to work on the INDeX system, it must use TBR. Refer to the phone
manufacturer's instructions to see how to set it to TBR.
Sharing Sockets
All standard telephone devices have a REN value. This value is a
measure of how much current they need to ring and operate properly
when a call arrives.
INDeX standard telephone sockets provide a REN of 2. Thus you
can share the socket between several standard telephone devices
(e.g. a phone and an answer machine) so long as their total REN
does not exceed 2.

Telephone Features – Page 5
38DHB0002UKDJ Issue 2 (12/00) INDeX 9.1 Standard Telephone
Telephone Tones & Ringing
The phone uses various tones and ringing to indicate calls and other
events.
Incoming Calls:
•Repeated Double Ring: External call.
•Repeated Single Ring: Internal call.
During Calls:
•Repeated Single Pip: Another extension is about to intrude or
has intruded on your call.
Outgoing Calls:
•Continuous Tone: Number called unobtainable or set to no calls.
Phone locked, no external calls (or phone is barred).
•Repeated Tone: Busy number (see page 10).
•Dial Tone: Dial number.
•Repeated Single Pip: Phone on divert or no calls (see page 15).
Night Service
The system takes different areas into and out of night service
automatically. It does this following timetables setup by the System
Manager. The effects of night service vary, but typically they are as
follows:
•Lines: The system directs calls to a night desk number or answer
phone extension.
•Phones: The type of calls you can make becomes more
restricted, e.g. no international or long distance calls.
Dialling Timeout
After you start dialling, if you do not dial another digit for several
seconds the system assumes that you have finished dialling. The
system then ignores any further digits that you dial. By default the
timeout is 5 seconds though this can be altered.
Since it is your phone that generates the audible dialling tones, the
system's dialling timeout does not affect calls connected through the
system to services that need to hear additional MF tones (e.g. voice
mail systems, BT star services, etc).
Phone Feature Passcode
The requirement to enter your passcode for many of the phone's
functions, indicated by a double-tone, can be switched off by the
System Manager. If this is the case then for non-voice mail functions
you can ignore instructions to enter your passcode.

Page 6 - Making Calls
INDeX 9.1 Standard Telephone 38DHB0002UKDJ Issue 2 (12/00)
Making Calls
Notes on Making Calls
Your phone allows very simple and quick dialling to make calls. To
simplify dialling further, the system can store several hundred speed
dials for use by any extension. It can also store personal speed dials
for your own frequently needed numbers.
•Call Barring
On external calls, the system may bar you from dialling particular
numbers or types of numbers (e.g. national, international).
Typically, call barring increases when the system puts the
phone's area into night service. Call barring can also change
according to time, date and day of the week. As the call barring
settings vary for each site, this guide cannot fully detailed their
effect.
Making External Calls
The method below uses normal dialling to make external calls. The
system may apply call barring to some or all external numbers. You
can also lock your phone by wrong passcode entry (see page 17).
To dial an external call:
1. Lift the handset and dial 9(Your System Manager will inform you
if you need to dial a different number).
2. If you hear a repeated single pip, the system requires a PIN code
or account code before allowing an external call (see page 8).
3. Dial the telephone number.
4. During the call you can do hold or transfer it (see page 13).
5. To end the call replace the handset.
To redial last external number used:
1. Lift the handset and dial # to repeat the last external number
used (including speed dials).
Making Internal Calls
To dial an internal call:
1. Lift the handset and dial the extension or group number.
2. If you hear continuous tone, to leave your number as a message,
dial 1(see page 10 for full details).
3. If you hear just ringing, either leave a message as above or to set
a callback, dial 2(see page 11 for full details).
4. If you hear busy tone, either leave a message or set a callback as
above. Otherwise, to camp on and wait, dial 3 (see page 11 for
full details).
5. To end the call, replace the handset.

Making Calls – Page 7
38DHB0002UKDJ Issue 2 (12/00) INDeX 9.1 Standard Telephone
Making a Page Call
You can page any free INDeX 20 series phone or turret or group of
such phones. They hear the call without doing anything though you
cannot hear them. If wanted, they can turn the page into a normal
call. If the extension you page is diverting calls, the page also diverts
(except group pages).
To page an extension or group:
1. Lift the handset and dial 7.
2. Dial the extension or group number.
3. If you hear busy or continuous tone, you can use the same
options as for a normal internal call (see page 10).
4. Speak and then replace the handset.
Hotline Operation
Hotline operation allows the phone to automatically dial a number
when left off-hook for a set period. Your System Manager or
maintainer controls the settings for this feature.

Page 8 - Speed Dials
INDeX 9.1 Standard Telephone 38DHB0002UKDJ Issue 2 (12/00)
Speed Dials
Using Speed Dials
The system can store telephone numbers as speed dials. You can
then ring those numbers by dialling the number of the speed dial
store.
•System speed dials: All extensions can use these, though call
barring may still apply. Ask your System Manager for a list.
•Personal speed dials: You can store up to 10 speed dials for
your own use (see below).
To use a speed dial:
1. Lift the handset and dial #.
2. Dial the speed dial store number (00 to 09 for personal speed
dials, 100 to 899 and 9000 to 9999 for system speed dials).
3. If the phone gives a repeated single-pip, it requires a PIN or
account code before allowing the call.
4. Continue as for a normal external call (see page 6).
Storing Personal Speed Dials
If external, prefix 9to the stored number, this is the normal number
to seize an external line. Your System Manager will inform you if you
have to add a different prefix number.
To store a personal speed dial number:
1. Lift the handset and immediately dial 0.
2. Broken dial tone: Dial the speed dial store to use (00 to 09).
3. Loud pip: Dial the phone's passcode (see page 17).
You will then hear either:-
•Continuous tone: Passcode wrong, replace handset.
•Three soft-tones: Number already set, dial to cancel.
•Single soft tone: No number set, dial a number and #. Then
replace the handset to finish.

PIN's & Account Codes – Page 9
38DHB0002UKDJ Issue 2 (12/00) INDeX 9.1 Standard Telephone
PIN's & Account Codes
Forced Account Code Entry
A repeating single-pip when making an external call may indicate
that you must dial an account code before continuing (check with
your System Manager). If so, the system checks the code you dial
against its list of codes before allowing the call. The system can
store up to 400 12-digit codes. Ask your System Manager for a list of
valid codes.
To enter a forced account code:
1. Dial an account code
2. If you make a mistake, dial and try again.
3. Then dial the external number required.
Forced PIN Code Entry
A repeating single-pip when making an external call may indicate
that you must dial a PIN code before continuing (check with you
System Manager). If so, the system checks the code you dial against
its list of codes before allowing the call. The PIN code you use also
sets your call barring and phone status for that call. The system
stores up to 400 PIN codes of up to 6 digits. Ask your System
Manager for a list of valid PIN codes.
To enter a PIN code:
1. Dial your PIN code
2. If you make a mistake, dial and try again. You will hear either:-
•Continuous tone: Code not recognised, end the call.
•Silence: Code accepted, continue the call as normal.
Roaming PINS
You can use a PIN code and its associated phone & call barring
settings to override the restriction on another normal phone. Note
that when you do this, the system automatically forces the call to be
external.
To use a roaming PIN:
1. Lift the handset and dial 6.
2. Repeated single pip: Dial your PIN code. If you make a mistake,
dial and dial the number again. You will hear either:-
•Continuous tone: Code not recognised, end the call.
•Silence: Code accepted, continue the call as normal.

Page 10 - Busy or Unanswered
INDeX 9.1 Standard Telephone 38DHB0002UKDJ Issue 2 (12/00)
Busy or Unanswered
If Busy or Unanswered
Your phone provides several methods for contacting an extension
that is busy, not answering or set to no calls. These option work for
normal, page and diverted calls.
•Leave a Message:
Lights the lamp of the extension called. That extension also
stores (and displays if a display phone) your number as a
message to reply.
•Callback:
Rings your phone when that extension called becomes free or is
next used.
•Camp On:
Flashes the lamp on the extension called to notify them that you
are waiting. It also stops other calls interrupting you.
Leaving a Message
The system can store you extension number as a message for
another extension to call you. If that extension has a message lamp,
the system also lights the lamp (supported on all INDeX phones plus
some standard telephones). If your call was diverted, the message
goes to the extension from which you were diverted.
To leave a message:
1. Dial 1.
2. Your call ends unless the extension called has already reached
its limit of five stored messages.
3. Replace the handset.

Busy or Unanswered – Page 11
38DHB0002UKDJ Issue 2 (12/00) INDeX 9.1 Standard Telephone
Arrange a Callback
If the extension you call is busy or does not answer, you can set a
callback. When that extension becomes free or is next used, your
phone rings. When you answer, the other extension rings. After
setting a callback you can make other calls, the callback will not take
place if you are busy. You can only arrange one callback at any time.
The Ringer Timeout sets how long a callback rings at your extension
before cancelling (see page 17). The system also cancels callbacks
that have not taken place after a period set by the System Manager
(the default is 2 hours).
To arrange a Call Back:
1. Dial 2.
2. The system ends your call unless you already have a callback
set.
3. Replace the handset.
Camp On and Wait
If the extension you call is busy, you can 'camp on' and wait. This
flashes the lamp on the busy extension if it is an INDeX phone. If it is
an INDeX display phone, the display shows your name and number.
While camped on, you cannot make or receive any other calls.
To Camp On to a busy extension:
1. Dial 3. Do not replace the handset as this ends the call and the
camp on.

Page 12 - Answering Calls
INDeX 9.1 Standard Telephone 38DHB0002UKDJ Issue 2 (12/00)
Answering Calls
Answering Normal Calls
The phone gives a repeated double ring for external calls, a repeated
single ring for internal calls.
To answer the call:
1. Lift the handset.
2. To end the call, replace the handset.
Answer a Message
The system can store a callers number for you to make a return call
(see page 10). Some standard phones have a message lamp which
the system can light when a caller leaves such a message.
If your system has a Voice Manager attached, this can also leave its
number as a message when you have new voice mail waiting in your
mailbox.
To answer a message waiting lamp:
1. Lift the handset and dial 1. The system rings the extension that
left the message.
To cancel a message waiting lamp:
1. Lift the handset and dial 2. Replace the handset.
Answering Other Extensions - Call Pickup
You can pickup an incoming external call to any other extension
regardless of whether or not the other extension is in your group. In
addition your phone can store a pickup group number (see below).
You can then pick up incoming external calls ringing any phone in
that group.
To pick up any ringing phone:
1. Lift the handset and dial the extension number followed by 9.
2. Continue the call as normal.
To pick up ringing phones in a group:
1. Lift the handset and press R# to pickup the longest ringing call.
2. Continue the call as normal.
To set the phone's pickup group:
1. Lift the handset and immediately dial 0.
2. Broken dial tone: Dial 42 (pickup group).
3. Loud pip: Dial the phone's 4-digit passcode (see page 17).
You will hear either:-
•Continuous tone: Passcode wrong. Replace the handset.
•Three soft-tones: Pickup group set. Dial to cancel it.
•Single soft tone: No pickup group set.
Dial a group number and then dial #.
•Continuous tone: Invalid number, replace the handset.
•Broken dial tone: Number okay, replace the handset.

Transfer, Park & Hold Calls – Page 13
38DHB0002UKDJ Issue 2 (12/00) INDeX 9.1 Standard Telephone
Transfer, Park & Hold Calls
Using Transfer, Park & Hold
After answering a call, you can hold it or transfer it. You can also
make an enquiry call and then switch between calls. You can hold a
call (where only you can retrieve it) or park the call (where other
extensions can retrieve it). Remember that calls transferred to an
extension with diverts set, follow those diverts just like normal calls.
Transferring Calls
You can transfer a call to an extension that is ringing or giving busy
tone. If the call waits unanswered for too long it may recall to your
extension.
To do an unannounced transfer:
1. Dial Rto hold your current call. Do not replace the handset as this
parks the call (see page 14).
2. Dial the extension to which you want to transfer the call.
3. Replace the handset (you can do this even if you hear ringing or
busy tone).
To do an announced transfer:
1. Dial Rto hold your current call. Do not replace the handset as this
parks the call (see page 14).
2. Dial the extension to which you want to transfer the call.
3. If unanswered, dial Rto retrieve the held call.
4. If answered, ask if they wish to accept the transfer.
5. If okay to transfer the call, replace the handset.
6. If not okay to transfer the caller, dial Rto retrieve the held call.

Page 14 - Transfer, Park & Hold Calls
INDeX 9.1 Standard Telephone 38DHB0002UKDJ Issue 2 (12/00)
Parking Calls
Any extension can retrieve a parked call by dialling the line number if
known. You can park several calls. Calls parked and not retrieved,
may recall your extension after a short time.
To park an external call:
1. During the call, dial R and replace the handset.
To unpark calls parked at your extension:
1. Lift the handset and dial 9.
To unpark a call parked at another extension:
1. Lift the handset and dial the parked calls line number.
Holding Calls
Only the extension that holds a call can retrieve it unless they
transfer the call. When you hold a call, the caller may hear music if
installed on your system. You can only hold one call at a time. You
can transfer a call to an extension that is ringing or giving busy tone.
If the call waits unanswered for too long, it may recall to your
extension.
To hold a call:
1. Dial R.
2. If you now replace the handset, the system parks the call (see
previous page).
3. Retrieve the call by dialling Ragain or while holding the call,
make another call (enquiry call) and either:
•To switch between calls, dial R.
•To transfer the held call, replace the handset.

Diverting Calls – Page 15
38DHB0002UKDJ Issue 2 (12/00) INDeX 9.1 Standard Telephone
Diverting Calls
Using Diverts
Your phone can have diverts for different situations, i.e. when busy,
not answering or to divert all calls. You can also select no calls
(which uses the Divert All number if set).
•Divert on busy: Calls divert when your phone is on a call. When
set, callers cannot set a callback or camp on to your phone.
•Divert on no answer: Calls divert after ringing your phone for a
set period (see page 17).
•Divert all: All calls to your phone are diverted. Only the extension
to which you divert calls can ring you.
•No calls: Switching no calls on stops all calls. Callers hear
continuous tone or divert to the Divert All number if set.
Switching No Calls On/Off
If you switch on no calls after setting a divert all number, it diverts all
callers and even the divert extension cannot call you. If you switch it
on without setting a divert all number, all callers hear continuous
tone.
Whilst on, you hear a repeated single pip if you lift the handset, but
you can still make calls. Switching no calls on takes the phone out of
group.
Note: Your System Manager can prevent use of the no calls feature.
To switch no calls on/off:
1. Lift the handset and immediately dial 0. You will hear either:
•Broken dial tone: Dial 60 (no calls on) or 61 (no calls off).
•Broken dial tone: Replace the handset to finish.

Page 16 - Diverting Calls
INDeX 9.1 Standard Telephone 38DHB0002UKDJ Issue 2 (12/00)
Switching a Divert On
A divert is switched on by setting a divert number. It is switched off
by cancelling that number.
When divert all is on, you hear a repeated single pip if you lift the
handset but you can still make calls. Switching divert all on takes the
phone out of group and no calls.
To set a divert number:
1. Lift the handset and immediately dial 0.
2. Broken dial tone: Dial 10 (divert all), 11 (divert on busy) or 12
(divert on no answer).
3. Loud pip: Dial the phone's 4-digit passcode (see page 17).
You will then hear either:-
•Continuous tone: Passcode wrong, replace the handset.
•Three soft-tones: Divert number already set.
To clear the stored number, press .
•Single soft tone: No divert number set.
To set a divert number, press and then dial the number
followed by #. If you enter an external number remember to add
the normal external call prefix.
•Continuous tone: Invalid number, replace the handset.
•Broken dial tone: Number entered okay, replace the
handset.
Switching a Divert Off
A divert is switched off by cancelling the stored divert number. To do
this, follow the process for setting a divert and press to clear any
stored number.

Other Features – Page 17
38DHB0002UKDJ Issue 2 (12/00) INDeX 9.1 Standard Telephone
Other Features
The Phone Passcode
If the phone gives a loud pip, it requires you to dial its passcode. The
default passcode is 0000.
Wrong passcode entry more than 5 times results in the phone
becoming barred. Barred phones cannot access features requiring
passcode entry. They can make external calls but only to special
numbers, e.g. emergency numbers.
The requirement to enter the passcode for many phone functions
can be switched off, see "Phone Feature Passcode" on page 5.
To change the phone's passcode:
1. Lift the handset and immediately dial 0.
2. Broken dial tone: Dial 70 (passcode).
3. Loud pip: Dial the phone's 4-digit passcode.
You will then hear either:-
•Continuous tone: Passcode wrong, replace the handset.
•Single soft tone: Dial the new passcode.
•Broken dial tone: Number okay, replace the handset to
finish.
Group
The system can include your phone in a group (or even in several
groups). You can then take your phone in and out of group. When 'in
group', you may receive calls made to the group number. Going into
group switches divert all and no calls off.
The group's type sets which group members the system rings when
a call to the group arrives. The different types are rotary, collective,
sequential and longest waiting (see page 22).
To join/leave group:
1. Lift the handset and immediately dial 0.
2. Broken dial tone: Dial 40 (in group) or 41 (out of group).
3. Broken dial tone: Replace the handset to finish.
Conference Calls
During a call, other extensions can add callers to create a
conference call. They can setup conferences including up to 64
parties(there are some limitations, consult your System Manager for
details). Standard phones cannot start or add calls to a conference
but can be included in a conference.
To exit a conference:
1. Replace the handset. This does not affect any other callers
involved in the conference.

Page 18 - Other Features
INDeX 9.1 Standard Telephone 38DHB0002UKDJ Issue 2 (12/00)
Setting the Ringer Timeout
The ringer timeout controls several actions:
•Callback: How long a callback rings before cancelling.
•Group hunting: How long calls to a group of which you are a
member, ring before trying another member.
•Divert on no answer: How long calls ring at your phone before
the system uses Divert on No Answer if set.
To set the ringer timeout:
1. Lift the handset and immediately dial 0.
2. Broken dial tone: Dial 13 (ringer timeout).
3. Loud pip: Dial the phone's passcode (see page 17).
You will then hear either:-
•Continuous tone: Passcode wrong. Replace handset.
•Three soft-tones: Timeout already set. Dial to cancel.
•Single soft tone: No timeout set. Dial a new timeout (0 to 999
seconds - 10 seconds ≈3 rings) and then dial #.
•Broken dial tone: Ringer timeout set. Replace the handset to
finish.
Personal Alarms
You can set a Personal Alarm for your phone. When it takes place,
the phone will give a repeating triple ring for 20 seconds or until you
lift and replace the handset.
•To set or alter an alarm:
Lift the handset and dial *8hhmm#where hhmm is the time in
24-hour clock format.
•To clear an alarm before it occurs:
Lift the handset and dial *8*#.

Voice Manager – Page 19
38DHB0002UKDJ Issue 2 (12/00) INDeX 9.1 Standard Telephone
Voice Manager
Using Voice Manager
The system can include a Voice Manager to record messages for
you in your own voice mailbox. You can use this by seetting the
Voice Manager number as your diverts (see page 15). You mailbox
ID normally matches your extension number.
•Voice Manager Functions:
The INDeX supports a number of different Voice Managers and
so the range of options available to you may differ.
Customising Your Mailbox
You can customise your mailbox in many ways. We strongly
recommend that you set a passcode to keep your mailbox private.
To customise your mailbox:
1. Dial the Voice Manager extension number (________).
2. When answered, dial #for the message desk.
3. Dial your ID. (_____) and your password if requested.
4. You should hear the normal voice manager greeting telling you
what messages you have. Dial 7and select one of the following.
•Temporary Greeting: Dial 0. This replaces your permanent
greeting until it is automatically deleted at a set time (___:___
am/pm).
•Record Name: Dial 1.
•Set Password: Dial 2. Do not set an obvious password such
as 1234, 0000 or your extension number.
•Day Alert Number: Dial 3. During day service, the Voice
Manager rings this number if you have new messages. This is
not used if you set a message light number.
•Permanent Greeting: Dial 4. The Voice Manager plays this to
callers diverted to your mailbox.
•Other Options: Dial .

Page 20 - Voice Manager
INDeX 9.1 Standard Telephone 38DHB0002UKDJ Issue 2 (12/00)
Collecting Voice Messages
Check your mail regularly. The system deletes new and old
messages after set periods. You can check your mailbox from an
external phone. It must have touch tone (MF) dialling with and #
keys.
After entering your mailbox the Voice Manager tells you what
messages you have.
To collect voice messages:
1. Dial the Voice Manager extension number (________).
2. When answered, dial #for the message desk.
3. Dial your ID. (_____) and your password if requested.
4. The Voice Manager tells you what messages you have.
5. Use the options below to play/action your messages.
Playing Messages
While playing messages, use the following controls.
To play messages:
•To hear the next message: Dial 3.
•To hear the previous message: Dial 1.
•To rewind the message: Dial 4.
•To fast forward the message: Dials 6.
•To hear the message details (date & time): Dial 5.
•To record a message in another mailbox: Dial 2.
Actioning Messages
While playing a message, you can action it in several ways:
To action a message:
•Dial 0and select one of the following:
•To delete the message: Dial #.
•To copy the message to another mailbox: Dial 0.
•To redirect the message to another mailbox: Dial 1.
•To record a reply in the senders mailbox: Dial 2.
•To call the sender: Dial 3.
•To finish actioning the message: Dial .
Table of contents
Other Avaya Telephone manuals

Avaya
Avaya 4620 User manual

Avaya
Avaya 1400 Series Product manual

Avaya
Avaya Partner 18 Instruction Manual

Avaya
Avaya 3900 Series User manual

Avaya
Avaya IP OFFICE 2420 User manual

Avaya
Avaya IP Office 9608 Installation and operating instructions

Avaya
Avaya 6402D Manual

Avaya
Avaya T3 Comfort User manual

Avaya
Avaya T3 Comfort User manual

Avaya
Avaya IP Office 9508 User manual

Avaya
Avaya T7316 User manual

Avaya
Avaya Aria User manual

Avaya
Avaya IP Office 9508 User manual

Avaya
Avaya Partner 18 User manual

Avaya
Avaya 6201 User manual

Avaya
Avaya IP Office 9608 User manual

Avaya
Avaya T7000 User manual

Avaya
Avaya one-X 9600 Series User manual

Avaya
Avaya IP Office 1608 User manual

Avaya
Avaya J179 User manual