Avery Weigh-Tronix WP-234 User manual
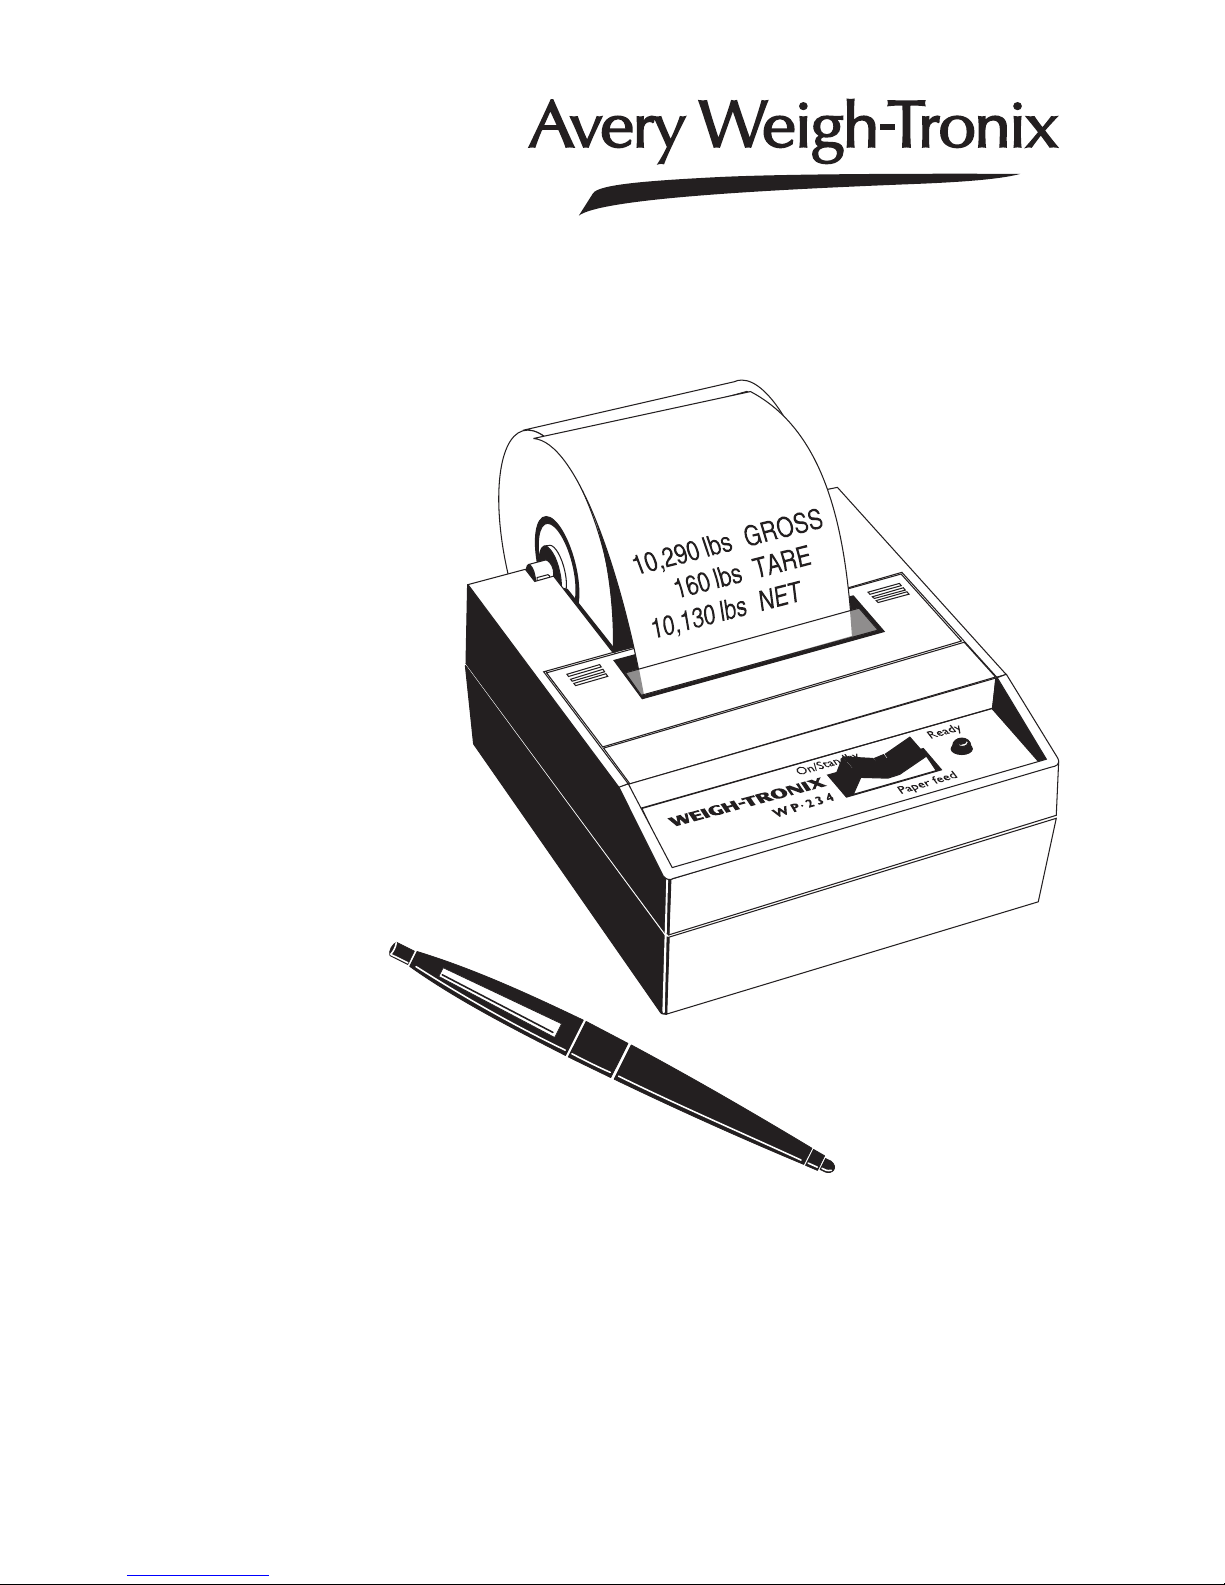
WP-234 Printer
User’s Manual

WP-234 Printer User’s Manual2
05/27/04 234_U.P65 PN 29623-0014H e 2 Printed in USA
Risk of electrical shock. Do not remove cover. No user service-
able parts inside. Refer servicing to qualified service personnel.
Weigh-Tronix reserves the right to change
specifications at any time.
CAUTION
EUROPEAN COUNTRIES
WARNING
This is a Class A product. In a domestic environment this product
may cause radio interference in which the user may be required to
take adequate measures.

WP-234 Printer User’s Manual 3
Table of Contents
Specifications .......................................................................... 4
Introduction ............................................................................. 7
Installation ............................................................................... 7
Installing the Paper .................................................. 7
To Remove the Paper Roll ..................................... 10
Operation .............................................................................. 11
Connecting and Powering Up Your Printer ............ 11
Maintenance .......................................................................... 11
Changing the Printer Ribbon ................................. 12
Inserting a Ribbon with Paper in the Printer .......... 13
Printer Test and Setup .......................................................... 14
Printer Test ............................................................. 14
Accessing the Setup Menu ..................................... 15
CONFIGURE . . . ..................................................... 15
CUSTOM. . . ............................................................ 18
SETCLOCK. . . ........................................................ 22
RESET SEQ# .......................................................... 23
Communication .................................................................... 24
RS-232 Serial Version ............................................ 24
20 mA Current Loop Version .................................. 25
Control Codes ........................................................ 26

WP-234 Printer User’s Manual4
Available BAUD rates: 300, 600, 1200, 2400, 4800,
9600, 19200
Voltage levels:
RS-232C: -9 Volts to + 9 Volts
20mA current loop
Character format:
ASCII character set—10 bits per character
required,
7 or 8 of which are data bits
Parity selection is even or odd for 7 data bits.
Busy signal - Clear to Send (CTS, XON-XOFF)
1.5K standard
Impact dot matrix
5 x 5, 5 x 7, 5 x 8 dot matrix
24 column: 12.8 characters/inch
32 column: 17 characters/inch
40 column: 21 characters/inch
7.4 lines per inch
130 lines per minute for 24 column
110 lines per minute for 32 and 40 column
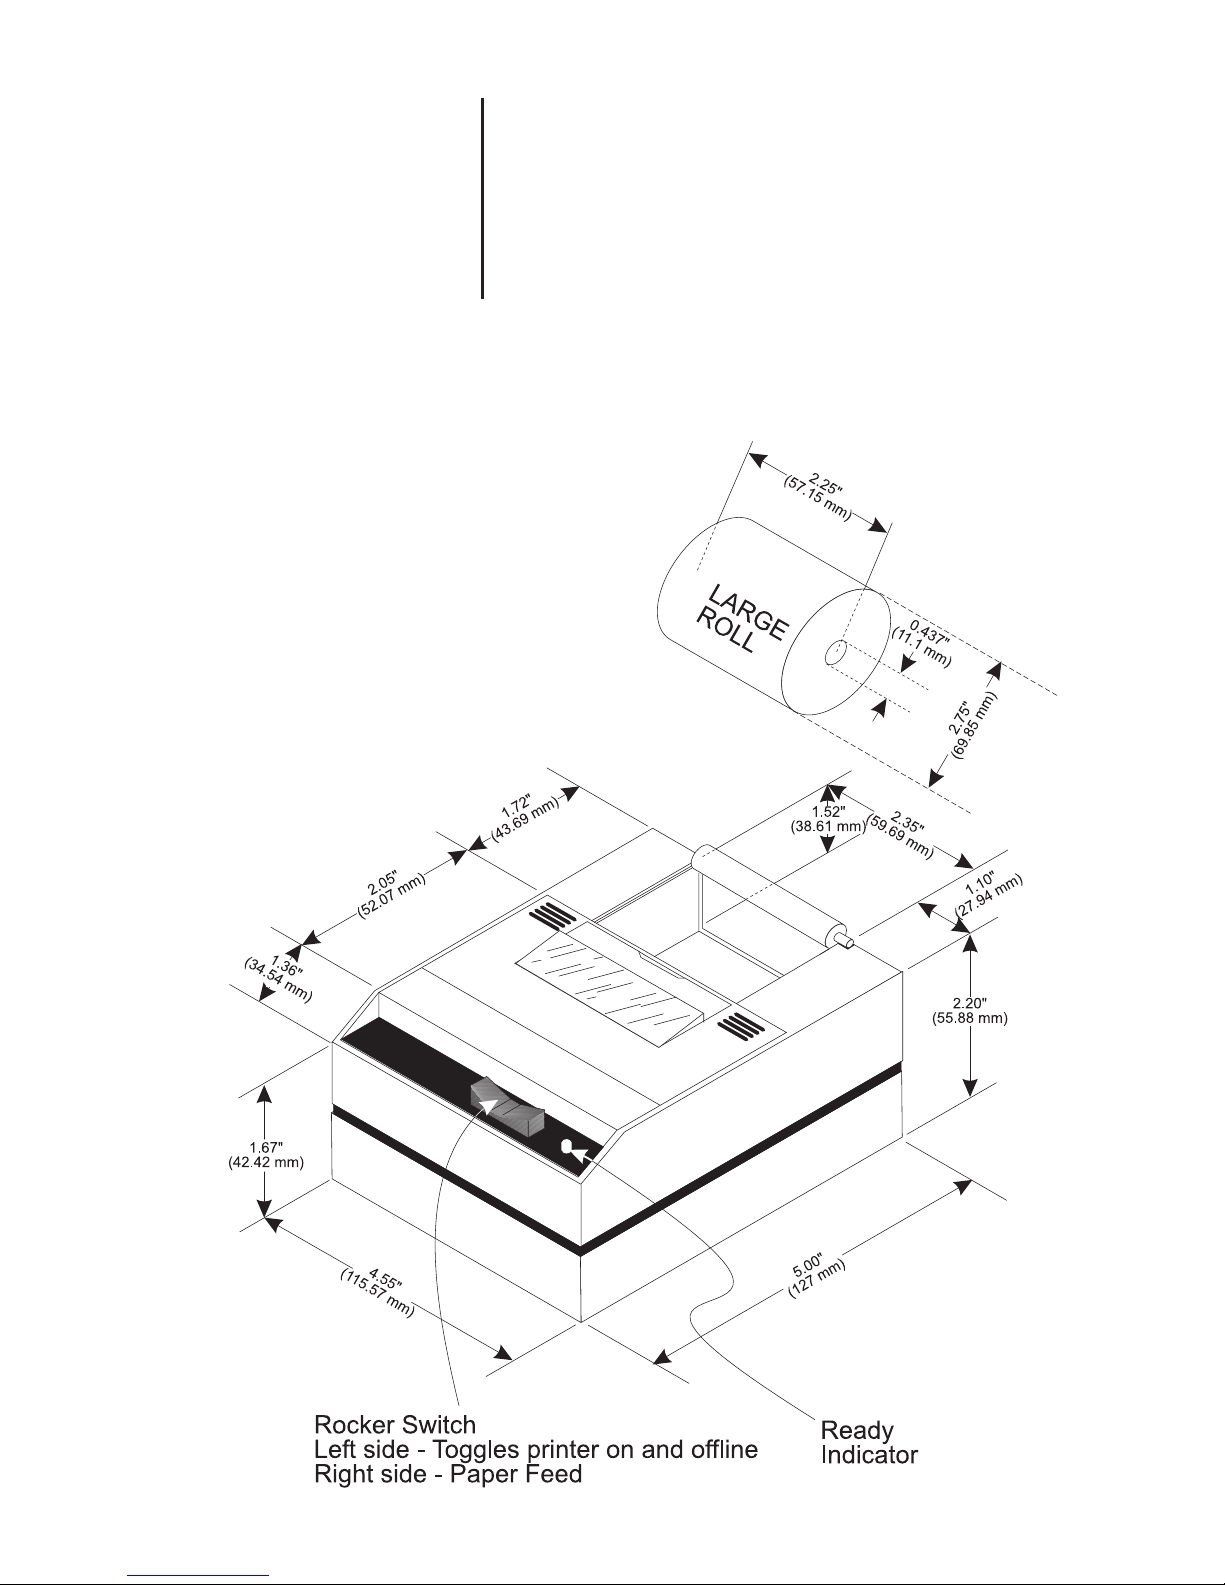
Table top: 2.25"W x 2.75"D; 0.44" I.D.
Panel mount: 2.25"W x 1.25"D
1.5 Watts (idle), 15 Watts maximum while printing
9VAC (120 VAC stepdown converter incl.)
Multi-national converters optional
Optional 9-12 VDC
140mA idle, 1 amp with 100% printing, 5.5 amp
peak with 100% printing
4.6"W x 5.0"L x 2.2"H
5°C - 40°C,41°F - 104°F
Interface-Serial
Character Buffering
Print Method
Character Matrix
Character Spacing
Line Feed Spacing
Print Speed
Paper
Power
AC Voltage
DC Voltage
External Dimensions
Operating Temp.
Specifications
WP-234 Printer User’s Manual 5
1,500,000 lines mean character before failure.
Black- 200,000 characters
Purple-250,000 characters
Large roll - 12,500 lines
Small roll - 3,000 lines
Ribbon life
Paper
Print Head Life

WP-234 Printer User’s Manual6

WP-234 Printer User’s Manual 7
Installing the
Paper
Introduction
Installation
The Model WP-234 dot matrix printer has one of
these electrical interfaces:
RS-232 Serial
20 mA Current Loop
This manual is split into the following main
sections:
• Introduction
• Installation
• Operation
• Maintenance
• Printer Test and Setup
• Communication
Please follow the precautions listed below when
setting up your printer. They are designed to help
you keep your printer working at its best.
* Plug your power supply into an appropriate
grounded outlet.
* Place your printer on a flat hard surface, like
a tabletop.
* Keep your printer out of direct sunlight.
1. Remove the printer cover by pressing on the
groove patterns to pop the front edge up. Lift
off the cover.
2. Press the rocker switch to the left. The light
will go off.
WP-234 Printer User’s Manual8
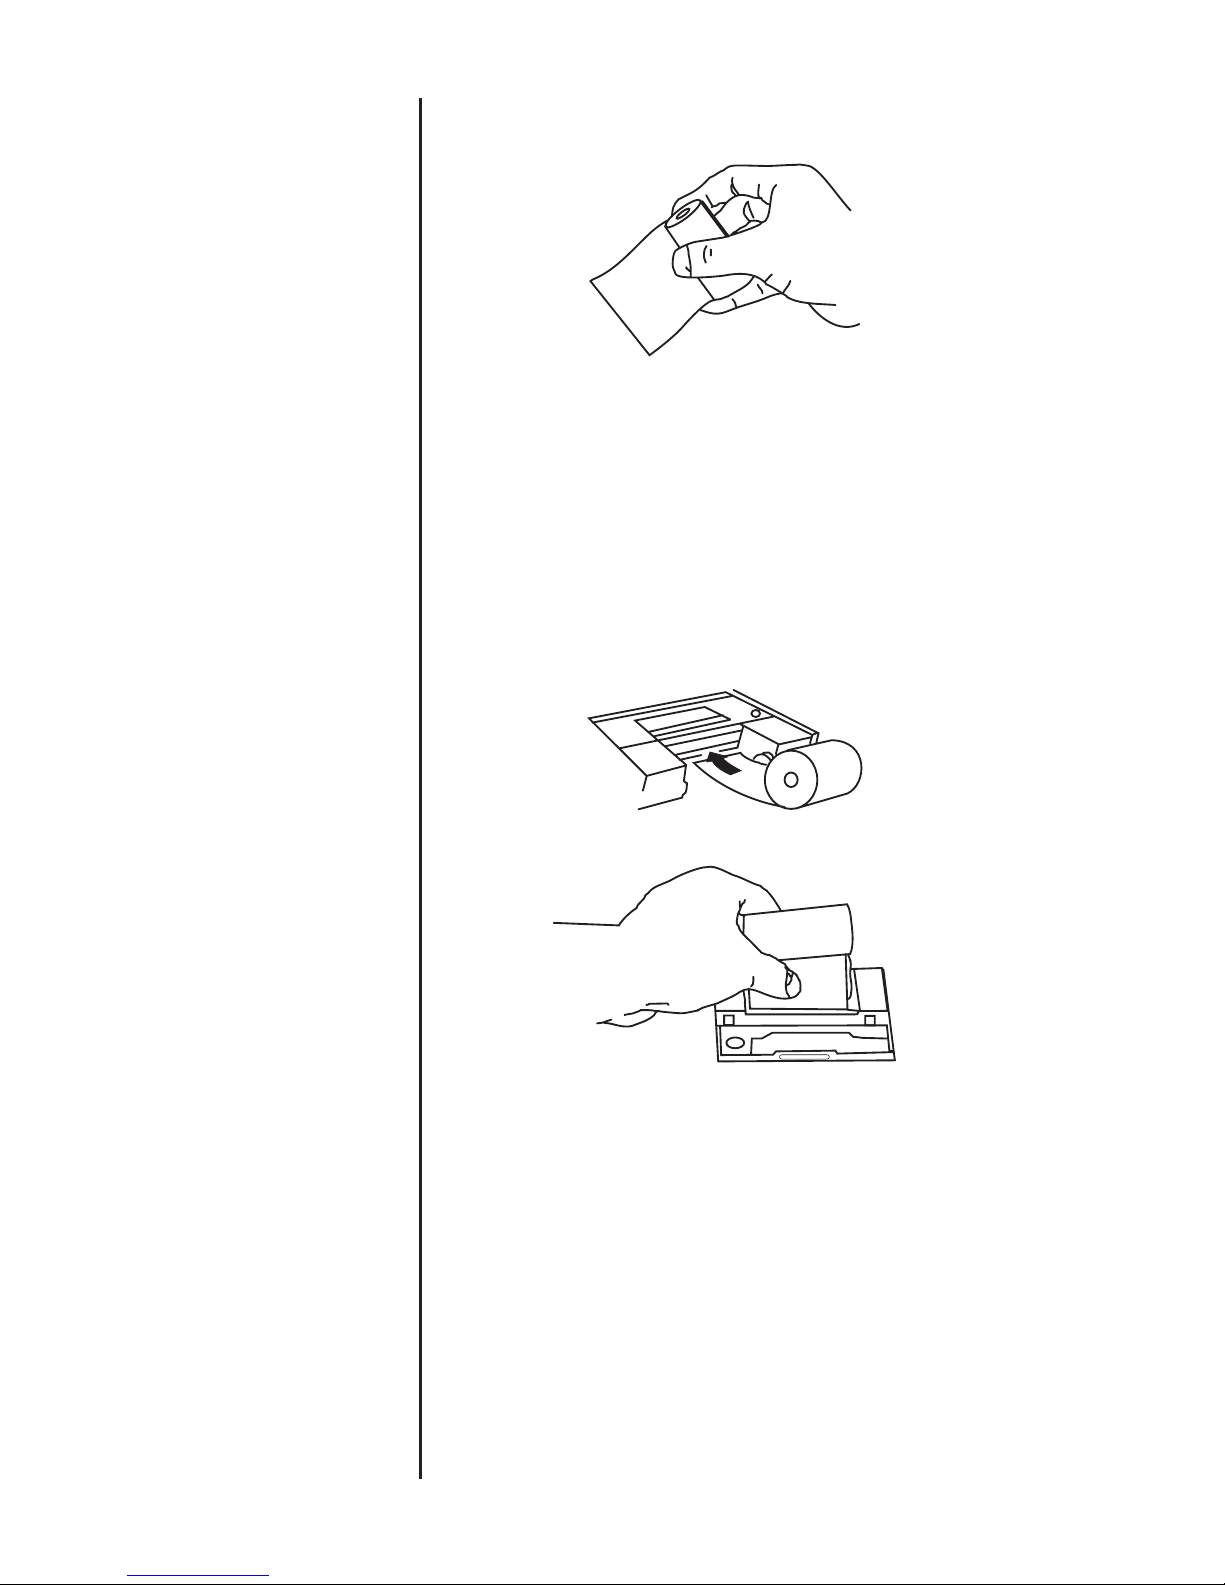
3. Unroll several inches of the paper.
4. Cut a straight edge on the paper roll if it is
jagged. This will facilitate the entry of the
paper into the printer.
5. Slide the paper through the slot connecting the
paper compartment and the printer compart-
ment. You can slide it in about one-quarter
inch before it stops.
6. While holding the paper in place, press the
rocker switch to the Paper Feed position. The
printer will activate, and a rubber roller will pull
the paper into the printer compartment. Hold
the switch in the Paper Feed position until the
paper emerges from the top of the printer
mechanism.
7. When an inch of paper has emerged from the
top of the printer, release the Paper Feed
button
8. Now pull the paper through the printer, until
several inches are exposed.

WP-234 Printer User’s Manual 9
9. Slide the paper through the slot in the printer
cover.
10. Push the back of the printer cover down and
into place.
11. Press the front of the printer cover down to
lock in place.
WP-234 Printer User’s Manual10
To Remove the
Paper Roll
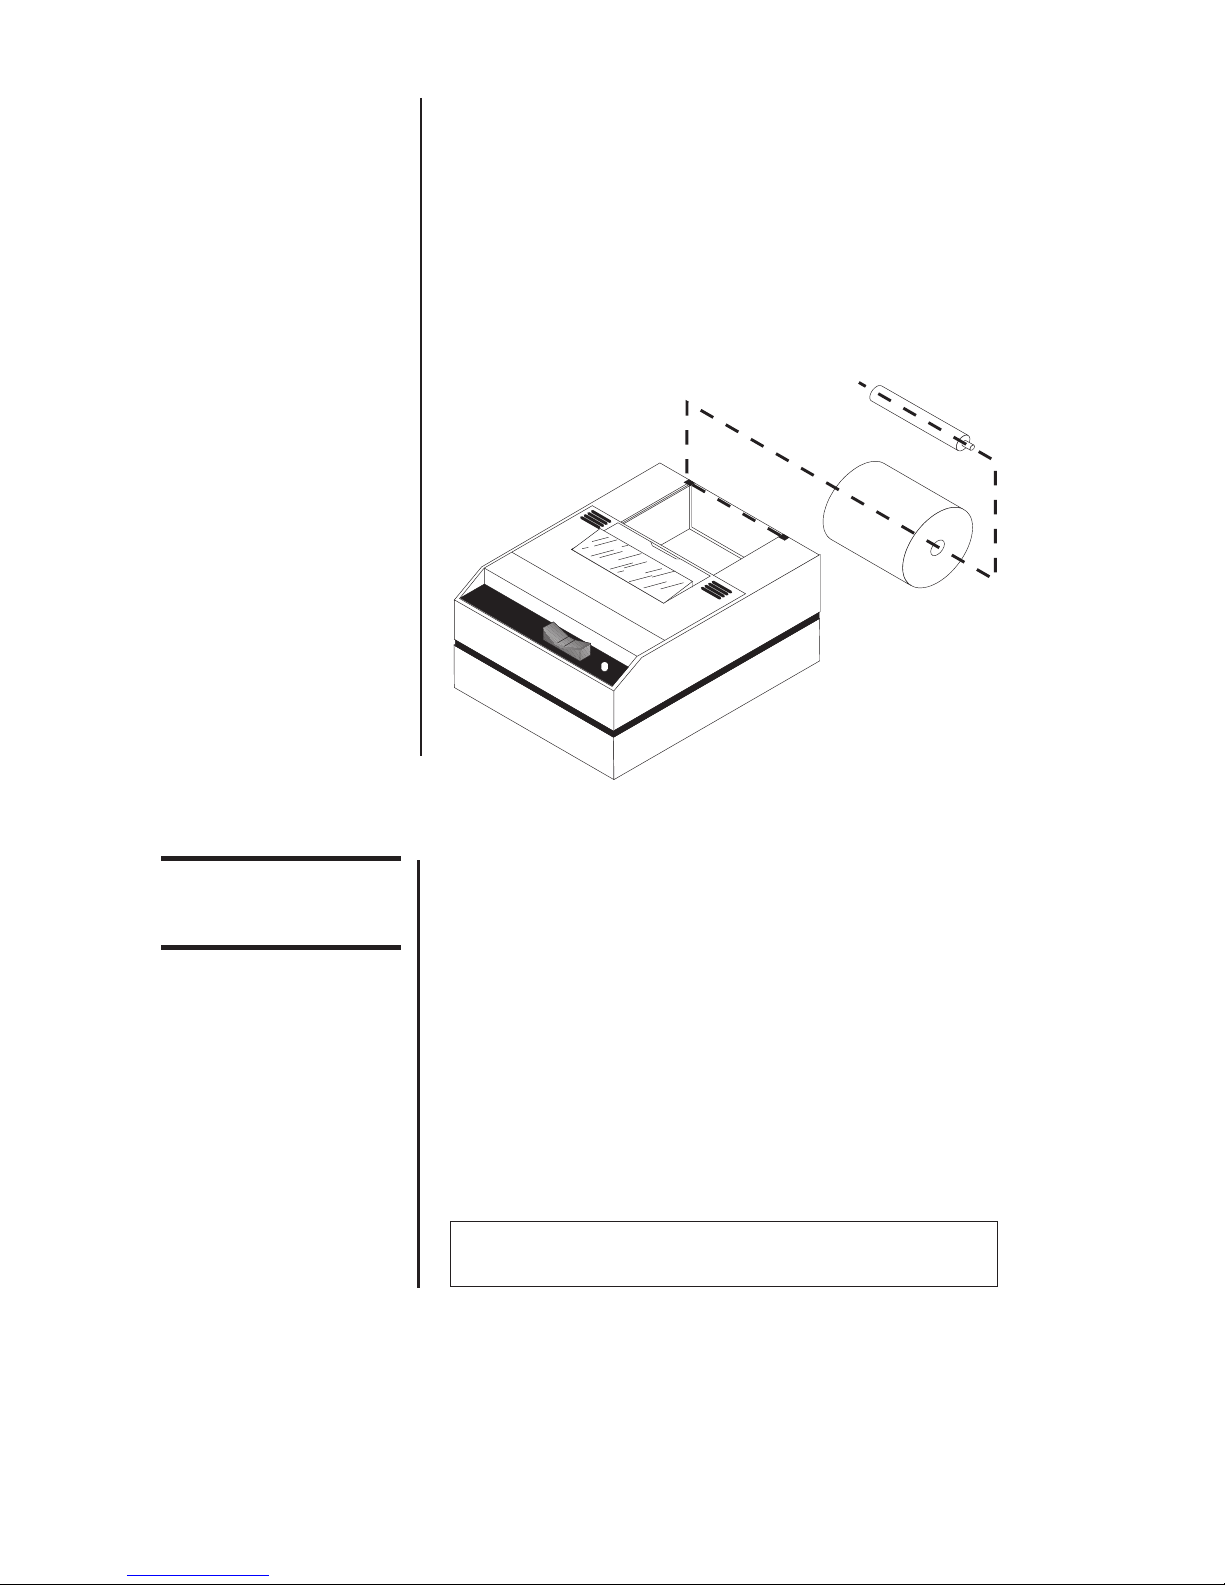
12. Put the paper spindle into the paper roll as
shown below, and place the roll with the
spindle onto the snaps near the back of the
printer. Turn the paper roll to take up any slack
in the paper feeding to the printer. Make sure
the roll of paper turns freely. If it does not turn
freely, the paper will jam and will possibly
damage the printer mechanism.
1. Advance the paper about one inch beyond the
paper cutter by using the Paper Feed switch.
2. Lift the paper roll away from the printer
housing and cut the paper feeding to the
printer with scissors. Try to make the cut as
square as possible to help the next time you
reload the paper.
3. Pull the remaining paper through the printer
mechanism. Be sure to pull the paper from
the top (paper cutter side).
WARNING! Pulling the paper out of the back of the
printer will damage the print mechanism.
WP-234 Printer User’s Manual 11
Connecting and
Powering Up
Your Printer
Maintenance
Operation
1. Attach the appropriate cable between the
printer and your instrument. The connector on
the printer side is “keyed” so that you cannot
plug the cable in the wrong way. This means
that the pins should be positioned so that a
slight pressure will seat the cable properly. Do
not force the pins in. Doing so could damage
the cable.
2. Plug the power cord into the back of the
printer. Plug the transformer into an appropri-
ate AC outlet. The unit will power up automati-
cally and print Ready. . .. This means the
printer is ready to print.
The Paper Feed switch on the printer is a rocker
type switch. Push the left side of the rocker switch
to toggle the printer on and offline. Push the right
side of the switch to advance the paper.
Your printer is now ready for printing.
The printer stores characters for printing until one
of two things happens:
1. The line buffer is filled.
2. It receives a line feed (hexadecimal 0A) or a
carriage return (hexadecimal 0D) code.
When (1) or (2) occurs, the printer prints out the
contents of its line buffer. If the buffer is empty
when the carriage return is received, the printer
simply advances the paper one line, leaving a
blank line in the printout.
When printing becomes faint or difficult to see,
replace the ribbon in your printer with an Epson
ERC-09 cartridge ribbon.
EJECT
PUSH
NCI Part Numbers:
Black ribbon: 22332-0029
Purple: 22332-0011
Long-lasting Black: 22332-0045
Wall mount power: 114815534
Paper spindle: 109316536
Paper roll 1.25” dia: 22335-0018
Paper roll 2.75” dia: 22335-0026
Almond paper cutter 23019-0019
Grey paper cutter 23019-0043
Clear plastic paper
roll cover 115513184
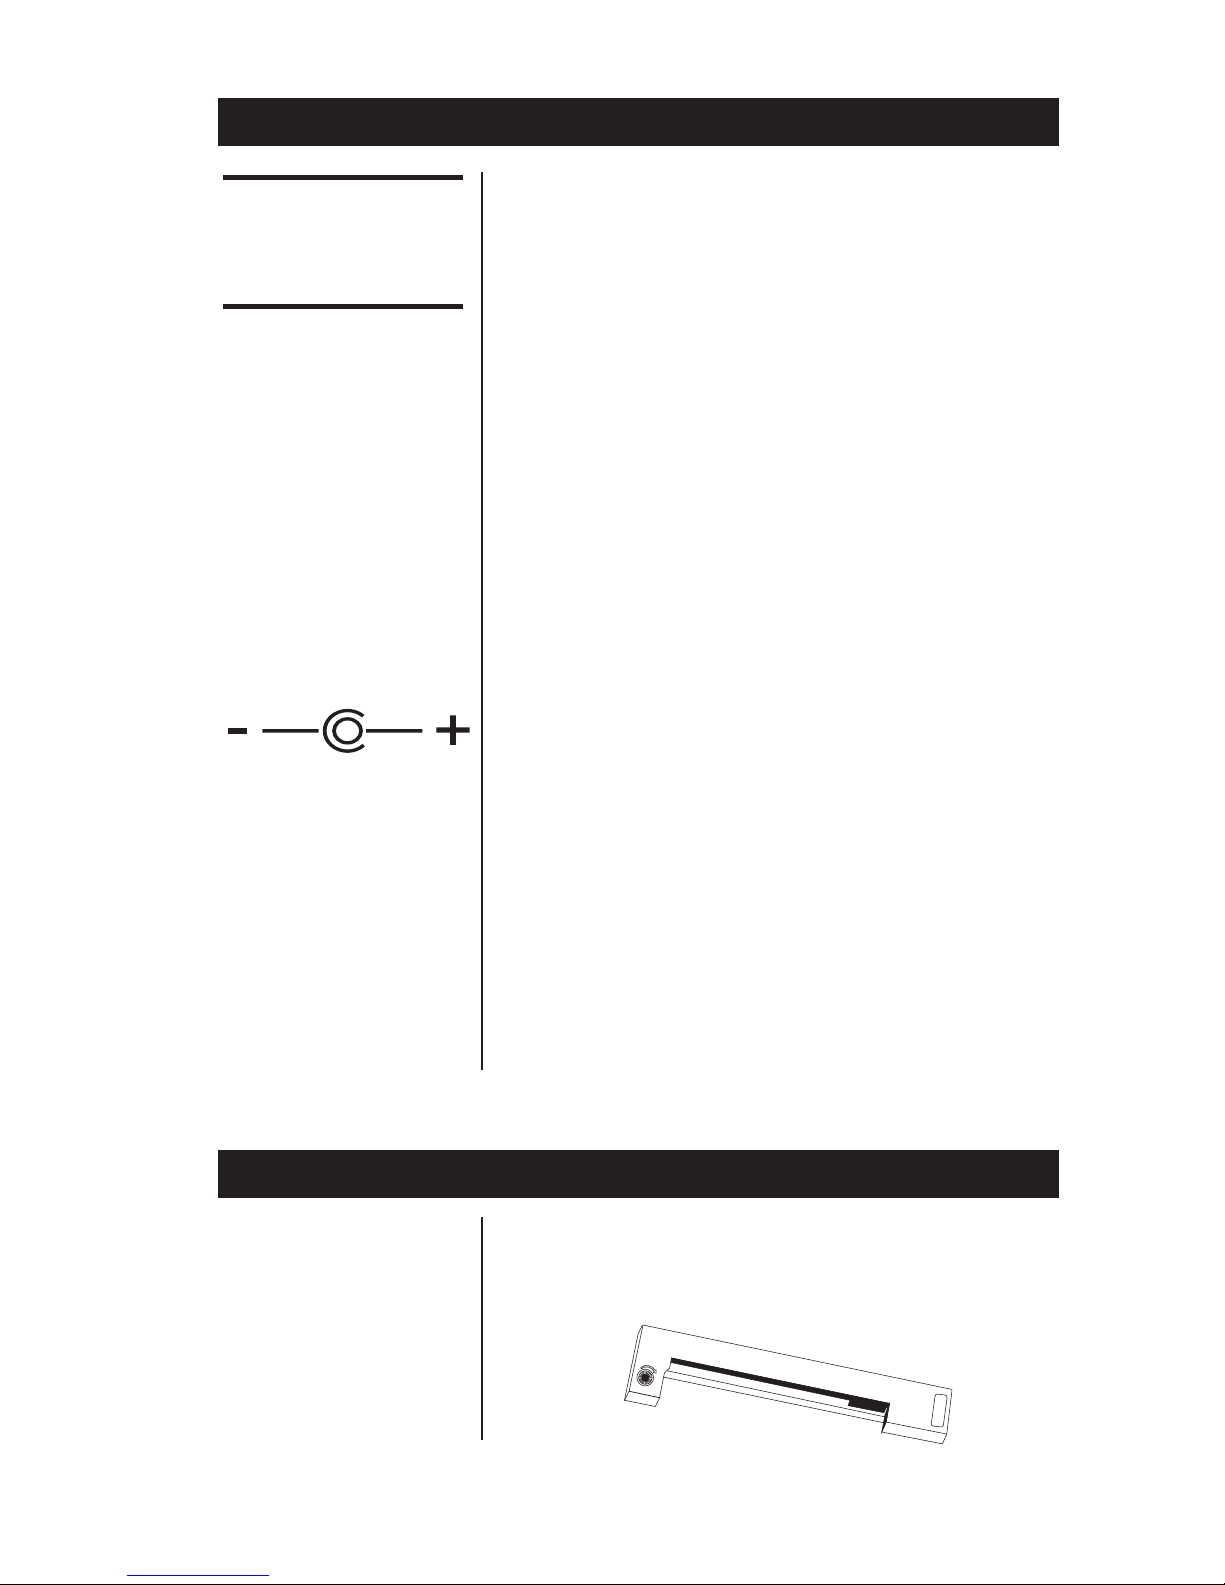
For DC modified
units supplied with
cable, connect
positive voltage to
striped wire.
See the DC power
connection illustra-
tion below:
WP-234 Printer User’s Manual12
Changing the
Printer Ribbon
If your printer is used infrequently, the print impres-
sion may become weak because the ribbon dried
out. To advance the ribbon to a new section, hold
down the Paper Feed switch for several seconds.
Below are the steps for replacing the ribbon:
1. Turn the printer to Standby.
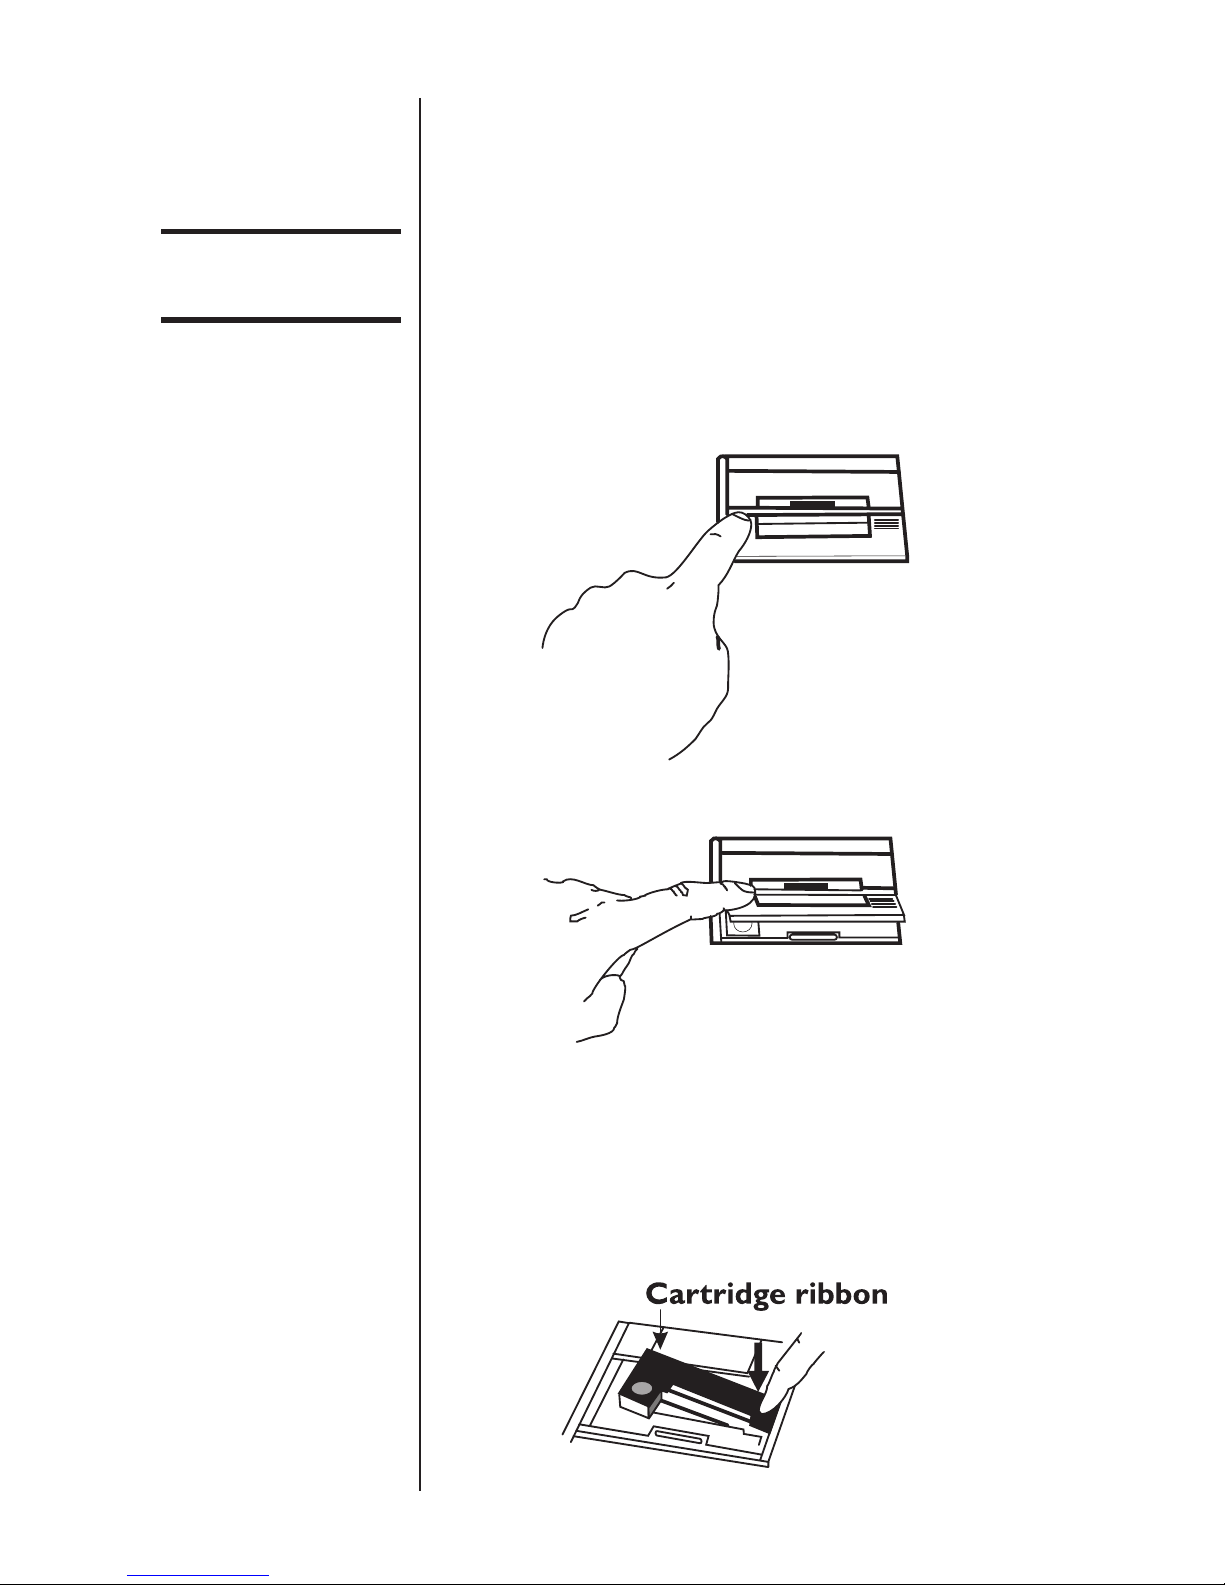
2. Four small grooves are embossed on each
side of the printer cover. Push down on one or
both of these areas until the printer cover tilts.
3. When the printer cover is tilted up, lift it
completely off.
4. Push down on the right side of ribbon car-
tridge where it is marked “PUSH”. Remove the
cartridge.

WP-234 Printer User’s Manual 13
Inserting a
Ribbon with
Paper in
the Printer
If you get ribbon ink
on the printer case,
wipe it off immedi-
ately. Once it dries it
is difficult to re-
move.
5. Install cartridge. Be sure the ink cartridge is
inserted firmly to prevent weak or irregular
printing. The cartridge must be properly seated
and aligned for best printing.
6. Turn the cartridge “knob” (marked by an arrow)
clockwise to stretch the ribbon.
7. Replace the cover.
8. Replace the paper.
You may insert the ribbon cartridge if there is
already paper in the printer.
Hold the cartridge as shown above and slide it over
the paper and into the printer compartment. Be
sure the paper goes between the ribbon cartridge
and the ink ribbon.
WP-234 Printer User’s Manual14
Printer Test
Printer Test and Setup
The printer can be tested and setup using the
steps described in this section. Testing and setup
are done using the rocker switch on the printer.
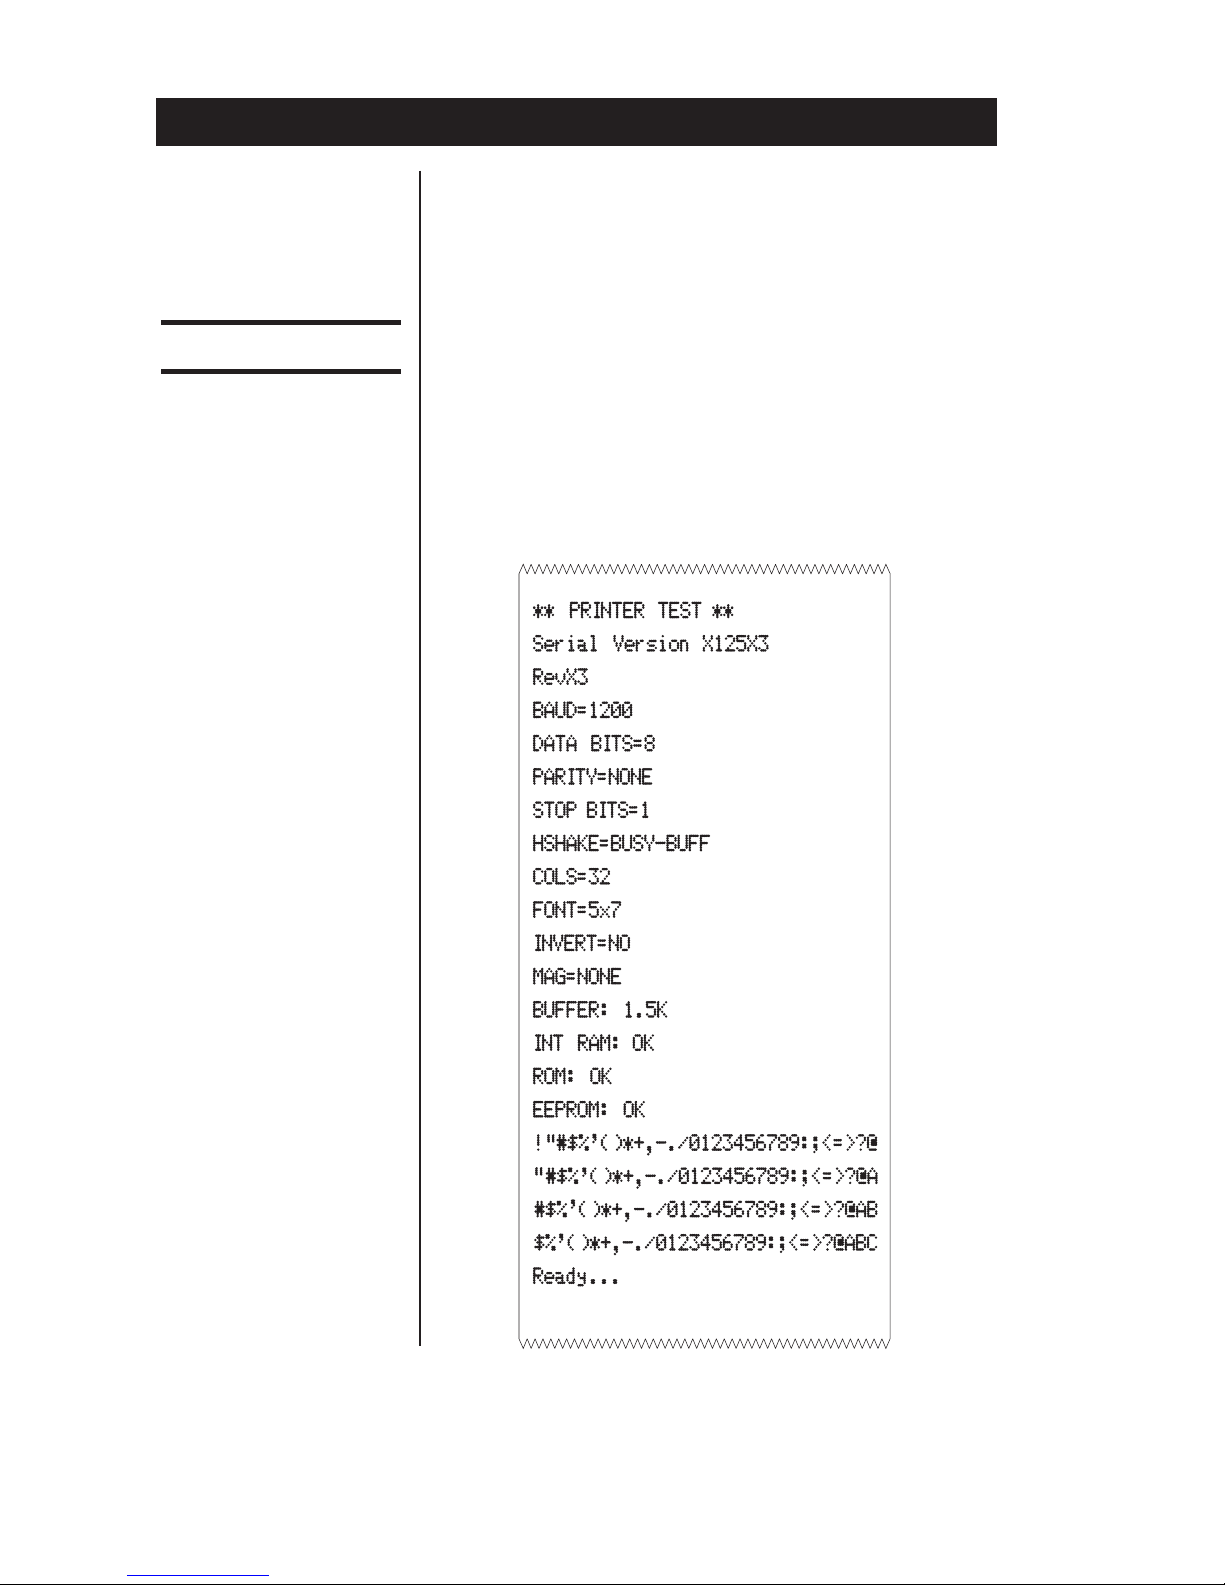
With the printer unplugged at the outlet or at the
back of the printer, press and hold the right side of
switch as you plug the unit in. The printer will print
out a list of the configuration as it currently exists
then do a continuous print test. To stop the print
test press either side of the rocker switch. Below is
a sample of what is printed when you do the print
test.

WP-234 Printer User’s Manual 15
Accessingthe
Setup Menu
This manual
assumes the time
and date option are
installed and
operating. If you do
not have this option
you will not see
references to the
clock or date listed
in most menus.
CONFIGURE. . .
To access the setup menu follow these steps:
1. Unplug the printer either at the outlet or at the
back of the printer.
2. Press and hold down the left side of the rocker
switch and plug in the printer. The printer will
advance the paper. After the paper advance
has stopped, count 3-5 seconds and release
the switch. The following is printed:
If you wait less than three or more than five
seconds Ready. . . is printed and you will have to
try steps 1 and 2 again to access the setup menu.
After you access the setup menu, if you press
NEXT (left side of switch) repeatedly you will see
the following list printed. If you keep pressing
NEXT (left side) the list repeats itself.
As you can see form the above printout the setup
menu contains the following items:
• CONFIGURE menu
• CUSTOM menu
• SET CLOCK menu
• RESET SEQ#
The following pages explain these items and how
to customize the printer to your needs.
The first setup menu item reads
CONFIGURE . . . [NEXT/OK]
[NEXT/OK] is a visual clue so you know that
pressing the left side of the rocker switch will go to
the NEXT part of the menu and that pressing the
right side of the rocker switch will accept (or say
OK to) what this line of the setup menu says.
WP-234 Printer User’s Manual16
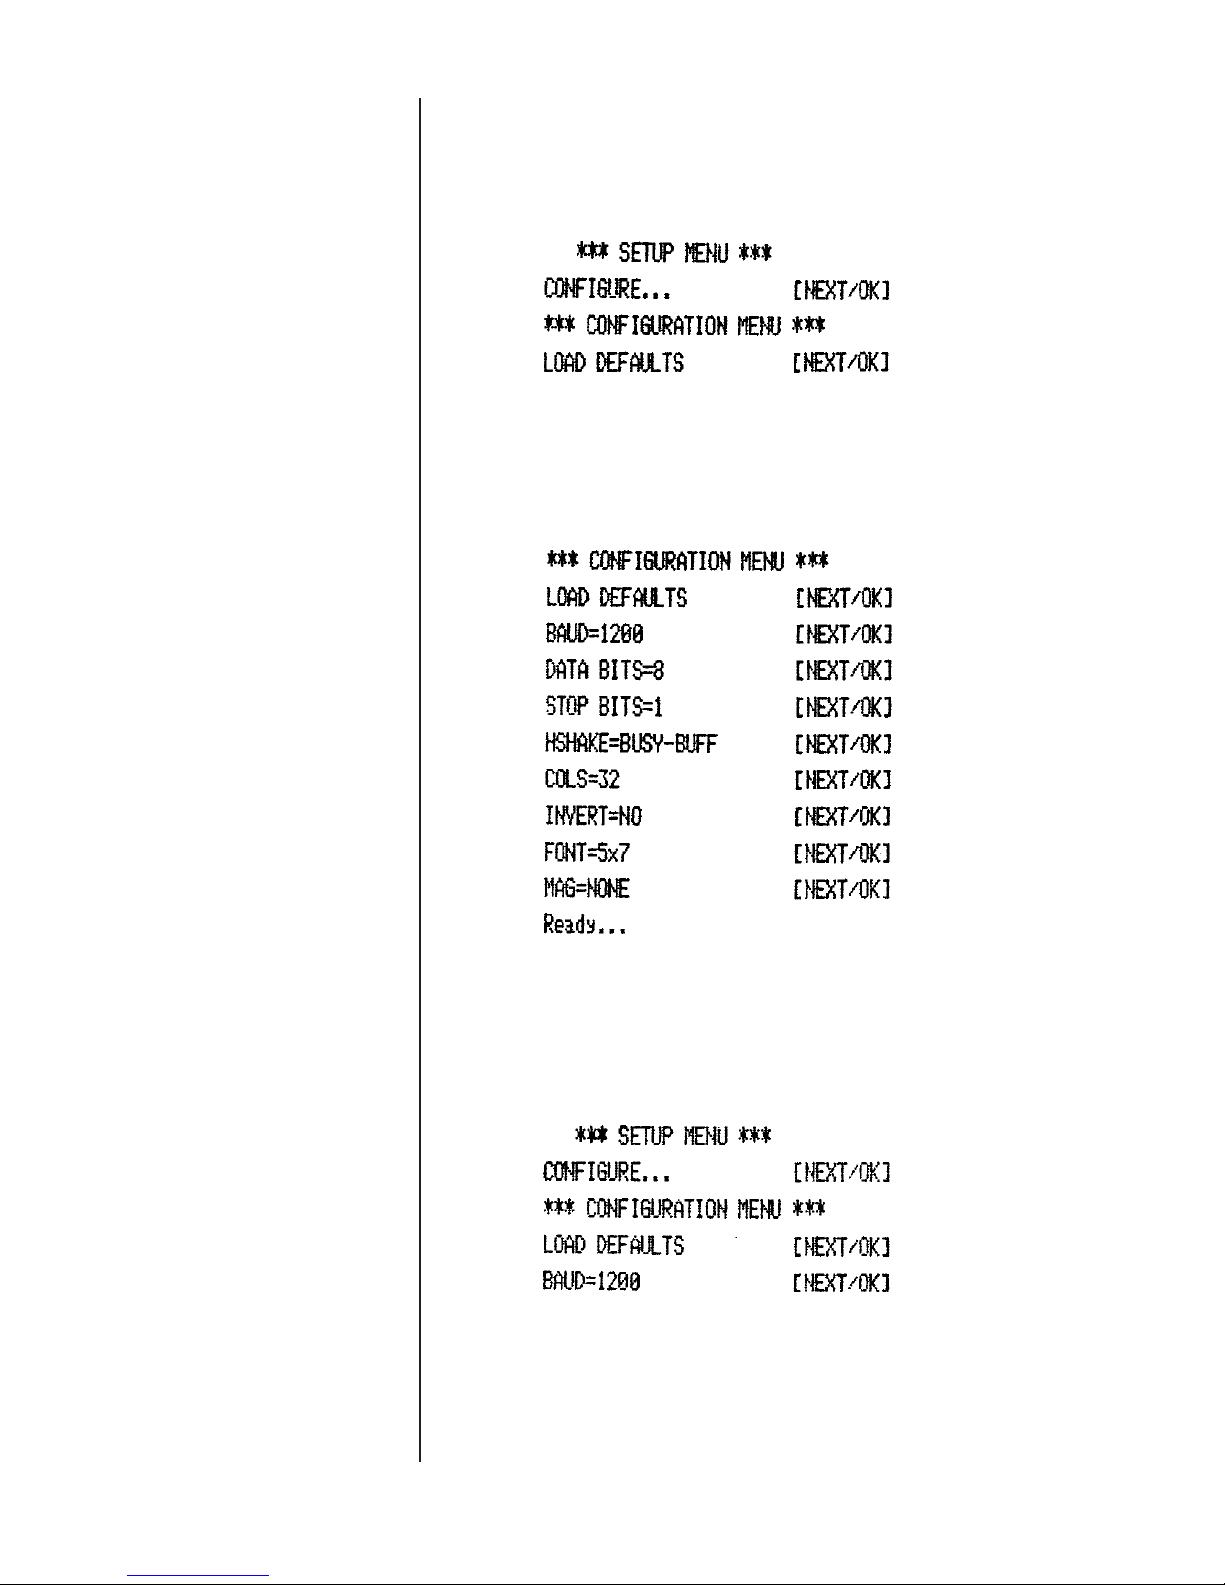
With the printer in the setup menu and with
CONFIGURE . . . [NEXT/OK] as the last item
printed, press OK (right side) to access the
configure menu. The following is printed:
LOAD DEFAULTS gives you the opportunity to
reset the printer to all default settings (shown
below).
Choose OK to do this or NEXT to go to the next
parameter. The following is printed:
Baud rate is the next parameter you can set in the
configure menu. The complete list of parameters
and their possible values is shown below.
WP-234 Printer User’s Manual 17
The sample list above shows the current baud rate
is 1200. To accept this, press OK (right side) or
view the next baud rate value by pressing NEXT
(left side). Press OK when the baud rate you want
is displayed.
Choose from these baud rates;
300, 600, 1200, 2400, 4800, 9600, or 19200
DATA BITS is the next parameter. Choose the
data bit value the same way baud rate was
chosen. Choices are 7 or 8 data bits. Parity will
appear next only if you choose 7 data bits.
If you choose 7 data bits you can select EVEN or
ODD parity. If you choose 8 data bits parity defaults
to NONE.
STOP BITS is the next parameter. Choose 1 or 2
stop bits.
HANDSHAKE is the next parameter. Choose from
the following settings:
BUSY-LINE
BUSY-BUFFER
XON/XOFF-LINE
XON/XOFF-BUFFER
NONE
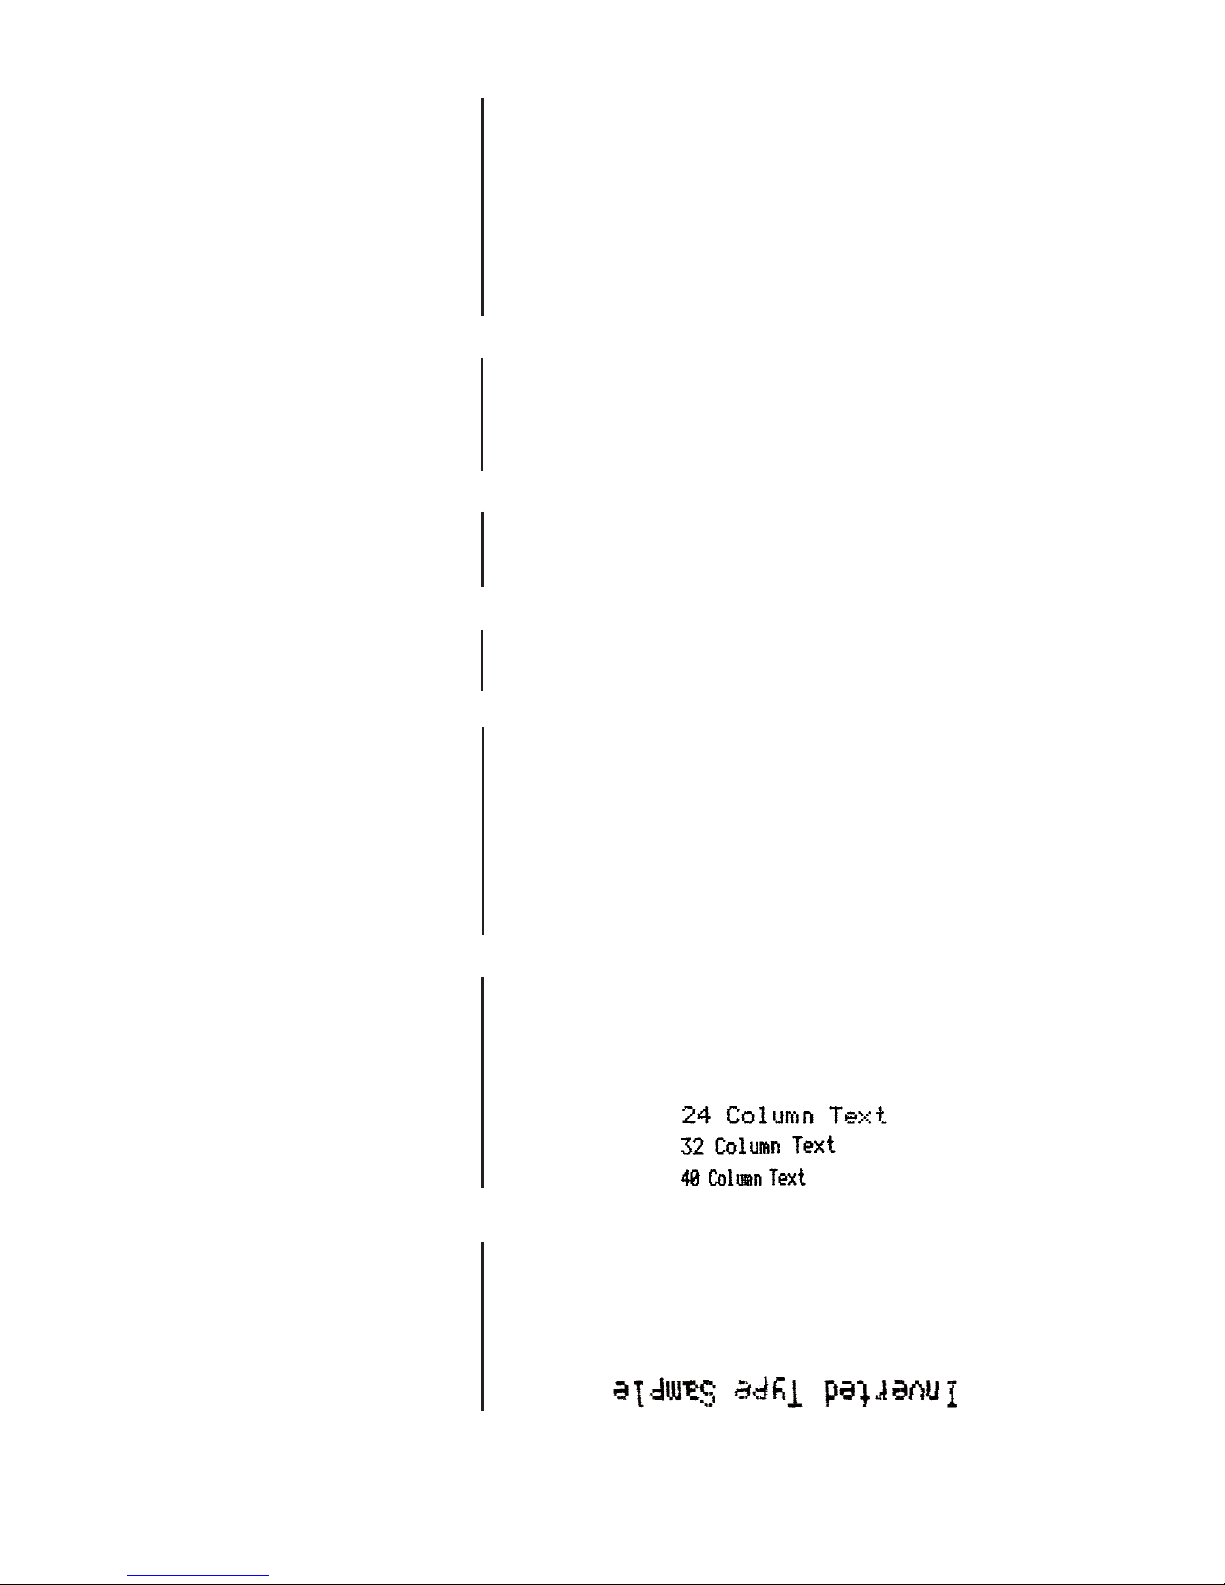
COLUMNS is the next parameter. Select the
number of characters per line (columns) for this
parameter. The choices you have are 24, 32, or 40.
Below are samples of each:
INVERT is the next parameter. Choose YES if you
want inverted text (upside down) or NO if you want
non-inverted text (right side up) in your printouts.
Below is an example of inverted text.
Baud Rate
Data Bits
Stop Bits
Handshake
Handshake is used
for serial interface
only.
Invert
Cols
Parity

WP-234 Printer User’s Manual18
Mag
Font
CUSTOM. . .
FONT is the next parameter. Choose from a 5 x 5,
5 x 7, or 5 x 8 dot matrix print pattern. The 5 x 5 dot
pattern produces only upper case (capital) letters.
The other two fonts can output upper and lower
case letters.
The last parameter is MAGNIFICATION. This
refers to the size of printed type from your printer.
Your choices (with examples) are
NONE
DOUBLE WIDE
DOUBLE HIGH
DOUBLE WIDE/HIGH
After you choose one of the magnifications the
printer will print Ready. . . to show the printer is out
of the configuration menu and the setup menu and
is ready to print.
The next setup menu item after CONFIGURE. . . is
CUSTOM. . .. With the printer in the setup menu
and with CUSTOM. . . as the last item printed, if
you press OK (right side) the printer will print the
following:
If you press OK the printer will print the current
custom setup. A sample is shown below.

WP-234 Printer User’s Manual 19
This manual
assumes the time
and date option is
installed and
operating. If you do
not have this option
you will not see
references to the
clock or date listed
in most menus.
T/D Format
This feature is
available only on
units with the time/
date option in-
stalled.
This printout shows you how each item is currently
set. Below is an explanation of each item and the
choices you can make for each.
TIME/DATE FORMAT is the next parameter.
Choose from the following formats.
MM/DD/YY hh:mm ?M
MM/DD/YY hh:mm ?M DOW MM = month
MM/DD/YY hh:mm DD = day
MM/DD/YY hh:mm DOW YY = year
DD-MM-YY hh:mm ?M hh = hour
DD-MM-YY hh:mm ?M DOW mm = minutes
DD-MM-YY hh:mm ?M = AM or PM
DD-MM-YY hh:mm DOW DOW=Day of week
DD/MON/YY hh:mm ?M
DD/MON/YY hh:mm ?M DOW
DD/MON/YY hh:mm
DD/MON/YY hh:mm DOW
NONE

WP-234 Printer User’s Manual20
Auto T&D
Auto Seq#
Pound Sign
_Underscore
➔➔
➔➔
➔
Zero
Busy Invert
AUTO TIME AND DATE is the next parameter.
Your choices are
YES - autoprint after CR (carriage return)
NO - do not autoprint after CR
Autoprint of the time and date will not occur unless
three seconds has elapsed since the printer has
stopped printing.
AUTO SEQUENCE NUMBER is the next param-
eter. Choose
NO - don’t autoprint sequence number after CR
YES - do autoprint sequence number after CR
Autoprint of the sequence number will not occur
unless three seconds has elapsed since the
printer has stopped printing.
ZERO is the next parameter. Choose how you want
the zero character to look in your printouts. Choose
between 0and 0.
POUND SIGN is the next parameter. Choose to
show pound as #or as the British sterling pound
symbol £.
_UNDERSCORE is the next parameter. Choose
which symbol the same ASCII code will print, an
_underscore or a left arrow.
BUSY INVERT is next.
Choices:
NO - voltage will be in a high state until the unit
is busy then voltage level goes low.
YES - voltage will be in a low state until the unit
is busy then voltage level goes high.
Other manuals for WP-234
1
Table of contents
Other Avery Weigh-Tronix Printer manuals

Avery Weigh-Tronix
Avery Weigh-Tronix WP-233 Series User manual

Avery Weigh-Tronix
Avery Weigh-Tronix ZG110 User manual

Avery Weigh-Tronix
Avery Weigh-Tronix ZG310 User manual

Avery Weigh-Tronix
Avery Weigh-Tronix TM-295 User manual

Avery Weigh-Tronix
Avery Weigh-Tronix ZG354 User manual

Avery Weigh-Tronix
Avery Weigh-Tronix WP-234 User manual

Avery Weigh-Tronix
Avery Weigh-Tronix WP-250 User manual


