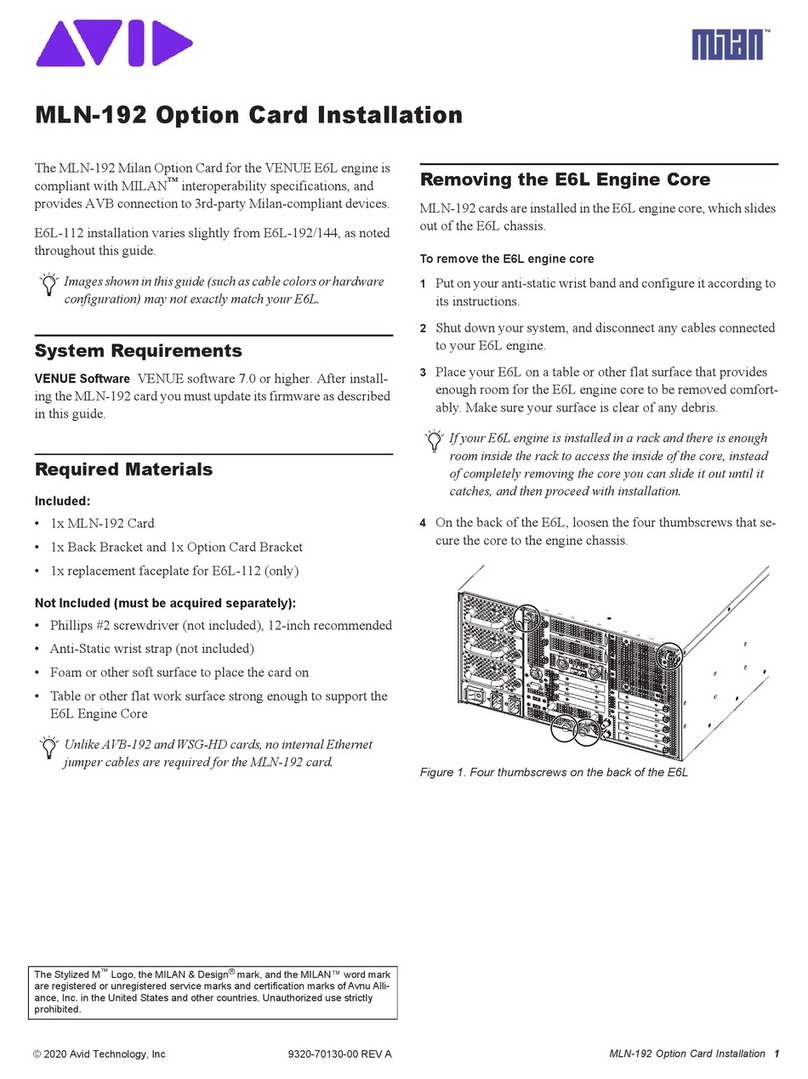
Avid Technology FOH Rack User manual

PN 9321-62799-00 REV A 08/10
FOH Rack
for VENUE Systems

Legal Notices
This guide is copyrighted ©2010 by Avid Technology, Inc., (hereafter “Avid”), with
all rights reserved. Under copyright laws, this guide may not be duplicated in
whole or in part without the written consent of Avid.
003, 96 I/O, 96i I/O, 192 Digital I/O, 192 I/O, 888|24 I/O, 882|20 I/O,
1622 I/O, 24-Bit ADAT Bridge I/O, AudioSuite, Avid, Avid DNA, Avid Mojo,
Avid Unity, Avid Unity ISIS, Avid Xpress, AVoption, Axiom, Beat Detective,
Bomb Factory, Bruno, C|24, Command|8, Control|24, D-Command, D-Control,
D-Fi, D-fx, D-Show, D-Verb, DAE, Digi 002, DigiBase, DigiDelivery, Digidesign,
Digidesign Audio Engine, Digidesign Intelligent Noise Reduction, Digidesign
TDM Bus, DigiDrive, DigiRack, DigiTest, DigiTranslator, DINR, D-Show,
DV Toolkit, EditPack, Eleven, HD Core, HD Process, Hybrid, Impact, Interplay,
LoFi, M-Audio, MachineControl, Maxim, Mbox, MediaComposer, MIDI I/O, MIX,
MultiShell, Nitris, OMF, OMF Interchange, PRE, ProControl, Pro Tools M-Powered,
Pro Tools, Pro Tools|HD, Pro Tools LE, QuickPunch, Recti-Fi, Reel Tape, Reso,
Reverb One, ReVibe, RTAS, Sibelius, Smack!, SoundReplacer, Sound
Designer II, Strike, Structure, SYNC HD, SYNC I/O, Synchronic, TL Aggro,
TL AutoPan, TL Drum Rehab, TL Everyphase, TL Fauxlder, TL In Tune,
TL MasterMeter, TL Metro, TL Space, TL Utilities, Transfuser, Trillium Lane Labs,
Vari-Fi Velvet, X-Form, and XMON are trademarks or registered trademarks of Avid
Technology, Inc. Xpand! is Registered in the U.S. Patent and Trademark Office.
All other trademarks are the property of their respective owners.
Product features, specifications, system requirements, and availability are
subject to change without notice.
Guide Part Number 9321-62799-00 REV B 08/10
Contents iii
Contents
Chapter 1. Introduction . . . . . . . . . . . . . . . . . . . . . . . . . . . . . . . . . . . . . . . . . . . . . . . . . . . . . . . . . . . . . . . . . . . . . . . . . . . 1
FOH Rack Features . . . . . . . . . . . . . . . . . . . . . . . . . . . . . . . . . . . . . . . . . . . . . . . . . . . . . . . . . . . . . . . . . . . . . . . . . . . . 1
Included Components . . . . . . . . . . . . . . . . . . . . . . . . . . . . . . . . . . . . . . . . . . . . . . . . . . . . . . . . . . . . . . . . . . . . . . . . . . 1
Expansion Options. . . . . . . . . . . . . . . . . . . . . . . . . . . . . . . . . . . . . . . . . . . . . . . . . . . . . . . . . . . . . . . . . . . . . . . . . . . . . 2
Operational Requirements . . . . . . . . . . . . . . . . . . . . . . . . . . . . . . . . . . . . . . . . . . . . . . . . . . . . . . . . . . . . . . . . . . . . . . . 2
FOH Rack Front Panel . . . . . . . . . . . . . . . . . . . . . . . . . . . . . . . . . . . . . . . . . . . . . . . . . . . . . . . . . . . . . . . . . . . . . . . . . . 3
FOH Rack Back Panel . . . . . . . . . . . . . . . . . . . . . . . . . . . . . . . . . . . . . . . . . . . . . . . . . . . . . . . . . . . . . . . . . . . . . . . . . . 4
FOH Link Cable . . . . . . . . . . . . . . . . . . . . . . . . . . . . . . . . . . . . . . . . . . . . . . . . . . . . . . . . . . . . . . . . . . . . . . . . . . . . . . . 6
Chapter 2. Connecting the FOH Rack. . . . . . . . . . . . . . . . . . . . . . . . . . . . . . . . . . . . . . . . . . . . . . . . . . . . . . . . . . . . . . . 9
Connecting Consoles to the FOH Rack. . . . . . . . . . . . . . . . . . . . . . . . . . . . . . . . . . . . . . . . . . . . . . . . . . . . . . . . . . . . . . . 9
Connecting the FOH Rack to the Stage Rack . . . . . . . . . . . . . . . . . . . . . . . . . . . . . . . . . . . . . . . . . . . . . . . . . . . . . . . . . 10
Ancillary Connections . . . . . . . . . . . . . . . . . . . . . . . . . . . . . . . . . . . . . . . . . . . . . . . . . . . . . . . . . . . . . . . . . . . . . . . . . 11
Powering the System Up and Down. . . . . . . . . . . . . . . . . . . . . . . . . . . . . . . . . . . . . . . . . . . . . . . . . . . . . . . . . . . . . . . . 11
Restarting the System . . . . . . . . . . . . . . . . . . . . . . . . . . . . . . . . . . . . . . . . . . . . . . . . . . . . . . . . . . . . . . . . . . . . . . . . . 11
How to Proceed . . . . . . . . . . . . . . . . . . . . . . . . . . . . . . . . . . . . . . . . . . . . . . . . . . . . . . . . . . . . . . . . . . . . . . . . . . . . . 11
Chapter 3. Mechanical Specifications . . . . . . . . . . . . . . . . . . . . . . . . . . . . . . . . . . . . . . . . . . . . . . . . . . . . . . . . . . . . . 13
FOH Rack Mechanical Specifications. . . . . . . . . . . . . . . . . . . . . . . . . . . . . . . . . . . . . . . . . . . . . . . . . . . . . . . . . . . . . . . 13
Environmental . . . . . . . . . . . . . . . . . . . . . . . . . . . . . . . . . . . . . . . . . . . . . . . . . . . . . . . . . . . . . . . . . . . . . . . . . . . . . . 13
Chapter 4. Audio Specifications. . . . . . . . . . . . . . . . . . . . . . . . . . . . . . . . . . . . . . . . . . . . . . . . . . . . . . . . . . . . . . . . . . . 15
FOH Rack General Audio Specifications. . . . . . . . . . . . . . . . . . . . . . . . . . . . . . . . . . . . . . . . . . . . . . . . . . . . . . . . . . . . . 15
FOH Inputs . . . . . . . . . . . . . . . . . . . . . . . . . . . . . . . . . . . . . . . . . . . . . . . . . . . . . . . . . . . . . . . . . . . . . . . . . . . . . . . . . 16
FOH Outputs . . . . . . . . . . . . . . . . . . . . . . . . . . . . . . . . . . . . . . . . . . . . . . . . . . . . . . . . . . . . . . . . . . . . . . . . . . . . . . . . 17
Synchronization and Control I/O . . . . . . . . . . . . . . . . . . . . . . . . . . . . . . . . . . . . . . . . . . . . . . . . . . . . . . . . . . . . . . . . . . 18
Environmental Compliance. . . . . . . . . . . . . . . . . . . . . . . . . . . . . . . . . . . . . . . . . . . . . . . . . . . . . . . . . . . . . . . . . . . . . . 19
EMC (Electromagnetic Compliance). . . . . . . . . . . . . . . . . . . . . . . . . . . . . . . . . . . . . . . . . . . . . . . . . . . . . . . . . . . . . . . . 19

Chapter 1: Introduction 1
Chapter 1: Introduction
The VENUE FOH Rack is an expandable rack component that
provides, in conjunction with a Stage Rack for remote stage
connections, local I/O, computer, and DSP processing for
VENUE D-Show®systems and VENUE Profile™ systems.
FOH Rack Features
Audio I/O
• 8 pairs of analog I/O for hardware inserts, or for input
and output of line-level program material from the FOH
position.
• Analog and Digital (AES or S/PDIF) 2-Track inputs and
outputs.
• Com mic input, with gain control and phantom power.
• Monitor outputs to connect to near field monitor speak-
ers at the mix position.
Synchronization and Control I/O
• MIDI In and Out ports, providing 16 channels of MIDI
input and 16 channels of MIDI output.
• Word clock I/O for digital clock synchronization.
• USB 2.0 ports for USB disks, iLoks, and other USB devices.
• 100 BaseT Ethernet (ECx) port for Ethernet-based remote
control.
• Snake 1 and 2 connectors (to Stage Rack)
CPU, DSP, and System Drives
The FOH Rack houses the CPU, DSP, hard drive and CD-ROM
drive that run the VENUE software on your VENUE system.
VENUE software is installed at the factory. The CD-ROM drive
lets you update or restore your VENUE system software, and
install compatible plug-ins from their installer discs.
A standard FOH Rack includes three Mix Engine cards, which
provide DSP for plug-ins and mixing. You can add two op-
tional Mix Engine cards, up to a maximum of five.
Redundant Power Supply Units (PSUs)
Each FOH Rack comes with dual redundant, field replaceable
(100V to 240V nominal, 50–60 Hz) PSUs with auto redundant
failover and LED status indication.
Included Components
The following components are included in a standard
FOH Rack configuration:
• 1 FOH Rack unit
• 1 FOH Link cable (for connection to a VENUE D-Show
Main/Sidecar or a VENUE Profile console)
• 2 IEC power cables
• VENUE system software
• VENUE Standalone software and user guides
• ECx Ethernet Control software
• VENUEPack Pro plug-in bundle and iLok

FOH Rack2
Expansion Options
I/O Options
IOx Card This option expands FOH Rack local I/O capabilities,
offering eight channels of AES3 digital I/O and eight channel
pairs of 1/4” TRS analog I/O.
Snake Card This option lets you to add another Stage Rack to
your VENUE System, giving you up to 96 channels of Stage
I/O.
DSP Expansion
To increase the amount of DSP available for plug-in process-
ing, you can add two additional Mix Engine cards (up to a
maximum of five) to the FOH Rack.
Record and Playback Options
FWx Record/Playback Option This FireWire-based option card
provides direct Pro Tools LE™ integration for up to 18 chan-
nels of 24 bit/48kHz recording and playback audio.
HDx Record/Playback Option This option card provides direct
Pro Tools|HD®integration for up to 64 channels of 24
bit/48kHz recording and playback audio with one card, or 128
channels with two cards.
VENUE MADI Option Card This option card lets you send or re-
ceive up to 64 channels of MADI digital audio to or from an
external MADI device such as an Avid HD MADI interface
(which you can use to record or playback audio with a
Pro Tools|HD system) or a third-party MADI device.
Operational Requirements
Temperature and Ventilation
The FOH Rack unit should be operated away from heat sources
and with adequate ventilation.
Storage
The FOH Rack unit should be stored and transported at tem-
peratures not lower than 0 degrees F (–18 degrees C) and not
exceeding 140 degrees F (60 degrees C).
Operation
The FOH Rack unit should be operated at temperatures not
lower than 40 degrees F (4 degrees C) and not exceeding
115 degrees F (40 degrees C).
Water and Moisture
The FOH Rack unit should be operated away from sources of
direct moisture and should be kept clear of liquids that might
spill into the unit. If condensation is present on the unit, leave
the unit to dry in ambient air for at least one hour before pow-
ering the unit on.
Cleaning and Maintenance
If you need to clean the surface of the FOH Rack unit, use a dry
cloth. Do not apply any cleaning solutions, spray cleaners, or
abrasives to the surface.
Power Connections
Each power supply in the FOH Rack requires its own power
connection. Each power supply is auto voltage-selecting
(100V to 240V). A modular IEC power cable is provided for
each power supply in the unit.
For more information on the IOx Card, see the IOx Card
guide.

Chapter 1: Introduction 3
FOH Rack Front Panel
Power Switch
The Power switch applies power to the FOH Rack and starts
the VENUE system.
Reset Buttons
Pressing both Reset buttons simultaneously instigates a full
system restart.
FOH Link Connector
The FOH Link connector accepts the FOH Link cable that con-
nects the FOH Rack to your D-Show Main Unit or Profile. This
cable provides all the data and audio connections between
your console and the FOH Rack.
USB Port
The USB port on the front panel of the FOH Rack is a USB 2.0
port. This port supports iLoks, USB key disks, and other USB
devices.
CD-ROM Drive
The built-in CD-ROM drive is for installing software updates,
plug-ins, and other data. The CD-ROM drive is read-only. No
data can be written to blank discs placed in the drive.
Figure 1. FOH Rack front panel
USB port
FOH Link
connector
Power
switch Reset
buttons
Use the Reset buttons only in the event of an emergency.

FOH Rack4
FOH Rack Back Panel
ECX Port
Use the ECx port to connect a laptop, tablet, or a wireless
router to the FOH Rack to control your VENUE system re-
motely, enabled by ECx Ethernet Control host and client soft-
ware. (This port does not support networking or any commu-
nication other than ECx.)
Snake Input and Output Section
The Snake card accepts a digital snake cable (Snake 1) and an
optional redundant cable (Snake 2) that connects the
FOH Rack to the Stage Rack.
Adding a second Snake card to the FOH Rack enables the use
of a second Stage Rack, expanding Stage I/O to 96 channels.
Snake Connectors
The FOH Rack snake connectors consist of two pairs of
BNC-style connectors (Snake 1 In and Out, Snake 2 In and
Out), and two pairs of signal status indicators.
Active LED Green LED lights to indicate that connection to
FOH Rack is active for the corresponding Snake. Only one
Snake can be active at a time.
Sig LED Green LED lights to indicate that signal is present on
the corresponding Snake.
All Snake LEDs flash when no Snake signal is present.
Power Supply
The FOH Rack contains two power supplies. The redundant
power supply automatically takes over in the event of a loss of
power to, or failure of, the primary power supply.
AC Power Connectors
The AC Power connectors accept standard IEC-type AC power
cables. FOH Rack power supplies are auto-power selecting
(100V to 240V) and automatically work with a standard mod-
ular power cord when connected to an AC receptacle in any
country.
Figure 2. FOH Rack back panel
IO section
Expansion
section
Snake
input and
Hard
drive
bay
AC power
connectors
ECx port
and power
supplies
USB port
output section
To use ECx, you must first install the host and client software
applications. See the VENUE D-Show Guide or the VENUE
Profile Guide for more information on installing and using
ECx.
The power supplies in FOH Rack have their own power
switches. These must be in the On postition in order to power
up the FOH Rack via the front panel power switch.

Chapter 1: Introduction 5
I/O Section
MIDI I/O Ports
These MIDI In and Out Ports provide 16 channels of MIDI in-
put and 16 channels of MIDI output. The MIDI I/O ports are
used in sending and receiving Snapshot MIDI messages, and
in receiving MIDI Time Code from external devices.
Com Mic, Gain Control, and Phantom Power
The Com Mic connector and associated controls let you inte-
grate a com system with your VENUE system. The Gain con-
trol operates in steps of 3 dB. If required, phantom power may
be applied to the Com mic with the Mic Power switch.
Monitor Outputs
These 2 Monitor Outputs are used for output to the near-field
monitoring system. These are 1/4-inch balanced TRS connec-
tors.
2-Track Analog Inputs and Outputs
These 2-Track analog connections are used for input and out-
put of analog audio material, which can be routed to the Main
bus. These are balanced 1/4-inch TRS connectors.
2-Track Digital Inputs and Outputs
These 2-Track digital connections are used for input and out-
put of digital audio material, which can be routed to the Main
bus. Stereo AES/EBU or S/PDIF I/O connectors are selectable
with the AES–SPDIF switch. These connectors support 24-bit,
48 kHz digital signals. Input signals with other sample rates
are sample-rate converted to 48 kHz.
Analog Inputs and Outputs (1–8)
These 8 pairs of analog inputs and outputs are used for hard-
ware inserts, or for input and output of program material from
the front of house position. These are balanced, 1/4-inch TRS
connectors.
Figure 3. FOH Rack I/O section
Analog I/O 1–8MIDI I/O
Com Mic
Com Mic Gain
Com Mic Phantom Power
Monitor
Outputs
2-Track Analog I/O
2-Track
AES/EBU I/O
2-Track
S/PDIF I/O
2-Track Digital
Format selector
Input

FOH Rack6
FOH Link Cable
Connector Specifications
P1: KPT 60 ZIFF connector w/ metal backshell
• Cannon P/N: KPSE06E22-55PF42F0 (housing)
• Cannon P/N: 030-9036-000 (contacts)
P2: KPT 55 Position w/ cable clamp, solder cup
• Cannon P/N: KPSE06E22-55PF42F0 (housing)
• Cannon P/N: 030-9036-000 (contacts)
Cable Specifications
VGA Bundle:
3 x 75 Ohm Coax, 2 x 24 awg Pair, 3 x 28awg
+ Foil and Braid shield
USB Bundle:
1 x 28 awg Pair, 4 x 24awg + Drain
+ Foil and Braid shield
Rack Bundle:
5 x 28 awg, Foil shield
Talkback (TB) Bundle:
4 x 28 awg, Foil shield
Headphone (HP) Bundle:
4 x 28 awg, Foil shield
CAN Bundle:
9 x 28 awg, Foil shield
Overall Shield: 360 degree Foil and 65% Braid + Drain
Overall Jacket: PVC, Black, UL
Connect all shields to the connector shell and to position EE on each
connector.
Figure 4. FOH Link cable specifications and connector pinout diagram
TB Bundle
+ Foil Shield
Overall Shield
+Foil/Braid Shield
HP Bundle
+ Foil Shield
Rack Bundle
+ Foil Shield
VGA Bundle
+ Foil Shield
Drain Wire
CAN Bundle
+ Foil Shield
USB Bundle
+Foil Shield

Chapter 1: Introduction 7
Connector Pinouts
Not connected: AA, FF, z, x, w, v, u, t, q, e, L, g
FOH Link cable VGA BUNDLE pinouts
P1 VGA BUNDLE P2
UREDDATAU
AGREENDATAA
TBLUEDATAT
VID V
B RED GND B
S GREEN GND S
n BLUE GND n
W GND W
CID C
mID m
pHSYNCp
XVSYNCX
kVGASHIELDk
FOH Link cable RACK BUNDLE pinouts
P1 RACK BUNDLE P2
HH RACK PSU HH
BB RACK GND BB
CC RACK SHD CC
DD SPR 1 DD
GG SPR 2 GG
FOH Link cable TALKBACK BUNDLE pinouts
P1 TB BUNDLE P2
RTBPR
jTBNj
y TB GND y
PTBSHEILDP
FOH Link cable HEADPHONE BUNDLE pinouts
P1 HP BUNDLE P2
NHPLN
iHPRi
h HP GND h
M HP SHEILD M
FOH Link cable CAN BUNDLE pinouts
P1 CAN BUNDLE P2
YCAN1HY
rCAN1Lr
ZCAN2HZ
sCAN2Ls
aCAN3Ha
bCAN3Lb
ECAN4HE
FCAN4LF
DCANCSD
FOH Link cable USB BUNDLE pinouts
P1 USB BUNDLE P2
KUSB5+K
J USB GND J
HUSBD+H
dUSBD–d
G USB SHIELD G
fUSB+5f
c USB GND c

FOH Rack8

Chapter 2: Connecting the FOH Rack 9
Chapter 2: Connecting the FOH Rack
Connecting Consoles to the FOH Rack
FOH Rack can be used with a Profile console or a D-Show Main unit/Sidecar console.
To connect Profile and the FOH Rack:
Connect one end of the FOH Link cable to the FOH Link port on the back panel of the Profile console. Connect the other end
of the FOH Link cable to the FOH Link port on the front panel of the FOH Rack. On each end, be sure to align the notch in the
connector housing with the slot in the plug, and to rotate the collar until the connector is fully latched.
To connect the D-Show Main Unit and the FOH Rack:
Connect one end of the FOH Link cable to the FOH Link port on the back panel of the Main unit. Connect the other end of
the FOH Link cable to the FOH Link port on the front panel of the FOH Rack. On each end, be sure to align the notch in the con-
nector housing with the slot in the plug, and to rotate the collar until the connector is fully latched.
Figure 5. FOH Link connection between Profile (left) and FOH Rack (right)
Figure 6. FOH Link connection between D-Show Main unit (left) and FOH Rack (right)

FOH Rack10
Connecting the FOH Rack to the Stage Rack
The FOH Rack is connected to the Stage Rack with the Digital Snake cable (available separately from Avid). It is recommended
that you use a second, redundant Digital Snake cable connected to Snake 2 ports on each unit.
To connect a Stage Rack to the FOH Rack:
1 Connect the send snake to the Stage 1 Out port of the Stage Rack to the Stage 1 In port on the FOH Rack.
2 Connect the return snake to the Stage 1 Out Port of the FOH Rack to the Stage 1 In port on the Stage Rack.
3 If you are using a second redundant snake, connect it to the Snake 2 ports on each unit in the same manner.
When the FOH Rack and the Stage Rack are powered up, the primary snake connection is indicated by the solid Active LED
(marked “Active”). If the Snake Signal LEDs flash, a Snake connection has not been established.
The connectors on Avid’s Digital Snake cable are color coded, so that the white connector connects to the white-outlined ports on
the Stage Rack and the FOH Rack.
If you are using a second redundant snake, the primary and the redundant snake must be the same length.
If there are problems with the Digital Snake connection, double check that all the BNC connectors are fully secured. If the
problem persists, try reversing the connectors connected to the In and Out ports on one end.
Figure 7. Detail of Digital Snake cable connection between Stage Rack (left) and FOH Rack (right)
If a second Stage Rack is used, an additional Snake Card must be installed in the FOH Rack. See the Snake Card Guide
for more information.
Connectors with white sleeves
Signal LED
attach to terminals with white labels
Signal LED
Redundant Snake
connects here
Redundant Snake
connects here
(Avid Digital Snake Cable only)

Chapter 2: Connecting the FOH Rack 11
Ancillary Connections
(AC Power, Synchronization and Optional Connections)
AC Power Connectors
The AC Power connectors accept standard AC power cable, for
powering each of the two redundant power supply units. FOH
Rack power supplies are auto-power selecting (100V to 240V,
50–60Hz) and automatically work with a standard modular
power cord when connected to an AC receptacle in any coun-
try.
ECx Port
The ECx port lets you connect an RJ-45 Ethernet cable for re-
mote control of the system from a laptop or tablet computer.
USB Ports
The USB ports on the front and back panel of the FOH Rack let
you connect iLoks, USB key disks and other USB devices. (An
additional, secure USB port is located inside the FOH Rack
chassis as well; use this internal port to connect and secure a
pre-loaded iLok to always be available to that FOH Rack sys-
tem.)
Word Clock I/O
The Word Clock In Out ports transmit and receive word clock
signals, letting you integrate external digital devices with
FOH Rack. The ports are also used to integrate a second Snake
card into your system.
Powering the System Up and Down
Powering Up
Power up the system in the following sequence:
1 VENUE console
2 FOH Rack
3 Stage Rack
4 Any connected computers for recording/playback options
5 Audio monitoring system
Powering Down
Power down the system in the following sequence:
1 Audio monitoring system
2 Any connected computers for recording/playback options
3 FOH Rack
4 Stage Rack
5 VENUE console
Restarting the System
If at any time during setup or performance it becomes neces-
sary to restart the system, you can restart the entire system or
reset individual hardware devices.
How to Proceed
To learn how to operate your VENUE system, see the
VENUE Profile Guide or VENUE D-Show Guide that came with
your console.
The power supplies in FOH Rack have their own power
switches. These must be in the On position in order to power
up the FOH Rack via the front panel power switch.
See the VENUE D-Show Guide or the VENUE Profile Guide
for more information on ECx.
For more information on using FOH Rack word clock I/O,
see the guide that came with your console. See the Snake
Card guide for more information on setting up a second
Stage Rack.
Faders move when power is turned on. Before powering up the
system, make sure all fader paths are clear of obstructions.
Each unit has a separate power switch.
For more information on restarting your VENUE system
and resetting system hardware, see the Troubleshooting
chapter of the guide that came with your console (VENUE
Profile Guide, or VENUE D-Show Guide).

FOH Rack12

Chapter 3: Mechanical Specifications 13
Chapter 3: Mechanical Specifications
FOH Rack Mechanical Specifications
Environmental
VENUE FOH Rack Specifications (Maximum Configuration)
Dimensions (H x W x D) 17.5 x 17.0 x 15.1 inches (445 x 432 x 384 mm)
Rack Spaces 10 U
Weight 74 lbs (33.7 kg)
Power Requirements 90–260 VAC, 50–60 Hz, 220 W
Snake 1 In/Out Connectors (to Stage Rack) BNC female (2)
Snake 2 In/Out Connectors (to Stage Rack) BNC female (2)
Word Clock In/Out Connectors BNC female (2)
USB Ports (3) USB 2.0
Parameter Specification Limit Units Condition/Comment
Storage Temperature 0 to +140 deg F –18 to +60 deg C
Operating Temperature +40 to +115 deg F +4 to +40 deg C
Storage humidity range 5 to 95 % Non-condensing
Operating humidity range 20 to 80 % Non-condensing

FOH Rack14

Chapter 4: Audio Specifications 15
Chapter 4: Audio Specifications
FOH Rack General Audio Specifications
All measurements at Fs=48 kHz with 150 Ohm source impedance and 600 Ohm load impedance, unless otherwise specified.
0 dBU = 0.775Vrms.
Audio, general
Parameter Specification Limit Units Condition/Comment
Internal Sample
Rate
48 kHz
External Sample
Rate
48 +/– 10 ppm (word clock input) kHz
Processing Delay
(latency)
Less than 2.8 max ms 48 channels, stage input through L–R bus to
stage output
Internal
Processing
up to 48-bit, fixed point 288 dB internal dynamic range
Frequency
Response
+/– 0.5 dB 20 Hz – 20 kHz BW, relative to 1 kHz
Dynamic Range 108 min dB Analog stage input to analog stage output,
re +24 dBu, A-weighted, 20 Hz – 20 kHz BW
Crosstalk –100 max dB Adjacent Stage inputs to L–R bus, @ 1 kHz
Residual Output
Noise
–90 max dBu 20 Hz – 20 kHz BW
Maximum Voltage
Gain
84 dB Stage input to L–R bus, channel & L–R
faders @ max

FOH Rack16
FOH Inputs
Analog Line Inputs 1–8; 2–Track Analog Inputs
Parameter Specification Limit Units Condition/Comment
Type Balanced, 1/4-inch TRS
Female
Maximum Input Level +24 max dBu
Input Impedance 10k Ohms
THD+N 0.003 max % –1 dBFS output, 20 Hz
to 20 kHz BW
2–Track AES Input
Parameter Specification Limit Units Condition/Comment
Type XLR3-F
Format AES/EBU
Termination 110 Ohm
Word Length 24 bit
Sample Rate 48 kHz
Sample Rate Conversion
(SRC)
32 to 96 kHz Always active
2–Track S/PDIF Input
Parameter Specification Limit Units Condition/Comment
Type Unbalanced, co-axial
(RCA)
Format S/PDIF (IEC-60958
Type II)
Termination 75 Ohm
Word Length 24 bit
Sample Rate 48 nom kHz
Sample Rate Conversion
(SRC)
32 to 96 kHz Always active

Chapter 4: Audio Specifications 17
FOH Outputs
Com Input (XLR/TRS)
Parameter Specification Limit Units Condition/Comment
Type Neutrik combi XLR/TRS
Sensitivity –2 to –32 dBu Equals 0 dBFS. Switch-
able in 6 gain steps
Phantom Power +15 VDC 6mA (switchable on
Mix Rack back panel)
Input Impedance 20k Ohms
Analog Line Outputs 1–8; 2–Track Analog Outputs; Monitor L/R
Parameter Specification Limit Units Condition/Comment
Type Balanced, 1/4-inch TRS
Female
Maximum Output Level +24 max dBu
Output Impedance 50K Ohm
2–Track AES Output
Parameter Specification Limit Units Condition/Comment
Type XLR3-M
Format AES/EBU
Word Length 24 bit
Sample Rate 48 kHz
Sample Rate Conversion
(SRC)
None
Dithering None
Channel Status Info Pro, Audio 48K, No
Emphasis
Max Cable Length 100 meter Without equalization,
110 ohm cable
Table of contents
Other Avid Technology Computer Hardware manuals

Avid Technology
Avid Technology Snake Card User manual

Avid Technology
Avid Technology Avid Adrenaline User manual

Avid Technology
Avid Technology 9320-62787-00 User manual

Avid Technology
Avid Technology Milan MLN-192 User manual

Avid Technology
Avid Technology HDX-192 User manual

Avid Technology
Avid Technology Pinnacle PCTV DVB-T User manual
Popular Computer Hardware manuals by other brands

WI AUDIOSTREAM
WI AUDIOSTREAM JM-WAL45 user guide

Vantec
Vantec UGT-UC302CB user manual

IBM
IBM Power 730 Express 8231-E2B manual

Delta Electronics
Delta Electronics Power Factor Corrector PFC4116V Series Specification sheet

EK-Quantum
EK-Quantum Vector RTX 3080/3090 Backplate user guide

ASROCK
ASROCK B650E TAICHI user manual