Aviosys 9000A Plus User manual

IP Kamera 9000A Plus
User Guide

IP KAMERA 9000A PLUS USER MANUAL
User Guide
IP Kamera 9000A
Manual version: 2.32
Date: SEP 20, 2004
VER. 2.32,
- 1 -

Caution: Any changes or modifications not approved by the party
responsible for compliance could void the user’s authority to operate the
equipment.
Note: This equipment has been tested and found to comply with the limits
for FCC and CE. These limits are designed to provide reasonable
protection against harmful interference when the equipment is operated in
commercial environment.
Important Notice
1. IP Kamera 9000A is for indoor use. Note that the CMOS lens can be
damaged permanently if the camera lense is exposed directly to
sunlight. (We will not hold any responsibility if CMOS lens is damaged
by sunlight)
2. IP Kamera 9000A us not water proof. Therefore we will not hold
any damage responsibility if the camera is used under raining
condition.
3. Be sure to use the DC adapter that is provided by your dealer. We will
not hold any responsibly if wrong DC adapter is in use.
4. Be caution in handling IP Kamera 9000A for physical shocks may
occur serious damage.
5. If IP Kamera 9000A does not operate properly, please contact your
local dealer for after sale service. In all cases, you are prohibited to
disassemble the product. If so, We does not hold any responsibility
for mal-function nor service warranty
- 2 -

IP KAMERA 9000A PLUS USER MANUAL
Table of Contents
1. PRODUCT OVERVIEW............................................................................................... 4
FEATURES ......................................................................................................
2. PHYSICAL DESCRIPTION ......................................................................................... 5
SPECIFICATION ..................................................................................................................
SYSTEM MINIMUM REQUIRNMENT .......................................................................................
3. PANEL DESCRIPTION…………………………………………………………………6
FRONT PANEL………………………………………………………………………………
BACK PANEL………………………………………………………………………………..
4. INSTALLATION…………………………………………………………………………7
PREPERATION....................................................................................................................
HARDWARE INSTALLATION .................................................................................................
SOFTWARE INSTALLATION ..................................................................................................
5. NETWORK SET UP.................................................................................................. 13
LAN SET UP........................................................................................................................
INTERNET SET UP...............................................................................................................
6. FUNCTION…………………………………………………………………………….15
SIMPLE FUNCTION .............................................................................................................
VIDEO ADJUSTMENT………………………………………………………………………..
SECURITY SETTING ............................................................................................................
MOTION DETECTION FUNCTION...........................................................................................
7. OTHER FUNCTIONS………………………………………………………………….24
8.AUTHORIZATION……………………… ………………………………………….…24
ADMINISTRATOR ................................................................................................................
NORMAL USER ...................................................................................................................
9. CAUTION................................................................................................................... 26
ADDITIONAL INFORMATION A: FAQ...................................................................................
VER. 2.32,
- 3 -

1. Product Overview
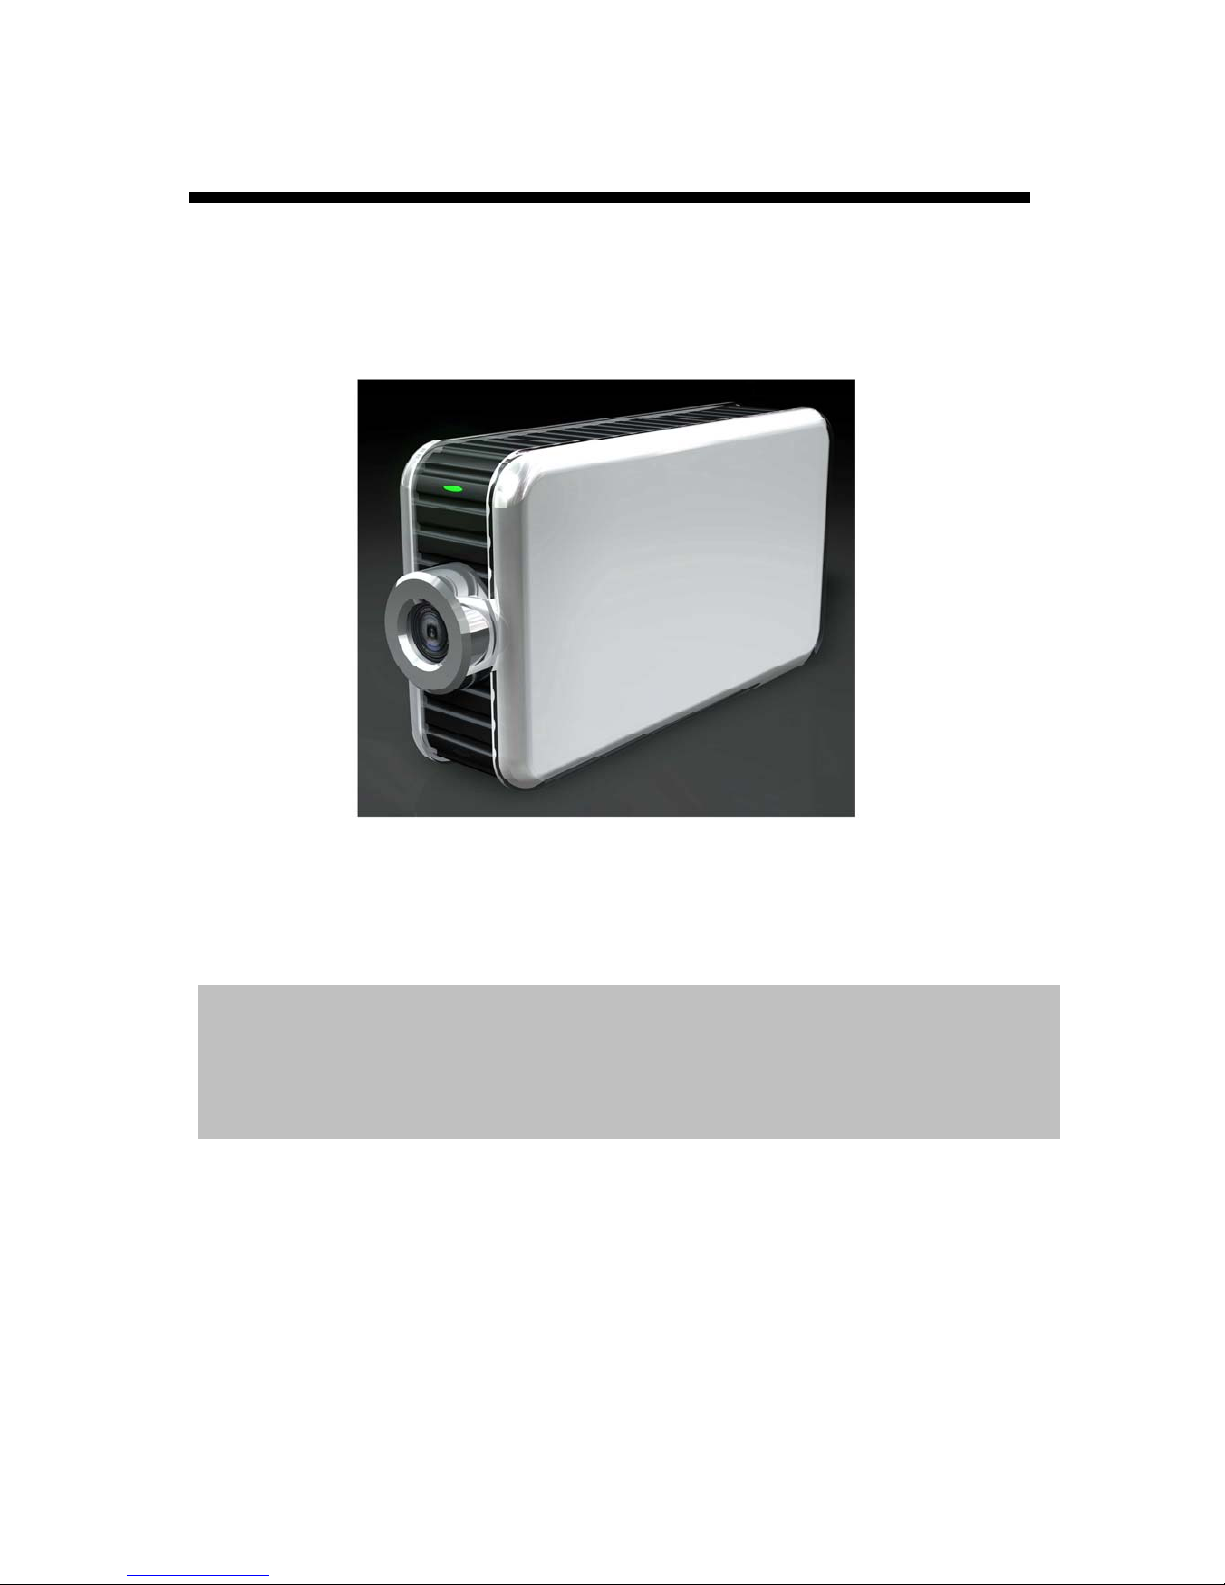
IP Kamera 9000A is an IP camera that has a digital web server in camera. This camera
can put up live image on-line and make remote locations immediately accessible
through standard web browsers.
IP Kamera 9000A is equipped with cutting edge technology, includes a digital camera,
web server, and optimized hardware for image compression, and physical Ethernet
connection. Therefore it does not need to plug in front of computer, users can simply
just plug into an internet line and start oberserving from any where in the world.
FEATURES
IP Kamera 9000A features:
1. Embedded Web Server - No need PC for camera.
2. Pass image to Displays - TV, PDP, HDTV. LCD TV
3. Support MSN & YAHOO Messenger
4. Multiple Cameras Supported
5. Multi - video from different area.
6. Layout 1x1, 2x2, 3x3, 4x4
7. Resolution - True 640x480, 352x288, 320x240, 176x144,
8. Video Quality - Low, High
9. Color adjustment: Brightness, Contrast, Hue, and Saturation
10. Motion Detection - Three-Sensitivity Level.
11.E-mail the Detected Images to preset e-Mail address.
12. FTP the Detected Images to preset FTP server.
13. Support Network - Fixed IP, DHCP, PPPoE & DDNS.
14. Default HTTP Port supported-
15. Changed to fit different network.
16. Browser by Internet - IE (internet Explore) , NETSCAPE,
Mozilla Firefox ( LINUX ).
17. Support Java Applet support and Active X control.
18. A Linux based server
•10/100BT LAN supported
•Built in JPEG Decoder
•Motion detection
•User able to monitor any place if select this Web Cam by using
any of Internet Browser.
•User may setup his email address in the system, let the system
notice the user when an event occur
•Provide some GPIOs for different application
19. Support GlobalSign – no need to lower security level.
20. Work with MSN& Yahoo Messenger, AMCAP, and WMCAP &
VIDCAP program
- 4 -

IP KAMERA 9000A PLUS USER MANUAL
2.Physical Description
BOX CONTENT
IP Kamera package content:
! 1 x IP Kamera 9000A
! 1 x Tripot
! 1 x RJ 45 internet line
! 1 x DC Power adopter 5V, 110 ~ 240.
! 1 x CD (a. IP KAMVID program b. User Manual book)
! 1 x Quick Installation Guide
Minimum Requirement
≥300MHz Intel Pentium II and above
Windows 98 / SE / 2000 / ME / XP, or LINUX, MAC system
≥64MB memory
VGA Card:support Hi - Colors and above and direct draw
Internet card - RJ 45 (CAT 5)
Internet Hub
Internet : one set of IP provided by your ISP
EX: xxx.xxx.xxx.xxx
VER. 2.32,
- 5 -

3. Panel Description
Front Panel:
1. Power indicator (blue LED)
2. Lens (CMOS)
Back Panel: from left to right:
1. Reset Button
2. DC Power - 5V
3. On / Off
4. RJ 45
5. Microphone In
Note: The Microphone Input support only audio from microphone. If input audio from
other audio device, the audio volume would be noise or over volume.
- 6 -

IP KAMERA 9000A PLUS USER MANUAL
4. Installation
Before using IP Kamera 9000A, follow bellow:
Before installation:
Reconfirm your package content
A Hub
Electricity 110 ~ 240 V
Hardware installation
1. Plug in IP Kamera 9000A (Power) 2. Plug in RJ 45 line to a HUB
3. Connect the other way to the computer
4. Connect your Hub into your modem 5. Turn you computer on
VER. 2.32,
- 7 -

SOFTWARE INSTALLER
1. IP_ KAM VID_ 1070
After connecting the power and RJ 45 line, following the steps below to install the
software.
Step 1: Install IP KAM by executes Setup.exe in the CD; choose setup language and
the install shield Wizard will help finish the program.
- 8 -

IP KAMERA 9000A PLUS USER MANUAL
Step 2: Then you can see shortcut icon “IP KamVid 1070 “on desktop, click this icon.
Note: Be sure that the power is turn on and the RJ45 line is properly connected.
Step 3: The KIPEDIT program will detect all the active IP9000s or IP9100s in the same
local Ethernet, and display the findings in the window.
VER. 2.32,
- 9 -

Step 4: Click the one you want to set, its name, IP will be displayed below. You can
change its name (please use numbers or letter) or IP (please set in the same subnet as
your PC) in the text windows. Then click Update. After about 20 seconds, the new
setting will work.
Step 5: Double click the picture in the window of KIPEdit or type the IP address in the
IE browser, you can open the web page of IP9000A. If you cannot open the web page
of IP9000A, be sure that you have installed IE 6.0 with SP1 or later version.
NOTE:
1. After you have installed IP 9000A on your PC, the IP 9000A was registered in
DirectX. IP 9000A can be used as local camera by any software that supported
DirectX, such as MSN, Amcap, Media encoder, Yahoo Messenger as long as you not
change the directory path of ipcam’s driver.
2. For those software that only supported old VFM driver, such as Vidcap and net
meeting, please click install VFM device, then you can get the captured images from
IP9000A (you should be the administrator at the first install process)
- 10 -

IP KAMERA 9000A PLUS USER MANUAL
3. For those not totally compatible with VFM, such as QQ and POPO, you should click
remove device button first, then click install VFM device, then you can get the
captured images from IP9000A.
Work with Yahoo /MSN Messenger
1. Work with Yahoo /MSN Messenger: We use Yahoo for instance. Select the friend
you would like to send your video. For instance, we pick up YahooHelper.
2. Choose Webcam then system will ask your Internet connecting speed.
3. Then My WEBCAM will jump up. Please go to “file “ “Preference” “Camera
Setting” to select your prefer video to transfer.
VER. 2.32,
- 11 -

4. You can type in appointed IP address (No matter Real IP or Dynamic IP) and confirm
by click “Add” and choose if reverse the out streaming video.
We support
A. Normal B. Flip Vertical C. Flip Horizontal D. Rotate 180
If the video is upside down, you can choose D to get rotate video.
And also adjust the video color ; Brightness, contrast, Hue, Saturation, Sharpness
Note
1 : for safety issue , as transfer video by Yahoo /MSN, only Administrator can do the
video streaming. You have to type the username and password.
2 : Work with Yahoo/ MSN , the streaming speed is depend on Yahoo .MSN server.
2. INFINITELY CAM : Please refer in readme file.
- 12 -

IP KAMERA 9000A PLUS USER MANUAL
5.Network Set up
From our Network set up, users can view live video from any where in the world, with
just a computer.
Click on Network set up: this area is authorized by administrator only.
1. Still IP: Provided by ISP, with this IP you can connect this address from any
where in the world.
VER. 2.32,
- 13 -

1-1 : Using Still IP: list your still IP address
1-2 : Choose “Reboot immediately”. Please close your browser and reboot again and
type in your IP address once again.
If using DHCP, please choose‘ Automatically by DHCP”
*And please use KIPEdit program (Find users exact IP) that’s included in the CD
ROM
2. DHCP setup- ADSL / xDSL: ISP will provide your exact IP address, please enter
your Username and password for your provider.
2-1 Enter your user name, password, mail server, mail name (pass word), sender
e-mail, and receiver e-mail.
2-2 Choose Save & Dial Now, by using PPPoE it can automatically dial to your ISP,
and ISP will provide exact IP address in your mail.
2-3 turn off your browser of IP Kamera 9000A and restart
- 14 -

IP KAMERA 9000A PLUS USER MANUAL
6. Functions
Please refer to all the function on the left side of IP Kamera 9000A AP; most of its
configuration can only be use by Administrator.
Functions:
1.IP address: Show select IP address.
2. Change Password.
3. Kamera Control:
Picture Quality - Low, High, Medium, Clarity& Motion
(Resolution) - 640*480,352*288,320*240,176*144,162*120
Frequency – Indoor 50, Indoor 60 & Outdoor
3-1.Picture Quality: 3-2.Resolution set up
3-3: Color Adjust :
Brightness Contrast, Saturation,
Hue, Sharpness
STD is Default color
VER. 2.32,
- 15 -

4. Image (Split) - 1x1, 2x2, 3x3, and 4x4.
Splits – Show same video in multiscreen – 1*1, 2*2, 3*3, 4*4
Note – split image are focus into a single image.
4 Video
5. Operation Mode:
Continues mode: Video will display
continues
Period – Video will refresh 1 - 60 per
millisecond or per second
6. View Log: Check on visitors IP and status
View which IP has been visiting your Live image
Note: View/Log / Camera Window is switch
- 16 -

IP KAMERA 9000A PLUS USER MANUAL
7. Configuration:
System
User
Motion Detection
Network
Audio
DDNS
7-1 System Set up
7-1-1 : Camera name, time and date setup
Note: maximum 18 English characyters
VER. 2.32,
- 17 -

7-1—2 : Setup Http port
7-1-3 : Reset:
7-1-4 : Restart IP Kamera 9000A
7-1-5 : Renew its position
7-2 User Management: Can choose user authorization require optional
Choose if viewers need a password or not.
Yes - Viewers needs a password
No - Open to all viewer who logs in to users IP
7-2-2: Add user by adding a username and a password and you can add a current users
list.
7-2-3: You can also delete a user by selecting its name and press delete.
- 18 -

IP KAMERA 9000A PLUS USER MANUAL
7-3: Motion detection: when motion detection is triggered, it will automatically send video
or image to user E-mail or FTP site.
7-3-1: Choose motion detection:
Disable : No motion detection
Enable: choose – low / mid / high
7-3-1-1: Motion Detection Setup:
Fill in sender mail and receiver mail.
7-3-1-2: When send to FTP, please fill in its
FTP server address, user name,
password, account and upload path,
and click on Upload images when
motion detected.
]
7-3-1-3 :Note setting : Future support
VER. 2.32,
- 19 -
Other manuals for 9000A Plus
1
Table of contents
Other Aviosys IP Camera manuals

Aviosys
Aviosys 9070-IRW User manual

Aviosys
Aviosys IP Kamera 9070-IR User manual

Aviosys
Aviosys 9000A Plus User manual

Aviosys
Aviosys 9070CS-PoE User manual

Aviosys
Aviosys 9070-Lite User manual

Aviosys
Aviosys 9070-CSW User manual

Aviosys
Aviosys IP Kamera 9070 User manual

Aviosys
Aviosys 9077SPD-I User manual

Aviosys
Aviosys IP Kamera 9070-IR User manual