AVIRE ESD User manual

1
Elevator Social Distancer (ESD)
Occupancy Detector for Promoting Social Distancing
Installation Guide
Lit. Ref. No: ESD 850ML V01
Part No: ESD-01-000
Parameter Value
Power Supply 24VDC
Consumption 0.5A
Connections N/O & N/C, USB
Operating Temperature 0-40c
Dimensions (W x H x D) 225 x 78 x 113
Technical Specication
NOTE: DO NOT INSTALL ON DEDICATED FIREFIGHTER ELEVATORS
In the box
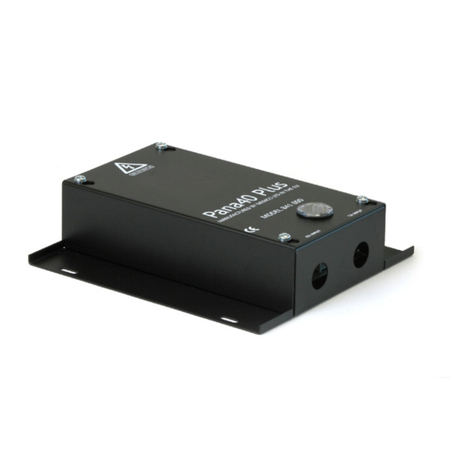
ESD Controller
USB Camera Module
Wiring Loom (Detector to ESD)
Mounting screws for camera
PZ0 screwdriver

2
Step 1. Lower the
elevator for access to
the top of the car
Step 2. Identify the detector
wiring - normally open (NO)
or normally closed (NC) - to
the door controller
Step 3. Ensure all power to
the elevator is turned o
before touching the wiring
Step 6. Finding a 24V
power source to supply
power to the ESD
controller via port 1 (see
above), turn the elevator
power on to supply
power to the system -
an audible signal will
indicate the ESD unit is
operational (Please use
Class 2 related power
supply in the USA)
Step 5. Using the wiring
loom provided, wire the
ESD controller OUT port
to the door controller
Step 4. Rewire the
detectors to the ESD
controller IN port

3
Positioning the camera
+ The camera is a wide angle lens so
should be able to see the entire car
+ The camera can be positioned
anywhere in the car but it should face
away from any mirrors
+ How the wire can be fed to the top of
the car needs to be taken into account
+ If possible use an existing opening to
avoid drilling into the ceiling
+ If there are no mirrors place the camera
at the front corner of the elevator facing
away from the door
Step 1. Find a suitable
location for the camera
(see above)
Step 3. Position and
mount the camera at a
suitable angle required
for the installation (see
diagrams below)
Step 2. Ensure the USB
cable can be routed from
the camera to the ESD
controller on the top of
the car
Step 4. Plug the camera
USB cable into the ESD
controller (plug 6) - any
of the two USB ports will
work

4
Note: use installation wizard once logged into conguration page for best results
Basic Conguration Settings
Number of
people allowed
The occupancy limit that will trigger the
ESD to hold the doors if exceeded
Rotation Congurable angle of rotation to
ensure the camera is positioned
correctly
Min. Detection
Height
Minimum height at which the ESD will
detect motion of a person
Mask Add mask and clear mask allows
setting of areas of detection to be
ignored e.g. a mirror
Repeat time(s) -
Max Occupancy
Tells user(s) the maximum occupancy
for the elevator (e.g. “max. occupancy
2”). The time setting allows setting of
how often it will repeat the message
Repeat time(s) -
Doors Held
Congurable time the ESD will use
to repeat the “max occupancy of X
reached; doors held” announcement
once the occupancy level has been
exceeded
Connecting to ESD via a smart phone
Step 1. Press and hold the
yellow button until the
ESD controller says ‘WIFI
Hotspot Started’
Step 3. On a web browser
navigate to: avireesd.local
and enter the following login
credentials:
Username: admin and
Password = panachrome
Step 2. Go to the WIFI
settings on a smart phone
and select:
avireesdXX
Password = panachrome

5
Use buttons to set occupancy
60 seconds
timeout
Testing the ESD
Enter the elevator to check the system sees
the correct number of people in the status
section.
If only able to test with one person, set
the occupancy level to zero and enter the
elevator to check that:
- the audio can be heard
- the audio interval is acceptable
- the doors are held open when the
occupancy level is exceeded
Step 3. After 60 seconds
the conguration mode
will disable and the unit
will function as normal
‘leaving cong mode’
Step 2. Toggle through the
occupancy level settings
using both the yellow and
blue buttons
Step 1. Press and hold
the blue button until the
ESD controller says ‘cong
mode enabled’
Once conguration is complete you should test the system by connecting a telephone
to the system and putting the elevator into normal use.
If the tests are succesful then the installation is complete.
If an error occurs please contact your local Avire Technical Support Team - their contact
details are available at www.avire-global.com

6
System Architecture
Door Controller Wiring Diagrams

Fig 7
Avire Trading Ltd
Unit 1, The Switchback
Gardner Road
Maidenhead
Berkshire
SL6 7RJ, UK
T: 01628 540100
E: sales.uk@avire-global.com
W: www.avire-global.com
ESD IG V01 (GB): PC 06/08/2020
Dimensions
Declaration of Conformity
Avire declares that this product complies with the essential requirements
and other relevant provisions of the following Directives: 2014/30/EU;
2014/33/EU and 2011/65/EU.
Safe Disposal of Electronic Equipment
The existence of this symbol on the product or on the packaging means
this product cannot be disposed of as household waste. It is the user’s
responsibility to deliver this product to a Recycling Collection Point or,
failing that, to return it to Avire for properly managed recycling.

1
Elevator Social Distancer (ESD)
Auslastungsdetektor für einfacheres Abstandhalten
Einbauanleitung
Literatur - ref. Nr.: ESD 850ML V01
Teilenr.: ESD-01-000
Parameter Wert
Stromversorgung 24VDC
Stromverbrauch 0.5A
Anschlüsse N/O und N/C, USB
Betriebstemperatur 0-40°C
Abmessungen (B x H x T) 225 x 78 x 113
Technische Daten
HINWEIS: NICHT AN SPEZIELLEN FEUERWEHRAUFZÜGEN INSTALLIEREN
Im Lieferumfang enthalten
ESD-Steuerung
USB-Kameramodul
Kabelbaum (Detektor an ESD)
Befestigungsschrauben für
Kamera
PZ0-Schraubendreher

2
Schritt 1. Fahren Sie den
Aufzug herunter, um Zugang
zum Fahrkorbdach zu
erhalten
Schritt 2. Suchen Sie die
Verdrahtung zwischen Detektor
Schließer (NO) oder Öner (NC)
und Türsteuerung
Schritt 3. Vergewissern Sie
sich, dass die gesamte
Stromversorgung zum
Aufzug unterbrochen ist,
bevor Sie die Verkabelung
berühren
Schritt 6. Suchen Sie eine
24-V-Stromquelle, um
die ESD-Steuerung über
Anschluss 1 mit Strom zu
versorgen (siehe oben),
und schalten Sie den
Aufzugsstrom ein, um
das System mit Strom zu
versorgen. Ein akustisches
Signal zeigt an, dass das
ESD-Modul funktionsfähig
ist (in den USA verwenden
Sie bitte eine der
Klasse 2 entsprechende
Stromversorgung).
Schritt 5. Stellen Sie mit
dem bereitgestellten
Kabelbaum eine
Verbindung zwischen
dem Anschluss OUT der
ESD-Steuerung und der
Türsteuerung her
Schritt 4. Verkabeln Sie nun
die Detektoren mit dem
Anschluss IN der ESD-
Steuerung

3
Positionierung der Kamera
+ Die Kamera hat ein Weitwinkelobjektiv
und sollte daher den gesamten
Fahrkorbraum erfassen können
+ Die Kamera kann an jedem beliebigen
Ort im Fahrkorb positioniert werden,
sollte aber nicht auf Spiegel gerichtet
werden
+ Es muss berücksichtigt werden, wie
das Kabel zum Fahrkorbdach geführt
werden kann
+ Nutzen Sie möglichst eine bereits
vorhandene Önung, um kein Loch in
die Decke bohren zu müssen
+ Wenn sich im Fahrkorb keine Spiegel
benden, platzieren Sie die Kamera in
der vorderen Ecke und so, dass sie nicht
auf die Tür gerichtet ist
Schritt 1. Suchen Sie
einen geeigneten
Installationsort für die
Kamera (siehe oben).
Schritt 3. Positionieren
und befestigen Sie die
Kamera in einem für die
Installation geeigneten
Winkel (siehe folgende
Diagramme).
Schritt 2. Vergewissern
Sie sich, ob das USB-
Kabel von der Kamera zur
ESD-Steuerung auf dem
Fahrkorbdach geführt
werden kann.
Schritt 4. Stecken Sie das
USB-Kabel der Kamera
in die ESD-Steuerung
(Anschluss 6) ein – beide
USB-Anschlüsse sind
dafür gleichermaßen
geeignet.

4Hinweis: Nach dem Einloggen auf der Kongurationsseite erzielen Sie durch
Nutzung des Installationsassistenten die besten Ergebnisse.
Grundkonguration
Zulässige
Personenzahl
Die Auslastungsgrenze, bei deren
Überschreiten der ESD die Türen
oen hält
Drehung Der Drehwinkel ist kongurierbar,
um die richtige Positionierung der
Kamera zu erreichen.
Min.
Erfassungshöhe
Mindesthöhe, auf der der ESD die
Bewegung einer Person erfasst
Maske Durch das Hinzufügen und
Löschen von Masken können
Erfassungsbereiche festgelegt
werden, die ignoriert werden sollen
(z. B. ein Spiegel).
Wiederholung(en)
– Max. Auslastung
Nennt dem bzw. den Benutzer(n) die
maximale Auslastung des Aufzugs
(z. B. „maximale Auslastung 2“). Sie
können einstellen, wie oft diese
Ansage wiederholt werden soll.
Wiederholung(en)
– Türen bleiben
geönet
Sie können kongurieren, wie oft
der ESD die Ansage „maximale
Auslastung von X erreicht, Türen
bleiben geönet“ wiederholt, wenn
die Auslastungsgrenze überschritten
ist.
Verbindung mit dem ESD über ein Smartphone
Schritt 1. Halten Sie die
gelbe Taste gedrückt, bis
die ESD-Steuerung die
Meldung „WIFI Hotspot
Started“ (WLAN-Hotspot
gestartet) ausgibt.
Schritt 3. Rufen Sie in einem
Browser avireesd.local auf
und geben Sie folgende
Anmeldedaten ein:
Username (Benutzername):
admin und Password
(Passwort) = panachrome
Schritt 2. Rufen Sie auf
dem Smartphone die
WLAN-Einstellungen auf
und wählen Sie:
avireesdXX
Passwort = panachrome

5
Festlegung der Auslastung mit den Tasten
60-Sekunden-
Zeitsperre
Testen des ESD
Betreten Sie den Aufzug, um zu sehen, ob
das System im Bereich Status die richtige
Personenanzahl anzeigt.
Wenn Sie nur mit einer Person testen
können, setzen Sie den Auslastungsgrad
auf null und betreten Sie den Aufzug.
Überprüfen Sie, ob:
- das akustische Signal zu hören ist
- das Intervall dieses Signals akzeptabel ist
- die Türen geönet bleiben, wenn der
Auslastungsgrad überschritten ist
Schritt 3. Nach 60
Sekunden wird der
Kongurationsmodus
deaktiviert und das Modul
funktioniert normal im
„leaving cong mode“
(Konguration-beendet-
Modus)
Schritt 2. Schalten Sie
mit der gelben und der
blauen Taste durch
die Einstellungen des
Auslastungsgrads
Schritt 1. Halten Sie die
blaue Taste gedrückt,
bis die ESD-Steuerung
die Meldung „cong
mode enabled“
(Kongurationsmodus
aktiviert) ausgibt
Wenn Sie die Konguration abgeschlossen haben, sollten Sie das System testen.
Verbinden Sie dazu ein Telefon mit dem System und versetzen Sie den Aufzug in den
normalen Betriebszustand.
Wenn die Tests erfolgreich waren, ist die Installation abgeschlossen.
Falls ein Fehler auftritt, wenden Sie sich bitte an das zuständige Avire-Team für
technischen Support – die Kontaktdaten nden Sie auf www.avire-global.com.

6
Systemarchitektur
Schaltpläne für Türsteuerung

ESD IG V01 (DE): PC 06/08/2020
Avire Ltd
Am Zeughaus 9 -13
97421 Schweinfurt
Deutschland
T: +49 (0) 9721 38656-0
T: +49 (0) 9721 38656-30
F: +49 (0) 9721 38656-99
E: sales.de@avire-global.com
W: www.avire-global.com
Abmessungen
Konformitätserklärung
Avire erklärt, dass dieses Produkt den grundlegenden Anforderungen und
anderen geltenden Bestimmungen der folgenden Richtlinien entspricht:
2014/30/EU, 2014/33/EU und 2011/65/EU.
Sichere Entsorgung von Elektrogeräten
Dieses Symbol auf dem Produkt oder der Verpackung weist darauf hin,
dass das Produkt nicht im Hausmüll entsorgt werden darf. Der Nutzer muss
das Produkt über eine Sammelstelle für die Wiederverwertung entsorgen.
Falls dies nicht möglich ist, ist der Nutzer verpichtet, das Produkt an
Avire zurückzusenden, damit die ordnungsgemäße Wiederverwertung
gewährleistet ist.

1
Dispositivo de distanciamiento
social para ascensores (ESD)
Detector de ocupación para asegurar el distanciamiento social
Guía de instalación
N.° ref. bibliográca: ESD-850ML V01
N.º de componente: ESD-01-000
Parámetro Valor
Fuente de alimentación 24VDC
Consumo 0.5A
Conexiones N/O y N/C, USB
Temperatura de
funcionamiento
0-40c
Dimensiones (An x Al x P) 225 x 78 x 113
Especicaciones técnicas
NOTA: NO INSTALAR EN ASCENSORES ESPECÍFICOS PARA BOMBEROS
Contenido de la caja
Controlador del ESD
Módulo de cámara USB
Mazo de cables (detector a ESD)
Tornillos de jación de la cámara
Destornillador PZ0

2
Paso 1. Baje el ascensor
para acceder a la parte
superior de la cabina.
Paso 2. Localice los cables
que conectan el detector -
normalmente abiertos (NO)
o normalmente cerrados
(NC) - al controlador de las
puertas
Paso 3. Asegúrese de
que toda la corriente
del ascensor está
desconectada antes de
tocar los cables.
Paso 6. Busque una
fuente de alimentación
de 24 V para el
controlador del ESD
a través del puerto
1 (ver más arriba); a
continuación, conecte la
alimentación del ascensor
para suministrar corriente
al sistema. Oirá una señal
cuando la unidad ESD
esté operativa (en EE.
UU., utilice una fuente de
alimentación de Clase 2).
Paso 5. Con el mazo de
cables incluido, conecte
el puerto de salida (OUT)
del controlador del ESD
al controlador de las
puertas.
Paso 4. Vuelva a colocar
los cables que conectan
el detector y el puerto
de entrada (IN) del
controlador del ESD.

3
Colocación de la cámara
+ La cámara es una lente gran angular,
por lo que normalmente abarcará toda
la cabina.
+ La cámara puede situarse en cualquier
lugar de la cabina, pero no debe estar
orientada hacia ningún espejo.
+ Estudie bien cómo colocar el cable en
la parte superior de la cabina.
+ Si es posible, utilice algún oricio
existente para evitar perforar el techo.
+ Si no hay espejos, coloque la cámara
en la esquina frontal del ascensor, de
espaldas a las puertas.
Paso 1. Busque un
emplazamiento
adecuado donde colocar
la cámara (ver más arriba).
Paso 3. Coloque y
monte la cámara en un
ángulo adecuado para la
instalación (ver imágenes
de abajo).
Paso 2. Asegúrese de que
puede conectar la cámara
y el controlador del ESD
con el cable en la parte
superior de la cabina.
Paso 4. Conecte el cable
USB de la cámara al
controlador del ESD
(entrada 6) –cualquiera
de los dos puertos USB
funcionará.

4
Nota: una vez en la página de conguración utilice el asistente de instalación
para obtener los mejores resultados.
Ajustes de conguración básicos
Número máximo
de personas
El límite de ocupación que hará que
el ESD retenga las puertas en caso de
superarse.
Rotación Ángulo de rotación congurable para
conrmar la ubicación correcta de la
cámara
Altura de
detección mín.
Altura mínima a la que el ESD detecta
el movimiento de una persona
Ocultación Función para detectar o ignorar áreas
de detección (p. ej. un espejo)
Frecuencia
de repetición
- Ocupación
máxima
Indica a los usuarios el número
máximo de personas que pueden
ocupar el ascensor (p. ej. «ocupación
máx. 2»). La función permite congurar
la frecuencia con la que se repetirá el
mensaje.
Frecuencia
de repetición
- Puertas
retenidas
La función congura la frecuencia
con la que el ESD repetirá el aviso
«Ocupación máx. de X superada;
puertas retenidas» cuando se supera el
nivel de ocupación.
Conexión al ESD mediante smartphone
Paso 1. Pulse y mantenga
pulsado el botón amarillo
hasta que el controlador
del ESD diga «WIFI
Hotspot Started».
Paso 3. En un navegador de
Internet, escriba avireesd.
local e introduzca los
siguientes datos de inicio de
sesión:
Nombre de usuario: admin y
Contraseña = panachrome
Paso 2. Vaya a los ajustes
de la conexión WIFI del
smartphone y seleccione:
avireesdXX
Contraseña =
panachrome

5
Botones de determinación de ocupación
Tiempo de
espera de 60
segundos
Prueba del ESD
Entre en el ascensor para comprobar si
el sistema detecta el número correcto de
personas en la sección de estado.
Si no puede hacer la prueba con más
de una persona, establezca el nivel de
ocupación en cero y entre en el ascensor
para comprobar si:
- funciona el sistema de audio
- el intervalo de audio es aceptable
- las puertas quedan abiertas cuando
se supera el nivel de ocupación
Paso 3. Pasados 60
segundos, el modo
de conguración se
desactivará, se oirá el
mensaje «leaving cong
mode» y la unidad
funcionará normalmente.
Paso 2. Cambie entre
los ajustes de los niveles
de ocupación con los
botones amarillo y azul.
Paso 1. Pulse y mantenga
pulsado el botón azul
hasta que el controlador
del ESD diga «cong
mode enabled».
Una vez nalizada la conguración, deberá probar el sistema conectando un teléfono
al mismo y colocando el ascensor en modo normal.
Si las pruebas son satisfactorias, la instalación habrá terminado.
En caso de fallo, póngase en contacto con el equipo de soporte técnico de Avire de su
zona, cuyos datos encontrará en www.avire-global.com

6
Arquitectura del sistema
Esquemas de cableado del controlador de las puertas
This manual suits for next models
1
Table of contents
Languages:
Other AVIRE Security Sensor manuals