- 3 -
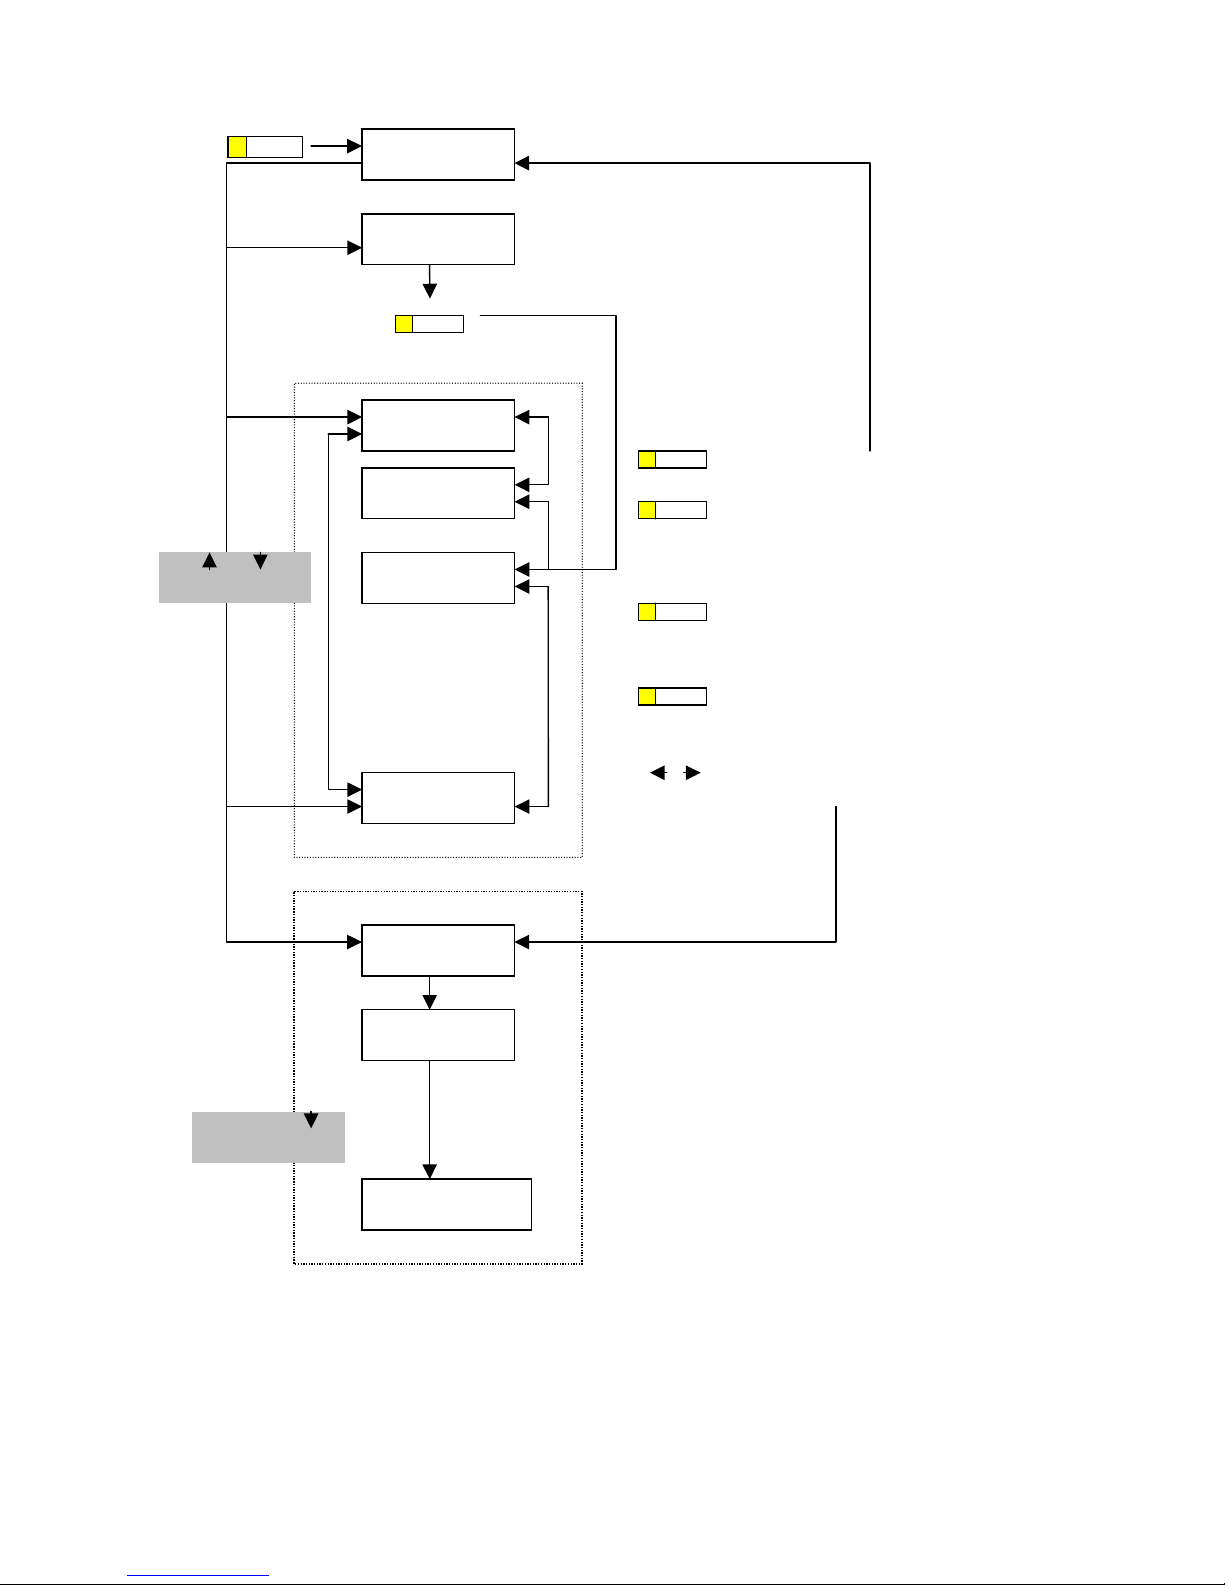
4 Setup Menu
MENU NAME:
Gary
DATE: --/--/--
TIME: --:--:--
DHCP:
Disable
ADSL DIALUP:
O
Router IP :
0. 0. 0. 0
Subnet Mask
255.255.255.0
Setup the name of the phone
Setup the date (year/month/day) e.g. 99/11/30
Setup the time (hour: minute:second) e.g. 14:53:20
Only need when SNTP is not available
Setup IP address
You don’t have to setup the IP address if DHCP is enabled but
you do when DHCP is disabled
Setup router IP address. You have to setup router IP address.
However, if you just want to do testing within the LAN, set the
router IP to 0.0.0.0 is recommended. You don’t have to setup
the router IP address if DHCP is enabled.
Setup subnet mask. The default subnet mask is 255.255.255.0
(class C network). You have to modify it depends on the
configuration of your network. You don’t have to setup the
subnet if DHCP is enabled.
Setup gateway IP address
If you want to dial to PSTN network, the VOIP gateway IP
address has to be set.
There are total 5 gateways from #1 to #5
Show the version of the firmware
Gateway #1 IP
---. ---. ---. ---
Version:
IP Phone V2.00
MENU
UPDATE CHANGES ?
<OK> or <Cancel>
Press the “ OK ” key to save and “ Cancel ” key to ignore the
changes
You can exit the Setup Menu anytime by press “MENU” key
again.
Use or
arrow key to switch
among stages
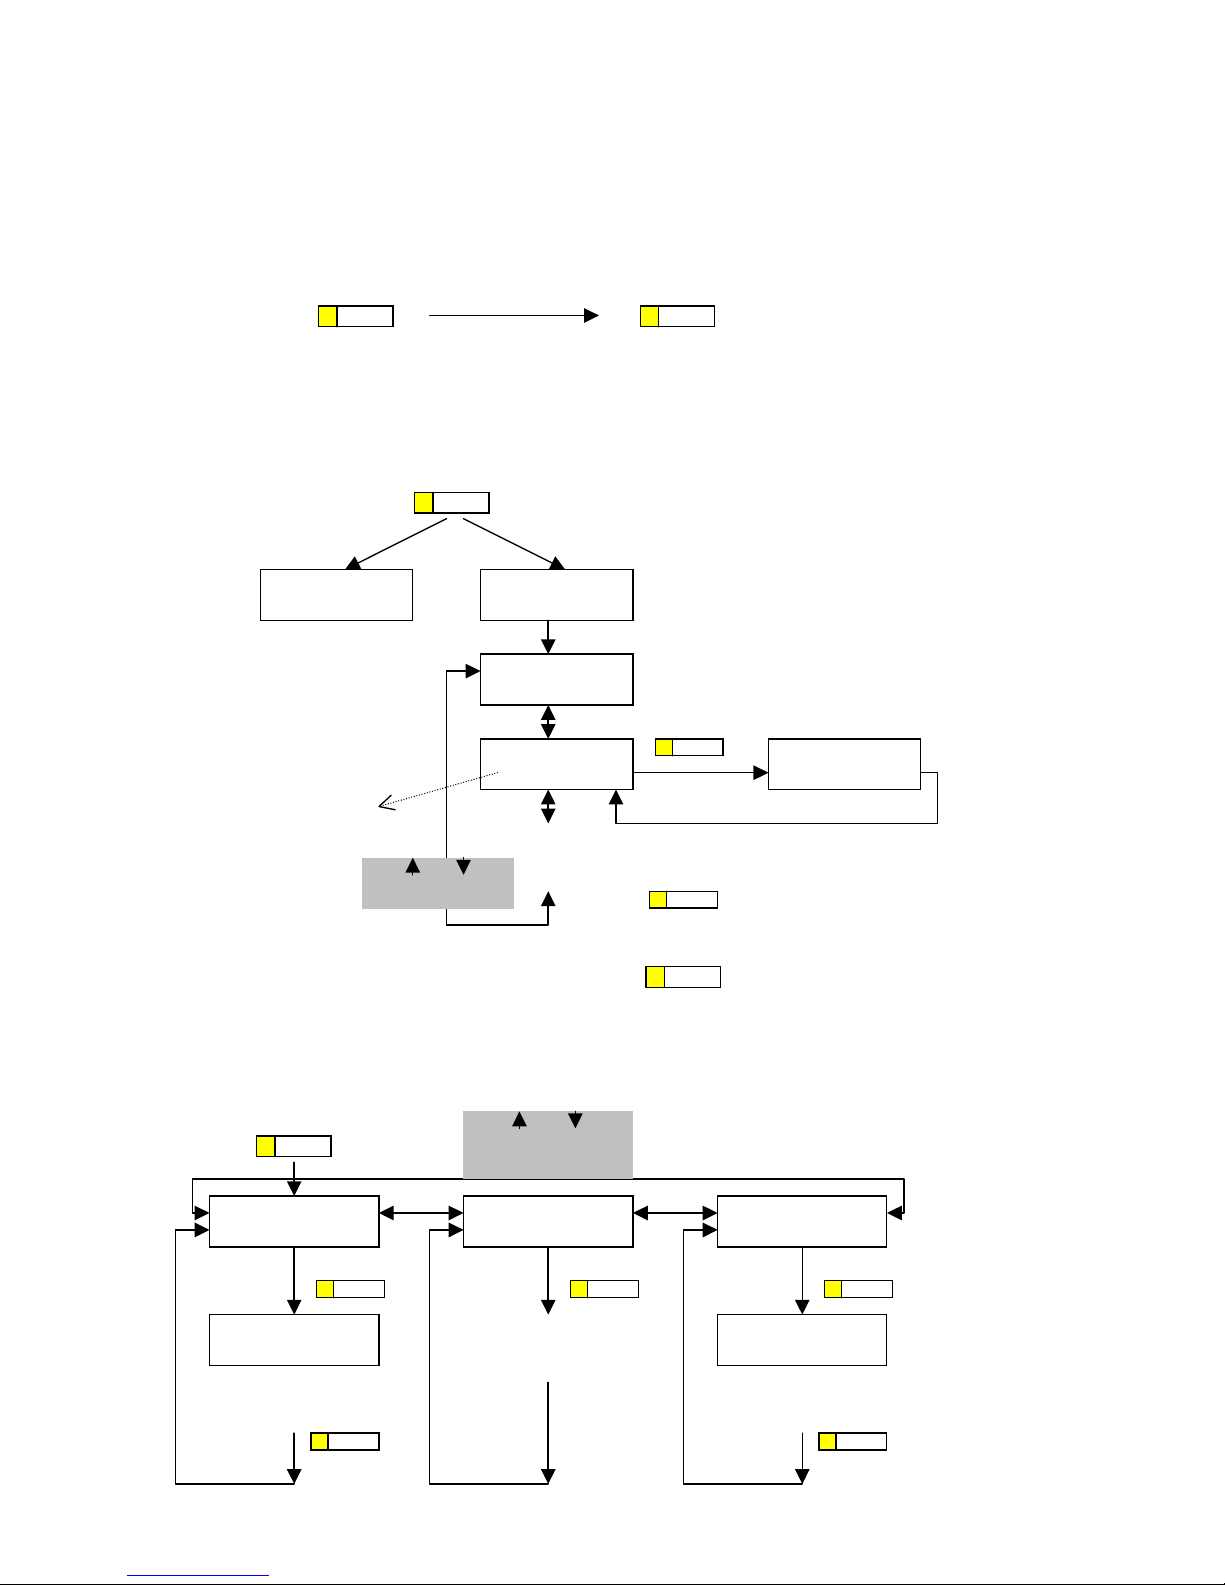
Default Codec
G.723.1
Setup the highest priority of the voice codec for this
phone. (G.711ALaw/ G.711ULaw/ G.723.1)
You could use ←, →key to choose.
SNTP Server IP:
0. 0. 0 . 0
Setup SNTP (Simple Network Time Protocol)
This function allow IP Phone to get Time from Internet
Time Zone
GMT + 0:00
Setup the Time Zone
IP Share : NAT
0. 0. 0. 0
IP Address :
0. 0. 0. 0
Setup DHCP mode (Enable or Disable switched by
or
key)
Setup ADSL Dialup mode (for Support PPPoE
NOT in the
UK). Enable or Disable switched by ←or →key
Note*: If
ou select ADSL DIALUP to “YES”, please
complete the settings as required
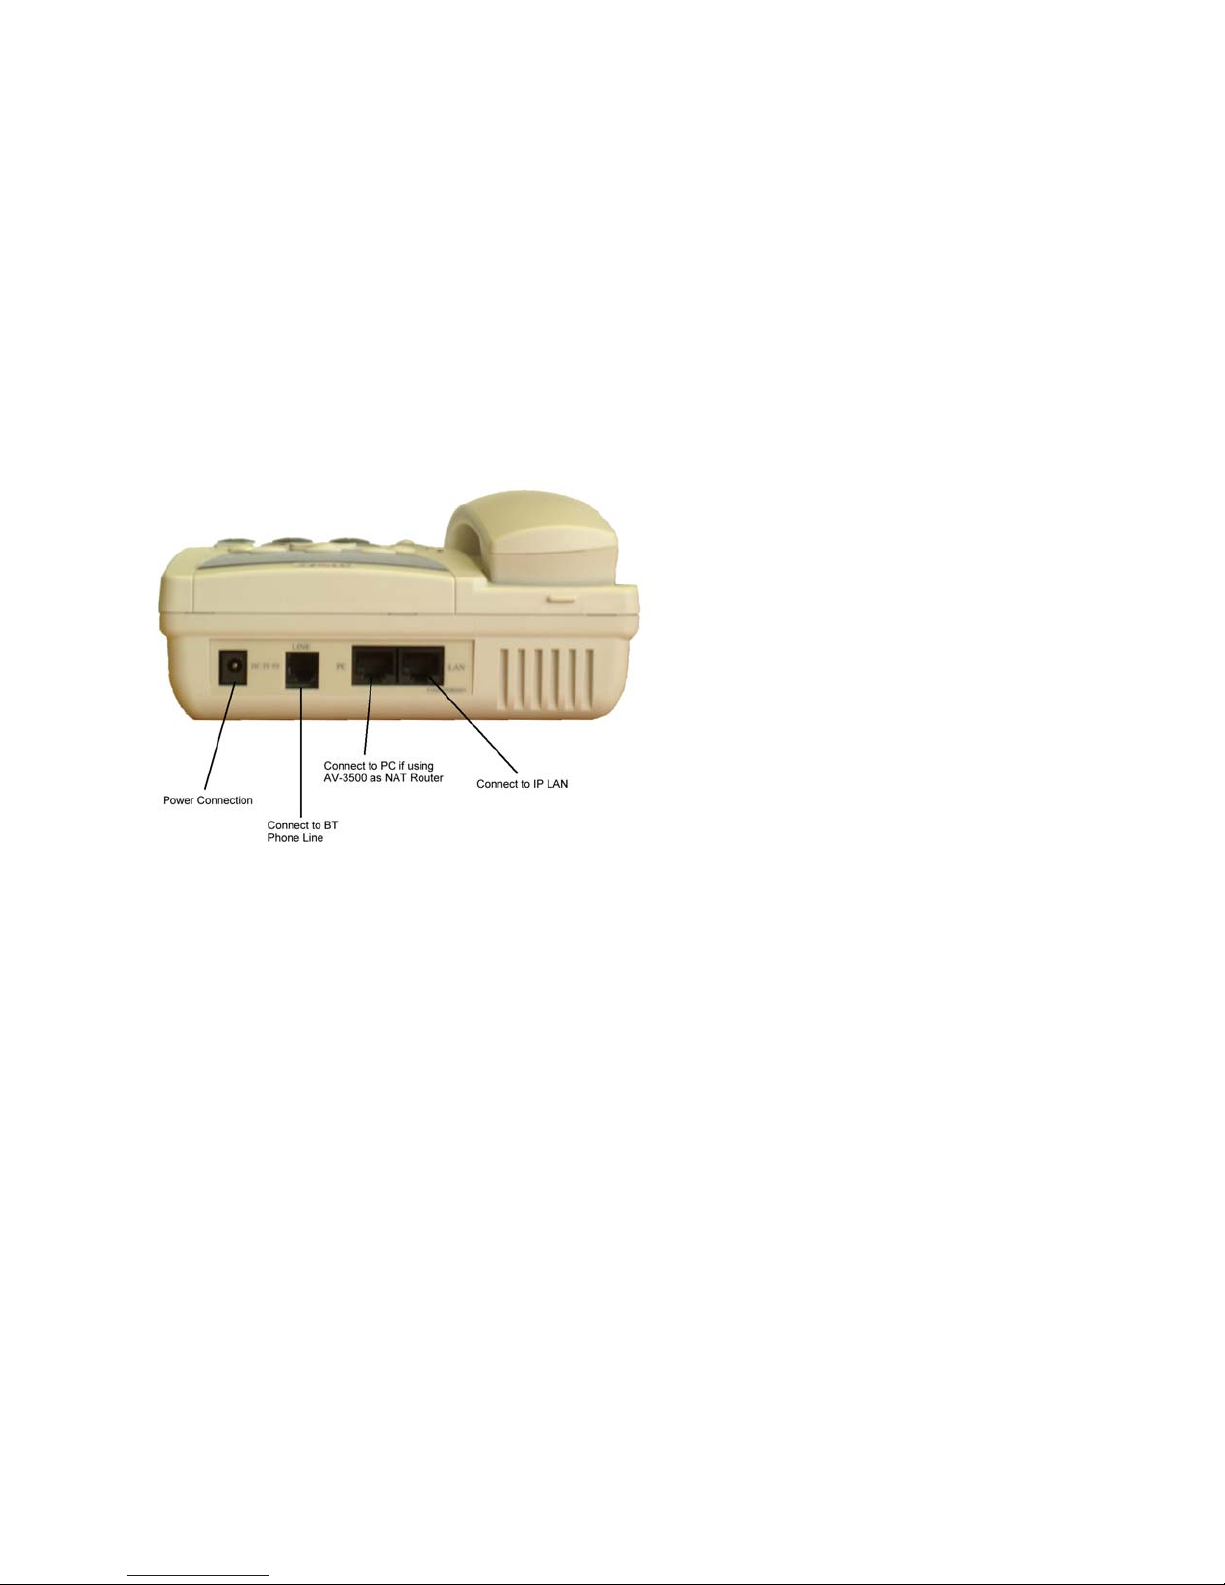
Setup the LAN IP address of the IP share to provide the virtual
IP address for Internet access. This sets the address of the
hone on the PC
ort
see Connections above
MAC Address :
00D0E90022E4
Show the MAC of the
achine.
Gatekeeper
NO
Enable or Disable Gatekeeper by ←or →key
Note*:If you select Gatekeeper to “YES”, please complete
the setting as note2