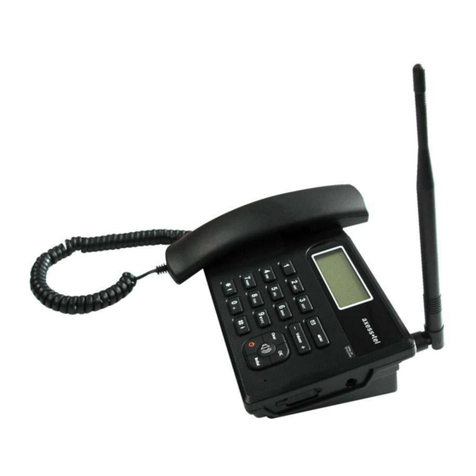
Axesstel PG530 Technical manual

0
PG530
Operation instruction

1
Catalogue
1. Introduction .....................................................................................3
1.1 Safely instruction ..............................................................3
1.2 Checking the Parts ...........................................................4
1.3 Install your phone .............................................................5
1.4 Technical Parameters and Service Conditions..................6
1.4.1 Technical Parameters ................................................6
1.4.2 Applicable conditions:................................................6
2. Getting To Know Your Phone ..........................................................7
3. Simple Instructions........................................................................10
3.1 ON/Off.............................................................................10
3.2 Making a Call ..................................................................10
3.3 Receiving a call...............................................................11
3.4 Redial .............................................................................11
3.5 Adjust headphone volume ..............................................11
3.6 Low-power indicator........................................................11
3.7 Charging indicator...........................................................11
4. Basic Functions............................................................................. 11
4.1 Scroll select ....................................................................11
4.2 Special character list.......................................................11
4.3 Input Mode......................................................................12
4.3.1 Write with standard text input “ABC”........................12
4.3.2 Write with text input "abc" ........................................12
4.3.3 Write with T9ENGLISH Text Input “ABC”/”abc”........12
4.3.4 Write with T9SPANISH Text Input “ABC”/”abc” ........12
4.3.5 Insert number ..........................................................13
5. Basic menu functions ....................................................................14
5.1 Phone book.....................................................................14
5.1.1 View names .............................................................14
5.1.2 Add new name.........................................................14
5.1.3 Settings....................................................................15
5.2 Service Messages ..........................................................15
5.2.1 New SMS.................................................................15
5.2.2 Inbox........................................................................16
5.2.3 Phone Inbox ............................................................16
5.2.4 Outbox .....................................................................16
5.2.5 Used space..............................................................16
5.2.6 Settings....................................................................17
5.2.7 Voicemail .................................................................17
5.3 Recent Calls ...................................................................17
5.3.1 Missed Calls ............................................................17
2
5.3.2 Received Calls.........................................................17
5.3.3 Dialed Calls .............................................................17
5.3.4 Recent Toll...............................................................17
5.3.5 Call Info ...................................................................17
5.4 Diverts calls ....................................................................18
5.4.1 All Calls....................................................................18
5.4.2 When Busy ..............................................................18
5.4.3 Unanswered ............................................................18
5.4.4 Unreachable ............................................................18
5.4.5 Cancel All.................................................................19
5.5 Audio profiles ..................................................................19
5.5.1 Ringing tone ............................................................19
5.5.2 Ringing volume........................................................19
5.5.3 Earpiece ..................................................................19
5.5.4 Keypad tones...........................................................19
5.5.5 Warning tones..........................................................19
5.5.6 Message tone ..........................................................19
5.6 Clock...............................................................................19
5.6.1 Alarm .......................................................................19
5.6.2 Set time ...................................................................20
5.6.3 Set date ...................................................................20
5.7 Settings...........................................................................20
5.7.1 Phone settings.........................................................20
5.7.2 Call Settings ............................................................20
5.7.3 Security settings ......................................................21
5.7.4 Reset Restart...........................................................22
5.8 Calculator:.......................................................................22
6. Maintenance of Your Phone ..........................................................22
7. Troubleshooting ............................................................................23
8. MENU ...........................................................................................24

3
1. Introduction
Congratulations on your purchase of Axesstel PG530 product. The PG530 Fixed
Wireless Phone enables the subscriber to set up the phone anywhere GSM wireless
service is available. Axesstel PG530 allows users to “get connected” to voice and
data services with unprecedented ease.
PG530 provides high quality and superior performance with many features such as
Multi-input mode, Name cards. Phonebook, Call Divert, Alarm, Calculator, Time &
Date setting, One-touch dialing, Message Reading & Writing, Caller-ID, Phone &
SIM lock, Network lock, Area lock, Call Barring, Call Waiting, Security Setting,
Sound setting and Hands-free operation. It can be conveniently set up in many
temporary spots (large gathering, temporary trading spots, etc.)
FEATURES
1. Speaker Phone
2. Signal Strength Indicator
3. Redial
4. VolumeControl
5. BatteryPowerBackup
6. LCDandKeypadBacklit
7. One-touch, Two-touch Dialing
8. AutomaticSending
9. Phone Book
10. Short Message Service
11. DataServiceCall
1.1 Safely instruction
This section provides various safety guidelines. Read this information before using
PG530. Failure to comply with these guidelines could prove either dangerous or
illegal.
¾Clean with the wet or anti-static cloth; do not use the dry or static cloth. Don't use
chemical product to clean the surface of your phone. Shut down your phone
when cleaning.
¾Do not expose to strong direct sunlight.
¾Avoid any liquid substances entry the inside of your phone.
¾Avoid dropping and other rough treatment to the phone.
¾Only connect your phone with the concurrent device.
¾Only use the Axesstel provided power adapter (Output: DC4.6V /1000mA). Do
not use Axesstel adapter or battery for any other purpose. Never use any other
charger or battery, which can damage the phone.

4
¾Do not use the non-chargeable battery that may explode when connected to the
adapter. Let the battery charged for 12 hours or more before its first use. Full
charge battery could maintain 4 hours communication time, or 72 hours standby
time (the actual time depends on local network condition)
¾Don't use this phone near the gas station, oil depot, chemical storage, medical
equipment, or dangerous substances and the area designated ‘switch off the any
cordless radio equipment’. Observe restrictions and follow any regulations or
rules that are in force.
¾This phone is for indoor use, don't use it outdoors or when there is lightning
storm.
¾This phone may affect the state of other electronic equipment, for example, the
TV, radio, and so on. Please keep away from these equipments when using it.
To improve quality place this phone away from metal goods and don't use the
same electrical outlet with electrical appliances that may cause electromagnetic
interference.
1.2 Checking the Parts
Check all the components according to the packing list when you open the package.
Please contact your service provider if you find some parts missing or damaged.
1. PG530 2.Handset 3.Antenna and battery
(optional)
4. Adapter 5.Telephone Cord 6.Instruction
Manual
7. Data cable is optional

5
1.3 Install your phone
a. Install the handset b. Insert the adapter into the
and the antenna. back of the base. Insert the adapter
into the power socket.
Caution: When assemble the antenna, first align the antenna hole with the
connector on the side of the phone, then tighten antenna's screw until it firmly
latches in with the connector. Don't over tighten the antenna.
Important Warning: If you use external antenna that is three or six meters long, it is
extremely dangerous to take it outside due to risk of lightning strike. Do Use the
lightning defense equipment between the antenna shelves with the down lead if you
use the antenna ten meters long. Strictly follow your antenna provider instruction
when installing outdoor antenna and lighting defense device
c. Installing the Battery
Open the battery cover in the bottom of the phone; put NI-MH 3.6V 1300mAH
rechargeable batteries in battery box. Pushing BNC connector plugs of the battery in
to the corresponding socket of phone.
d. Installing SIM card
Open the SIM card box in the bottom of the phone, insert the SIM card as indicated
correctly, lock it tightly and cover the box.

6
1.4 Technical Parameters and Service Conditions
1.4.1 Technical Parameters
Work frequency: 850/1900MHz (Auto switch)
Delivered Power: MAX: 2W(850MHz)/MAX: 1W (1900MHz)
GSM Channel interval:200 KHz
Receive sensitivity: ≤-100dBm
1.4.2 Operation conditions:
Environmental Temperature: -10℃~+40℃
Ambient noise: ≤60db(A)
Relative Humidity: 45%~95%
Atmospheric pressure: 86~106KPa
Power Adapter: 110V~240V AC, 50Hz/60Hz, DC 4.6V 1000mA
Battery: 1.2V 1300mAh rechargeable Ni-MH battery(optional)

7
2. Getting To Know Your Phone

8
Keys explanation
1. The left soft key
¾In Standby mode, enter the main menu by pressing this key.
¾At Menu state, enter sub-menu or the interface of menu.
¾At Edit state, confirm your operation by pressing this key.
¾At Off-hook state, after dialing the number, begin connect to the GSM network
by pressing this key.
2. The right soft key
¾In Standby mode, press this key to view phone book list.
¾At Sub-menu state, press this key to return to the previous menu (current
operation cancelled).
¾At Main-menu state, return to the waiting mode by pressing this key.
¾Enter the name card at standby mode.
¾At Edit mode, press this key allow you to return to previous menu.
3. MUTE
¾Access, search through, amend and save records when browsing the
phonebook.
¾During calls, press this key to adjust volume; hold/retrieve; end current (call);
mute (if active, the other side can’t hear your voice.); main menu (enter the
main menu)
¾If you build more than two side communication, you could see another
submenu when press “MUTE” key that is multiparty/join all (build the
conference telephone)
¾To prevent the person you are speaking from hearing you during conversation,
but you can hear the other side speaking.
Press “MUTE” key, LCD display “ ” on the top left corner. It means the
phone is now on mute mode.
Press “MUTE” key again to cancel mute mode.
4. [0-9]
¾At off-hook or HAND-FREE state, input the calling numbers.
¾You can input the corresponding character for all kinds of input mode and
select the character you want to input. In the English mode, press '1' you can
input special character.
¾You can press this number key as a speed dial number in the standby mode.

9
(keep on pressing it for several seconds)
5. * key
At the off-hook state, it's equivalent to number key when you input the dial number.
6. # input mode key
At the on-hook state, it's equivalent to number key when you input the dial number. If
you press it long time you can get 'P'.
Press this key to switch among different input mode.
7.
Call out the number you had dialed immediately.
8. Arrow keys:
¾–▲/▼: When the user is in the inbox or writing a message, this key will allow to
move up and down
¾In standby mode, press ▲key, you could view the dialed numbers list. Press ▼
key ,you could view the received numbers list.
¾◄VOL-/ ►VOL+: When the user is in the inbox or writing a message this key
allows to move right and left. You can scroll down or up the Ring volume during
idle mode and audio volume during conversation with this key.
9. REDIAL
Press it to redial the last dialed number in the standby mode or Hand-free mode.
10. CLEAR
You can delete the character before the current cursor in the EDIT mode when you press
it, and you can delete all the character when you press and hold this key.
11. Speaker
In the standby mode, press this key and dial the number when you see the vision
'dial please'. You can communicate with the other even if you haven't lifted up the
handset. In the same time, you can adjust the volume. Press this key again you
could end the communication.
12. ON/OFF
After the AC adapter or battery have been installed properly, Turn on the power switch,
and then keep on pressing the " " key for about 3 seconds, the backlight will lit
automatically.
13. SMS
Press the key to enter the SMS menu.

10
Insert SIM
MEMU
3. Simple Instructions
3.1 ON/Off
At first, make sure the power is OFF and SIM card has been properly inserted into
your phone. Turn on the power switch, then press and hold the key for 3 seconds.
Wait for the banner of your service provider to appear and you can start to use. (The
left bar shows the battery charge level, and the right bar shows you the signal
strength of the cellular network at your current location. It shows the strongest the
signal when there are five bars.) If there is power providing
but no SIM card, the phone will clue you to insert the SIM
card? After insert your card it will detect the card
automatically. The vision of the screen is:
3.2 Making a Call
¾Number Editing
At the off-hook or hand-free state, enter the number you want to call. You can press
▲or ▼key to move your cursor, or press the "CLEAR" key to delete the number
before the current cursor.
¾Calling
At the off-hook or hand-free state, enter the number you want to call and press " "
key or just wait for about 7 seconds. When you finished conversation, replace the
handset or press the " " key to end the call.
¾Calling fix sub-phone
For Some fix sub-phone you can't make a call directly, you should call main-phone first
and then sub-phone. Insert a "P" between the two phone numbers, and then the phone
will help you complete all calling job, just do as follow: pressing # key until a "P" appears
on LCD.
¾Emergency call
Please ensure your phone is power on and among the GSM network, at the off-hook
or hand-free state, you could call out the emergency number directly without SIM card.
¾One-touch dialing
At the standby or hand-free state, press 0-9 for a while, then the number store in
<Speed dial list> will be dialed out. (Or input the number 0-9, end as #, and then
press the left soft key to confirm it).
¾Dial in menu "naming card"
At the off-hook or hand-free state, you could enter it by pressing the right soft key,
then press ▲or ▼key to search the name you need, then press the left soft key to
view the number of it. Press this key once again then the calling is established. Or
you could locate on the desired name by press the first letter of corresponding name.

11
3.3 Receiving a call
When a call is coming, you could answer by picking up the handset or by pressing
SPEAKER key. After you have finished the conversation, replace the handset to hook or
press the SPEAKER key.
If you don’t want to receive an incoming call, simply press the right soft key to reject
the call.
3.4 Redial
At the off-hook or on-hook state, press REDIAL key, the last dialed number will be
dialed out automatically.
3.5 Adjust headphone volume
During communication, you could adjust headphone volume. You have 7-step or
silence selection to adjust. Use the right key and left key to adjust the volume, each
corresponding to increase and reduce the volume separately.
3.6 Low-power indicator
When the battery is low, the phone will sound an alarm and display "the battery will
run out soon" message on screen.
3.7 Charging indicator
If using battery for power supply, you can connect the phone to an AC adapter for
charging when the battery is exhausted. The battery power indicator bar will flash up
and down. The battery is fully charged when the battery indicator bar stops scrolling
and the Battery full message appears, The indicator will stop flashing after charge
complete; there is 5 steps for fully charged.
4. Basic Functions
4.1 Scroll select
In standby mode, press the left soft key to enter into the main menu. You can scroll
select by using ▲or ▼key. The scroll bar in the right of the screen will show you the
location of the menu in the current level. Press the left soft key to enter this menu or
press the right soft key return to the previous menu level.
4.2 Special character list
At the English input state, press 1 to get particular characters as follows:
Press 1 time and again to select what you want to use.

12
At the all input state, press * to get special characters as follows:
└┘, 。:; ?! “ ” 、… - $ ( ) ¥« » #‘’£〈〉 + - * / = % ~ ¯ @ [ ]
Use ▲or ▼key to scroll through the character list, please pressing the figure about
relative to the bottom of the character.
Press 0 to get a blank space.
4.3 Input Mode
At the input state, press # to switch to different input mode in order, press “CLEAR”
key to delete the character before the cursor while press this key long enough to
delete all the character you input.
▲key is used to make cursor right shift and ▼key is used to make cursor left shift.
When you add new phonebook names or view the names in the phone Book, the
input mode automatically switches to the ABC mode and displays the ABC icon.
4.3.1 Write with standard text input “ABC”.
“ABC” text input is the default mode for text entry. When you use standard text input,
the icon ABC appears in the upper right corner of your phone’s screen.
1. Press the key that is below the letter you want to enter.
2. Press it several times until the desire letter appears on the screen. For each key
have several letter. Press a key once or several times to enter the letter(s) you want.
For example, press the “2” key three time to enter the letter C.
4.3.2 Write with text input "abc"
Press # until the symbol "abc" appears on the right corner of phone screen then you
could write with "abc" input mode. The use of this input mode is the same as "ABC"
input mode. The only difference between them is "ABC" input mode use for upper
case input while "abc" for lower-case input! Other functions remain the same.
4.3.3 Write with T9ENGLISH Text Input “ABC”/”abc”
With predictive text input, you need to press each number key only once for each
letter, since the word changes after stroke a key, try to disregard the word until you
have finished all the characters. Then you could press ▲and ▼key to select a
desired word! Press ▲and ▼key to view the next matching word if the word is not
the desire word. Once found the correct word, press the left soft key to confirm it.
You can change “ABC” to “abc” in turn by press 1 key when you with this text input.
4.3.4 Write with T9SPANISH Text Input “ABC”/”abc”
With predictive text input, you need to press each number key only once for each
letter, since the word changes after stroke a key, try to disregard the word until you
have finished all the characters. Then you could press ▲and ▼key to select a

13
desired word! Press ▲and ▼key to view the next matching word if the word is not
the desire word. Once found the correct word, press the left soft key to confirm it.
You can change “ABC” to “abc” in turn by press 1 key when you with this text input.
4.3.5 Insert number
To add a number, change to the number input mode first, just press and hold # key
until 123 appears. Enter the desired numbers, and then press # key to return to ABC
or other input mode.

14
5. Basic menu functions
Press the left soft key to enter the main menu. You can scroll select by use ▲or ▼
key. The scroll bar in the right of the screen will show you the location of the menu in
the current level. Press the left soft key to enter this menu or press the right soft key
to return the previous menu level.
Note: Only operate all the menu functions in standby mode.
5.1 Phone book
Use this function to store desire names and their associated phone number, mobile
phone numbers, fax number and so on. Press the left
soft key to enter the phone book when in the main menu.
5.1.1 View names
(1) Scroll with ▲or ▼in the phone book until find out
View names and press the left soft key to confirm it.
(2) Display the name list what you had saved before. Or you just need to press the
first letter of the stored name, and then you could locate its location. For example
when you press “2” key three times, you could locate the name which uses the letter
“C” as prefix.
¾Scroll with ▲or ▼to browse the all note.
¾Press MUTE key, you can do Search, Edit, Delete, Add new name or Add to
group for the current name.
¾Or presses the left soft key, you can look over the phone number of the current name.
The icon in the left of the number denotes the stored type of it.
Press MUTE key in this instance, you can Edit, Delete, Add to speed or send
message to the current number.
Press
key to dial out the current number
Note: one-touch dialing (speed dial):
You must store names and numbers in your phone book before you can use
1-touch dialing. You can assign a name from the phone book to a 1-touch dial
location; Press the keys 0 to 9. For a while the associated number is automatically
dialed out.
5.1.2 Add new name
(1) Press the left soft key 2 times, and then find out “Add new names” Scroll with ▲
or ▼key, press the left soft key to confirm.
(2) If you select “Choice” in Phone book→Settings→Save nos. to submenu
previously, you have the option to save to either SIM card or Phone when you

15
enter the Add new name submenu. Otherwise it will follow the default setting in
the Save nos. to and don’t give you the option.
(3) There have options: <NAME>, <SET GROUP>and three< NUMBER> in the Add
new name submenu.
¾NAME: input the name belongs to the phone number.
¾SET GROUP: select the group you want to classify (no group, Family, Friends,
Business, Colleague, VIP, and Society in order).
¾NUMBER: input the telephone number you want to add. You can input up to 3
phone numbers related to one name and select one phone type for every name
(phone, home, office, fax type and so on). They have corresponded icon for each
one, just use ▲or ▼key to select a suit one.
5.1.3 Settings
(1) Scroll ▲or ▼key to find out Settings in the phone book menu then press the left
soft key.
(2) When in the Settings menu to select what you want to operate by pressing ▲or
▼key, then press the left soft key to access the menu interface. The menu
options are as follows:
¾Edit Groups sub-menu has two options, Group Filters and Group Ring Tones.
In the Group Filters, check the groups. If in the symbol-□before the group
is empty that denotes its not in the scope of searching, Else in the scope of
searching . Press the right soft key to exit.
Group Tones distribute different ring type for different group. You can
estimate which group the incoming call belongs to rapidly before answer the
call.
¾Save nos. to sub-menu have three submenus: SIM card, Choice, Phone
memory. If Choice is selected you have an option to store information in Phone
or SIM Card.
¾Used space sub-menu you could check the stored information about the SIM
card, phone and speed-dial. As the storage capacity of SIM card depends on the
card type, the phone could accommodate up to 200 records and the speed-dial
up to 10 records.
¾Speed dial list sub-menu you could view the speed dial number.
5.2 Service Messages
5.2.1 New SMS
You can use this menu item to create a new message and send it out. Access
message input interface to enter the message. (Please refer
Service
Messages

16
to“Text Input”.) When you finish entering a new message, Press the left soft key
allows you to input number, and then press the left soft key to operate it as follow.
¾Select “Send” that you can send this message
¾Select “Save” that the current message will be stored to outgoing messages
5.2.2 Inbox
This function helps you browse the incoming message in SIM and its related
information, such as Sender’s phone number and its owner and Reception date and
time.
When you receive a new message, you can hear the ring “de…”twice (since the
message ring is open) and view the ‘New Message’ on screen. If you have a missed
message, you can see the message icon on the top of the screen. The phone saves
the message in the SIM card automatically.
When the message icon flashes continuously, your SIM card has no more storage
space for new messages. You need to erase the existing messages. Scroll with ▲or
▼key to the desired message.
Press the left soft key to view the detail of the message in the list. Press the left soft
key allows you to operate it as follows.
¾Edit: Edit this piece of short message to other receivers.
¾Delete: Delete this piece of short message.
¾Forward: Transfer this piece of short message to other receivers.
¾Text reply: Reply messages to the opposite party.
¾Voice call: Call the opposite party.
¾Extract nos. You could extract the number including in message.
5.2.3 Phone Inbox
This function that you can browse the incoming message in phone, the option is
same as Inbox.
5.2.4 Outbox
Check the message you have saved in the SIM card, press MENU key to view, and
then press the left soft key allows you to operate it as follow.
¾Edit
¾Delete
¾Send
¾Extract nos.
Press the left soft key to send, send too many or save the message.
5.2.5 Used space
Check the used space: Inbox, Out Box/ phone.

17
5.2.6 Settings
Define the key setting about message before you use it. In the Message settings,
you can find submenus as follows.
¾Messages Centre
You can connect with your network service provider to get this number from the
Short Message Service. In this submenu, input the number of your Messages center,
press the left soft key.
¾Validity period
If outgoing messages failed at first try, use this option to specify the period of time for
message retransmission.. The options you can select include: 1 hour, 2 hours, 6
hours, 1 day, 2 days, 1 week, 4 weeks, and 6months, In this submenu, scroll to the
desired time then press the left soft key to confirm
5.2.7 Voicemail
This function needs the current network support. Press the left soft key to operate it
as follow.
¾Select “Call Voicemail”: you can check the current voicemail.
¾Select “Voicemail Number”: set the number to connect to voicemail system.
Contact your service provider for more information.
5.3 Recent Calls
This function allows you to view a list of the last 20 missed calls or received calls and
the last 10 dialed numbers. In the Recent Calls main menu, press the left soft key
you can view the list of the submenu including all options. Stroll with ▲or ▼key and
press the left soft key to dial out the number you have select.
5.3.1 Missed Calls
Allow you to view all the missed calls.
5.3.2 Received Calls
Allow you to view all the received calls.
5.3.3 Dialed Calls
Allow you to view all the dialed calls.
5.3.4 Recent Toll
Fee
5.3.5 Call Info
Includes Call timers and Clear logs, you can view the last call duration time and all the
call Duration time.
Recent
calls

18
Diverts
calls
Note: the Latest Call Duration shows you the latest call duration. All the Duration
shows you all the duration time since last clear time. Select ‘Clear logs’ deletes all
the call logs.
Caution: PIN2 is needed in some operations, contact with your network provider to
get this code.
5.4 Diverts calls
This network service is used to forward certain incoming calls to another telephone
number you have already appointed to. Please contact to your service provider to
activate this function.
Select the Diverts calls menu and press the left soft key.
The divert modes available are: All Calls, When Busy,
Unanswered, Unreachable, Cancel all. Scroll with ▲or
▼key to select what you want to set.
5.4.1 All Calls
Divert all calls
5.4.2 When Busy
Divert when busy
5.4.3 Unanswered
Divert when not answered
5.4.4 Unreachable
Divert when not reachable
After choosing one of the above 4 options:
¾On: Only registered services are functional.
¾Off: Delete the divert service.
¾Status: Query if the service is active.
¾By service: Select By Service and then select one of the following options, you
can set to divert which service to the preset number:
Press the left soft key to enter by service sub-menu. Scroll with ▲or ▼key in the
options as follow, set corresponding service to each number.
¾All services: Divert incoming calls, voice calls and short messages.
¾Voice calls: Only divert voice calls.
¾Data: Only divert data
¾Fax: Only divert faxes.
¾Messages: Only divert short messages.
¾All Except msgs: Diverts all services except messages.

19
Clock
Audio
Profiles
Scroll with ▲or ▼key to select operation when the settings have been made.
5.4.5 Cancel All
All diverts are off.
5.5 Audio profiles
This menu helps you to set up your phone sound setting. Press the left soft key to
obtain the options as below.
5.5.1 Ringing tone
You can choose the ring type of your phone. A total of 23
ring types are available.
5.5.2 Ringing volume
You can select the ringing volume here. A total of 8 levels are available. (1-6 and
Loudest and Off)
5.5.3 Earpiece
You can select the earpiece volume here. A total of 8 levels are available. (1-6 and
Loudest and Off)
5.5.4 Keypad tones
You can select the volume of keypad tones here. A total of 8 levels are available. (1-6
and Loudest and Off)
5.5.5 Warning tones
Set the phone to sound a warning tone when the battery is running out of power.
(Switch on or off)
5.5.6 Message tone
Set the phone to sound a tone when a new message coming. (Switch on or off)
5.6 Clock
There are some settings about clock in this menu. In the clock
main menu, press the left soft key. Scroll with ▲or ▼key to
select the option what you want to use, press the left soft key
to confirm it.
5.6.1 Alarm
¾Set Time: In this menu the phone can be set to alarm at a specified time. The
alarm time must be after the current time.
¾Set tone: Set a specified ring for the alarm.
¾Repeat on/off: repeat every day or not.
Table of contents
Other Axesstel Telephone manuals

Axesstel
Axesstel PX210 User manual

Axesstel
Axesstel pg330 User manual

Axesstel
Axesstel PX320N User manual

Axesstel
Axesstel PXA20 User manual

Axesstel
Axesstel AXW-P450 User manual

Axesstel
Axesstel PX300 Series User manual

Axesstel
Axesstel PX120N User manual

Axesstel
Axesstel PX210 User manual

Axesstel
Axesstel PG130 User manual

Axesstel
Axesstel CDMA PX330N User manual
Popular Telephone manuals by other brands

Radio Shack
Radio Shack 17-918 owner's manual

Cortelco
Cortelco CENTURION EXTENDED BASIC TELEPHONE Owner's instruction manual

LAZER
LAZER 906K user guide

AEI COMMUNICATIONS
AEI COMMUNICATIONS ASP-6210-S QIG

Siemens
Siemens Profiset 30isdn operating instructions

Unify
Unify OpenScape CP200T Installation and quick reference guide