2/4
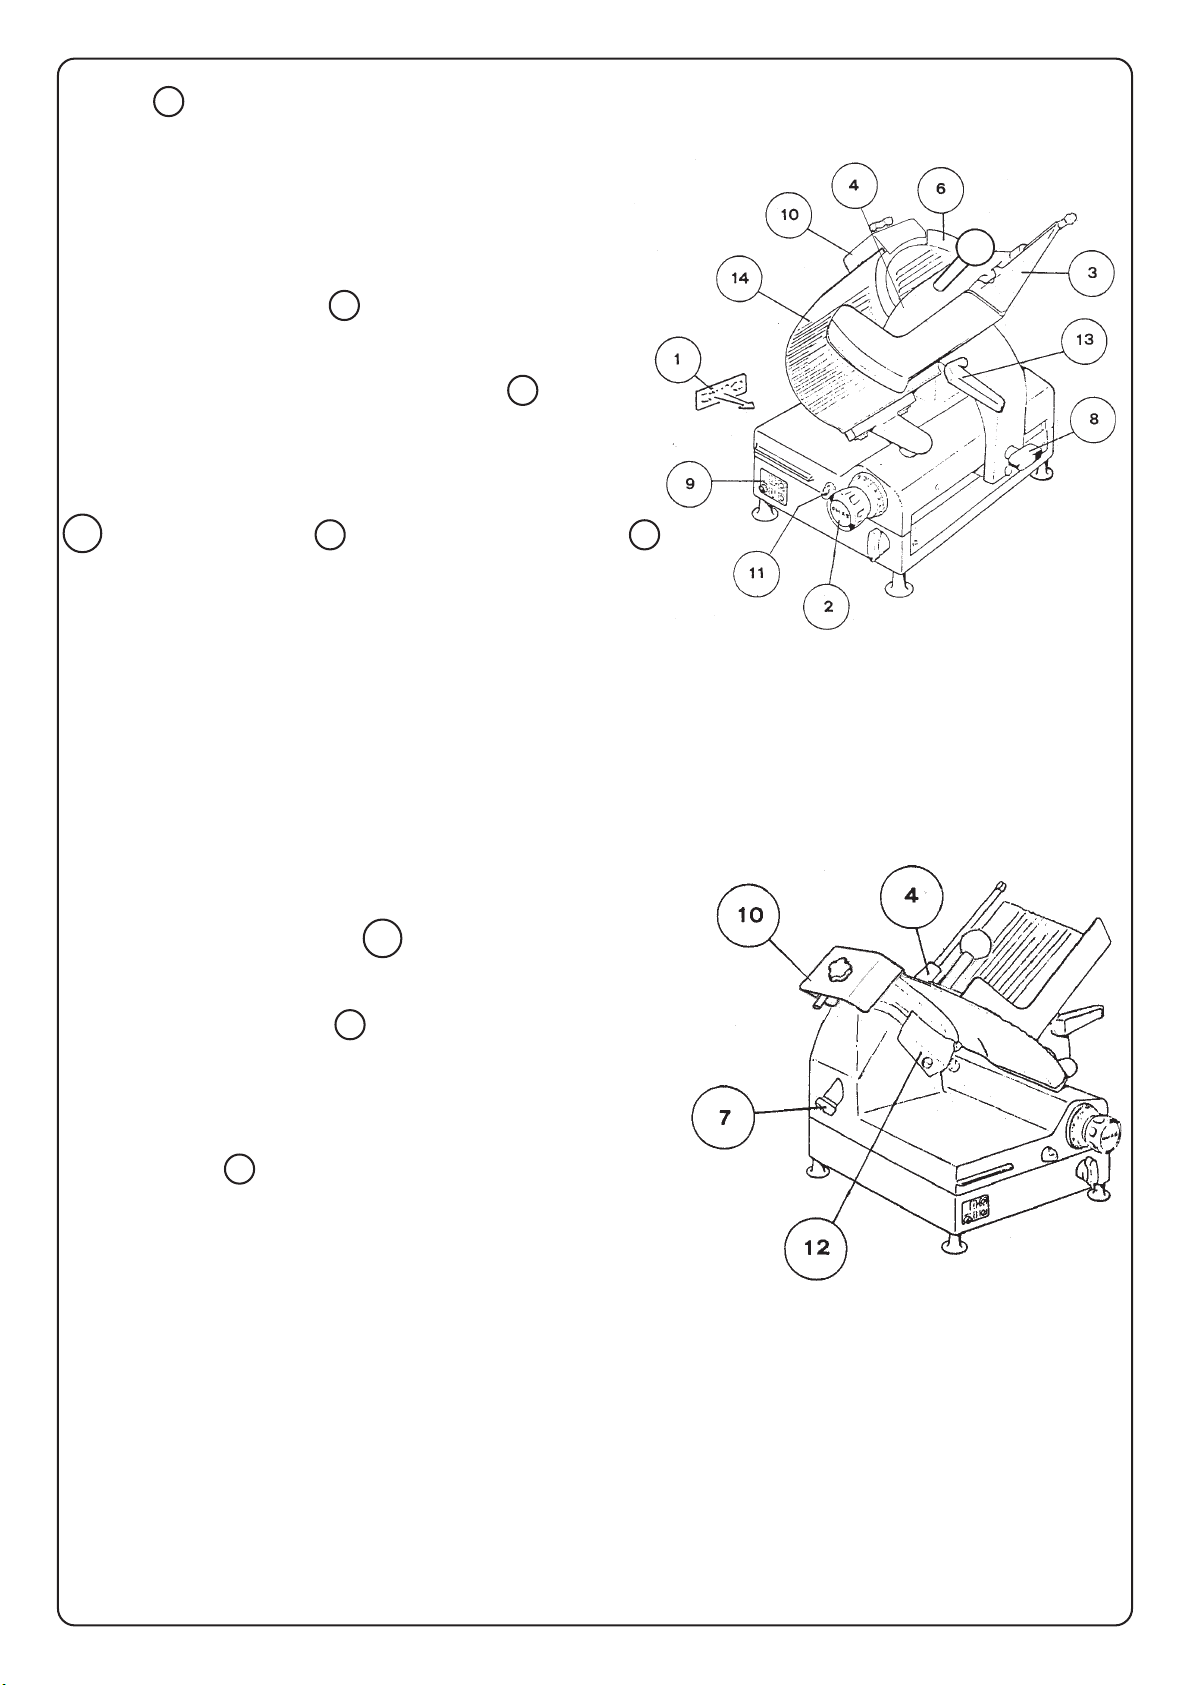
When the siicer is not working, the slicer thickness
control 2 mustbesetonzero(fuIlyclockwise)toprevent
the blade edge from being exposed.
AlwaysUNPLUGthepowercordbeforecleaningormoving
theslicer.
SLICING
PuII the product holder 3 towards you until it stops
andplace the productto besliced ontheproduct holder
tray. Place the last slice device against the productand
starttheslicerbypressingthe on-offswtich 9 .Adjust the
slicethicknessby turning theslicethickness control.The
numbers on the slice thickness control do not indicate
precise measurement, but may be used for reference to
duplicateslicethickness.Usingeitherthecarriage handle
13 orIast slice device 4 pushtheproduct holder 3
back and forth to slice. Always swtich-off the slicer and
turnthe slice thickness control clockwiseto zero when
notslicing.
WARNING:Slicershouldnotbeoperatedbyuntrained
personnelorpersonsunder18years of age.
CLEANING
Thismachinemustbethoroughlycleanedaftereachday’s
operationor everytimeit willnot beused foran extended
period.
WARNING: UNPLUGMACHINE POWERCORD
AND TURN THE INDEX KNOB FULLY CLOCKWISE
BEFORECLEANING THESLICER.
Removethe slice deflector 12 byremoving itsthumb
screw.
Theproduct holdercanberemovedforaneasycleaning
byunfastening itshandle 8 .
Usingamildsoapandhotwatersolutionandacleancloth,
wipeall surfacesof theslicer.
Thoroughlyrinseitwithanothercleanclothandfreshwater.
Removethe blade cover byremoving
the hand knob 7 . With the hand knob removed, grasp
theedge ofthe blade cover andcarefullyliftit straightoff
theknife.
WARNING:THESLICERBLADE ISVERYSHARPUSE
EXTREME CAUTION WHEN WORKING NEAR THE
BLADE.
CAREFULLYwashboth sidesof theblade with the slice
thicknesscontrolturnedfullyclockwise. Washtheblade
by wiping outward from the centre. ALWAYS rinse the
bladethoroughlyusingfreshwaterandacleancloth.Never
use steel pads it clean the blade. Wash and thoroughly
rinsetheremovedcomponentspriortoreassemblingthem.
DONOTwashany slicercomponentsin adishwasher.


