SLICING
PuII the product holder 3 toward you until
it stops and place the product to be sliced on
the product holder tray. Set the last slice
device 4 against the product and stwich on
the slicer by pressing the on-off stwich.
Adjust the slice thickness 7 by turning the
slice thickness control 2 .
The numbers on the slice thickness control
do not indicate actual measurements but
may be used for reference to duplicate slice
thickness.
Using the Iast slice device 4 handle push
CLEANING
This machine must be thoroughly cleaned after each day’s operation or anytime it will
not be used for an extended period of time.
WARNING: UNPLUGMACHINE POWER CORDANDTURNTHEINDEXKNOB FULLY
CLOCKWISEBEFORE CLEANING THESLICER.
Remove the slice deflector by removing its thumb screw.
Turnoverproduct holder 3 .Pull the carriage uptoits limit stop and rotatetowardsthe
outside,by having the plate either removed orturnedover, makes easier the cleaning of
remote spots otherwise difficult to be reached.
Usinga mild soap andhotwater solution and acleancloth, wipe all surfacesofthe slicer.
Thoroughlyrinseitwithanother clean cloth and fresh water.
Remove the blade cover by removing the hand knob 5.
Withthe handknob removed, graspthe edgeofthe bladecover and carefullylift itstraight
offtheblade.
WARNING:THE SLICER BLADE IS VERYSHARPUSEEXTREME CAUTION WHEN
WORKINGNEAR THEBLADE.
CAREFULLYwash both sides of theblade withthe slice thickness control turned fully
clockwise. Wash the blade by wiping outward from the center.ALWAYS rinse the blade
thorougthly using fresh water and aclean cloth. Never use steel pads itclean the blade.
Wash and thoroughly rinse the removed components prior to reassembling them. DO
NOT wash any slicer components in a dishwasher.
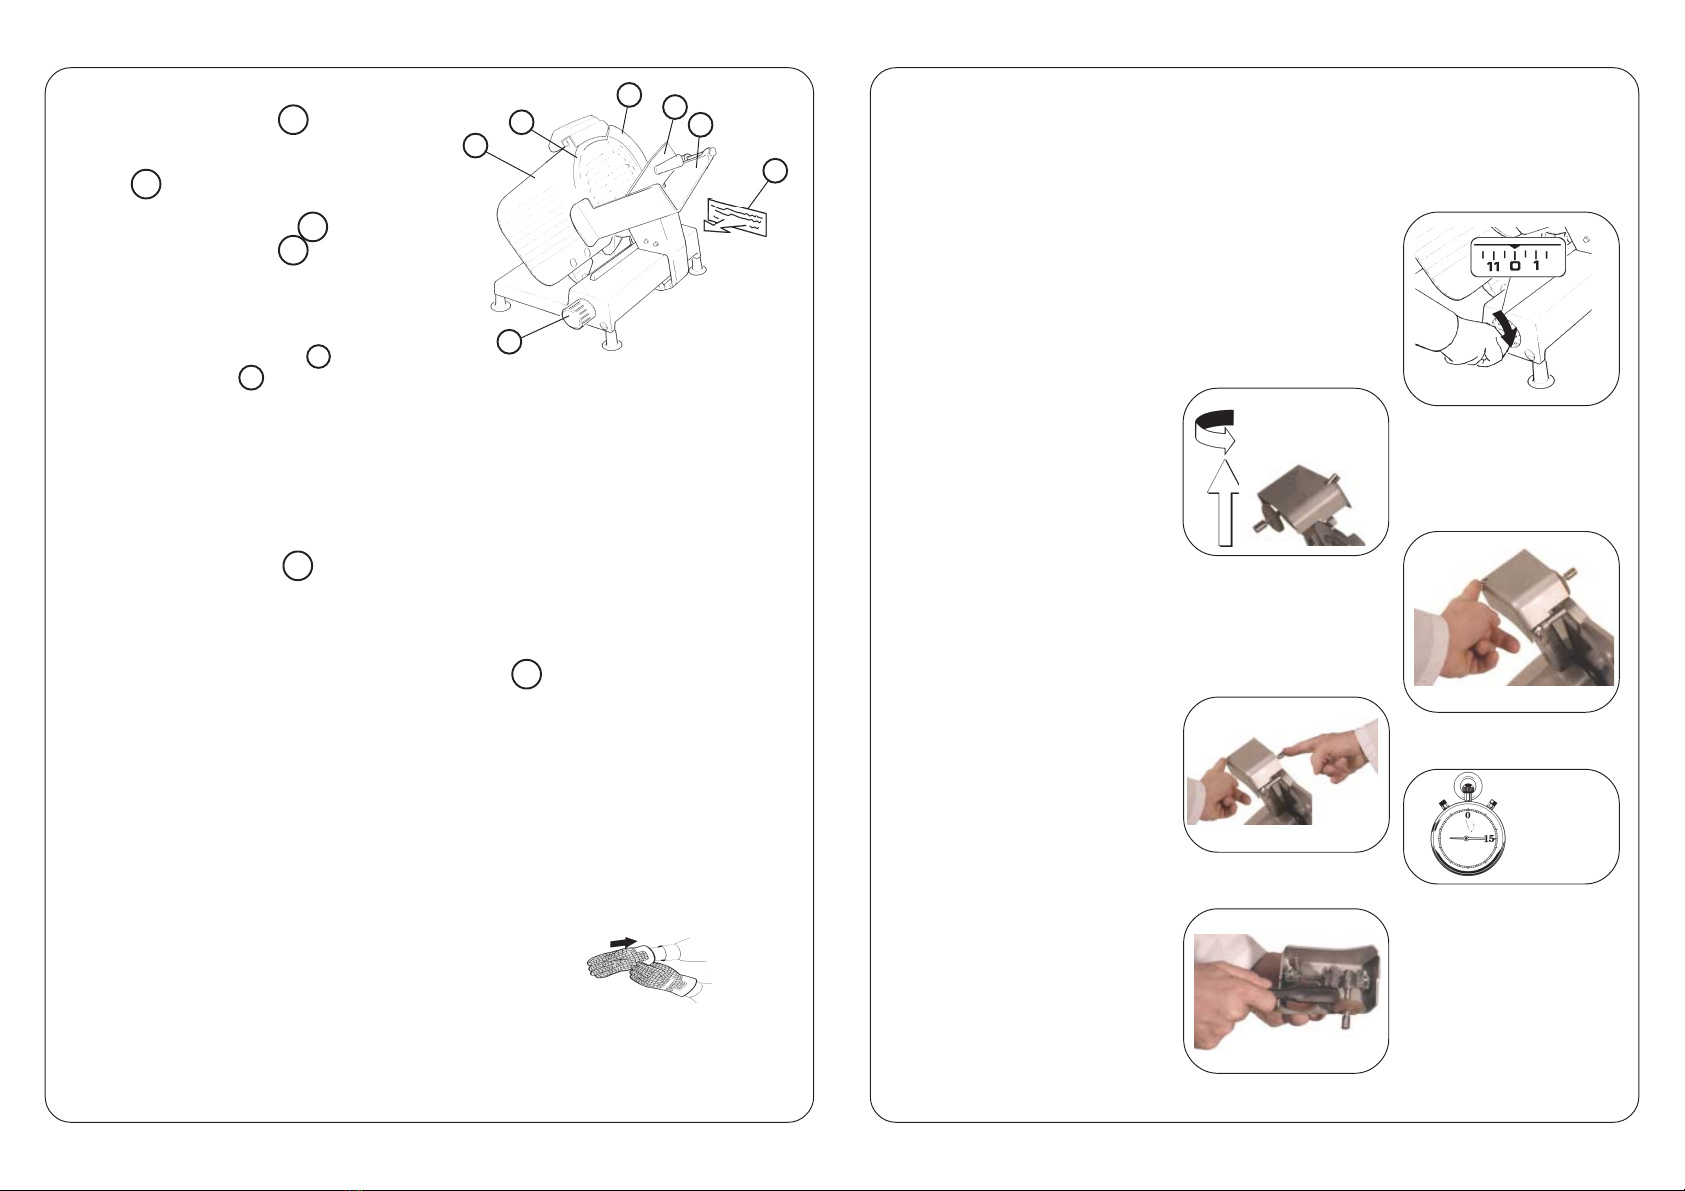
Makesure that the machineoff.
Clean the blade removing any
greasyresidue.
Rotate the slice thickness control
tozerotomakesurethat theblade
is covered by the slice thickness
plate.
ATTENTION: During the shar-
pening operations, pay
attention to an accidental
contact with the blade.
Slip off completely the sharpener
and spin it 180 degrees.
Sharpening: Press the
sharpeningwheel for about 10-15
seconds, then press
simultaneously also the grinding
stonefor two seconds.
Contemporaneouslyloosenthe
twogrindstones.
Liftandrotate180degreesthe
sharpenerandreallocateitinto
its initial position.
Cleaningofthegrinding wheels
For an adequate sharpening the
grinding wheel must always be
clean.Removedirtandgreasewith
alcoholandusinga brush.
MAINTENANCE
ATTENTION
Use protection gloves
ELECTRICALSAFETY
Whenthe slicer is running theeventualremoval of the blade cover,or the default of
electric power, causes the stop of the machine.
SHARPENINGOPERATION
Your slicer blade will provide long service in normal deli, food store, or commercial
kitchen use.
However, inhigh volumeapplicationswhereitisapractice tosharpen theblade frequently
or even daily, the blade will be expended in a shorter time.
the product holder 3 back and forth to slice. Always turn off the slicer and turn the
slice thickness control clockwise to zero when not slicing.
For a correct sharpening of the
blade follow these instructions:
1
2
3
4
5
6
1
5
7
2
4
63
STOP
180°


