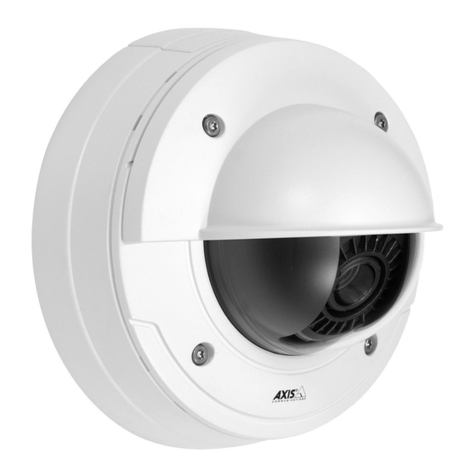
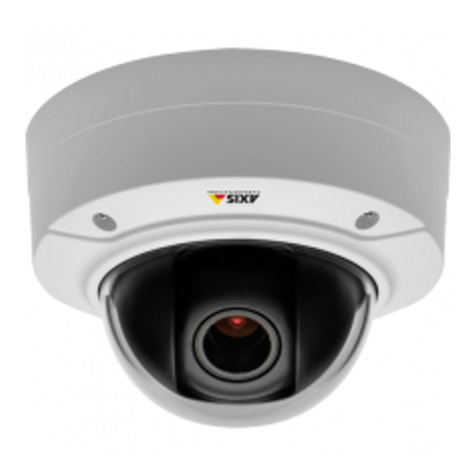
Axis P3365-VE User manual

INSTALLATIONGUIDE
AXISP3365–VEFixedDomeNetworkCamera
ENGLISH
FRANÇAIS
DEUTSCH
ITALIANO
ESPANÕL
ò
ò
¨
¨
¾
¾

LegalConsiderations
Videoandaudiosurveillancecanberegulatedbylawsthat
varyfromcountrytocountry.Checkthelawsinyourlocal
regionbeforeusingthisproductforsurveillancepurposes.
Thisproductincludesone(1)H.264decoderlicenseand
one(1)AACdecoderlicense.Topurchasefurtherlicenses,
contactyourreseller.
Liability
Everycarehasbeentakeninthepreparationofthis
document.PleaseinformyourlocalAxisofceofany
inaccuraciesoromissions.AxisCommunicationsABcannot
beheldresponsibleforanytechnicalortypographicalerrors
andreservestherighttomakechangestotheproductand
manualswithoutpriornotice.AxisCommunicationsAB
makesnowarrantyofanykindwithregardtothematerial
containedwithinthisdocument,including,butnotlimited
to,theimpliedwarrantiesofmerchantabilityandtnessfor
aparticularpurpose.AxisCommunicationsABshallnot
beliablenorresponsibleforincidentalorconsequential
damagesinconnectionwiththefurnishing,performance
oruseofthismaterial.Thisproductisonlytobeusedfor
itsintendedpurpose.
IntellectualPropertyRights
AxisABhasintellectualpropertyrightsrelatingto
technologyembodiedintheproductdescribedinthis
document.Inparticular,andwithoutlimitation,these
intellectualpropertyrightsmayincludeoneormoreof
thepatentslistedatwww.axis.com/patent.htmandoneor
moreadditionalpatentsorpendingpatentapplicationsin
theUSandothercountries.
Thisproductcontainslicensedthird-partysoftware.See
themenuitem“About”intheproduct’suserinterfacefor
moreinformation.
ThisproductcontainssourcecodecopyrightAppleCom-
puter,Inc.,underthetermsofApplePublicSourceLicense
2.0(seewww.opensource.apple.com/apsl).Thesourcecode
isavailablefromhttps://developer.apple.com/bonjour/
EquipmentModications
Thisequipmentmustbeinstalledandusedin
strictaccordancewiththeinstructionsgiveninthe
userdocumentation.Thisequipmentcontainsno
user-serviceablecomponents.Unauthorizedequipment
changesormodicationswillinvalidateallapplicable
regulatorycerticationsandapprovals.
TrademarkAcknowledgments
AXISCOMMUNICATIONS,AXIS,ETRAX,ARTPECandVAPIX
areregisteredtrademarksortrademarkapplicationsofAxis
ABinvariousjurisdictions.Allothercompanynamesand
productsaretrademarksorregisteredtrademarksoftheir
respectivecompanies.
Apple,Boa,Apache,Bonjour,Ethernet,InternetExplorer,
Linux,Microsoft,Mozilla,Real,SMPTE,QuickTime,UNIX,
Windows,WindowsVistaandWWWareregistered
trademarksoftherespectiveholders.Javaandall
Java-basedtrademarksandlogosaretrademarksor
registeredtrademarksofOracleand/oritsafliates.
UPnPTMisacerticationmarkoftheUPnPTMImplementers
Corporation.
SD,SDHCandSDXCaretrademarksorregisteredtrademarks
ofSD-3C,LLCintheUnitedStates,othercountriesorboth.
Also,miniSD,microSD,miniSDHC,microSDHC,microSDXC
arealltrademarksorregisteredtrademarksofSD-3C,LLC
intheUnitedStates,othercountriesorboth.
RegulatoryInformation
Europe
ThisproductcomplieswiththeapplicableCEmarking
directivesandharmonizedstandards:
•ElectromagneticCompatibility(EMC)Directive
2004/108/EC.SeeElectromagneticCompatibility
(EMC),onpage2.
•LowVoltage(LVD)Directive2006/95/EC.SeeSafety,
onpage3.
•RestrictionsofHazardousSubstances(RoHS)Directive
2011/65/EU.SeeDisposalandRecycling,onpage3.
Acopyoftheoriginaldeclarationofconformitymaybe
obtainedfromAxisCommunicationsAB.SeeContact
Information,onpage3.
ElectromagneticCompatibility(EMC)
Thisequipmenthasbeendesignedandtestedtofulll
applicablestandardsfor:
•Radiofrequencyemissionwheninstalledaccordingto
theinstructionsandusedinitsintendedenvironment.
•Immunitytoelectricalandelectromagneticphenomena
wheninstalledaccordingtotheinstructionsandused
initsintendedenvironment.
USA
Usinganunshieldednetworkcable(UTP)–This
equipmenthasbeentestedusinganunshieldednetwork
cable(UTP)andfoundtocomplywiththelimitsfora
ClassAdigitaldevice,pursuanttopart15oftheFCCRules.
Theselimitsaredesignedtoprovidereasonableprotection
againstharmfulinterferencewhentheequipmentis
operatedinacommercialenvironment.Thisequipment
generates,uses,andcanradiateradiofrequencyenergy
and,ifnotinstalledandusedinaccordancewiththe
instructionmanual,maycauseharmfulinterferenceto
radiocommunications.Operationofthisequipmentin
aresidentialareaislikelytocauseharmfulinterference
inwhichcasetheuserwillberequiredtocorrectthe
interferenceathisownexpense.
Usingashieldednetworkcable(STP)–Thisequipment
hasalsobeentestedusingashieldednetworkcable(STP)
andfoundtocomplywiththelimitsforaClassBdigital
device,pursuanttopart15oftheFCCRules.Theselimits
aredesignedtoprovidereasonableprotectionagainst
harmfulinterferenceinaresidentialinstallation.This
equipmentgenerates,usesandcanradiateradiofrequency
energyand,ifnotinstalledandusedinaccordancewith
theinstructions,maycauseharmfulinterferencetoradio
communications.However,thereisnoguaranteethat
interferencewillnotoccurinaparticularinstallation.If
thisequipmentdoescauseharmfulinterferencetoradioor
televisionreception,whichcanbedeterminedbyturning
theequipmentoffandon,theuserisencouragedtotryto
correcttheinterferencebyoneormoreofthefollowing
measures:
•Reorientorrelocatethereceivingantenna.
•Increasetheseparationbetweentheequipmentand
receiver.
•Connecttheequipmentintoanoutletonacircuit
differentfromthattowhichthereceiverisconnected.
•Consultthedealeroranexperiencedradio/TV
technicianforhelp.
Tobeusedinaresidentialareaorademandingelectrical
environment,theproductshallbeconnectedusinga
shieldednetworkcable(STP)thatisproperlygrounded.
Canada
ThisClassBdigitalapparatuscomplieswithCanadian
ICES-003.Theproductshallbeconnectedusingashielded
networkcable(STP)thatisproperlygrounded.
CetappareilnumériquedelaclasseBestconfomeàla
normeNMB-003duCanada.Leproduitdoitêtreconnecté
àl'aided'uncâbleréseaublindé(STP)quiestcorrectement
misàlaterre.
Europe
ThisdigitalequipmentfulllstherequirementsforRF
emissionaccordingtotheClassBlimitofEN55022.The
productshallbeconnectedusingashieldednetworkcable
(STP)thatisproperlygrounded.
Thisproductfulllstherequirementsforemissionand
immunityaccordingtoEN50121-4andIEC62236-4railway
applications.
Thisproductfulllstherequirementsforimmunity
accordingtoEN61000-6-1residential,commercialand
light-industrialenvironments.
Thisproductfulllstherequirementsforimmunity
accordingtoEN61000-6-2industrialenvironments.
Thisproductfulllstherequirementsforimmunity
accordingtoEN55024ofceandcommercialenvironments
Australia/NewZealand
ThisdigitalequipmentfulllstherequirementsforRF
emissionaccordingtotheClassBlimitofAS/NZSCISPR22.
Theproductshallbeconnectedusingashieldednetwork
cable(STP)thatisproperlygrounded.
Japan
この装置は、クラスB情報技術装置です。この装置
は、家庭環境で使用することを目的としています
が、この装置がラジオやテレビジョン受信機に近
接して使用されると、受信障害を引き起こすこと
があります。取扱説明書に従って正しい取り扱い
をして下さい。本製品は、シールドネットワーク
ケーブル(STP)を使用して接続してください。また
適切に接地してください。
Korea
이기기는가정용(B급)전자파적합기기로서주로
가정에서사용하는것을목적으로하며,모든지
역에서사용할수있습니다.적절히접지된STP
(shieldedtwistedpair)케이블을사용하여제품
을연결하십시오.
Safety
ThisproductcomplieswithIEC/EN/UL60950-1and
IEC/EN/UL60950-22,SafetyofInformationTechnology
Equipment.Theproductshallbegroundedeitherthrougha
shieldednetworkcable(STP)orotherappropriatemethod.
DisposalandRecycling
Whenthisproducthasreachedtheendofitsusefullife,
disposeofitaccordingtolocallawsandregulations.For
informationaboutyournearestdesignatedcollectionpoint,
contactyourlocalauthorityresponsibleforwastedisposal.
Inaccordancewithlocallegislation,penaltiesmaybe
applicableforincorrectdisposalofthiswaste.
Europe
Thissymbolmeansthattheproductshallnotbe
disposedoftogetherwithhouseholdorcommercialwaste.
Directive2012/19/EUonwasteelectricalandelectronic
equipment(WEEE)isapplicableintheEuropeanUnion
memberstates.Topreventpotentialharmtohumanhealth
andtheenvironment,theproductmustbedisposedofin
anapprovedandenvironmentallysaferecyclingprocess.
Forinformationaboutyournearestdesignatedcollection
point,contactyourlocalauthorityresponsibleforwaste
disposal.Businessesshouldcontacttheproductsupplierfor
informationabouthowtodisposeofthisproductcorrectly.
Thisproductcomplieswiththerequirementsof
Directive2011/65/EUontherestrictionoftheuseof
certainhazardoussubstancesinelectricalandelectronic
equipment(RoHS).
China
Thisproductcomplieswiththerequirementsofthe
legislativeactAdministrationontheControlofPollution
CausedbyElectronicInformationProducts(ACPEIP).
ContactInformation
AxisCommunicationsAB
Emdalavägen14
22369Lund
Sweden
Tel:+46462721800
Fax:+4646136130
www.axis.com
Support
Shouldyourequireanytechnicalassistance,pleasecontact
yourAxisreseller.Ifyourquestionscannotbeanswered
immediately,yourresellerwillforwardyourqueriesthrough
theappropriatechannelstoensurearapidresponse.Ifyou
areconnectedtotheInternet,youcan:
•downloaduserdocumentationandsoftwareupdates
•ndanswerstoresolvedproblemsintheFAQdatabase.
Searchbyproduct,category,orphrase
•reportproblemstoAxissupportstaffbylogginginto
yourprivatesupportarea
•chatwithAxissupportstaff(selectedcountriesonly)
•visitAxisSupportatwww.axis.com/techsup/
LearnMore!
VisitAxislearningcenterwww.axis.com/academy/for
usefultrainings,webinars,tutorialsandguides.


AXISP3365–VEFixedDomeNetworkCamera
SafetyInformation
ReadthroughthisInstallationGuidecarefullybeforeinstallingtheproduct.KeeptheInstallation
Guideforfuturereference.
HazardLevels
DANGERIndicatesahazardoussituationwhich,ifnotavoided,willresultin
deathorseriousinjury.
WARNINGIndicatesahazardoussituationwhich,ifnotavoided,couldresult
indeathorseriousinjury.
CAUTIONIndicatesahazardoussituationwhich,ifnotavoided,couldresult
inminorormoderateinjury.
NOTICE NOTICE
NOTICEIndicatesasituationwhich,ifnotavoided,couldresultindamage
toproperty.
OtherMessageLevels
ImportantIndicatessignicantinformationwhichisessentialfortheproduct
tofunctioncorrectly.
NoteIndicatesusefulinformationwhichhelpsingettingthemostout
oftheproduct.
5
ENGLISH

AXISP3365–VEFixedDomeNetworkCamera
SafetyInstructions
NOTICE NOTICE
NOTICE
•TheAxisproductshallbeusedincompliancewithlocallawsandregulations.
•StoretheAxisproductinadryandventilatedenvironment.
•AvoidexposingtheAxisproducttoshocksorheavypressure.
•Donotinstalltheproductonunstablebrackets,surfacesorwalls.
•UseonlyapplicabletoolswheninstallingtheAxisproduct.Excessiveforcecouldcause
damagetotheproduct.
•Donotusechemicals,causticagents,oraerosolcleaners.Useacleanclothdampened
withpurewaterforcleaning.
•Useonlyaccessoriesthatcomplywithtechnicalspecicationoftheproduct.Thesecanbe
providedbyAxisorathirdparty.
•UseonlysparepartsprovidedbyorrecommendedbyAxis.
•Donotattempttorepairtheproductbyyourself.ContactAxissupportoryourAxis
resellerforservicematters.
Transportation
NOTICE NOTICE
NOTICE
•WhentransportingtheAxisproduct,usetheoriginalpackagingorequivalenttoprevent
damagetotheproduct.
Battery
TheAxisproductusesa3.0VBR/CR2032lithiumbatteryasthepowersupplyforitsinternal
real-timeclock(RTC).Undernormalconditionsthisbatterywilllastforaminimumofveyears.
LowbatterypoweraffectstheoperationoftheRTC,causingittoresetateverypower-up.When
thebatteryneedsreplacing,alogmessagewillappearintheproduct’sserverreport.Formore
informationabouttheserverreport,seetheproduct´ssetuppagesorcontactAxissupport.
Thebatteryshouldnotbereplacedunlessrequired,butifthebatterydoesneedreplacing,contact
Axissupportatwww.axis.com/techsupforassistance.
WARNING
•Riskofexplosionifthebatteryisincorrectlyreplaced.
•ReplaceonlywithanidenticalbatteryorabatterywhichisrecommendedbyAxis.
•Disposeofusedbatteriesaccordingtolocalregulationsorthebatterymanufacturer's
instructions.
6

AXISP3365–VEFixedDomeNetworkCamera
DomeCover
NOTICE NOTICE
NOTICE
•Becarefulnottoscratch,damageorleavengerprintsonthedomecoverbecausethis
coulddecreaseimagequality.Ifpossible,keeptheprotectiveplasticonthedomecover
untiltheinstallationiscomplete.
•Donotcleanadomecoverthatlookscleantotheeyeandneverpolishthesurface.
Excessivecleaningcoulddamagethesurface.
•Forgeneralcleaningofthedomecoveritisrecommendedtouseanon-abrasive,
solvent-freeneutralsoapordetergentmixedwithpurewaterandasoft,cleancloth.Rinse
wellwithpurelukewarmwater.Drywithasoft,cleanclothtopreventwaterspotting.
•Neveruseharshdetergents,gasoline,benzeneoracetoneetc.andavoidcleaningthe
domecoverindirectsunlightoratelevatedtemperatures.
7
ENGLISH

8

AXISP3365–VEFixedDomeNetworkCamera
InstallationGuide
ThisInstallationGuideprovidesinstructionsforinstallingAXISP3365–VENetworkCameraonyour
network.Forotheraspectsofusingtheproduct,seetheUserManualavailableatwww.axis.com
InstallationSteps
1.Makesurethepackagecontents,toolsandothermaterialsnecessaryfortheinstallation
areinorder.Seepage9.
2.Studythehardwareoverview.Seepage10.
3.Studythespecications.Seepage13.
4.Installthehardware.Seepage16.
5.Accesstheproduct.Seepage21.
PackageContents
•AXISP3365–VEFixedDomeNetworkCamera
•1Resitorxscrewdriver
•1Smokeddomecoverwithgasket
•5mnetworkcablewithgasket
•1cablegasket
•1terminalconnector
•1weathershield
•InstallationandManagementSoftwareCD
•Printedmaterials
-InstallationGuide(thisdocument)
-Drilltemplate(1x)
-Extraserialnumberlabel(2x)
-AVHSAuthenticationkey
OptionalAccessories
•Multi-userdecoderlicensepack
•AXIST8414InstallationDisplay
•AXISPoEMidspans
•AXIST90AIlluminators
•IP51-rateddrop-ceilingmountkit
•Pendantkit
9
ENGLISH

AXISP3365–VEFixedDomeNetworkCamera
•Mountingbracket
•Cableshield
•Pendantkitincludingweathershield
•AudioI/Ocablewithpre-mountedgasket
Forinformationaboutavailableaccessories,seewww.axis.com
HardwareOverview
123456
78
910
13
14
12
11
15
16
1.Networkconnector
2.Audioout
3.LEDindicators(network,status,power)
10

AXISP3365–VEFixedDomeNetworkCamera
4.Audioin
5.I/Oconnector
6.Controlbutton
7.Fanconnector
8.SDcardslot
9.Mountingbracket
10.Networkcable
11.Unitcasing
12.Cameraheater
13.Domecover
14.Weathershield
15.Sideholesforcablesroutedalongwall
16.Spring
Dimension(HxW)
117x179mm(4.59”x7.05”)
Weight
1.6kg(3.5lb)
LEDIndicators
LEDColorIndication
GreenSteadyforconnectiontoa100Mbit/snetwork.Flashesfornetwork
activity.
AmberSteadyforconnectiontoa10Mbit/snetwork.Flashesfornetwork
activity.
Net-
work
UnlitNonetworkconnection.
GreenSteadygreenfornormaloperation.
AmberSteadyduringstartupandwhenrestoringsettings.
Status
RedSlowashforfailedupgrade.
GreenNormaloperation. Power
AmberFlashesgreen/amberduringrmwareupgrade.
11
ENGLISH

AXISP3365–VEFixedDomeNetworkCamera
Note
•TheStatusLEDcanbeconguredtobeunlitduringnormaloperation.Tocongure,go
toSetup>SystemOptions>Ports&Devices>LED.Seetheonlinehelpformore
information.
•TheStatusLEDcanbeconguredtoashwhileaneventisactive.
•TheStatusLEDcanbeconguredtoashforidentifyingtheunit.GotoSetup>System
Options>Maintenance.
ConnectorsandButtons
Forspecicationsandoperatingconditions,seepage13.
NetworkConnector
RJ45Ethernetconnector.SupportsPoweroverEthernet(PoE).
NOTICE NOTICE
NOTICE
Duetolocalregulationsortheenvironmentalandelectricalconditionsinwhichtheproduct
istobeused,ashieldednetworkcable(STP)maybeappropriateorrequired.Allcables
connectingtheproducttothenetworkandthatareroutedoutdoorsorindemanding
electricalenvironmentsshallbeintendedfortheirspecicuse.Makesurethatthenetwork
devicesareinstalledinaccordancewiththemanufacturer’sinstructions.Forinformation
aboutregulatoryrequirements,seeElectromagneticCompatibility(EMC),onpage2.
I/OConnector
Usewithexternaldevicesincombinationwith,forexample,tamperingalarms,motiondetection,
eventtriggering,timelapserecordingandalarmnotications.Inadditiontothe0VDCreference
pointandpower(DCoutput),theI/Oconnectorprovidestheinterfaceto:
•Digitaloutput–ForconnectingexternaldevicessuchasrelaysandLEDs.Connected
devicescanbeactivatedbytheVAPIX®ApplicationProgrammingInterface,output
buttonsontheLiveViewpageorbyanActionRule.Theoutputwillshowasactive
(shownunderSystemOptions>Ports&Devices)ifthealarmdeviceisactivated.
•Digitalinput–Analarminputforconnectingdevicesthatcantogglebetweenanopen
andclosedcircuit,forexample:PIRs,door/windowcontacts,glassbreakdetectors,
etc.Whenasignalisreceivedthestatechangesandtheinputbecomesactive(shown
underSystemOptions>Ports&Devices).
AudioConnector
TheAxisproducthasthefollowingaudioconnectors:
•Audioin(pink)–3.5mminputforamonomicrophone,oraline-inmonosignal(left
channelisusedfromastereosignal).
12

AXISP3365–VEFixedDomeNetworkCamera
•Audioout(green)–3.5mmoutputforaudio(linelevel)thatcanbeconnectedto
apublicaddress(PA)systemoranactivespeakerwithabuilt-inamplier.Astereo
connectormustbeusedforaudioout.
SDCardSlot
AnSDcard(notincluded)canbeusedforlocalrecordingwithremovablestorage.Formore
information,seeSpecications,onpage13.
NOTICE NOTICE
NOTICE
Topreventcorruptionofrecordings,theSDcardshouldbeunmountedbeforeremoval.To
unmount,gotoSetup>SystemOptions>Storage>SDCardandclickUnmount.
ControlButton
Thecontrolbuttonisusedfor:
•Resettingtheproducttofactorydefaultsettings.Seepage21.
•ConnectingtoanAXISVideoHostingSystemserviceorAXISInternetDynamicDNS
Service.Formoreinformationabouttheseservices,seetheUserManual.
Specications
OperatingConditions
TheAxisproductisintendedforoutdooruse.
ProductClassicationTemperature
AXISP3365–VEIEC62262IK10,
NEMA250Type4X-40°Cto55°C(-40°Fto131°F)
PowerConsumption
ProductPoE
AXISP3365–VEPoweroverEthernet(PoE)IEEE802.3af/802.3atType1Class3
13
ENGLISH

AXISP3365–VEFixedDomeNetworkCamera
Connectors
I/OConnector
4-pinterminalblockfor:
•Auxiliarypower(DCoutput)
•DigitalInput
•DigitalOutput
•0VDC(-)
12 3 4
FunctionPinNotesSpecications
0VDC(-)10VDC
DCoutput2Canbeusedtopowerauxiliaryequipment.
Note:Thispincanonlybeusedaspowerout.3.3VDC
Maxload=50mA
DigitalInput3Connecttopin1toactivate,orleaveoating
(unconnected)todeactivate0tomax40VDC
Digital
Output
4Connectedtopin1whenactivated,oating
(unconnected)whendeactivated.Ifused
withaninductiveload,e.g.arelay,adiode
mustbeconnectedinparallelwiththeload,
forprotectionagainstvoltagetransients.
0tomax40VDC,open
drain,100mA
14

AXISP3365–VEFixedDomeNetworkCamera
3.3 V max 50 mA
1
2
3
4
AudioConnector
3.5mmaudio
connectors(stereo)
123
AudioInputAudioOutput
1TipMicrophone/Linein
2Ring
Lineout(mono)
3SleeveGroundGround
SDCardSlot
SupportsSDcardswithupto64GBofstorage.Forbestrecordingperformance,useanSDHC
orSDXCcardwithspeedclass10.
15
ENGLISH

AXISP3365–VEFixedDomeNetworkCamera
InstalltheHardware
PreparetheNetworkCable
Ifacableotherthantheprovidedcableisused,youneedtoprepareanetworkcablewithagasket.
Gentlyforcethecablethroughthegasketprovidedandattachanetworkconnector.Itmaybe
necessarytopierceaholeinthegasketwiththeresitorxscrewdriver.
Note
•Donotforcethenetworkconnectorintothegasket.
•Donotpiercethegasketwithaknifeorothersharpobject.
PreparetheUnitCasing(forroutingcablesalongthewall)
Ifthecablesaretoberoutedalongthewall,preparetheunitcasingasfollows:
1.Detachthesidelidthatisattachedtotheunitcasingbyremovingthescrew.
2.Loosenthetwoscrewsonthecableshieldanddetachthebottompart.
3.Attachthebottompartofthecableshieldtotheunitcasingwiththescrew.
1
2
3
1.Cableshield(optionalaccessory)–toppart
2.Cableshield(optionalaccessory)–bottompart
3.Unitcasing
16

AXISP3365–VEFixedDomeNetworkCamera
ReplaceClear/SmokedDomeCover(Optional)
TheAxisproductissuppliedwithanoptionaldome.Toreplacethedomecover:
1.Loosenthe4screwsunderthedomecoverthatholdthedomeinplace.
2.Replacetheolddomewiththenew.Makesuretherubbergasketsitssecurelyinplace
andtightenthescrews.
MountingBracket
Themountingplatehas4mountingpatterns(A,B,C,D).Themountingpatternsfollowthestandard
forthefollowingmountingoptions:
•A:4"squarebox
•B:standard-sizedUSdoublegangjunctionbox
•C:4"octagonbox
•D:standard-sizedUSsinglegangjunctionbox
RoutetheCables
Dependingonwhetheryouwanttoroutethecablesthroughoralongthewall,followtherelevant
instructionsbelow.Toroutecablesalongthewall:
1.Usingthedrilltemplatedrill4holesinthewall.
2.Attachthemountingbrackettothewallusing4screwsappropriateforthewallmaterial.
3.Removethecameraunitfromtheunitcasingbypushingthespringsaside.
4.Removethegasketsfromthesideholesintheunitcasing.Ifthereisonlyonecable,
removeonlyonegasket.
5.Placetheunitcasingonthemountingbracketandattachitbytighteningthefourscrews.
6.Pullthecablesupthroughthesideholesintheunitcasing.
7.Dragthegasketsalongthecableandplugthemintotheholes.Thegasketsshouldt
snuglyintheholeswithnofoldsorbends.
8.Re-attachthetoppartofthecableshieldbytighteningthetwoscrews.
17
ENGLISH

AXISP3365–VEFixedDomeNetworkCamera
Note
Toavoidmoisture-relatedproblemsitisrecommendedthatthecablesareroutedtothe
camerafrombelowwiththecableholesfacingdownwards.
Toroutecablesthroughthewall:
1
2
3
4
1.Mountingbracket
2.Networkcablewithgasket
3.Unitcasing
4.Removegasketsfromholes
1.Usingthedrilltemplatedrill4holesinthewall.
2.Routethenetworkcable(andtheI/O,audiocableifnecessary)throughthewalland
throughtheholesinthemountingbracket.
3.Attachthemountingbrackettothewallusing4screwsappropriateforthewallmaterial.
4.Removethecameraunitfromtheunitcasingbypushingthespringsaside.
5.Removethegasketsfromthebackholesintheunitcasing.Ifthereisonlyonecable,
removeonlyonegasket.
6.Routethecablesthroughtheseholes.
7.Dragthegasketsalongthecablesandplugthemintotheholes.Thegasketsshouldt
snuglyintheholeswithnofoldsorbends.
8.Attachtheunitcasingtothemountingbracketbytighteningthefourscrews.
18

AXISP3365–VEFixedDomeNetworkCamera
InstalltheCameraUnit
1
2
3
1.Fanconnector
2.Cameraunit
3.Networkcable
Note
•Becarefulnottostretchorbendthenetworkcabletoomuch.Thiscouldcausedamageto
thenetworkcable.
•TheAxisproductcanalsobettedwithametalconduitforprotectingthecablingwhen
cablesareroutedalongthewall.
1.Attachthenetworkcabletothecameraunit;andthecableforaudioandI/Oif
required.Itisrecommendedthatthenetworkcableistwistedtoaloopasshowninthe
illustrationabove.
2.InserttheSDmemorycard(optional).
3.Pullasidethespringsintheunitcasingandclickthecameraunitinplace.
4.Attachthefanconnectortotheconnectorinthecameraunit.
19
ENGLISH

AXISP3365–VEFixedDomeNetworkCamera
AdjusttheLens
1
2
1.Linestohelpwithhorizontalalignment
2.Lockingscrew
OpentheLiveViewpage(seeAccesstheProduct,onpage21)inthewebinterfaceandmakethe
followingadjustmentstothecamera:
1.Loosenthelockingscrew.
2.Turnthelenstothedesiredposition.Makesurethelinesoneithersideofthelensare
alignedhorizontally.Ensurethatthemarkonthelenscover,betweenthehorizontal
lines,isfacingup.
3.Oncesatised,gentlytightenthelockingscrewtosecurethecamera’sposition.
4.OpentheFocusAdjustmentpageinthewebinterfaceunderSetup>BasicSetup>
Focus&Zoom,andfollowtheon-screeninstructions.Usetheimagewindowtoadjust
thefocusandzoom.Seetheonlinehelplesformoreinformation.
Note
•Duetothedome’srefraction,theimagemayappearslightlyoutoffocusoncethedome
hasbeenplaced.TocorrectthisgototheFocusAdjustmentpageintheWebinterface
underSetup>BasicSetup>Focus&Zoom,andadjustthefocusagain.
•Adjustingthefocusandzoommanuallycandamagethelens.
CompletetheInstallation
1.Rotatetheblackshieldinsidethedometomatchthecamera’sposition.
2.Ifrequired,attachtheweathershieldtothecamerabeforeyouattachthedomecover.
Todothisremovethetwoscrewsinthedomecover.Transferthewashersfromthese
screwstothescrewsusedontheweathershield,andattachtheweathershield.
3.Makesuretherubbergasketsitssecurelyonthedomecover,attachthedomecoverto
theunitcasingbytighteningthe4screws.
Theinstallationisnowcomplete.
20
Other manuals for P3365-VE
3
Table of contents
Languages:
Other Axis Security Camera manuals

Axis
Axis M3204 User manual

Axis
Axis NETWORK CAMERA 2100 User manual

Axis
Axis AXIS M-1004W User manual

Axis
Axis M1143-L User manual

Axis
Axis 01809-031 User manual

Axis
Axis M31 SERIES User manual

Axis
Axis P3807-PVE User manual

Axis
Axis Q6054 User manual

Axis
Axis M31-LVE Series User manual

Axis
Axis Q1765-LE PT User manual