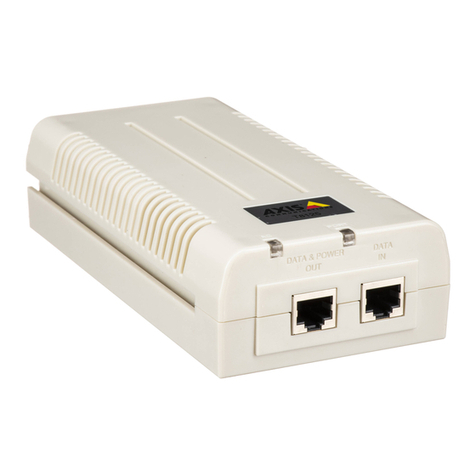
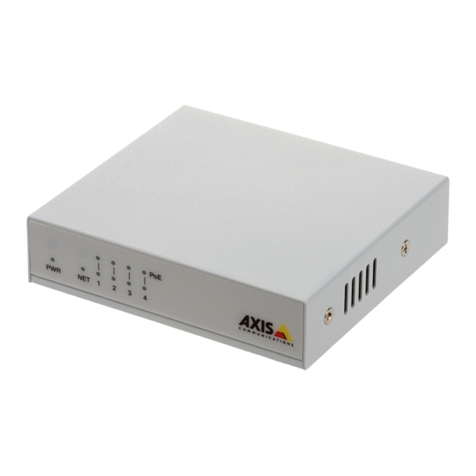
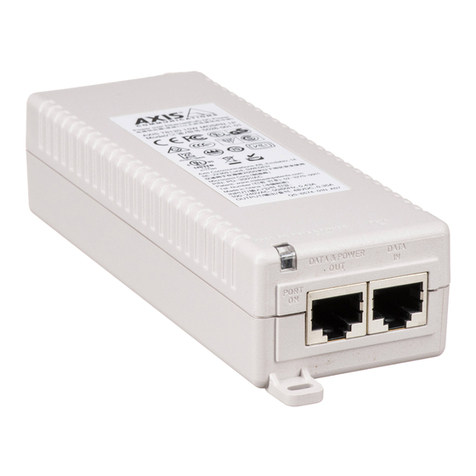
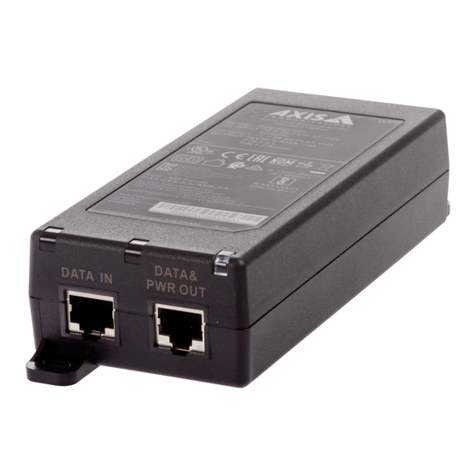
Axis T8120 Midspan 1-port User manual

ENGLISH FRANCAIS DEUTSCH ESPAÑOL
ITALIANO
AXIS PoE Midspan
1-Port
Installation Guide
PoE_IG.book Page 1 Thursday, June 12, 2008 4:01 PM

2
Safety Information
Installation and removal of the PoE Midspan
must be carried out by qualified personnel
only.
AC Power Cord Set:
• The power cord must have regulatory agency
approval for the specific country in which it
is used (i.e., UL, CSA, VDE, etc.).
• The power cord must be a three-conductor
type (two current carrying conductors; one
ground conductor) terminated on one end by
an IEC 60320 appliance coupler (for
connection to the PoE Midspan), and on the
other end by a plug containing a ground
(earthing) contact.
• The power cord must be rated for a minimum
of 250Vac RMS operation, with a minimum
rated current capacity of 5 amps (or a
minimum wire gauge of 18 AWG (0.75mm2)).
Note: PoE Midspan units installed in
Australia require power cords with a
minimum wire gauge of 16 AWG (1.0 mm2).
• The AC wall socket-outlet must be near the
PoE Midspan and easily accessible. You can
remove AC power from the PoE Midspan by
disconnecting the AC power cord from either
the wall socket-outlet or the PoE Midspan
appliance coupler.
The PoE Midspan data and data/power
interfaces are qualified as SELV (Safety
Extra-Low Voltage) circuits according to IEC
60950. These interfaces can only be connected
to SELV interfaces on other equipment.
WARNINGS!
• Read the installation instructions before
connecting the PoE Midspan to its power
source.
• Follow basic electricity safety measures
whenever connecting the PoE Midspan to its
power source.
• This product relies on the building
installation for short-circuit (over current)
protection. Ensure that a fuse or circuit
breaker no larger than 120 VAC, 3A. U.S.
(240 VAC, 1.5A international) is used on the
phase conductor.
• A voltage mismatch can cause equipment
damage and may pose a fire hazard. If the
voltage indicated on the label is different
from the power outlet voltage, do not
connect the PoE Midspan to this power
outlet.
The PoE Midspan "Data In" and "Data & Power
Out" ports are shielded RJ-45 data sockets.
They cannot be used as Plain Old Telephone
Service (POTS) telephone sockets. Only RJ-45
data connectors may be connected to these
sockets.
EMC Compliance
A Category 5 foiled twisted-pair cable must be
used to ensure compliance with requirements
of FCC Part 15, subpart B, Class B. The use of
unshielded cables (Category 5 for 10BASE T
ports or for 100BASE Tx ports) complies with
Class A requirements.
Notice
Axis’s policy is to improve its products as new
technology, components, software, and
firmware become available. Axis, therefore,
reserves the right to change specifications
without prior notice.
Trademarks
The product described in this guide is a
licensed product of PowerDsine.
Support
Should you require any technical assistance,
please contact your Axis reseller. If your
questions cannot be answered immediately,
your reseller will forward your queries through
the appropriate channels to ensure a rapid
response. If you are connected to the Internet,
you can:
• download user documentation
• find answers to resolved problems in the FAQ
database. Search by product, category, or
phrases
• report problems to Axis support by logging in
to your private support area.
PoE_IG.book Page 2 Thursday, June 12, 2008 4:01 PM
AXIS PoE Midspan 1-Port
ENGLISH
ENGLISH
3
ENGLISH
AXIS PoE Midspan 1-Port
Functions and Features
The Power over Ethernet (PoE) Midspan adds 48V DC to unused (non-data)
wires (Mode B) in a standard Category 5 Ethernet cable. As a result, the PoE
Midspan delivers both data and power to the terminal. The device is
designed to meet the IEEE802.3af standard.
Preliminary Steps
• Ensure AC power is applied to the PoE Midspan using an operational
AC cable with an appropriate ground connection.
• Ensure that output Ethernet cable is connected to the Data & Power
Out port.
• Verify that a power ready Ethernet compatible device is connected.
Note: Do not use a cross over cable between the PoE Midspan output port
and the load device
Installation
The PoE Midspan may be wall or bench mounted using the rear side holes.
Note the following before mounting the PoE Midspan to a fixed location:
• Do not to cover the PoE Midspan or block the airflow to the PoE with
any foreign objects. Keep the PoE Midspan away from excessive heat
and humidity, and keep it free from vibration and dust
• Ensure that the cable length from the Ethernet network source to the
terminal does not exceed 100 meters (333 Feet). The PoE is not a
repeater and does not amplify the Ethernet data signal
• Use a splitter if desired; ensure that the splitter is connected close to
the terminal and not on the Midspan
• There is no "on-off" switch, simply plug the PoE Midspan into an AC
power source
PoE_IG.book Page 3 Thursday, June 12, 2008 4:01 PM

4
AXIS PoE Midspan 1-Port
Installing the Unit
1. Connect the PoE Midspan to an AC outlet (100-240 VAC), using a
standard power cable.
2. Connect the unit Data In jack (input) to the remote Ethernet network
switch Patch panel.
3. Connect the Data & Power Out jack (output) to the terminal.
.
Indicators
LED AC (Main) Port
Green Indicates that the power is on
(Power is active)
Indicates that a remote terminal is
connected
Green
blinking
Output voltage is out of range Overload or short circuit
Data in
AC Input connectivity
Output Port Input port
CAT 5 Cable
Data & Power out
indicator
Port connectivity
indicator
Terminal Ethernet
PoE_IG.book Page 4 Thursday, June 12, 2008 4:01 PM

AXIS PoE Midspan 1-Port
ENGLISH
ENGLISH
5
ENGLISH
Specifications
Environmental specifications
Electrical specifications
Ethernet Interface
Mode Temperature Humidity
Operating 0 - 40°C
32 to 104°F 10 to 90%
(no condensation allowed)
Storage -20 to 70°C
-4 to 158°F
Input voltage 90 to 264V AC (47-63 Hz)
Input current 0.5A (max)
Minimum Available Output Power 15.4W
Nominal Output Voltage 45 to 56V DC
Input (Data In):
Ethernet 10/100Base-T
RJ 45 female socket
Output (Data & Power Out):
Ethernet 10/100Base-T, plus 48 VDC
RJ 45 female socket, with DC
voltage on wire pairs 7-8 and
4-5.
PoE_IG.book Page 5 Thursday, June 12, 2008 4:01 PM

6
AXIS PoE Midspan 1-Port
Troubleshooting
Symptom Corrective Steps
Midspan does not
power up
1. Verify that an approved power cord is used.
2. Verify that the voltage at the power inlet is between 100
and 240V AC.
3. Remove and re-apply power to the device and check the
indicators during power up sequence.
A port indicator is
not lit and the PD
does not operate
1. The Midspan did not detect a PD and therefore the port is
not enabled.
2. Verify that the PD is designed for PoE operation
3. Verify that you are using a standard Category 5/5e/6,
straight-wired cable, with four pairs
4. If there is a connected external power splitter, replace it
to verify that it is functioning properly
5. Ensure that the input Ethernet cable is connected to the
Data In port
6. Verify that the PD is connected to the Data & Power port.
7. Try to reconnect the same PD into a different Midspan. If
it works, there is probably a faulty port or RJ-45
connection.
8. Verify that there is no short over any of the twisted pair
cables or over the RJ45 connectors.
The end device
operates, but there
is no data link
1. Verify that the port indicator on the front panel is
continuously lit.
2. If an external power splitter is in use, replace it with a
known-good splitter.
3. Verify that for this link, you are using standard UTP/FTP
Category 5 straight (non-crossover) cabling, with all four
pairs.
4. Verify that the Ethernet cable length is less than 100
meters from the Ethernet source to the load/remote
terminal.
5. Try to reconnect the same PD into a different Midspan. If
it works, there is probably a faulty port or RJ-45
connection.
PoE_IG.book Page 6 Thursday, June 12, 2008 4:01 PM

AXIS PoE Midspan à 1 port
FRANCAIS
FRANCAIS
7
FRANCAIS
AXIS PoE Midspan à 1 port
Fonctions et caractéristiques
L’injecteur Power over Ethernet (PoE) ajoute 48 V CC aux fils (ne servant pas
à la transmission des données) non utilisés (en Mode B) d’un câble Ethernet
standard de catégorie 5. L’injecteur PoE peut donc alimenter le terminal
aussi bien en données qu’en électricité. Il est conforme à la norme
IEEE802.3af.
Étapes préliminaires
• Vérifiez que l’injecteur PoE est raccordé à un câble CA en bon état de
fonctionnement et correctement mis à la terre.
• Vérifiez que le câble Ethernet de sortie est branché sur le port de
données et d’alimentation (sortie).
• Vérifiez qu’un périphérique compatible Ethernet prêt à être branché
est connecté.
Remarque : N’utilisez pas de câble simulateur de modem entre le port de
sortie de l’injecteur PoE et le périphérique de charge.
PoE_IG.book Page 7 Thursday, June 12, 2008 4:01 PM

AXIS PoE Midspan à 1 port
8
Installation
L’injecteur PoE peut être fixé au mur ou sur une surface plate à l’aide des
trous situés au dos de l’appareil.
Veuillez prendre note de ce qui suit avant de poser l’injecteur PoE à un
endroit fixe :
• Ne recouvrez pas l’injecteur PoE et ne bloquez pas son système
d’aération par des corps étrangers. Conservez l’injecteur PoE à l’abri
des excès de la chaleur et de l’humidité, des vibrations et de la
poussière.
• Veillez à ce que la longueur de câble entre la source du réseau
Ethernet et le terminal ne dépasse pas 100 mètres. Le PoE n’est pas un
répéteur et il n’amplifie pas le signal des données Ethernet.
• Utilisez un diviseur si vous le souhaitez, en veillant à ce qu’il soit
branché à proximité du terminal et non sur l’injecteur.
• Il n’y a pas d’interrupteur Marche/Arrêt. Il suffit donc de brancher
l’injecteur PoE sur une prise de courant CA pour le mettre en marche.
Installation de l’injecteur
1. Branchez l’injecteur PoE sur une prise CA (100-240 V CA), à l’aide d’un
câble ordinaire.
2. Branchez le connecteur Données d’entrée (entrée) de l’appareil sur le
tableau de connexions du commutateur réseau Ethernet distant.
3. Branchez le
connecteur
Données et
alimentation
de sortie
(sortie) sur le
terminal.
Données d’entrée
Indicateur de
Port de sortie Port d’entrée
Câble de cat. 5
Données et
Indicateur de
Terminal Ethernet
connexion d’entrée CA
connexion du port
alimentation de sortie
PoE_IG.book Page 8 Thursday, June 12, 2008 4:01 PM

AXIS PoE Midspan à 1 port
FRANCAIS
FRANCAIS
9
FRANCAIS
Indicateurs
Caractéristiques techniques
Caractéristiques environnementales
Caractéristiques électriques
Interface Ethernet
DEL CA (secteur) Port
Vert Indique que l’appareil est sous
tension (alimenté en courant).
Indique qu’un terminal distant est
connecté.
Vert
clignotant
La tension de sortie est hors
limites.
Surcharge ou court-circuit
Mode Température Humidité
En fonctionnement 0 à 40 °C
32 à 104 °F 10 à 90 %
(condensation non
autorisée)
En stockage -20 à 70 °C
-4 à 158 °F
Tension d’entrée 90 à 264 V CA (47-63 Hz)
Courant d’entrée 0,5 A (max.)
Puissance de sortie disponible minimum 15,4 W
Tension de sortie nominale 45 à 56 V CC
Entrée (données d’entrée) :
Ethernet 10/100Base-T
Connecteur femelle RJ45
Sortie (données et alimentation de
sortie) :
Ethernet 10/100Base-T, plus 48 V CC
Connecteur femelle RJ45,
avec tension CC sur les paires
de fils 7-8 et 4-5.
PoE_IG.book Page 9 Thursday, June 12, 2008 4:01 PM

AXIS PoE Midspan à 1 port
10
Résolution des problèmes
Symptôme Correction
L’injecteur ne se met
pas sous tension.
1. Vérifiez qu’un cordon d’alimentation approuvé est utilisé.
2. Vérifiez que la tension à l’arrivée se situe entre 100 et
240 V CA.
3. Mettez l’injecteur hors tension et rallumez-le en vérifiant
les indicateurs pendant la mise sous tension.
Un indicateur de
port est éteint et le
périphérique ne
fonctionne pas.
1. L’injecteur n’a pas détecté de périphérique. Le port est
donc désactivé.
2. Vérifiez que le périphérique prend en charge la
technologie PoE.
3. Vérifiez que vous utilisez un câble à fils droits ordinaire
de catégorie 5/5e/6, à quatre paires.
4. Si un diviseur d’alimentation externe est utilisé,
remplacez-le pour vous assurer qu’il fonctionne
correctement.
5. Vérifiez que le câble Ethernet d’entrée est branché sur le
port de données d’entrée.
6. Vérifiez que le périphérique est branché sur le port de
données et d’alimentation.
7. Essayez de rebrancher le périphérique sur un injecteur
différent. S’il fonctionne, il est probable que le port ou le
connecteur RJ-45 soit défectueux.
8. Vérifiez qu’il n’y a pas de court-circuit sur les câbles à
paires torsadées ni sur les connecteurs RJ45.
PoE_IG.book Page 10 Thursday, June 12, 2008 4:01 PM

AXIS PoE Midspan à 1 port
FRANCAIS
FRANCAIS
11
FRANCAIS
Le périphérique final
fonctionne, mais il
n’y a pas de liaison
de données.
1. Vérifiez que l’indicateur de port à l’avant de l’appareil est
allumé en continu.
2. Si un diviseur d’alimentation externe est utilisé,
remplacez-le par un diviseur que vous savez en bon état
de fonctionnement.
3. Vérifiez que, pour cette liaison, vous utilisez un câble
droit UTP/FTP ordinaire de catégorie 5 (et non un câble
simulateur de modem), avec les quatre paires.
4. Vérifiez que le câble Ethernet ne fait pas plus de 100
mètres de long entre la source Ethernet et le terminal
distant/de charge.
5. Essayez de rebrancher le périphérique sur un injecteur
différent. Si cela fonctionne, il est probable que le
connecteur RJ-45 soit défectueux..
Symptôme Correction
PoE_IG.book Page 11 Thursday, June 12, 2008 4:01 PM

PoE_IG.book Page 12 Thursday, June 12, 2008 4:01 PM

AXIS PoE-Midspan 1 Anschluss
DEUTSCH
DEUTSCH
13
DEUTSCH
AXIS PoE-Midspan 1 Anschluss
Funktionen und Merkmale
Der PoE-Midspan (Power over Ethernet) überträgt 48 V Gleichstrom über
ungenutzte (nicht Daten führende) Leiter (Modus B) eines Standard-
Ethernet-Kabels der Kategorie 5. Damit überträgt der PoE-Midspan sowohl
Daten als auch Strom an das Endgerät. Das Gerät entspricht dem Standard
IEEE802.3af.
Vorbereitende Schritte
• Stellen Sie sicher, dass Netzstrom am PoE-Midspan über ein
einsatzbereites Netzkabel mit einer entsprechenden Erdung anliegt.
• Stellen Sie sicher, dass das ausgehende Ethernet-Kabel am Daten- und
Stromausgang angeschlossen ist.
• Prüfen Sie, ob ein netzstromfähiges, Ethernet-kompatibles Gerät
angeschlossen ist.
Hinweis: Verwenden Sie kein Verbindungskabel zwischen dem Ausgang am
PoE-Midspan und dem Lastgerät.
PoE_IG.book Page 13 Thursday, June 12, 2008 4:01 PM
AXIS PoE-Midspan 1 Anschluss
14
Installation
Der PoE-Midspan kann mithilfe der rückseitigen Löcher entweder an der
Wand oder auf einem Tisch angebracht werden.
Beachten Sie vor der Montage des PoE-Midspan an einem festen Ort bitte
Folgendes:
• Decken Sie den PoE-Midspan nicht ab bzw. versperren Sie den
Luftstrom zum PoE nicht mit Fremdkörpern. Halten Sie den PoE-
Midspan von übermäßiger Wärme und Feuchtigkeit fern und setzen
Sie ihn weder Vibrationen noch Staub aus.
• Stellen Sie sicher, dass die Kabellänge von der Ethernet-
Netzwerkquelle zum Endgerät 100 Meter nicht überschreitet. Der PoE
ist kein Repeater und verstärkt damit nicht das Datensignal der
Ethernet-Verbindung.
• Verwenden Sie, falls gewünscht, einen Splitter; vergewissern Sie sich,
dass der Splitter in der Nähe des Endgeräts und nicht am Midspan
sitzt.
• Es ist kein Netzschalter vorgesehen; schließen Sie den PoE-Midspan
einfach an eine Netzstromquelle an.
Installieren des Gerätes
1. Schließen Sie den PoE-Midspan über ein Standardnetzkabel an eine
Netzsteckdose (100-240 V AC) an.
2. Verbinden Sie die Buchse Data In (Dateneingang) am Gerät mit dem
Patchpanel des ortsfernen Ethernet-Netzwerk-Switches.
PoE_IG.book Page 14 Thursday, June 12, 2008 4:01 PM
AXIS PoE-Midspan 1 Anschluss
DEUTSCH
DEUTSCH
15
DEUTSCH
3. Verbinden Sie die Gerätebuchse Data & Power Out (Daten- und
Stromausgang) mit dem Endgerät.
Anzeigen
LED Netz Anschluss
Grün
Zeigt an, dass das Gerät
eingeschaltet ist (Netzstrom
liegt an).
Zeigt an, dass ein ortsfernes
Endgerät angeschlossen ist.
Grün
(blinkt)
Ausgangsspannung liegt
außerhalb des Bereichs
Überlast oder Kurzschluss
Data in
Netzeingangs-
Ausgangs- Eingangs-
CAT 5-Kabel
Data & Power out
anzeige
Anschluss-
anzeige
Endgerät Ethernet
(Daten- und Stromausgang) (Dateneingang)
anschluss anschluss
PoE_IG.book Page 15 Thursday, June 12, 2008 4:01 PM

AXIS PoE-Midspan 1 Anschluss
16
Technische Daten
Umgebungsbedingungen
Elektrische Daten
Ethernet-Schnittstelle
Modus Temperatur Luftfeuchtigkeit
Betrieb 0 bis 40 °C
10 bis 90 %
(keine Kondensation
zulässig)
Lagerung -20 bis 70 °C
Eingangsspannung 90 bis 264 V AC (47-63 Hz)
Eingangsstrom 0,5 A (max.)
Minimal verfügbare Ausgangsleistung 15,4 W
Ausgangsnennspannung 45 bis 56 V DC
Eingang (Data In):
Ethernet 10/100Base-T
RJ 45-Buchse
Ausgang (Data & Power out):
Ethernet 10/100Base-T, plus 48 V DC
RJ 45-Buchse, mit
Gleichspannung an den
Leiterpaaren 7-8 und 4-5
PoE_IG.book Page 16 Thursday, June 12, 2008 4:01 PM

AXIS PoE-Midspan 1 Anschluss
DEUTSCH
DEUTSCH
17
DEUTSCH
Fehlerbehebung
Symptom Abhilfemaßnahmen
Midspan fährt nicht
hoch
1. Prüfen Sie, ob ein zugelassenes Netzkabel verwendet wird.
2. Prüfen Sie, ob die Spannung am Netzeingang zwischen
100 und 240 V AC liegt.
3. Ziehen Sie das Netzkabel vom Gerät ab und stecken Sie es
erneut ein und prüfen Sie dann die Anzeigen beim
Hochfahren.
Eine
Anschlussanzeige
leuchtet nicht, und
das zu versorgende
Gerät funktioniert
nicht
1. Der Midspan hat kein zu versorgendes Gerät erkannt, und
deshalb ist der Anschluss nicht aktiviert.
2. Prüfen Sie, ob das zu versorgende Gerät für den PoE-
Betrieb geeignet ist.
3. Prüfen Sie, ob Sie ein 1:1-verdrahtetes Standardkabel der
Kategorie 5/5e/6 mit vier Paaren verwenden.
4. Falls ein externer Power-Splitter angeschlossen ist,
ersetzen Sie ihn, um sicherzustellen, dass er
ordnungsgemäß funktioniert.
5. Stellen Sie sicher, dass das Eingangs-Ethernet-Kabel an
den Anschluss „Data In“ (Dateneingang) angeschlossen
ist.
6. Prüfen Sie, ob das zu versorgende Gerät an den Anschluss
„Data & Power“ (Daten und Strom) angeschlossen ist.
7. Versuchen Sie, dasselbe zu versorgende Gerät an einen
anderen Midspan anzuschließen. Wenn es funktioniert, ist
wahrscheinlich ein Anschluss oder die RJ-45-Verbindung
fehlerhaft.
8. Stellen Sie sicher, dass kein Kurzschluss zwischen den
Twisted-Pair-Kabeln oder zwischen den RJ-45-Steckern
besteht.
PoE_IG.book Page 17 Thursday, June 12, 2008 4:01 PM

AXIS PoE-Midspan 1 Anschluss
18
Das Endgerät
funktioniert, aber es
besteht keine
Datenverbindung
1. Prüfen Sie, ob die Anschlussanzeige an der Vorderseite
ununterbrochen leuchtet.
2. Falls ein externer Power-Splitter verwendet wird,
ersetzen Sie ihn durch einen Splitter, von dem Sie wissen,
dass er funktioniert.
3. Vergewissern Sie sich, dass Sie für diese Verbindung 1:1-
verdrahtete (nicht gekreuzte) UTP/FTP-Standardkabel der
Kategorie 5 mit allen vier Paaren verwenden.
4. Stellen Sie sicher, dass die Länge des Ethernet-Kabels 100
Meter von der Ethernet-Quelle zum Last- bzw. ortsfernen
Endgerät nicht überschreitet.
5. Versuchen Sie, dasselbe zu versorgende Gerät an einen
anderen Midspan anzuschließen. Wenn es funktioniert, ist
wahrscheinlich ein Anschluss oder die RJ-45-Verbindung
fehlerhaft.
Symptom Abhilfemaßnahmen
PoE_IG.book Page 18 Thursday, June 12, 2008 4:01 PM

AXIS PoE Midspan 1-Porta
ITALIANO
ITALIANO
19
ITALIANO
AXIS PoE Midspan 1-Porta
Funzioni e caratteristiche
Il PoE Midspan (Power over Ethernet) consente di applicare una tensione
continua di 48 V ai cavi (non in dotazione) inutilizzati (modalità B) di un
cavo Ethernet standard Cat. 5. Ciò consente di utilizzare il PoE Midspan per
trasmettere dati e alimentazione al terminale. Il dispositivo è conforme allo
standard IEEE802.3af.
Operazioni preliminari
• Verificare che il PoE Midspan sia alimentato con corrente CA mediante
un cavo CA attivo con adeguata connessione di messa a terra.
• Verificare che il cavo Ethernet di uscita sia collegato alla porta dei dati
e dell'alimentazione.
• Verificare che il dispositivo compatibile con Ethernet da alimentare sia
collegato.
Nota: Non usare cavi incrociati tra la porta di uscita del PoE Midspan e il
dispositivo di carico.
PoE_IG.book Page 19 Thursday, June 12, 2008 4:01 PM

AXIS PoE Midspan 1-Porta
20
Installazione
Il PoE Midspan può essere montato a muro o su un piano tramite i fori sul
retro.
Prima di montare il PoE Midspan in un'ubicazione fissa, prendere nota di
quanto segue:
• Non coprire il PoE Midspan né ostruire il flusso di aria con materiale
estraneo. Tenere il PoE Midspan lontano da calore e umidità eccessivi,
nonché da vibrazioni e polvere.
• Verificare che la lunghezza del cavo tra la presa di rete Ethernet e il
morsetto non superi 100 metri. Il PoE Midspan non è un ripetitore e
non amplifica il segnale dati Ethernet.
• Se necessario è possibile usare uno splitter, a condizione che tale
splitter venga collegato il più vicino possibile al terminale e non al
Midspan.
• Il PoE Midspan non dispone di un interruttore di accensione ed è
quindi sufficiente collegarlo a una presa CA.
Installazione dell'unità
1. Collegare il PoE Midspan a una presa CA (100-240 VCA) utilizzando
un cavo di alimentazione standard.
2. Collegare la presa jack di ingresso Data In (Ingresso dati) al pannello
di permutazione di rete Ethernet.
3. Collegare la
presa jack di
uscita Data &
Power Out
(Uscita dati e
alimentazione)
al terminale.
Ingresso dati
Indicatore dello
Porta di Porta di
Cavo CAT 5
Uscita dati
dell'ingresso CA
Indicatore dello
della porta
Terminale Ethernet
stato di connessione
uscita ingresso
e alimentazione
PoE_IG.book Page 20 Thursday, June 12, 2008 4:01 PM
Other manuals for T8120 Midspan 1-port
1
Table of contents
Languages:
Other Axis Switch manuals

Axis
Axis T8504-E User manual

Axis
Axis 5801-694 User manual

Axis
Axis D8004 User manual

Axis
Axis T8504-R User manual

Axis
Axis 30 W Midspan AC/DC User manual

Axis
Axis T8125 User manual

Axis
Axis T8524 PoE+ User manual

Axis
Axis T8344 User manual

Axis
Axis 2N Access Unit Instruction sheet

Axis
Axis T86 Series User manual
Popular Switch manuals by other brands

Siemens
Siemens 3VM11 1AA Series operating instructions

Broadrack
Broadrack Mars 8 user manual

SMC Networks
SMC Networks TigerCard SMC8724M Specifications

Albalá Ingenieros
Albalá Ingenieros ASW3000C01 manual

schmersal
schmersal AZM300B-ST-1P2P-A-DU manual

HP
HP StorageWorks 8/40 - SAN Switch Hardware reference manual